1. Pengenalan
This manual provides detailed instructions for the installation, operation, and maintenance of your Lantronix KVM Serverswitch, model 300.000.9000. This device allows you to control multiple computers from a single PS/2 keyboard, PS/2 mouse, and VGA monitor console. Please read this manual thoroughly before using the product to ensure proper setup and optimal performance.
2. Maklumat Keselamatan
To prevent damage to the product or injury to yourself, observe the following safety precautions:
- Pastikan peranti diletakkan pada permukaan yang stabil dan rata.
- Jangan dedahkan peranti kepada kelembapan, suhu melampau atau cahaya matahari langsung.
- Gunakan hanya penyesuai kuasa yang dibekalkan dengan unit.
- Jangan buka peranti casing. Rujuk semua servis kepada kakitangan yang berkelayakan.
- Disconnect power before cleaning. Use a soft, dry cloth for cleaning.
3. Kandungan Pakej
Sahkan bahawa semua item terdapat dalam pakej anda:
- Lantronix KVM Serverswitch (Model 300.000.9000)
- Penyesuai Kuasa
- Rack Mount Kit (optional, may be sold separately)
- Panduan Mula Pantas (dokumen ini berfungsi sebagai manual penuh)
4. Produk Lebihview
The Lantronix KVM Serverswitch 300.000.9000 is an 8-port KVM switch designed for managing multiple PS/2-based servers or PCs. It features a robust design suitable for server room environments.
4.1 Panel Depan
The front panel typically includes port selection buttons and LED indicators for active ports.
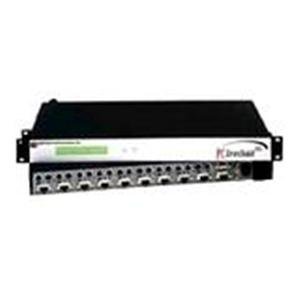
Imej: Depan view of the Lantronix KVM Serverswitch. This image displays the device's front panel, featuring multiple buttons for selecting connected computers and corresponding LED indicators to show the active port.
4.2 Panel Belakang
The rear panel houses the console ports for your keyboard, mouse, and monitor, as well as the KVM ports for connecting to the servers/PCs and the power input.
Note: A specific image for the rear panel is not available. Please refer to the physical device for port identification.
5. Persediaan
Follow these steps to set up your KVM Serverswitch:
- Matikan Semua Peranti: Pastikan semua komputer dan suis KVM dimatikan sebelum membuat sebarang sambungan.
- Sambungkan Peranti Konsol:
- Connect your PS/2 keyboard to the keyboard port on the KVM switch's console section.
- Connect your PS/2 mouse to the mouse port on the KVM switch's console section.
- Connect your VGA monitor to the VGA port on the KVM switch's console section.
- Sambungkan Komputer: For each computer you wish to connect:
- Connect a KVM cable (VGA, PS/2 keyboard, PS/2 mouse) from the computer's respective ports to an available KVM port on the switch.
- Ensure a secure connection for all cables.
- Sambungkan Kuasa: Plug the supplied power adapter into the KVM switch's power input, then plug the adapter into a power outlet.
- Hidupkan kuasa: First, power on the KVM switch. Then, power on all connected computers.
6. Operating the KVM Serverswitch
The Lantronix KVM Serverswitch offers multiple methods for switching between connected computers.
6.1 Front Panel Push Buttons
Press the corresponding button on the front panel to switch to the desired computer. The LED indicator for the selected port will illuminate.
6.2 Penukaran Kekunci Panas
Use keyboard hotkeys to switch between computers without needing to reach the switch. Common hotkey sequences include:
- [Scroll Lock] + [Scroll Lock] + [Port Number]: Switches directly to the specified port.
- [Scroll Lock] + [Scroll Lock] + [Up/Down Arrow]: Switches to the next/previous port.
- Refer to the specific hotkey combinations printed on the device or in a separate quick start guide if available, as they can vary.
6.3 Auto-Scan Mode
The KVM switch may feature an auto-scan mode that automatically cycles through all connected computers, displaying each for a set duration. This is useful for monitoring multiple systems. Consult the device's specific features for activating and configuring auto-scan.
7. Penyelenggaraan
Regular maintenance ensures the longevity and optimal performance of your KVM switch.
- Pembersihan: Disconnect power before cleaning. Use a soft, dry, lint-free cloth to wipe the exterior of the device. Do not use liquid or aerosol cleaners.
- Pengudaraan: Pastikan bukaan pengudaraan tidak disekat. Aliran udara yang betul mengelakkan terlalu panas.
- Pengurusan Kabel: Keep cables organized and free from kinks or excessive tension to prevent damage to connectors and ensure reliable signal transmission.
8. Penyelesaian masalah
If you encounter issues with your KVM Serverswitch, refer to the following common problems and solutions:
| Masalah | Kemungkinan Punca | Penyelesaian |
|---|---|---|
| Tiada paparan video. | Loose VGA cable connection. Incorrect port selected. Monitor not powered on. | Check all VGA cable connections. Ensure the correct port is selected on the KVM switch. Verify monitor power. |
| Papan kekunci atau tetikus tidak bertindak balas. | Loose PS/2 cable connection. Incorrect port selected. Keyboard/mouse not compatible. | Check all PS/2 cable connections. Ensure the correct port is selected. Try a different keyboard/mouse if available. |
| KVM switch not powering on. | Power adapter not connected or faulty. Power outlet not working. | Verify power adapter connection to the switch and outlet. Test the outlet with another device. |
| Cannot switch between computers. | Hotkeys not recognized. Front panel buttons unresponsive. | Ensure hotkey sequence is correct. Try using front panel buttons. Power cycle the KVM switch and connected computers. |
9. Spesifikasi
Key technical specifications for the Lantronix KVM Serverswitch 300.000.9000:
- Nombor Model: 300.000.9000
- ASIN: B00006B74R
- Jenama: Lantronix
- Bilangan Pelabuhan: 8 (for PS/2 PCs/Servers)
- Console Connections: 1 x VGA, 1 x PS/2 Keyboard, 1 x PS/2 Mouse
- PC Connections: 8 x VGA, 8 x PS/2 Keyboard, 8 x PS/2 Mouse (via KVM cables)
- Kaedah Penukaran: Front Panel Push Buttons, Hotkeys
- Dimensi Pakej: 22.5 x 12.25 x 6.5 inci
- Berat Barang: 11.18 paun
- Pengeluar: LANTRONIX
- Tarikh Mula-mula Tersedia: 21 Jun 2002
- UPC: 783384222113
10. Waranti dan Sokongan
For warranty information and technical support, please refer to the official Lantronix webtapak atau hubungi bahagian perkhidmatan pelanggan mereka. Simpan resit pembelian anda sebagai bukti pembelian untuk tuntutan waranti.
Lantronix Official Webtapak: www.lantronix.com


