
1. Pengenalan
The Next Cine800S GoogleTV Projector is designed to provide a versatile and immersive home entertainment experience. This manual offers essential information for the safe and efficient setup, operation, and maintenance of your projector. Please read this manual thoroughly before using the device.
2. Maklumat Keselamatan
- Bekalan Kuasa: Use only the specified power adapter. Ensure the power cord is not damaged or pinched.
- Pengudaraan: Do not block ventilation openings. Maintain adequate space around the projector for proper airflow to prevent overheating.
- penempatan: Letakkan projektor di atas permukaan yang stabil dan rata. Elakkan meletakkannya di bawah cahaya matahari langsung, berhampiran sumber haba atau dalam persekitaran yang mempunyai kelembapan atau habuk yang tinggi.
- Pembersihan: Putuskan sambungan kuasa sebelum membersihkan. Gunakan kain lembut dan kering. Jangan gunakan cecair atau pembersih aerosol.
- Penjagaan Lensa: Elakkan menyentuh kanta projektor secara langsung. Gunakan kain lembut dan tidak berbulu yang direka khas untuk kanta optik jika pembersihan perlu dilakukan.
- Servis: Jangan cuba membaiki projektor sendiri. Rujuk semua servis kepada kakitangan yang berkelayakan.
3. Produk Lebihview
The Next Cine800S is a Full HD LED projector featuring Google TV. Below are key components and features.

Rajah 3.1: Depan view of the Next Cine800S GoogleTV Projector, highlighting its design and key features like 800 ANSI Lumens and Google TV integration.
3.1. Ciri-ciri Utama
- Resolusi Paparan: Full HD 1920x1080, supporting screen sizes from 40 to 200 inches.
- Kecerahan: 800 ANSI Lumens.
- Pemprosesan Video: Supports 4Kx2K @ 60fps encode/decode.
- Focus & Keystone: Automatic or Manual Focus, Automatic Keystone Correction.
- Sistem pengendalian: Google TV with Android 14.
- Perkhidmatan Penstriman: Netflix L1, Prime Video, YouTube, Disney+ with L1 DRM Certification.
- Kesambungan Tanpa Wayar: Wi-Fi 802.11 a/b/g/n/ac (2.4G & 5G) and Bluetooth 5.0.
- Ingatan: 2GB LPDDR4 RAM / 8GB eMMC Storage.
- Audio: Integrated 12W (4W) Speaker.
- Sistem Optik: Dust-Sealed Optical Mechanism.
- Pencerminan Skrin: Air Screen and Google Cast for iOS & Android devices.
3.2. Pelabuhan dan Sambungan
Identify the various input and output ports on your projector.
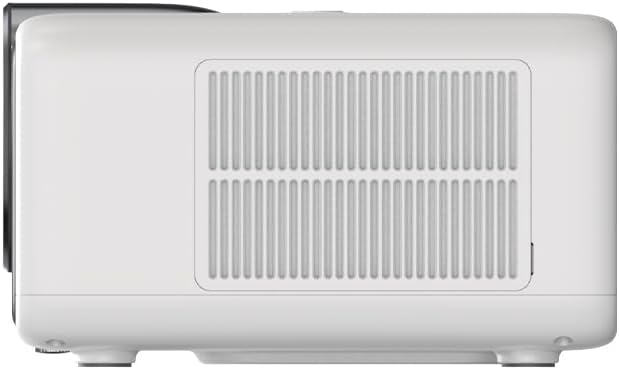
Figure 3.2: Rear panel of the projector, displaying available ports. Note: Actual ports may vary slightly by region or production batch. This model typically includes HDMI, USB, and a 2.5mm Audio Jack.
- HDMI: Connect to external video sources such as Blu-ray players, gaming consoles, or computers.
- USB: Untuk menyambungkan peranti storan USB untuk memainkan media files.
- Bicu Audio 2.5mm: Untuk menyambungkan peranti audio luaran seperti fon kepala atau pembesar suara.
4. Persediaan
4.1. Membongkar dan Pemeriksaan Awal
- Keluarkan projektor dan semua aksesori dengan berhati-hati daripada pembungkusan.
- Check for any signs of damage during transit. If damage is found, contact your retailer immediately.
- Ensure all listed accessories are present.
4.2. Penempatan Projektor
Optimal placement is crucial for the best viewpengalaman dalam.

Gambar 4.1: Cthample of projector placement and adjustable screen sizes (40" to 200").
- Jarak: Position the projector at a suitable distance from the screen or wall to achieve your desired screen size (40 to 200 inches).
- Ketinggian: Place the projector on a stable surface or mount it to project the image at the desired height.
- Pemasangan: The projector includes a mounting point on its base. Ensure any tripod or mount used is compatible with the projector's screw size and weight. Note that some standard tripod screws may not fit.
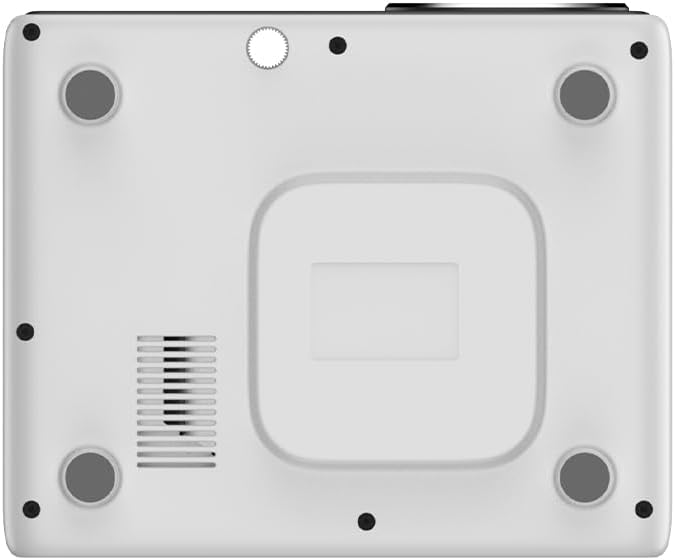
Rajah 4.2: Bawah view of the projector, indicating the mounting point and ventilation grilles.
4.3. Sambungan Kuasa
- Sambungkan penyesuai kuasa ke port input kuasa projektor.
- Palamkan penyesuai kuasa ke salur keluar elektrik yang sesuai.
- Tekan butang kuasa pada projektor atau alat kawalan jauh untuk menghidupkannya.
4.4. Persediaan Awal dan Sambungan Rangkaian
- Upon first power-on, the projector will guide you through the initial Google TV setup process.
- Follow the on-screen instructions to select your language, connect to a Wi-Fi network (2.4G or 5G), and log in with your Google account.
- The projector features automatic focus and keystone correction. If the image is not perfectly clear or rectangular, you can access manual adjustment options in the settings menu.
5. Arahan Operasi
5.1. Menavigasi Google TV
The projector runs on Google TV, providing a user-friendly interface for accessing content.

Figure 5.1: The Google TV interface on the Next Cine800S Projector, showing recommended content and installed applications.
- Use the remote control to navigate through menus, select apps, and control playback.
- The home screen provides personalized recommendations and quick access to your favorite streaming services.
5.2. Aplikasi Penstriman
Access popular streaming platforms directly from your projector.

Figure 5.2: Supported streaming applications and Google Play Store access.
- Pre-installed apps include Netflix, Prime Video, YouTube, and Disney+.
- Download additional applications from the Google Play Store.
- Ensure you are logged into your respective service accounts to access content.
5.3. Menyambung Peranti Luaran
- HDMI: Connect your device to an HDMI port. The projector will automatically detect the input or you can manually select it from the input source menu.
- USB: Insert a USB drive into the USB port. The media player application will typically launch automatically, allowing you to browse and play supported media files (JPG, PNG, BMP, JPEG, MP3, M4A, MP2, WAV, FLAC, MP4, MOV, TS, DAT, F4V, 3GP).
5.4. Pencerminan Skrin
The projector supports Air Screen and Google Cast for mirroring content from your iOS or Android devices.
- Pastikan peranti mudah alih dan projektor anda disambungkan ke rangkaian Wi-Fi yang sama.
- On your mobile device, open the screen mirroring function (e.g., 'Screen Cast', 'Smart View', 'AirPlay').
- Pilih projektor daripada senarai peranti yang tersedia.
6. Penyelenggaraan
Penyelenggaraan berkala memastikan prestasi optimum dan memanjangkan jangka hayat projektor anda.
6.1. Membersihkan Lensa

Figure 6.1: Close-up of the projector lens, which requires careful cleaning.
- Use a soft, lint-free cloth or a lens cleaning brush to gently remove dust from the lens surface.
- For stubborn smudges, use a specialized lens cleaning solution applied to a microfiber cloth, not directly to the lens.
- Avoid abrasive materials or excessive force, which can scratch the lens.
6.2. Cleaning Ventilation Ports
- Periodically check the ventilation grilles for dust accumulation.
- Use a soft brush or a vacuum cleaner with a brush attachment to gently clean the grilles.
- Jangan masukkan sebarang objek ke dalam bukaan pengudaraan.
6.3. Kemas Kini Perisian
- Ensure your projector is connected to the internet.
- Navigate to the system settings to check for and install available software updates. Updates can improve performance and add new features.
7. Penyelesaian masalah
Bahagian ini menangani isu biasa yang mungkin anda hadapi dengan projektor anda.
| Masalah | Kemungkinan Punca | Penyelesaian |
|---|---|---|
| Tiada kuasa | Kord kuasa terputus, masalah soket kuasa | Periksa sambungan kord kuasa. Cuba salur keluar kuasa yang berbeza. |
| Tiada imej | Input source not selected, device not connected, lens cap on | Ensure input source is correctly selected. Check HDMI/USB connections. Remove lens cap. |
| Imej kabur | Fokus tidak dilaraskan | Adjust focus manually using the projector's focus ring or through the settings menu if automatic focus is not sufficient. |
| Image is distorted/trapezoidal | Keystone not adjusted, projector not perpendicular to screen | The projector has automatic keystone correction. If the image is still distorted, access the manual keystone correction settings to fine-tune the image. |
| Tiada bunyi atau kualiti bunyi yang buruk | Volume too low, external audio device not connected, speaker issue | Increase volume. Check external audio connections if used. If internal speaker sound is distorted at low volumes, consider connecting external speakers via the 2.5mm audio jack or Bluetooth. |
| Isu sambungan Wi-Fi | Kata laluan salah, masalah penghala, gangguan isyarat | Verify Wi-Fi password. Restart router. Ensure projector is within Wi-Fi range. |
| Alat kawalan jauh tidak berfungsi | Batteries low/dead, IR sensor blocked | Gantikan bateri. Pastikan tiada halangan antara alat kawalan jauh dan sensor IR projektor. |
8. Spesifikasi
Detailed technical specifications for the Next Cine800S GoogleTV Projector.
| Ciri | Spesifikasi |
|---|---|
| Model | Cine800S |
| Teknologi Paparan | Projektor LED |
| Resolusi Asli | Full HD 1920x1080 |
| Kecerahan | 800 ANSI Lumen |
| Saiz Unjuran | 40" — 200" |
| Penyahkodan Video | 4Kx2K @ 60fps |
| Fokus | Automatik atau Manual |
| Pembetulan Batu Kunci | Automatik |
| Sistem Operasi | Google TV, Android 14 |
| DRM Certification | Netflix L1, Prime Video, YouTube, Disney+ L1 |
| Wi-Fi | 802.11 a/b/g/n/ac (2.4G & 5G) |
| Bluetooth | 5.0 |
| RAM | 2GB LPDDR4 |
| Storan Dalaman | 8GB eMMC |
| Output Speaker | 12W (4W) |
| Pelabuhan | HDMI, 2.5mm Audio Jack, USB |
| Format Media yang Disokong | JPG, PNG, BMP, JPEG, MP3, M4A, MP2, WAV, FLAC, MP4, MOV, TS, DAT, F4V, 3GP, FAT, NTFS |
| Mekanisme Optik | Dust-Sealed System |
| Pencerminan Skrin | Air Screen, Google Cast (iOS & Android) |
9. Waranti dan Sokongan
For warranty information, please refer to the documentation provided with your purchase or visit the official Next website. For technical support, product inquiries, or service requests, please contact Next customer service through their official channels.
Simpan resit pembelian dan nombor siri produk anda di tempat yang mudah dicapai semasa menghubungi sokongan.