
1. Maklumat Keselamatan
Please read all safety instructions carefully before using the NiPoGi Mini PC E3B. Failure to follow these instructions may result in electric shock, fire, or damage to the device.
- Gunakan hanya penyesuai kuasa yang disediakan bersama peranti.
- Jangan dedahkan peranti kepada air, lembapan atau suhu yang melampau.
- Elakkan meletakkan peranti berhampiran sumber haba atau di bawah cahaya matahari langsung.
- Jangan buka peranti casing. Rujuk semua servis kepada kakitangan yang berkelayakan.
- Pastikan pengudaraan yang betul di sekeliling peranti untuk mengelakkan terlalu panas.
2. Kandungan Pakej
Sahkan bahawa semua item terdapat dalam pakej anda:
- 1 x NiPoGi Mini PC E3B
- 1 x EU Power Adapter
- 1 x Kabel HDMI
- 1 x VESA Mount
- 1 x Manual Pengguna
3. Produk Lebihview
3.1 Panel Depan dan Belakang

The image above illustrates the various ports and buttons available on the front and rear of the NiPoGi Mini PC E3B.
Panel Depan:
- Butang Kuasa: Untuk menghidupkan atau mematikan peranti.
- Bicu Audio 3.5mm: Untuk fon kepala atau mikrofon.
- Port USB3.2 Gen2 Jenis-A (x2): Port USB berkelajuan tinggi untuk peranti persisian.
- USB3.2 Gen2 Type-C Port (x1): Supports data transfer and 4K@60Hz video output.
Panel belakang:
- DC DALAM: Port input kuasa.
- Port HDMI 2.0 (x1): Menyokong output video 4K@60Hz.
- DP1.4 Port (x1): Menyokong output video 4K@60Hz.
- RJ45 Gigabit Ethernet Port (x2): For wired network connection (10M/100M/1000Mbps).
- Port USB3.2 Gen1 Jenis-A (x4): Port USB standard untuk peranti.
3.2 Komponen Dalaman dan Pengembangan

The NiPoGi Mini PC E3B is designed for easy storage expansion. It features:
- RAM LPDDR5 24GB: High-speed memory for efficient multitasking.
- 512GB M.2 SSD: Primary storage for the operating system and applications.
- Slot M.2 Tambahan: Supports M.2 NVMe PCIe 3.0 x4 or PCIe 4.0 x4 SSDs, expandable up to 4TB.
- 2.5-inch SSD/HDD Bay: Supports external 2.5-inch SSD/HDD expansion up to 2TB (drive not included).
4. Persediaan
4.1 Menyambung Peranti
- Paparan Sambungkan: Use the HDMI, DisplayPort, or USB-C port to connect your monitor(s). The device supports up to three 4K displays simultaneously.
- Sambungkan Papan Kekunci dan Tetikus: Plug your USB keyboard and mouse into any available USB-A ports.
- Sambungkan Kuasa: Plug the EU power adapter into the DC IN port on the rear panel, then connect it to a power outlet.
- Sambungan Rangkaian Pilihan: For a wired connection, connect an Ethernet cable to one of the RJ45 ports.
4.2 Kuasa Awal Hidup dan Persediaan Windows
- Tekan butang kuasa pada panel hadapan. Peranti akan but.
- Upon the first startup, you will be guided through the Windows 11 Pro setup process. Follow the on-screen instructions to select your language, region, and create a user account.
- Ensure you have an internet connection (wired or Wi-Fi) during setup for updates and account synchronization.
4.3 Pemasangan Pemasangan VESA
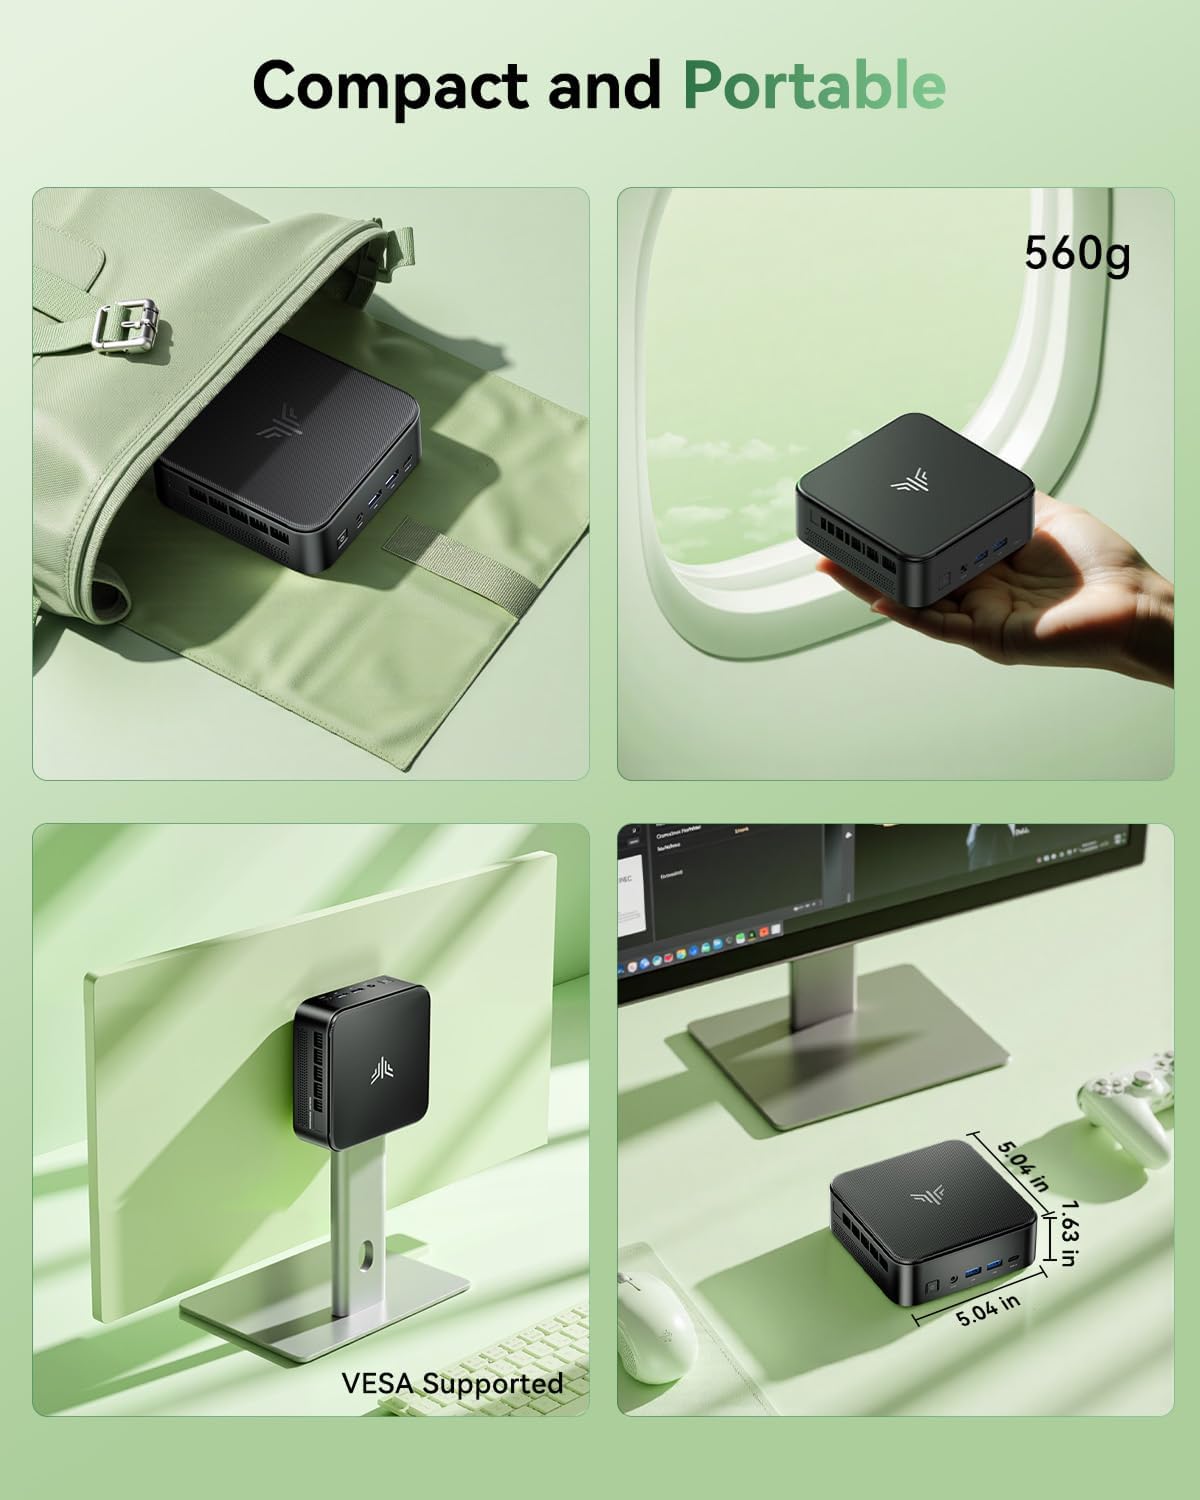
The included VESA mount allows you to attach the Mini PC to the back of a compatible monitor or TV, saving desk space.
- Locate the VESA mounting holes on the back of your monitor (typically 75x75mm or 100x100mm).
- Attach the VESA bracket to the monitor using the provided screws.
- Slide the Mini PC onto the VESA bracket until it clicks securely into place.
5. Arahan Operasi
5.1 Hidupkan/Mati Kuasa
- Untuk Menghidupkan: Tekan butang kuasa sekali.
- Untuk Mematikan: Click the Windows Start button, then select Power > Shut down. Alternatively, press and hold the power button for 4-5 seconds.
- Untuk Mulakan Semula: Click the Windows Start button, then select Power > Restart.
5.2 BIOS Settings (Automatic Power On)
The Mini PC supports automatic power-on after a power failure. To enable this feature:
- Semasa permulaan, tekan berulang kali ESC key to enter the BIOS setup utility.
- Navigate to the "Boot" section.
- Locate and select "Enable Automatic Power On" (or similar option).
- Simpan perubahan dan keluar dari BIOS.
5.3 Display Configuration (Triple Display)

The NiPoGi Mini PC E3B supports connecting up to three 4K displays simultaneously via its HDMI, DisplayPort, and USB-C outputs. This allows for an extended desktop environment, enhancing productivity.
- Connect your monitors to the available HDMI, DP, and Type-C ports.
- Once connected, Windows will automatically detect the displays. You can configure display settings (extend, duplicate, etc.) by right-clicking on the desktop and selecting "Display settings."
5.4 Kesambungan Rangkaian

The Mini PC offers both wired and wireless network options.
- Sambungan Berwayar: Connect an Ethernet cable to one of the two RJ45 Gigabit Ethernet ports.
- Sambungan Wayarles (Wi-Fi 6): The device features integrated 802.11ax dual-band (2.4G/5G) Wi-Fi 6 for faster and more stable wireless connectivity. To connect, click the network icon in the Windows taskbar, select your Wi-Fi network, and enter the password.
5.5 Kesambungan Bluetooth
The Mini PC includes Bluetooth 5.2, allowing you to connect various wireless devices such as keyboards, mice, headphones, and speakers.
- Pergi ke Tetapan Windows > Peranti > Bluetooth & peranti lain.
- Pastikan Bluetooth dihidupkan.
- Click "Add Bluetooth or other device" and follow the on-screen instructions to pair your device.
6. Penyelenggaraan
- Pembersihan: Use a soft, dry cloth to clean the exterior of the Mini PC. Do not use liquid cleaners or aerosols. Ensure ventilation openings are free from dust.
- Kemas Kini Perisian: Regularly check for and install Windows updates and driver updates for optimal performance and security. You can find driver updates on the NiPoGi official website or through Windows Update.
7. Penyelesaian masalah
- Tiada Kuasa: Pastikan penyesuai kuasa disambungkan dengan selamat ke kedua-dua Mini PC dan soket kuasa yang berfungsi. Cuba soket lain.
- Tiada Paparan: Check that the monitor is powered on and correctly connected to the Mini PC. Try a different video cable or monitor. Ensure the correct input source is selected on your monitor.
- Prestasi Perlahan: Close unnecessary applications. Check for background processes. Ensure sufficient free storage space. Consider updating drivers or performing a system scan for malware.
- Isu Rangkaian: For wired connections, check the Ethernet cable and router. For Wi-Fi, ensure the Wi-Fi adapter is enabled and you are connected to the correct network with the right password. Restart your router and the Mini PC.
- Peranti Periferal Tidak Berfungsi: Ensure USB devices are properly connected. Try different USB ports. Update or reinstall device drivers if necessary.
8. Spesifikasi
| Ciri | Spesifikasi |
|---|---|
| Pemproses | AMD Ryzen 7 7735HS (8 Cores/16 Threads, up to 4.75 GHz) |
| Grafik | AMD Radeon 680M (Integrated, 12 Cores, 2200MHz) |
| RAM | 24GB LPDDR5 (5500 MT/s) |
| Penyimpanan | 512GB M.2 SSD (Expandable up to 4TB via M.2 slots, 2.5-inch SSD/HDD up to 2TB) |
| Sistem Operasi | Windows 11 Pro (64-bit) |
| Kesambungan Wayarles | Wi-Fi 6 (802.11ax, Dual Band 2.4G/5G), Bluetooth 5.2 |
| Kesambungan Berwayar | 2 x RJ45 Gigabit Ethernet Ports |
| Output Video | 1 x HDMI 2.0, 1 x DisplayPort 1.4, 1 x USB-C (supports 4K@60Hz triple display) |
| Port USB | 2 x USB3.2 Gen2 Type-A (Front), 4 x USB3.2 Gen1 Type-A (Rear), 1 x USB3.2 Gen2 Type-C (Front) |
| Port Audio | 1 x 3.5mm Headphone/Microphone Combo Jack |
| Dimensi (L x W x H) | 11.9 x 11.9 x 3.6 cm (4.69 x 4.69 x 1.42 inci) |
| Berat badan | 1.36 kg (3 lbs) |
| Penggunaan Kuasa | 28 Watt |
9. Waranti dan Sokongan
The NiPoGi Mini PC E3B comes with a 1-year warranty, providing peace of mind for your purchase. For technical support, troubleshooting assistance, or warranty claims, please refer to the contact information provided with your product packaging or visit the official NiPoGi webtapak.
NiPoGi is committed to providing high-quality customer service and professional support.