pengenalan
This manual provides comprehensive instructions for the safe and effective use of your ANDELI OPTIM RL-600LB-DBB auto-darkening welding helmet. Please read this manual thoroughly before operation and retain it for future reference.
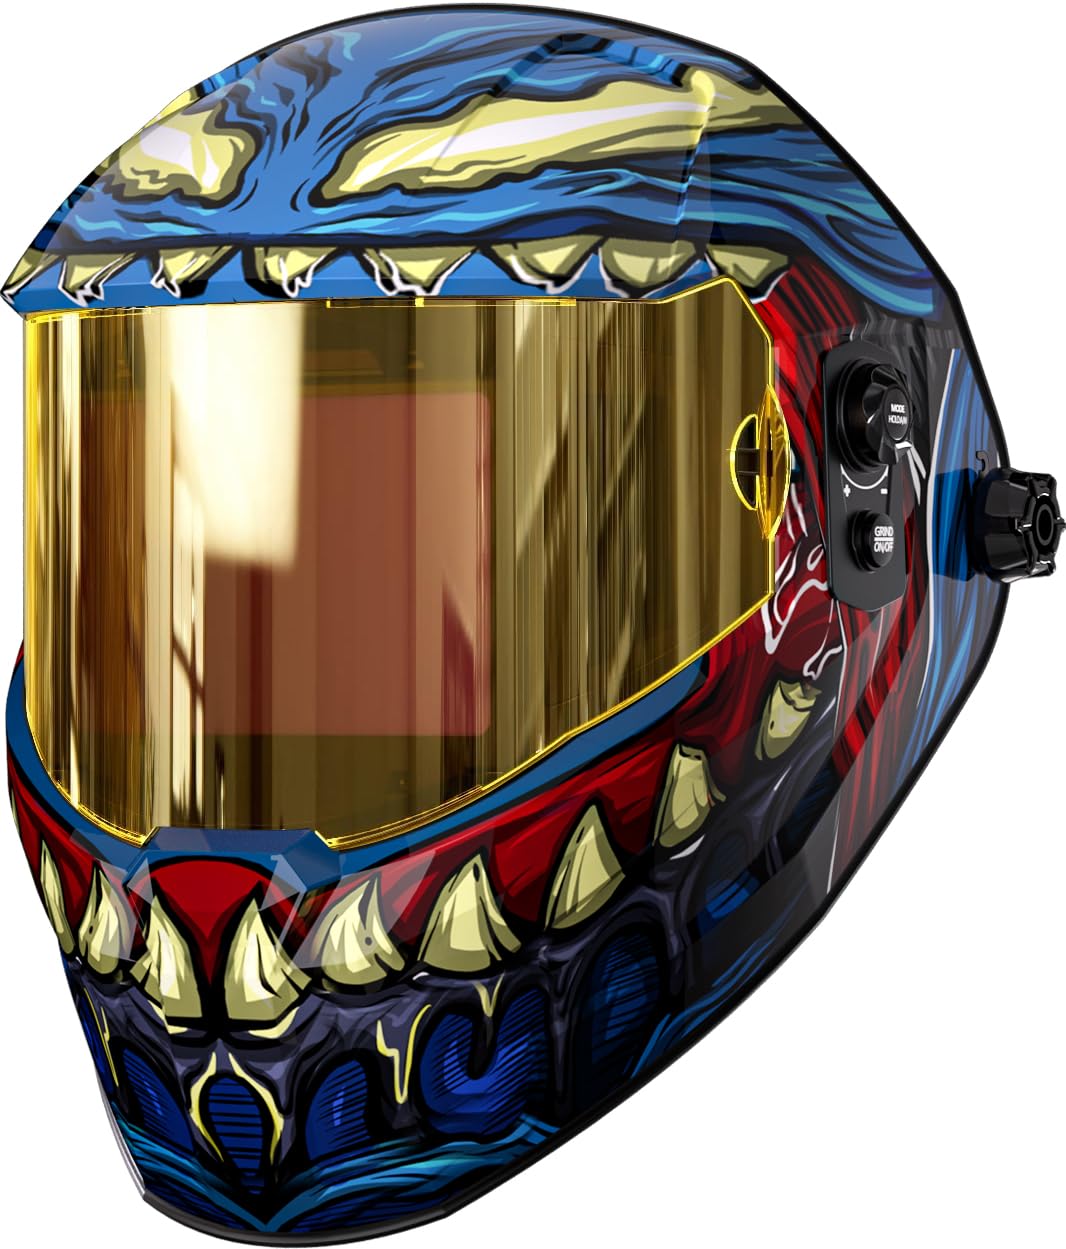
Image: The ANDELI OPTIM RL-600LB-DBB welding helmet, showcasing reka bentuk dan ciri-cirinya.
Maklumat Keselamatan
Welding operations involve inherent risks. Always follow safety guidelines to prevent injury. This helmet is designed to protect your eyes and face from arc flash, sparks, and harmful radiation during welding. It is not suitable for laser welding or overhead applications where falling objects are a hazard.
- Perlindungan Mata: Always wear appropriate primary eye protection (safety glasses) under the welding helmet.
- Pengudaraan: Pastikan pengudaraan yang mencukupi untuk mengelakkan terhidu asap kimpalan.
- Pemeriksaan: Inspect the helmet and lens before each use for any damage. Replace damaged parts immediately.
- Suhu: Do not expose the helmet to extreme temperatures.
- Pembersihan: Clean the lens with a soft cloth and mild cleaner. Do not use abrasive materials.
Kandungan Pakej
Sahkan bahawa semua item terdapat dalam pakej:
- ANDELI OPTIM RL-600LB-DBB Welding Helmet
- Manual Pengguna (dokumen ini)
- (Optional: Replacement outer lens covers, inner lens covers, USB-C charging cable if included)
Note: The product includes one welding helmet. Additional accessories may be sold separately.
Ciri-ciri Produk
- Panorama 180 ° View: Menawarkan ruang yang luas viewing area for improved situational awareness.
- Penapis Penggelapan Automatik (ADF): Automatically adjusts shade level upon arc ignition.
- Enhanced Optical Clarity: Provides a clear and true-color view lopak kimpalan.
- Masa Respons Pantas: Darkens rapidly (1/30000s) to protect eyes from arc flash.
- Adjustable Shade Range: Wide shade range from 4/5-9/9-13 for various welding processes.
- Sumber Kuasa Dwi: Solar-powered with a rechargeable battery for extended operation.
- Comfortable Headgear: Features 6 contact points for weight distribution and reduced pressure.

Imej: A terperinci view highlighting key features such as the 180° panoramic view, digital control panel, Type-C charging, 6-point headgear, and lightweight design.

Image: Illustration of the 180° panoramic viewing area, including the main 4.53"x3.23" and side 1.3"x2.5" views.
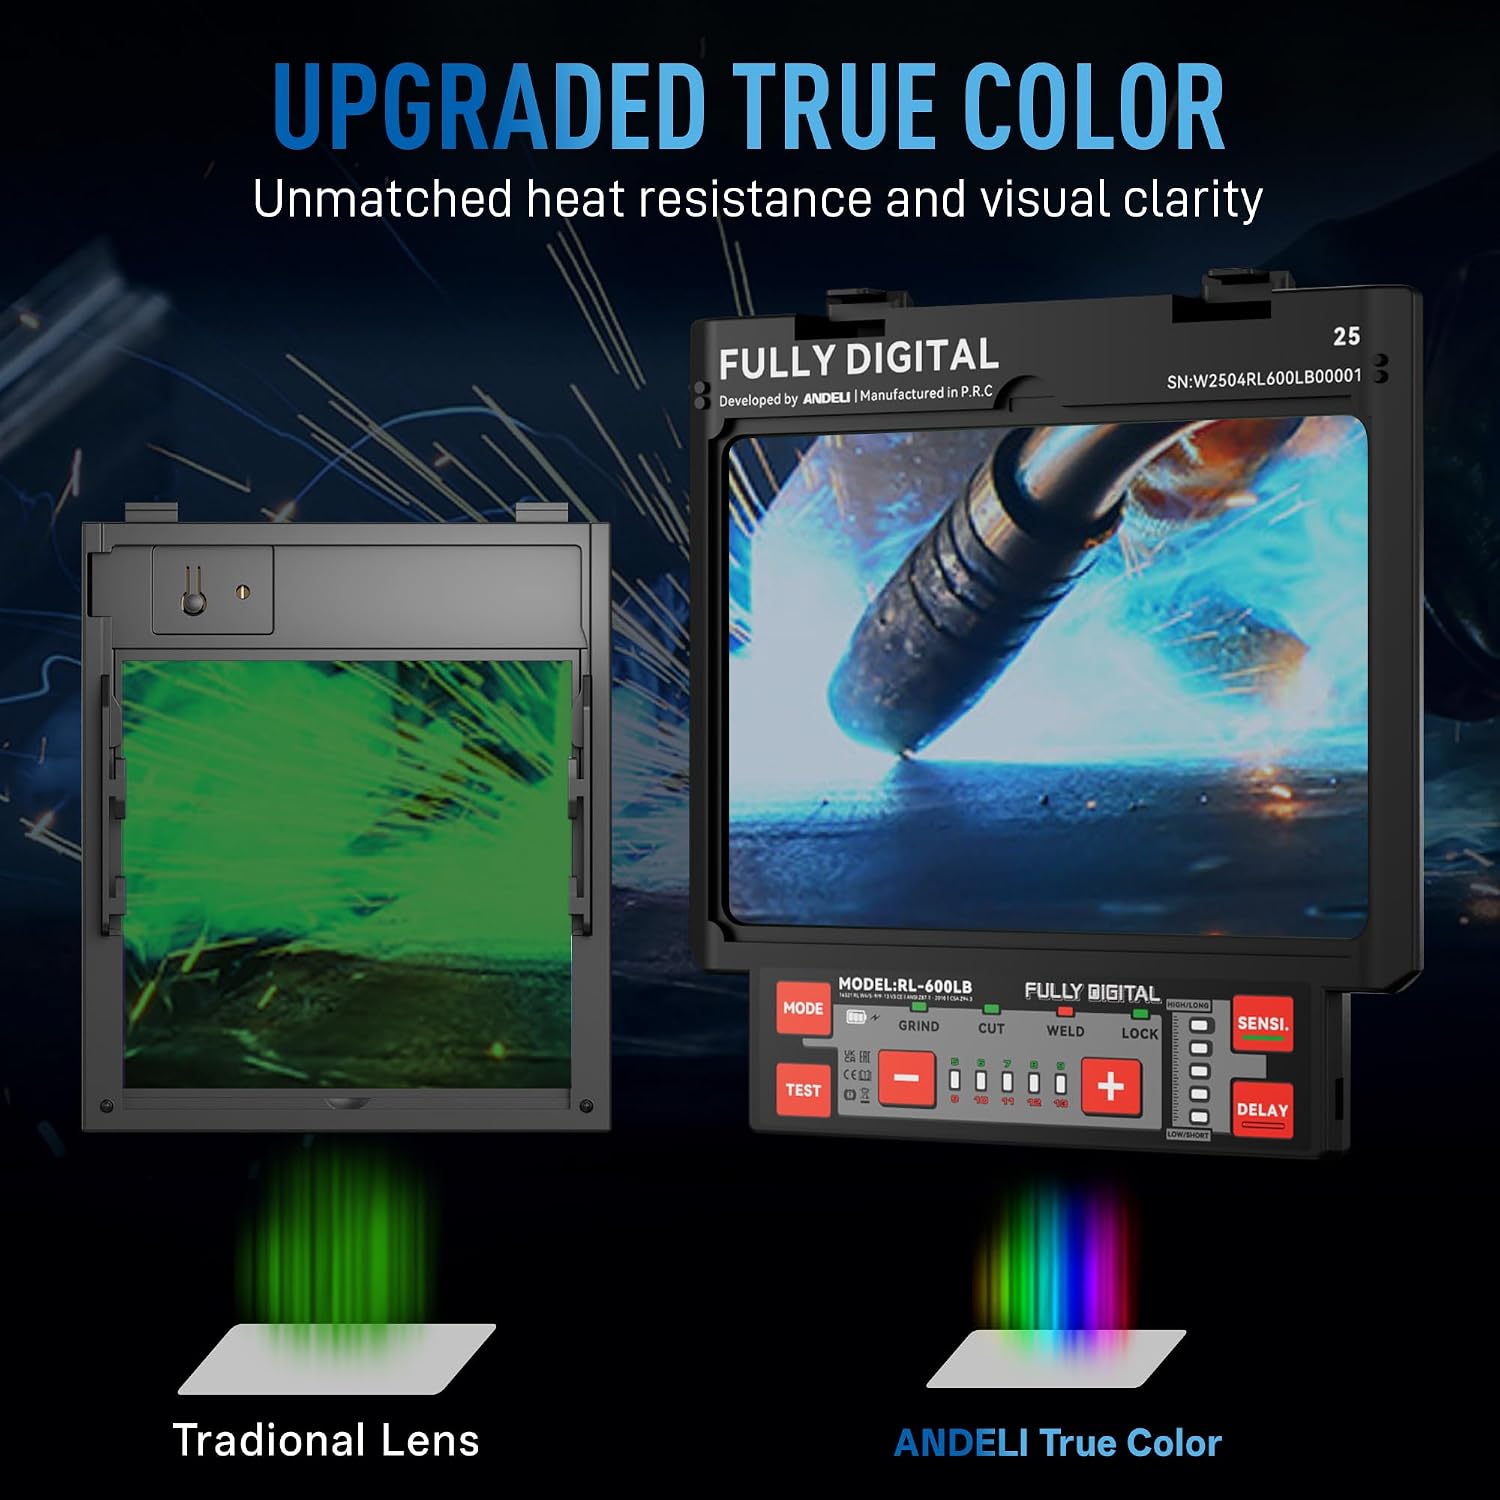
Image: Comparison showing the upgraded true color lens clarity versus a traditional green-tinted lens.
Persediaan
- Bongkar: Carefully remove the welding helmet and all accessories from the packaging.
- Periksa: Check the helmet for any signs of damage during shipping. Ensure the protective films are removed from the lenses.
- Mengecas Bateri: Connect the helmet to a USB-C power source to ensure the rechargeable battery is fully charged before first use. The solar panel will help maintain the charge during use.
- Adjust Headgear:
- Place the helmet on your head.
- Adjust the top strap (3) to position the helmet correctly on your head.
- Use the front/back adjustment knob (2) to move the helmet closer or further from your face.
- Tighten the tightness adjustment knob (7) at the back to secure the headgear comfortably.
- Ensure the helmet is stable and the viewing area is centered with your eyes.
- Test ADF: Before welding, press the "TEST" button on the control panel to verify the auto-darkening function. The lens should darken momentarily and then return to its light state.
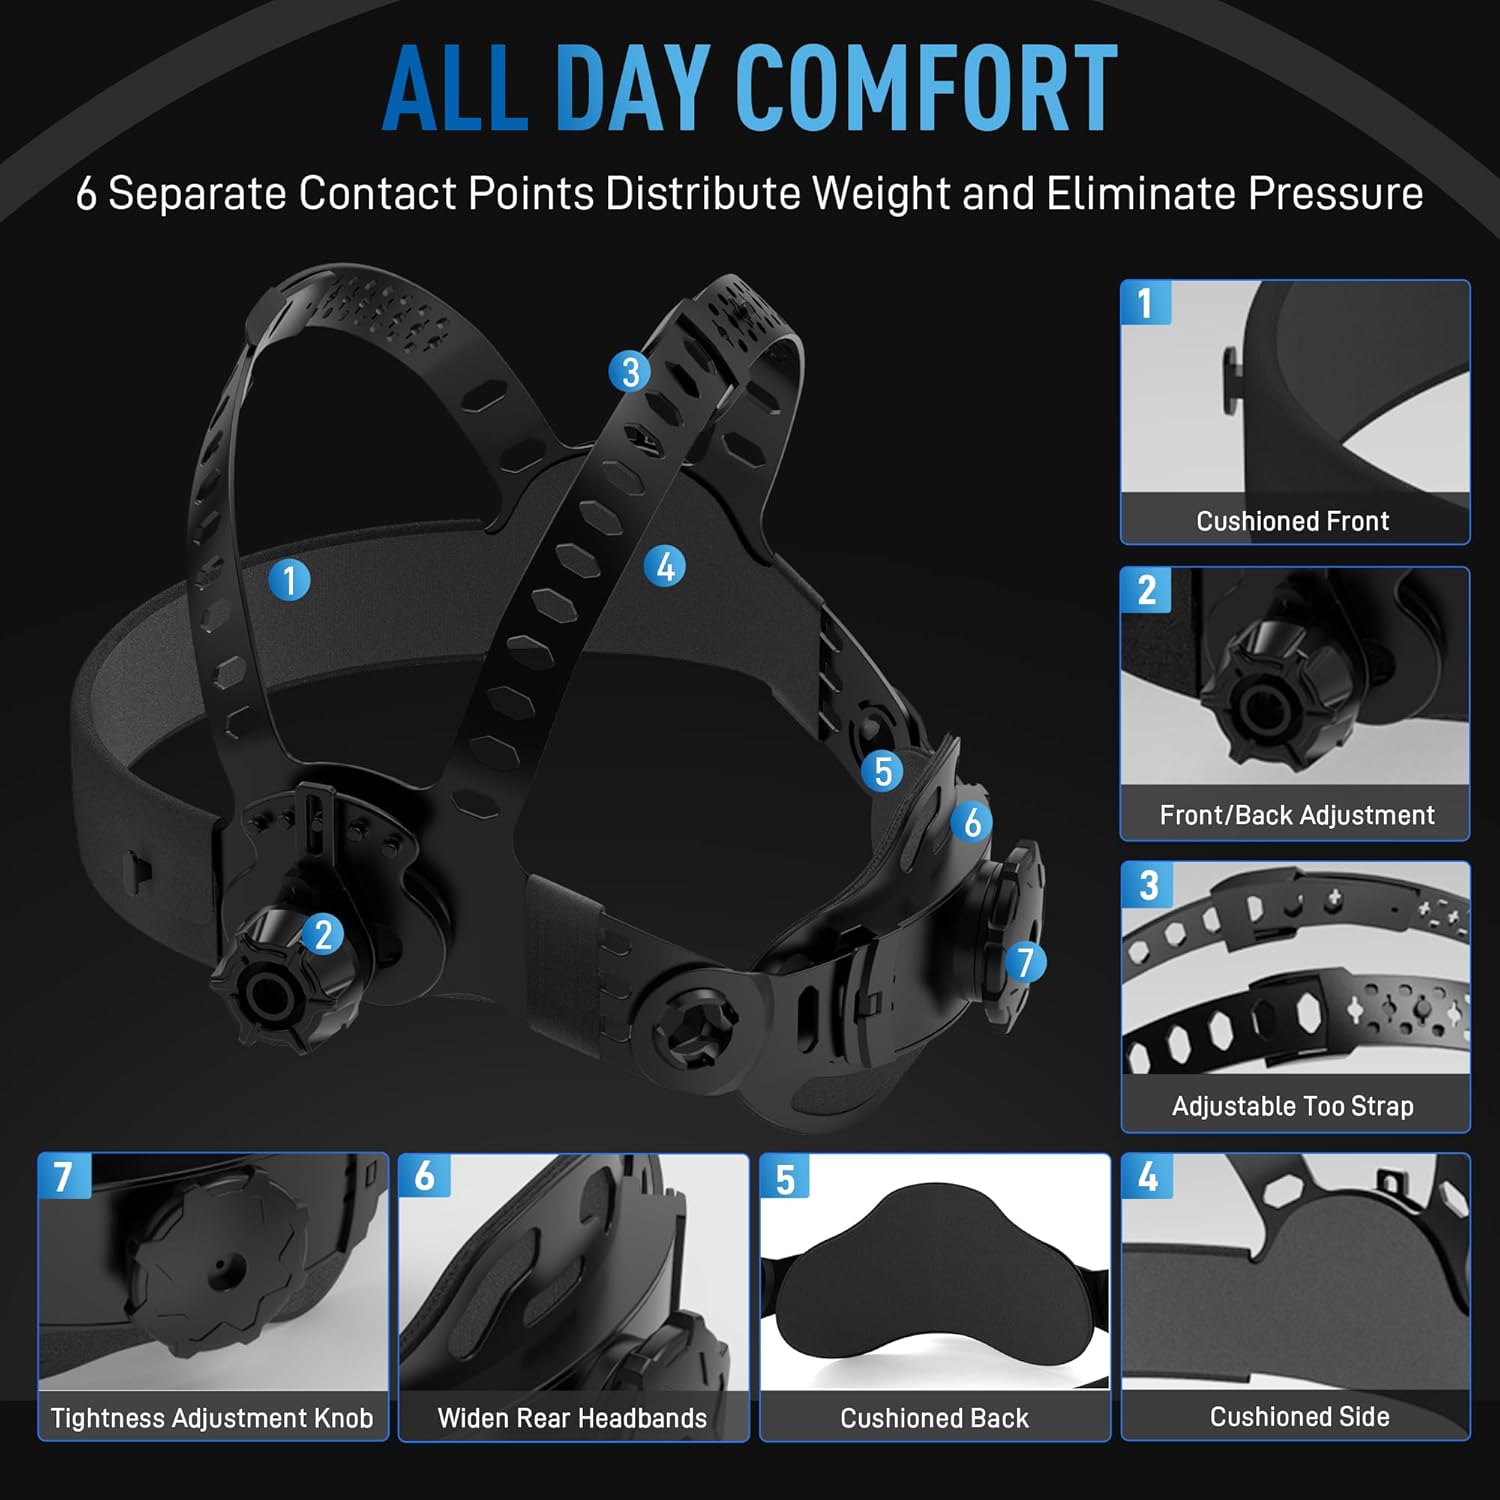
Image: Diagram illustrating the various adjustment points on the helmet's headgear for optimal comfort and fit, including cushioned front, front/back adjustment, adjustable top strap, cushioned side, cushioned back, widen rear headbands, and tightness adjustment knob.
Arahan Operasi
Panel Kawalan Terlaluview
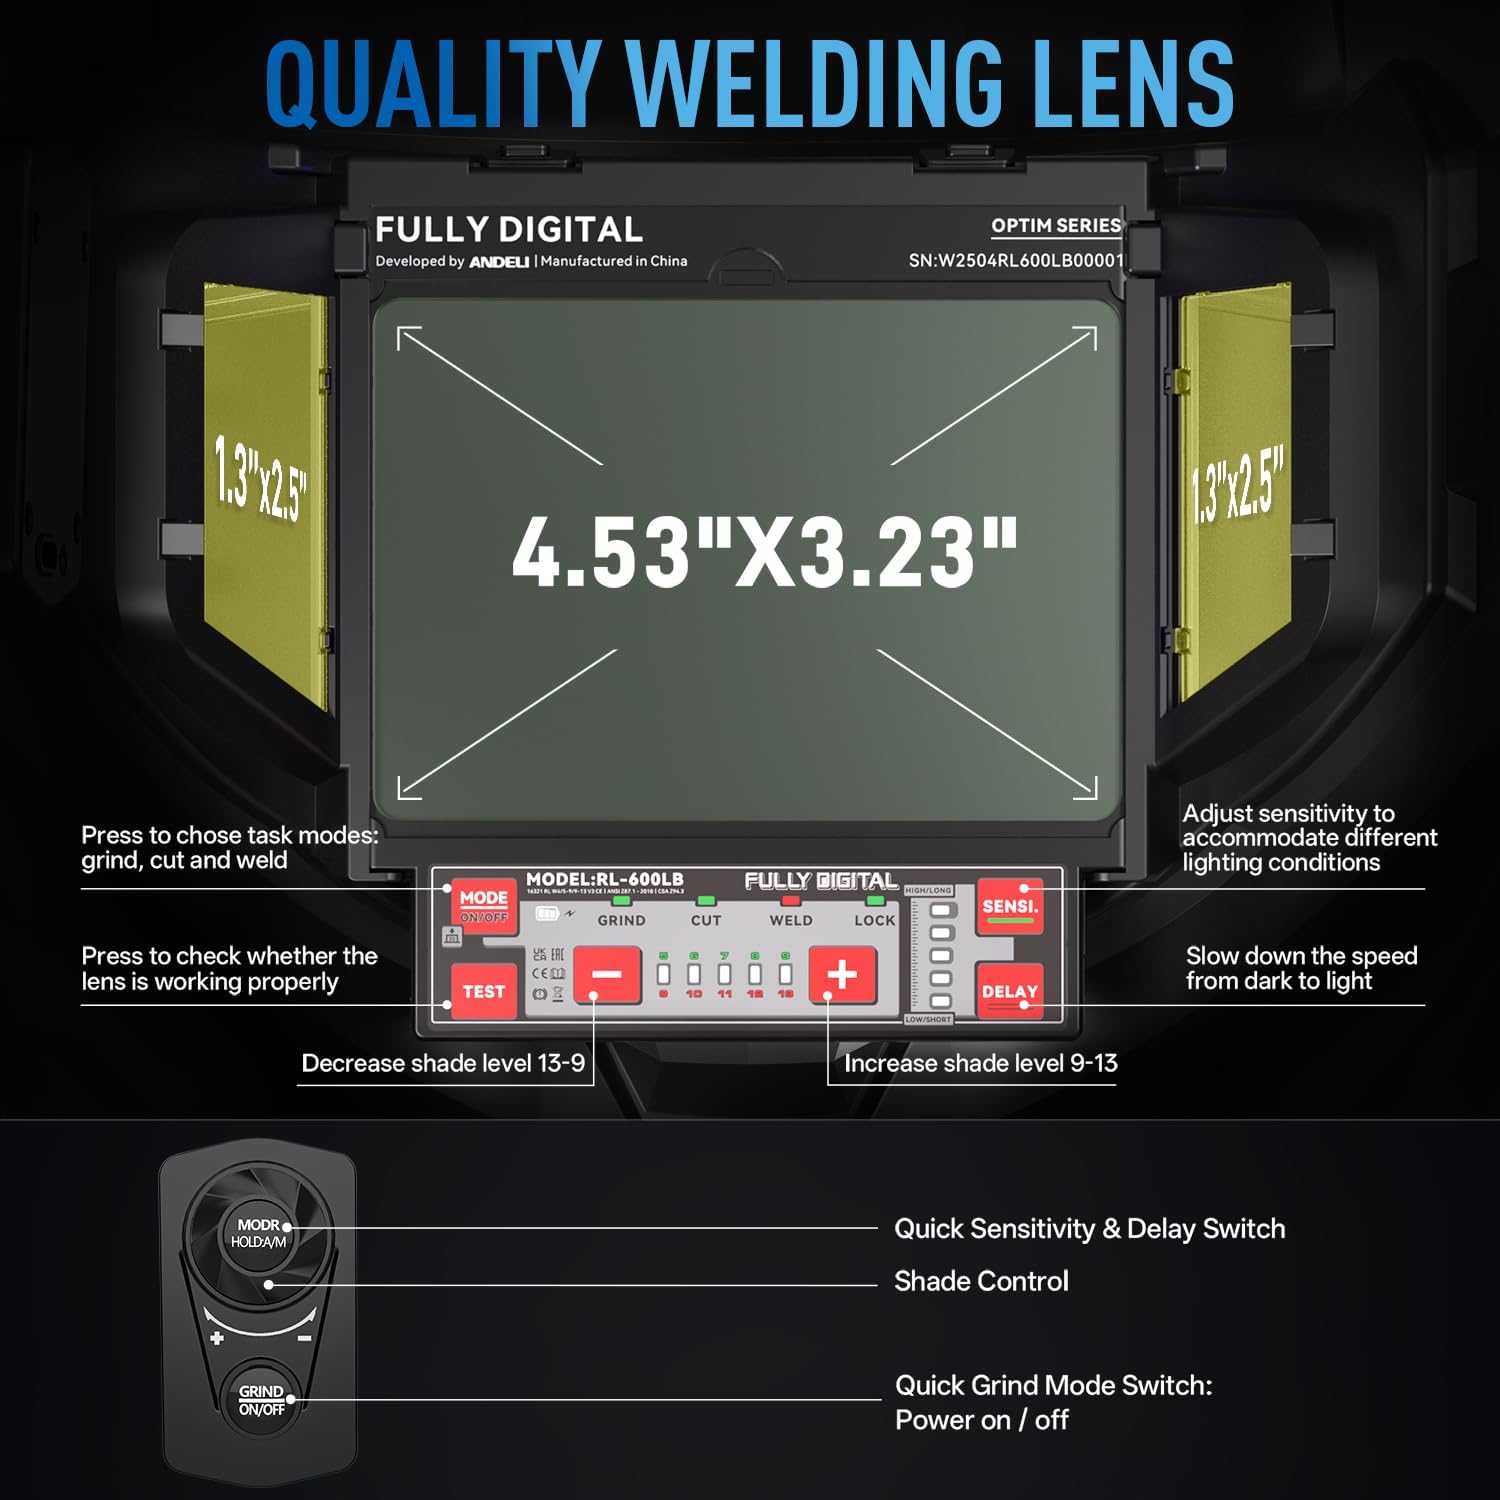
Image: Close-up of the digital control panel and remote, showing buttons for mode selection (grind, cut, weld), sensitivity, shade adjustment, test, lock, and delay.
- Butang MOD: Press to select between GRIND, CUT, and WELD modes.
- SENSITIVITY (SENSI.) Knob: Adjusts the sensitivity of the arc sensors to detect the welding arc. Turn to accommodate different lighting conditions.
- SHADE Adjustment (+/- Buttons): Use these buttons to increase or decrease the shade level (4/5-9/9-13).
- Tombol KELEWATAN: Adjusts the time the lens remains dark after the welding arc stops. This prevents eye strain from afterglow.
- Butang UJIAN: Verifies the auto-darkening function.
- Butang Kunci: Locks the current shade setting.
Operasi Kimpalan
- Pilih Mod: Choose the appropriate mode (WELD, GRIND, or CUT) using the MODE button. For welding, select WELD.
- Laraskan Lorek: Set the shade level according to your welding process and amperage. Start with a higher shade and reduce if visibility is poor. Refer to standard welding shade charts for guidance.
- Laraskan Kepekaan: Set the sensitivity to ensure the helmet darkens reliably when the arc is struck. Higher sensitivity is needed for low amperage TIG welding.
- Adjust Delay: Set the delay time to prevent eye fatigue. A longer delay is often preferred for high amperage welding or when tack welding.
- Mulakan Kimpalan: Once all settings are configured and tested, you can begin your welding task. The lens will automatically darken when the arc is struck and lighten when the arc stops, based on your delay setting.

Image: Illustrates the helmet's fast photosensitivity with 4 arc sensors and 1/30000s response time, detecting 5Amp TIG welding arcs to provide superior eye protection.
Penyelenggaraan
- Pembersihan:
- Bersihkan cangkerang topi keledar dengan sabun lembut dan air. Elakkan pelarut yang keras.
- Clean the outer and inner protective lenses with a soft, clean cloth and a specialized lens cleaning solution. Do not use abrasive materials or paper towels, as they can scratch the lens.
- Regularly check the auto-darkening filter (ADF) for dust or debris and clean gently if necessary.
- Penggantian Lensa:
- Replace scratched or damaged outer and inner protective lenses immediately to maintain optical clarity and protection.
- Refer to the helmet's design for specific instructions on how to remove and install replacement lenses. Typically, outer lenses clip into place, and inner lenses slide into a frame.
- Penjagaan Bateri:
- Ensure the solar panel is clean and unobstructed to maximize charging efficiency.
- Charge the internal rechargeable battery regularly via the USB-C port, especially if the helmet is stored for extended periods or used in low-light conditions.
- Storan: Store the helmet in a dry, clean environment away from direct sunlight and extreme temperatures.

Imej: Meletup view showing the different layers of the welding helmet's lens assembly, including the internal protective lens, LCD shading layer, UV/IR filter, lens frame, side view, and outside lens cover.
Menyelesaikan masalah
| Masalah | Kemungkinan Punca | Penyelesaian |
|---|---|---|
| Lens does not darken. |
|
|
| Lens remains dark after welding. |
|
|
| Poor visibility through lens. |
|
|
| Helmet feels uncomfortable. |
|
|
Spesifikasi
| Ciri | Perincian |
|---|---|
| Jenama | ANDELI |
| Nombor Model | RL-600LB-DBB |
| bahan | plastik |
| Kejelasan Optik | 1/1/1/2 |
| ViewKawasan Kawasan | Main: 4.53" x 3.23" (11.4 x 9.5 cm), Side: 1.3" x 2.5" |
| Julat Teduh | Light State: Shade 4/5, Dark State: Shade 9-13 (Adjustable) |
| Masa Tindak Balas | 1/30000s |
| Penderia Arka | 4 |
| Bekalan Kuasa | Solar Cell & Rechargeable Battery (USB-C) |
| Berat badan | lebih kurang 560g (1.1 lbs) |
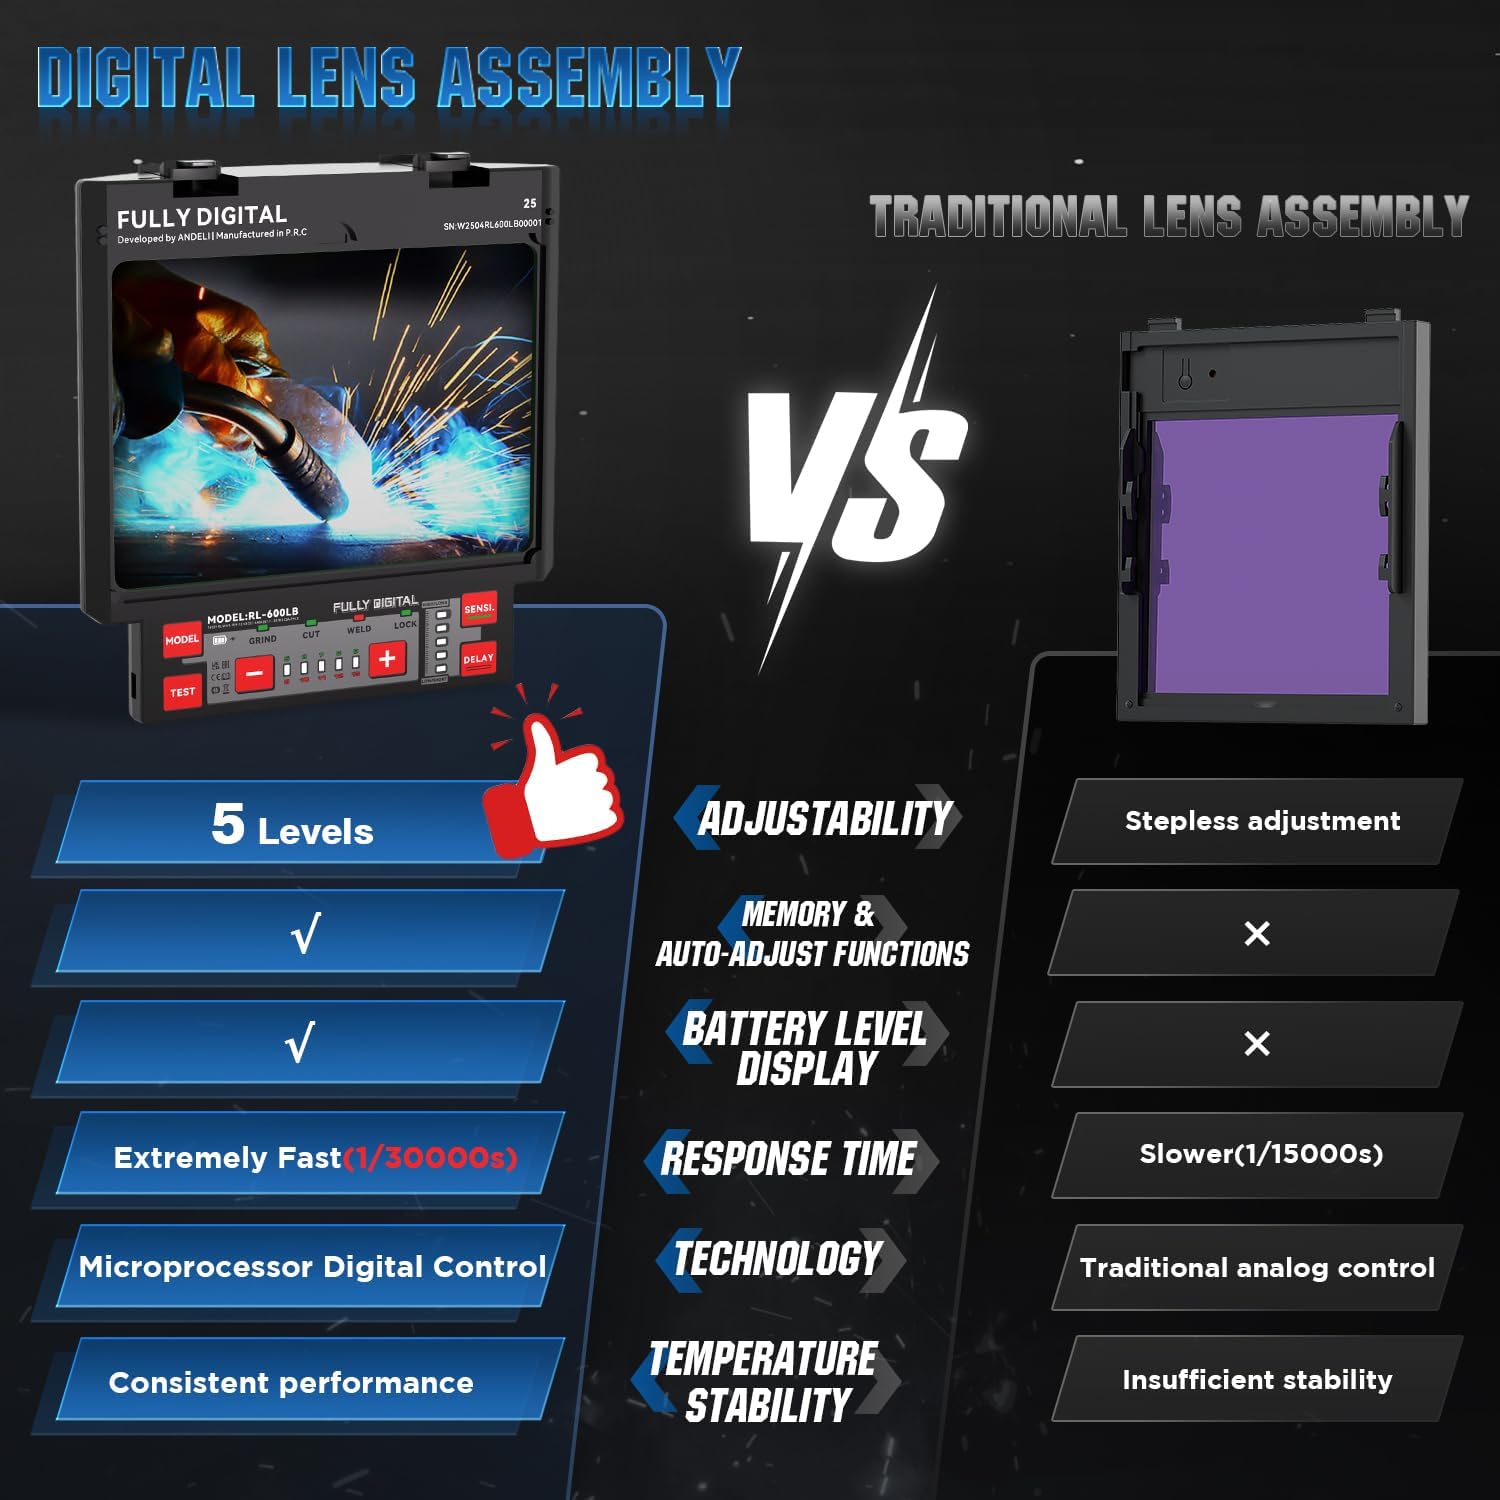
Image: Comparison table highlighting the advantages of the digital lens assembly, including adjustability, memory, battery level display, faster response time, microprocessor control, and consistent performance, compared to a traditional lens.
Waranti dan Sokongan
This ANDELI OPTIM welding helmet comes with a Waranti 1 tahun dari tarikh pembelian, meliputi kecacatan pembuatan. Sila simpan bukti pembelian anda untuk tuntutan waranti.
For technical support, warranty service, or to purchase replacement parts, please contact ANDELI customer service through the retailer where the product was purchased or visit the official ANDELI webtapak.
Pengeluar: andeli