1. Pengenalan
Welcome to the user manual for your LOKLNEYK H610 S4 Motherboard. This guide provides detailed instructions for installation, operation, maintenance, and troubleshooting to ensure optimal performance and longevity of your system. Please read this manual thoroughly before beginning installation.
2. Persediaan
2.1. Kandungan Pakej
Sahkan bahawa semua komponen terdapat dalam pakej motherboard anda:
- LOKLNEYK H610 S4 Motherboard
- I / O Shield
- Kabel Data SATA (kuantiti mungkin berbeza-beza)
- Manual Pengguna (dokumen ini)
- CD/USB pemacu (atau arahan muat turun)
2.2. Susun Atur Papan Induk
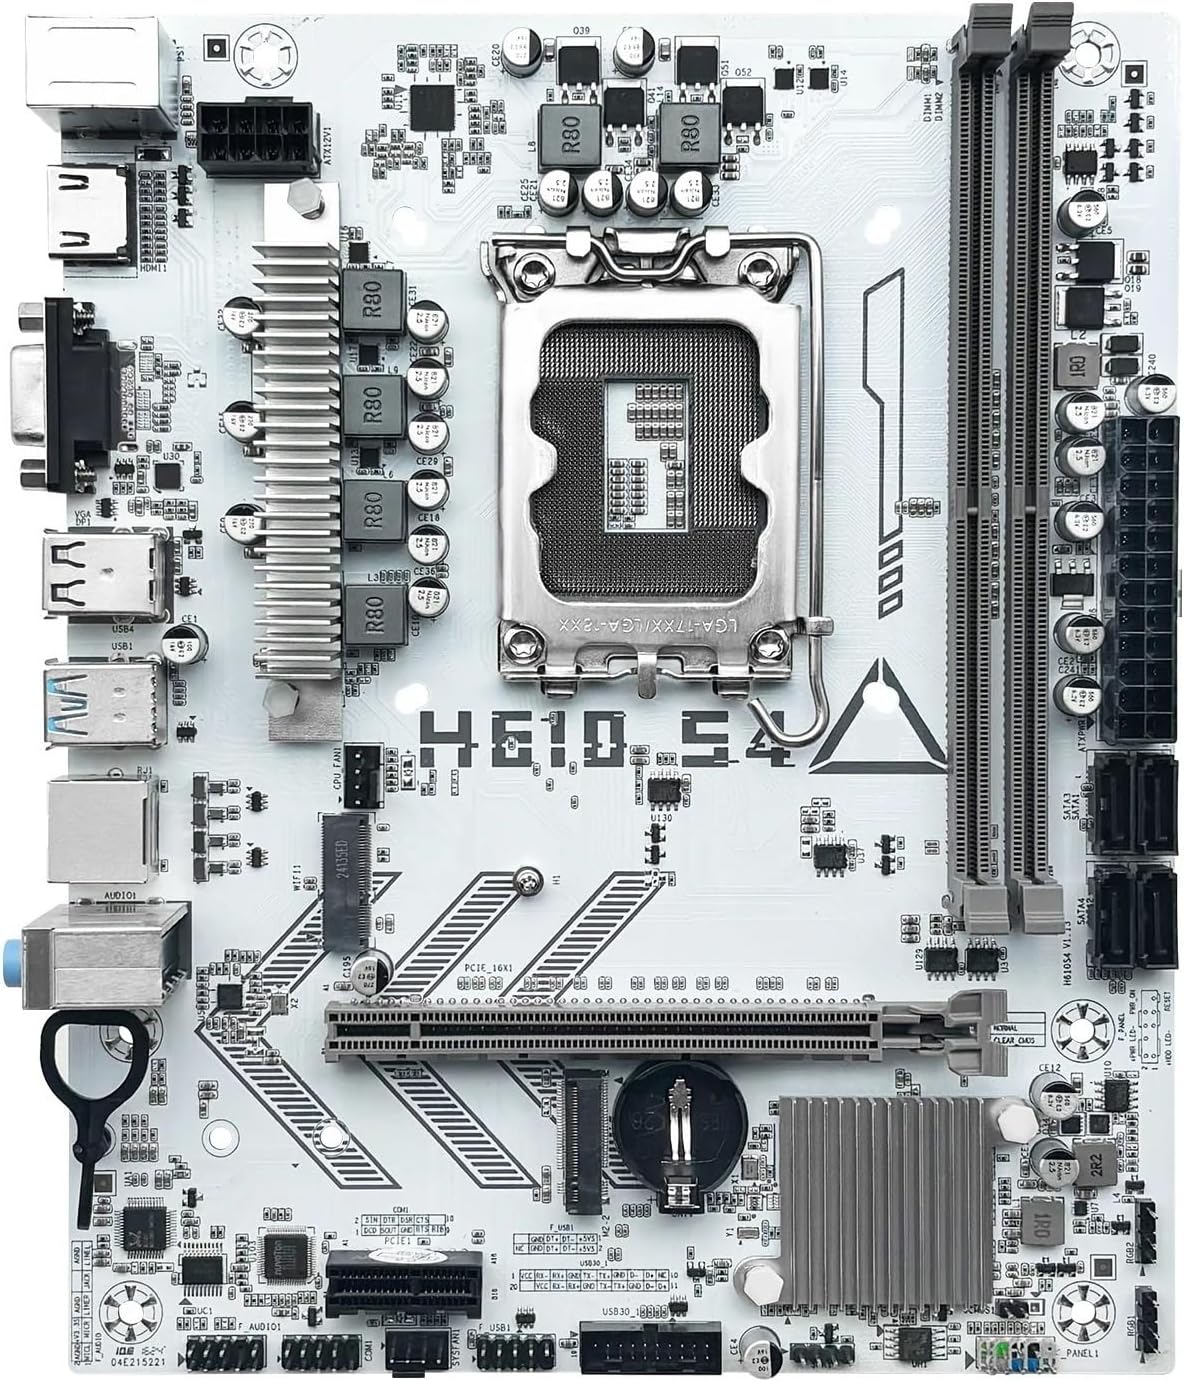
Familiarize yourself with the various components and connectors on the motherboard. Refer to the diagram below for a detailed overview of the H610 S4 motherboard's key areas.

Figure 1: Labeled diagram of the LOKLNEYK H610 S4 Motherboard, highlighting CPU socket, RAM slots, PCIe slots, M.2 slots, SATA ports, and various headers.
2.3. Langkah Pemasangan
Ikuti langkah ini untuk pemasangan papan induk dan komponen anda dengan betul:
- Sediakan Casis: Pasang perisai I/O ke dalam bukaan belakang sarung komputer anda.
- Pasang Papan Induk: Carefully place the motherboard into the chassis, aligning it with the standoffs. Secure it with screws.
- CPU Installation (LGA 1700):
- Open the CPU socket lever and protective cover.
- Align the CPU's triangular mark with the mark on the socket.
- Perlahan-lahan letakkan CPU ke dalam soket. Jangan paksa.
- Tutup tuil untuk mengamankan CPU.
- Pemasangan Penyejuk CPU: Install your CPU cooler according to its manufacturer's instructions, ensuring proper thermal paste application.
- RAM Installation (DDR4):
- Buka klip pada kedua-dua hujung slot memori DDR4.
- Align the memory module's notch with the slot's key.
- Tekan ke bawah dengan kuat pada kedua-dua hujung modul sehingga klip terpasang pada tempatnya.
- Storage Installation (NVMe M.2 / SATA):
- For M.2 SSDs, insert the drive into the M.2 slot and secure it with the provided screw.
- For SATA drives, connect SATA data cables to the motherboard's SATA ports and to your drives. Connect power cables from your power supply to the drives.
- Pemasangan Kad PCIe: Insert your graphics card or other PCIe expansion cards into the appropriate PCIe slots and secure them.
- Sambungan Bekalan Kuasa: Sambungkan penyambung kuasa ATX 24-pin dan penyambung kuasa CPU 8-pin daripada bekalan kuasa anda ke papan induk.
- Sambungan Panel Depan: Connect the front panel headers (power button, reset button, USB ports, audio jacks, LED indicators) to the corresponding pins on the motherboard. Refer to the motherboard layout diagram (Figure 1) for pin locations.
Gambar 2: Lebihview of the LOKLNEYK H610 S4 Motherboard, showing the general layout of components.
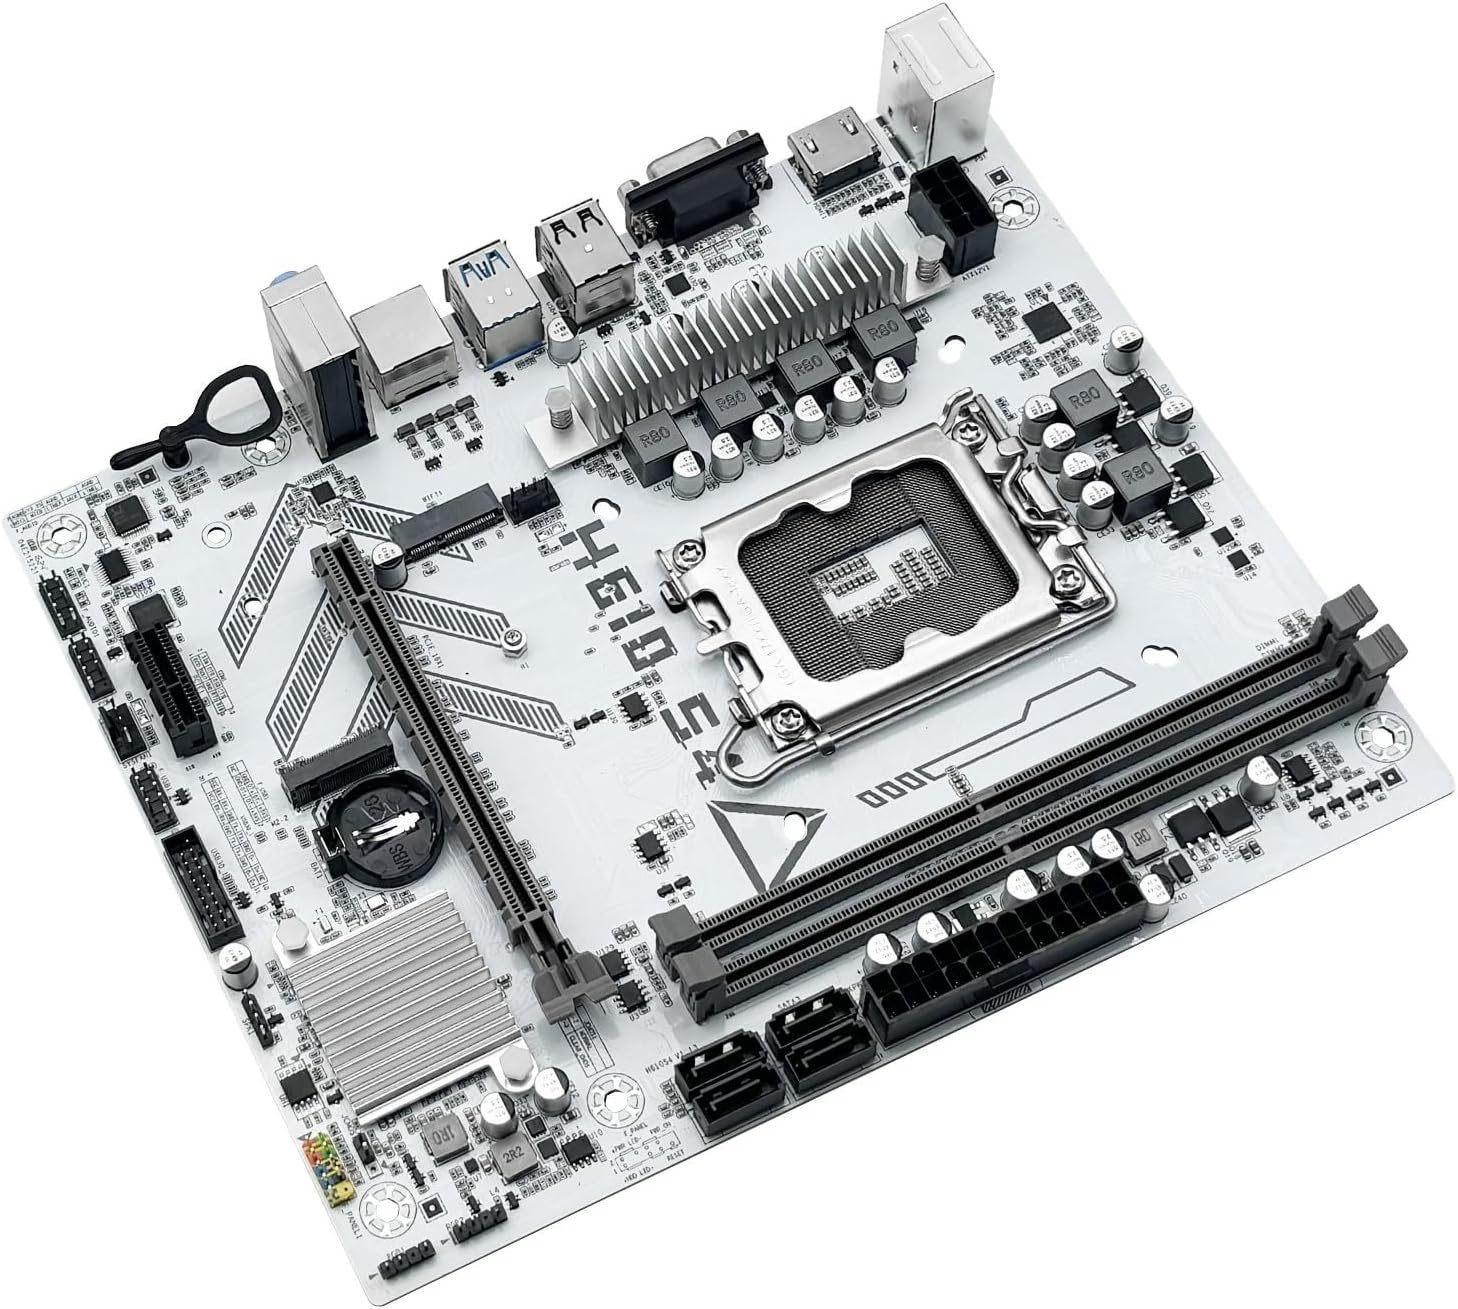
Figure 3: Rear I/O panel connectors and typical accessories like the I/O shield and SATA cables.
3. Arahan Operasi
3.1. But Pertama
After completing all hardware installations, connect your monitor, keyboard, and mouse. Power on your system. The system should display the BIOS/UEFI splash screen. If not, check all power connections and component seating.
3.2. Konfigurasi BIOS/UEFI
Untuk memasuki utiliti persediaan BIOS/UEFI, tekan butang DEL or F2 key during the initial boot sequence. Here you can configure:
- Boot order for your operating system drive.
- Tetapan tarikh dan masa.
- Memory profiles (e.g., XMP for DDR4).
- Fan speed controls.
- SATA mode (AHCI/RAID).
3.3. Pemasangan Pemandu
Selepas memasang sistem pengendalian anda, adalah penting untuk memasang pemacu terkini untuk komponen papan induk anda. Ini termasuk:
- Pemacu cipset
- Pemacu LAN (Ethernet)
- Pemacu audio
- Graphics drivers (for integrated graphics or discrete GPU)
Drivers can typically be found on the LOKLNEYK official website or on the provided driver media.
4. Penyelenggaraan
4.1. Pembersihan
Pembersihan tetap membantu mengekalkan prestasi optimum dan memanjangkan jangka hayat papan induk anda. Gunakan udara termampat untuk mengeluarkan habuk daripada heatsink, kipas dan komponen lain. Pastikan sistem dimatikan dan dicabut plag sebelum dibersihkan.
4.2. Kemas Kini BIOS/UEFI
Periodically check the LOKLNEYK website for updated BIOS/UEFI versions. Updates can provide improved compatibility, stability, and new features. Follow the specific instructions provided by LOKLNEYK for updating the BIOS/UEFI to avoid system damage.
5. Penyelesaian masalah
Bahagian ini menyediakan penyelesaian kepada isu biasa yang mungkin anda hadapi.
5.1. Isu dan Penyelesaian Biasa
- Tiada Kuasa:
- Periksa sama ada bekalan kuasa disambungkan dengan betul ke papan induk (ATX 24-pin dan CPU 8-pin).
- Pastikan suis bekalan kuasa berada dalam kedudukan 'ON'.
- Sahkan sambungan butang kuasa panel hadapan.
- Tiada Paparan:
- Ensure the monitor cable is securely connected to the graphics card or motherboard (if using integrated graphics).
- Pasang semula kad grafik dan modul RAM.
- Cuba but dengan hanya satu batang RAM.
- Ketidakstabilan/Ranap Sistem:
- Semak suhu CPU dan GPU.
- Pastikan semua pemandu dikemas kini.
- Uji modul RAM untuk ralat.
- Peranti But Tidak Ditemui:
- Verify that your storage drive (SSD/HDD) is properly connected.
- Check BIOS/UEFI settings for correct boot order and SATA mode.
- Pastikan sistem pengendalian dipasang dengan betul pada pemacu.
For more complex issues, consult the LOKLNEYK support website or a qualified technician.
6. Spesifikasi
Below are the technical specifications for the LOKLNEYK H610 S4 Motherboard:
| Ciri | Spesifikasi |
|---|---|
| Soket CPU | LGA 1700 |
| Compatible CPUs | Intel Core 12th, 13th, 14th Generation i3, i5 Processors |
| Chipset | Intel H610 |
| Slot memori | 2 x DDR4 DIMM |
| Kapasiti Memori Maks | 64 GB |
| Antaramuka Penyimpanan | 2 x M.2 (NVMe 2280), 4 x SATA 3.0 |
| Slot PCIe | 1 x PCIe 4.0 x16, 1 x PCIe x1 |
| LAN | 1 x RJ45 Gigabit Ethernet |
| Port USB | USB 3.0, USB 3.1 Gen1, USB 2.0 (Front & Rear) |
| Output Video | HDMI, VGA |
| Audio | Audio Onboard |
| Faktor Bentuk | Compact (180mm x 220mm) |

Figure 4: LOKLNEYK H610 S4 Motherboard showing its physical dimensions.
7. Waranti dan Sokongan
7.1. Maklumat Waranti
Please refer to the warranty card included with your product or visit the official LOKLNEYK webtapak untuk terma dan syarat jaminan terperinci. Simpan bukti pembelian anda untuk tuntutan waranti.
7.2. Sokongan Teknikal
If you encounter any issues that cannot be resolved using this manual, please visit the LOKLNEYK support website for FAQs, driver downloads, and contact information for technical assistance.