
1. Pengenalan
This manual provides detailed instructions for the AOOSTAR MACO PRO 6850H Mini PC. Please read this guide thoroughly before using the device to ensure proper operation and to maximize its performance and lifespan. This mini PC is designed for a variety of tasks, including office work, creative projects, gaming, and home theater applications, offering high performance in a compact form factor.

The AOOSTAR MACO PRO 6850H Mini PC is versatile for various applications, from professional use to entertainment.
2. Kandungan Pakej
Sahkan bahawa semua item terdapat dalam pakej:
- 1 × AOOSTAR MACO PRO 6850H Mini PC
- 1 × Kabel HDMI
- 1 × Penyesuai Kuasa

Ensure all listed components are included in your package.
3. Fizikal Overview
Familiarize yourself with the ports and features of your AOOSTAR MACO PRO 6850H Mini PC.
Panel Depan
- Power Button with Fingerprint Sensor: For powering on/off and secure login via Windows Hello.
- Bicu Audio 3.5mm: Untuk fon kepala atau pembesar suara luaran.
- Port USB 3.2 Gen 2 (x2): Untuk menyambungkan peranti USB.
- Port USB4 (x1): Pemindahan data berkelajuan tinggi dan output paparan.
Panel Belakang
- Input Kuasa DC: Sambungkan penyesuai kuasa yang disertakan.
- Port LAN 2.5G (x2): Untuk sambungan rangkaian berwayar berkelajuan tinggi.
- Port HDMI 2.1 (x1): Untuk menyambung ke paparan.
- DisplayPort 1.4 (x1): Untuk menyambung ke paparan.
- Port USB 2.0 (x2): For connecting peripherals like keyboard and mouse.
- Port USB4 (x1): Pemindahan data berkelajuan tinggi dan output paparan.
Panel Sisi
- OCuLink Port (x1): Dedicated port for external GPU connection.

Front and rear panel connectivity options for the AOOSTAR MACO PRO 6850H Mini PC.
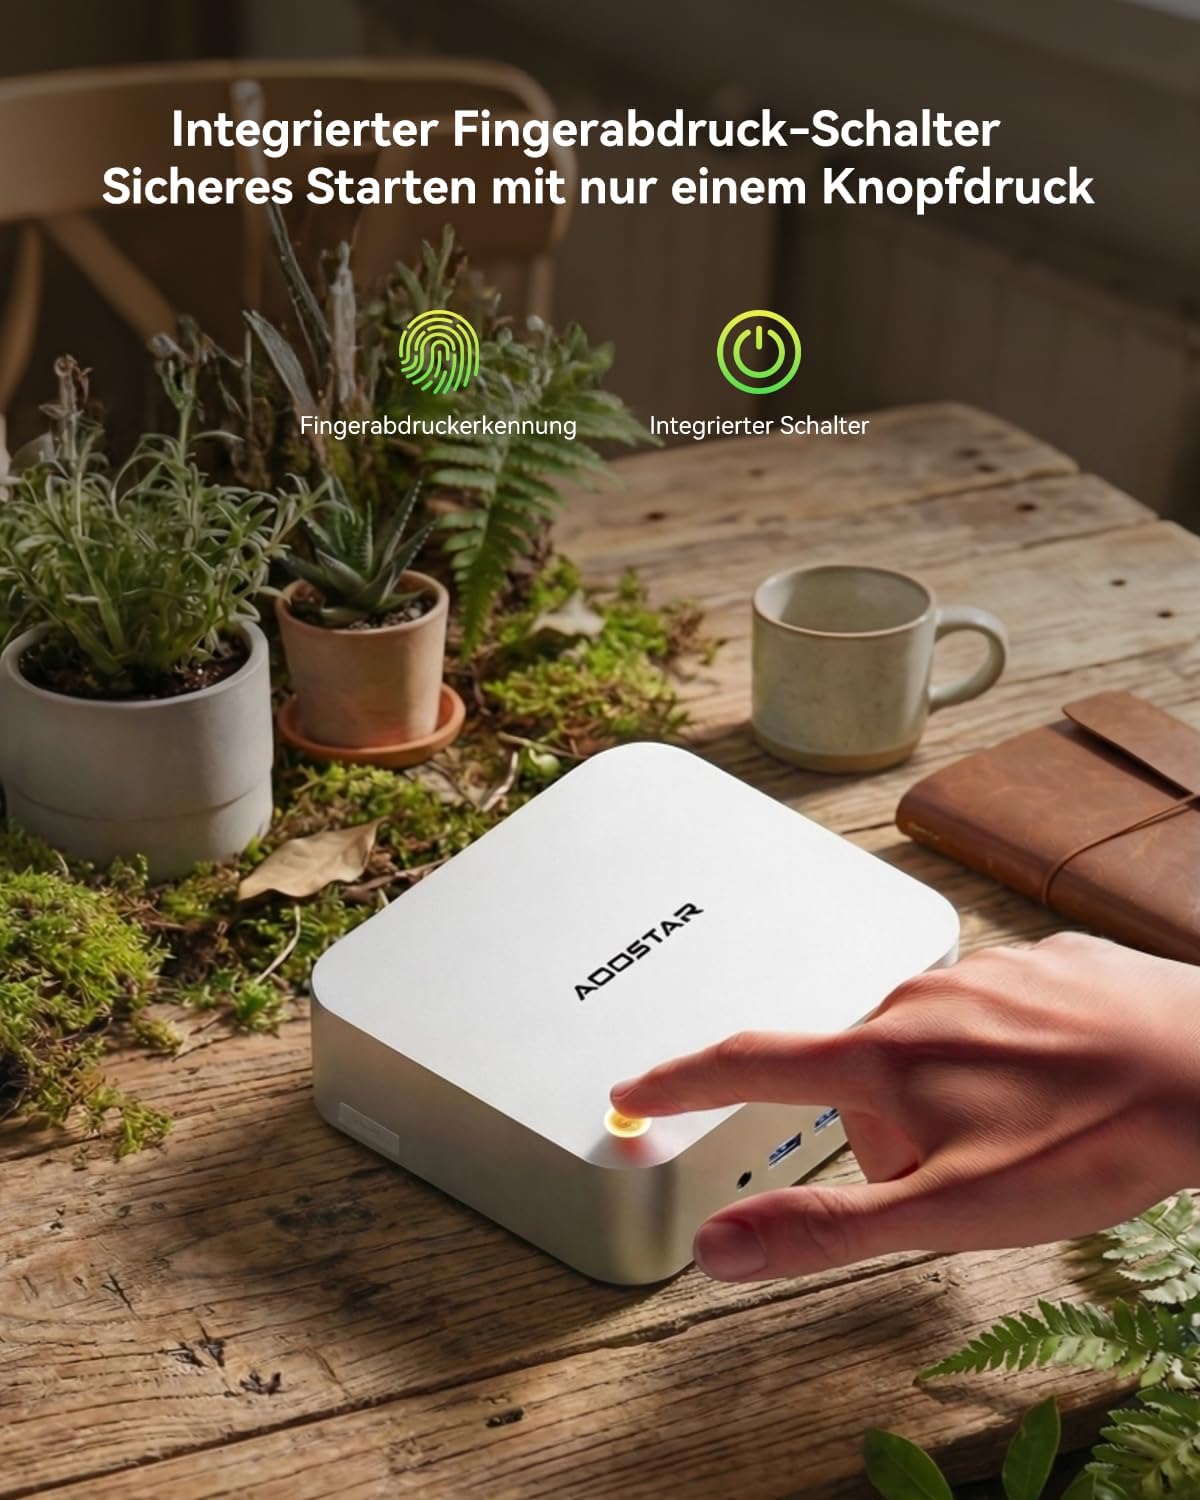
Integrated fingerprint sensor for secure one-button startup.
4. Arahan Persediaan
Follow these steps to set up your AOOSTAR MACO PRO 6850H Mini PC:
- Sambung ke Paparan: Use the included HDMI cable or a DisplayPort cable to connect the Mini PC to your monitor or TV. You can also use a USB4 port for display output.
- Sambung Peranti: Plug in your keyboard and mouse to the available USB ports.
- Sambungkan ke Rangkaian: For a wired connection, connect an Ethernet cable to one of the 2.5G LAN ports. For wireless, the device supports Wi-Fi 6 and Bluetooth 5.2, which can be configured after initial boot.
- Sambungkan Kuasa: Plug the power adapter into the DC power input on the rear panel, then connect it to a power outlet.
- Hidupkan kuasa: Tekan butang kuasa pada panel hadapan untuk menghidupkan Mini PC.
- Persediaan Windows Awal: The Mini PC comes with Windows 11 Pro pre-installed. Follow the on-screen instructions to complete the initial setup, including language, region, and user account creation.

The Mini PC is ready for use after connecting essential peripherals and power.
5. Arahan Operasi
Operasi Asas
- Hidupkan/Mati Kuasa: Press the power button to turn on the device. To shut down, use the Windows Start menu. A short press on the power button can put the PC to sleep.
- Fingerprint Login: Utilize the integrated fingerprint sensor for quick and secure login via Windows Hello. Register your fingerprint in Windows Settings > Accounts > Sign-in options.
Ciri Lanjutan
- Persediaan Berbilang Paparan: The Mini PC supports up to four 4K displays simultaneously via HDMI, DisplayPort, and two USB4 ports. Connect your displays to the respective ports.

Achieve enhanced productivity with a quad-display setup.
- OCuLink External GPU: For demanding graphical tasks, connect an external GPU (eGPU) using the dedicated OCuLink port (PCIe 4.0 x4, 64 Gbit/s). This provides high bandwidth for improved graphics performance. Nota: Hot-plugging is not supported for OCuLink. Ensure the system is powered off before connecting or disconnecting an eGPU.

Expand graphics capabilities with an OCuLink external GPU.
- Perluasan Storan: The Mini PC features three M.2 PCIe 4.0 x4 slots, allowing for storage expansion up to 8TB (in addition to the pre-installed 1TB SSD). Refer to the specifications for compatible M.2 SSD types.

Expand storage with additional M.2 SSDs.
6. Penyelenggaraan
Penyelenggaraan yang betul memastikan jangka hayat dan prestasi optimum Mini PC anda.
- Pembersihan: Regularly clean the exterior of the Mini PC with a soft, dry cloth. Use compressed air to gently clear dust from ventilation openings to prevent overheating. Do not use liquid cleaners directly on the device.
- Pengudaraan: Ensure the Mini PC is placed in a well-ventilated area. Do not block the air vents.
- Kemas Kini Perisian: Keep your Windows operating system and drivers updated to ensure system stability and security.
- Suhu: Operate the Mini PC within recommended temperature ranges. Avoid exposing it to extreme heat or cold.

The Glacier cooling system ensures efficient heat dissipation.
7. Penyelesaian masalah
Jika anda menghadapi masalah dengan Mini PC anda, rujuk masalah dan penyelesaian biasa berikut:
- Tiada Kuasa:
- Pastikan penyesuai kuasa disambungkan dengan selamat ke PC Mini dan salur keluar kuasa yang berfungsi.
- Sahkan alur keluar kuasa berfungsi dengan memasang peranti lain.
- Tiada Output Paparan:
- Check that the HDMI or DisplayPort cable is securely connected to both the Mini PC and the monitor.
- Pastikan monitor dihidupkan dan ditetapkan kepada sumber input yang betul.
- Cuba kabel paparan atau monitor lain jika tersedia.
- System Does Not Boot / No Operating System Detected:
- If the system boots directly into BIOS or reports no boot device, ensure the internal SSD is properly seated. If you are comfortable, you may open the case to check the M.2 SSD connection.
- Contact support if the issue persists, as it may indicate a hardware problem or an issue with the pre-installed OS.
- Fan Noise is Loud:
- Ensure the Mini PC has adequate ventilation and is not obstructed.
- Dust accumulation can cause fans to work harder; clean the vents as described in the Maintenance section.
- Advanced users may adjust fan curves in the BIOS settings, though this requires caution and testing to avoid overheating.
- Isu Kesambungan Wi-Fi/Bluetooth:
- Pastikan Wi-Fi dan Bluetooth diaktifkan dalam tetapan Windows.
- Check for updated wireless drivers from the AOOSTAR support webtapak.
- Mulakan semula penghala/modem anda.
8. Spesifikasi
Detailed technical specifications for the AOOSTAR MACO PRO 6850H Mini PC:
| Ciri | Perincian |
|---|---|
| Jenama | AOOSTAR |
| Model | MACO PRO 6850H |
| Sistem Operasi | Windows 11 Pro (Prapasang) |
| Model CPU | AMD Ryzen 7 PRO 6850H (8 Cores/16 Threads, up to 4.7 GHz) |
| Model GPU | Integrated AMD Radeon 680M Graphics (2200 MHz) |
| RAM | 24GB LPDDR5 6400 MHz (Non-expandable) |
| Penyimpanan | 1TB M.2 NVMe PCIe 4.0 SSD |
| Peluasan Storan | 3 × M.2 2280 PCIe 4.0 x4 slots (up to 8TB total) |
| Output Video | 1 × HDMI 2.1 (8K@60Hz), 1 × DisplayPort 1.4 (8K@60Hz), 2 × USB4 (4K@120Hz) - Supports Quad 4K Displays |
| Port USB | 2 × USB4 (40 Gbps, 100W PD), 2 × USB 3.2 Gen 2, 2 × USB 2.0 |
| Rangkaian | 2 × 2.5G LAN, Wi-Fi 6, Bluetooth 5.2 |
| Audio | Bicu Audio 1 × 3.5mm |
| Ciri Khas | OCuLink Port (PCIe 4.0 x4 for eGPU), Fingerprint Recognition (Windows Hello) |
| Kaedah Penyejukan | Air Cooling (Glacier cooling system with vapor chamber) |
| Dimensi | 13 × 15 × 5.5 cm |
| Berat badan | 0.66 kg |
9. Waranti & Sokongan
Your AOOSTAR MACO PRO 6850H Mini PC comes with a Waranti 12 bulan from the date of purchase. AOOSTAR also provides lifetime technical support for this product.
If you encounter any issues or have questions that are not covered in this manual, please contact AOOSTAR customer support:
- e-mel: Refer to your product packaging or the official AOOSTAR webtapak untuk alamat e-mel sokongan terkini.
- Sokongan dalam talian: Visit the AOOSTAR official website for FAQs, driver downloads, and further assistance.
When contacting support, please have your product model (MACO PRO 6850H) and purchase information readily available.