1. Pengenalan
Thank you for choosing the Keenso Front Rear Dash Cam. This device is designed to provide reliable video recording of your journeys, offering enhanced safety and security for your vehicle. This manual will guide you through the installation, operation, and maintenance of your dash cam to ensure optimal performance.
2. Maklumat Keselamatan
- Do not operate the dash cam while driving. Adjust settings only when the vehicle is safely parked.
- Pastikan kamera papan pemuka dipasang dengan kukuh dan tidak menghalang anda view jalan raya atau mengganggu kawalan kenderaan.
- Elakkan daripada mendedahkan peranti kepada suhu yang melampau, cahaya matahari langsung untuk tempoh yang lama atau kelembapan yang berlebihan.
- Use only the provided car charger and data cable to prevent damage to the device.
- Do not attempt to disassemble or repair the dash cam yourself. Contact customer support for assistance.
- Sandarkan video penting secara kerap files untuk mengelakkan kerugian.
3. Kandungan Pakej
Sahkan bahawa semua item terdapat dalam pakej anda:
- 1 x Keenso Car DVR Unit
- 1 x Pengecas Kereta
- 1 x Manual Pengguna (dokumen ini)
- 1 x Data Cable (USB)
- 2 x Mounts (for installation)
- 1 x Pita Bermuka Dua
- 1 x Magic Base
Rajah 3.1: All components included in the Keenso Dash Cam package.
4. Ciri-ciri Produk
The Keenso Front Rear Dash Cam offers a range of features for reliable vehicle monitoring:
- Bahan Berkualiti Tinggi: Constructed from durable ABS material for long-lasting performance.
- Bateri Litium Terbina dalam: Features a 180mAh lithium-ion battery for continuous recording even when external power is interrupted.
- Paparan Mesra Pengguna: Equipped with a 2.0-inch screen (960x240 resolution) for easy viewing and management of recordings.
- Enhanced Parking Safety: Motion detection feature automatically records movement around your parked vehicle.
- Rakaman Gelung: Automatically overwrites older, non-protected files when the memory card is full, ensuring continuous recording without manual deletion.
- Penglihatan Malam Inframerah: Professional configuration of 4 infrared night lights combined with WDR technology enhances night recording clarity.
- Supercapacitors: Designed to operate reliably in temperatures ranging from -10℃ to 70℃.
- Kamera Resolusi Tinggi: 10MP image sensor with a 170-degree wide-angle lens, covering multiple lanes.

Rajah 4.1: Bahagian depan view of the dash cam, highlighting the display screen and control buttons.
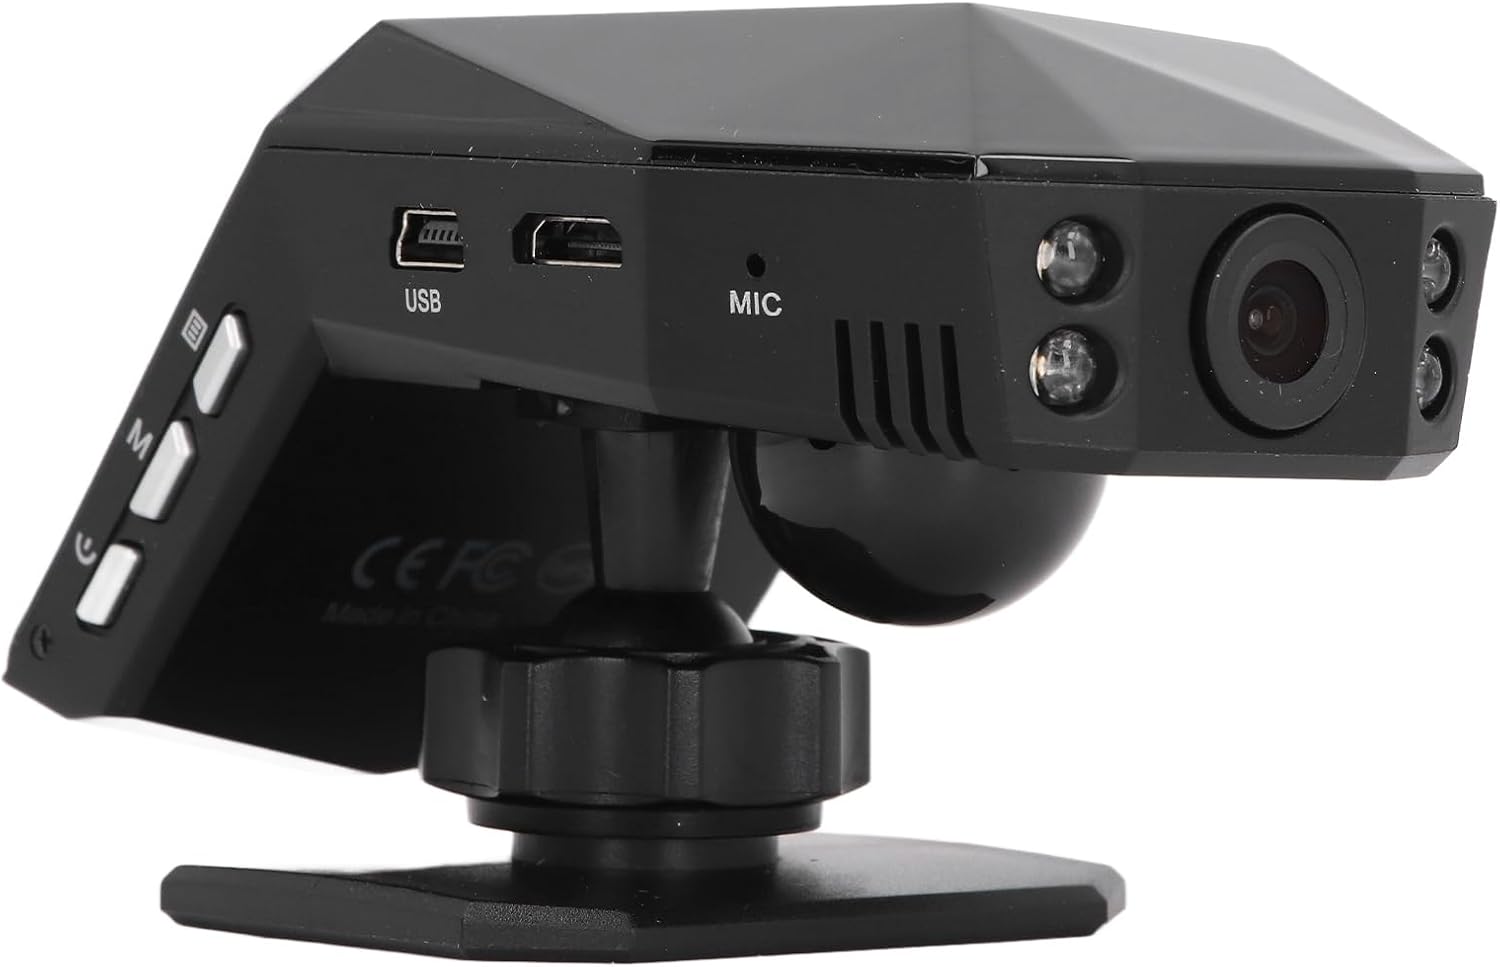
Rajah 4.2: belakang view of the dash cam, showing the camera lens and four infrared night vision lights.
5. Persediaan
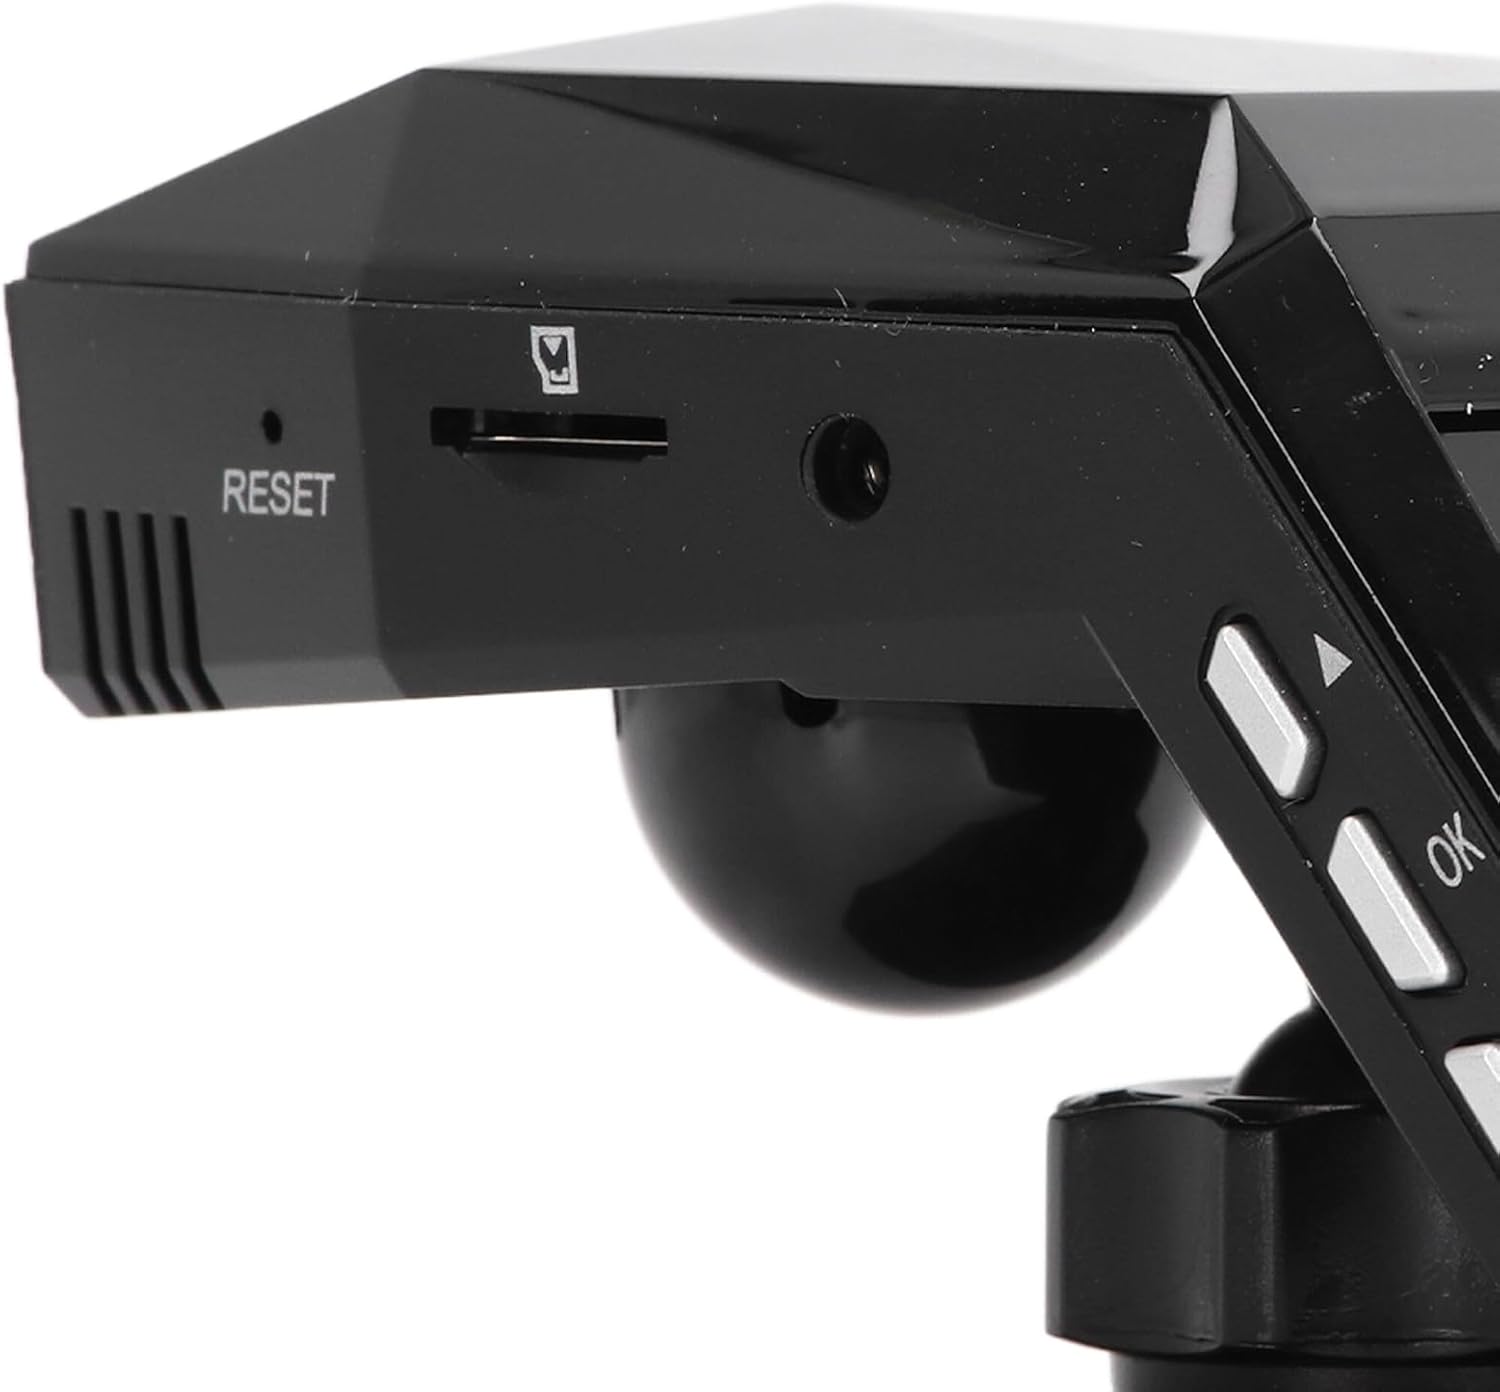
5.1 Inserting the Micro Memory Card
- Pastikan cam dash dimatikan.
- Locate the Micro Memory Card slot on the side of the device.
- Gently insert a Micro Memory Card (up to 32GB, not included) into the slot until it clicks into place.
- Untuk mengeluarkannya, tolak kad perlahan-lahan ke dalam sehingga ia berbunyi klik, kemudian lepaskan untuk mengeluarkannya.

Rajah 5.1: sebelah view showing the Micro Memory Card slot and Reset button.
5.2 Memasang Dash Cam
- Pilih lokasi pada cermin depan anda yang tidak menghalang anda view, typically behind the rearview cermin.
- Clean the windshield surface thoroughly.
- Attach the magic base to the chosen location using the double-sided tape. Ensure it is firmly secured.
- Connect the dash cam to one of the provided mounts.
- Attach the mount with the dash cam to the magic base. Adjust the camera angle for optimal road coverage.
5.3 Kuasa Penyambung
- Masukkan pengecas kereta ke dalam soket pemetik api kenderaan anda.
- Connect the other end of the car charger cable to the USB port on the dash cam.
- Route the cable neatly along the windshield trim to avoid interference with driving.
- Kamera papan pemuka biasanya akan dihidupkan secara automatik apabila kenderaan dihidupkan dan dimatikan apabila enjin dimatikan.
6. Arahan Operasi
6.1 Operasi Asas
- Hidupkan/Mati Kuasa: The device powers on automatically when connected to vehicle power and off when power is cut. You can also manually power on/off using the power button.
- Rakaman: Once powered on, the dash cam will automatically begin continuous loop recording. A recording indicator will be visible on the screen.
- Navigasi Menu: Use the 'M' button to access the menu and the up/down arrow buttons to navigate. The 'OK' button confirms selections.
6.2 Rakaman Gelung
The dash cam features intelligent loop recording. When the Micro Memory Card reaches its capacity, the system will automatically delete the oldest unprotected video files to make space for new recordings. This ensures continuous recording without manual intervention.
6.3 Pemantauan Tempat Letak Kereta 24 Jam
To activate 24-hour parking monitoring, ensure the feature is enabled in the settings. When the car encounters a collision while parked, the dash cam will automatically start recording for approximately one minute. For continuous monitoring when the car is off, a voltage reducing cable (purchased separately) is required.
6.4 Pengesanan Pergerakan
If enabled in the settings, the motion detection feature will automatically activate and begin recording if a significant object enters the camera's monitoring range while the vehicle is parked. It is recommended to turn off motion detection when driving to avoid unnecessary recordings.
6.5 Viewrakaman
awak boleh view recorded videos directly on the 2.0-inch display screen. Navigate to the playback mode in the menu to browse and play files. Alternatively, remove the Micro Memory Card and insert it into a computer to view files.
7. Penyelenggaraan
- Pembersihan: Use a soft, dry cloth to clean the dash cam's lens and screen. Do not use abrasive cleaners or solvents.
- Kad Memori: Format the Micro Memory Card regularly (e.g., once a month) within the dash cam's settings to maintain optimal performance and prevent data corruption.
- Kemas Kini Perisian: Semak pengeluar website periodically for any available firmware updates. Follow the instructions provided with the update carefully.
- Storan: Apabila tidak digunakan untuk tempoh yang lama, simpan kamera papan pemuka di tempat yang sejuk dan kering, jauh daripada cahaya matahari langsung.
8. Penyelesaian masalah
| Masalah | Kemungkinan Punca | Penyelesaian |
|---|---|---|
| Dash cam tidak dihidupkan. | No power supply; faulty car charger; depleted internal battery. | Check car charger connection and vehicle's power outlet. Ensure the car charger is functional. Charge the internal battery. |
| Rakaman berhenti tanpa diduga. | Memory card full; memory card error; power interruption. | Format the memory card. Replace the memory card if errors persist. Check power connection. |
| Kualiti video kurang baik. | Kanta kotor; filem pelindung pada kanta; tetapan resolusi yang salah. | Clean the lens. Remove any protective film. Adjust video resolution settings to 1080P. |
| Kamera papan pemuka membeku atau ranap. | Software error; memory card issue. | Press the RESET button (refer to Figure 5.1). Format or replace the memory card. |
| Pemantauan tempat letak kereta tidak berfungsi. | Feature not enabled; no voltage reducing cable for continuous power. | Enable parking monitoring in settings. Consider installing a voltage reducing cable for 24/7 monitoring. |
9. Spesifikasi
| Ciri | Spesifikasi |
|---|---|
| Bahan Produk | ABS |
| Resolusi Video | 1920x1080P/30fps |
| Resolusi Imej | 10MP |
| Jenis Bateri | Bateri Litium Ion |
| Kapasiti Bateri | 180mAh |
| Saiz Skrin Paparan | 2.0 Inci |
| Paparan Resolusi Skrin | 960x240 |
| Supported Micro Memory Card | Sehingga 32GB (tidak termasuk) |
| Suhu Operasi | -10 ℃ hingga 70 ℃ |
| Dimensi Produk (D x W x H) | 5.91" x 4.72" x 3.54" |
10. Waranti dan Sokongan
This Keenso product is covered by a manufacturer warranty for 90 days from the date of purchase. This warranty covers defects in materials and workmanship under normal use.
For technical support, warranty claims, or any questions regarding your Keenso Front Rear Dash Cam, please contact your retailer or visit the official Keenso weblaman web untuk maklumat khidmat pelanggan.