
pengenalan
This manual provides detailed instructions for the installation, operation, and maintenance of your GAMDIAS Aura GC11 ARGB Mid-Tower PC Case. Please read this manual thoroughly before beginning installation to ensure proper setup and safe use of the product. The GAMDIAS Aura GC11 ARGB is designed to accommodate Mini-ITX, Micro-ATX, and ATX motherboards, featuring a bar-patterned mesh front panel for optimal airflow and four pre-installed 120mm ARGB fans.
Maklumat Keselamatan
- Always disconnect the power supply from the wall outlet before installing or removing any components to prevent electrical shock.
- Kendalikan semua komponen dengan berhati-hati bagi mengelakkan kerosakan.
- Pakai tali pergelangan tangan anti-statik atau kerap sentuh objek logam yang dibumikan untuk melepaskan elektrik statik sebelum mengendalikan komponen dalaman.
- Jauhkan bahagian kecil dan bahan pembungkusan daripada kanak-kanak.
- Ensure proper ventilation around the PC case to prevent overheating.
Kandungan Pakej
Verify that all the following items are present in your package:
- GAMDIAS Aura GC11 ARGB Mid-Tower PC Case
- 4 x Pre-installed 120mm ARGB Fans
- Kit Aksesori (skru, pengikat, pengikat kabel)
- Manual Pengguna (dokumen ini)
Persediaan dan Pemasangan
1. Membongkar Kes
Carefully remove the PC case from its packaging. Inspect the case for any signs of damage during transit. Remove any protective films from the tempered glass panel.

Imej: Bersudut view of the GAMDIAS Aura GC11 ARGB PC case, showcasing the tempered glass side panel and the distinctive bar-patterned mesh front panel.
2. Mengakses Bahagian Dalaman
To access the interior of the case, locate and remove the thumbscrews securing the tempered glass side panel. Carefully lift and remove the panel. The opposite solid side panel can also be removed for cable management access.

Imej: Dalaman view of the GAMDIAS Aura GC11 ARGB PC case, with the side panel removed, revealing the motherboard mounting area, fan cutouts, and cable management space.
3. Pemasangan Papan Induk
- Install the necessary motherboard standoffs into the motherboard tray according to your motherboard's form factor (Mini-ITX, Micro-ATX, or ATX).
- Install your motherboard's I/O shield into the rear opening of the case.
- Letakkan papan induk anda dengan berhati-hati pada penyangga, selaraskan lubang skru.
- Selamatkan papan induk dengan skru yang disediakan.
4. Pemasangan Unit Bekalan Kuasa (PSU).
- Mount your PSU into the dedicated compartment at the bottom rear of the case.
- Selamatkan PSU dengan skru dari belakang kes itu.
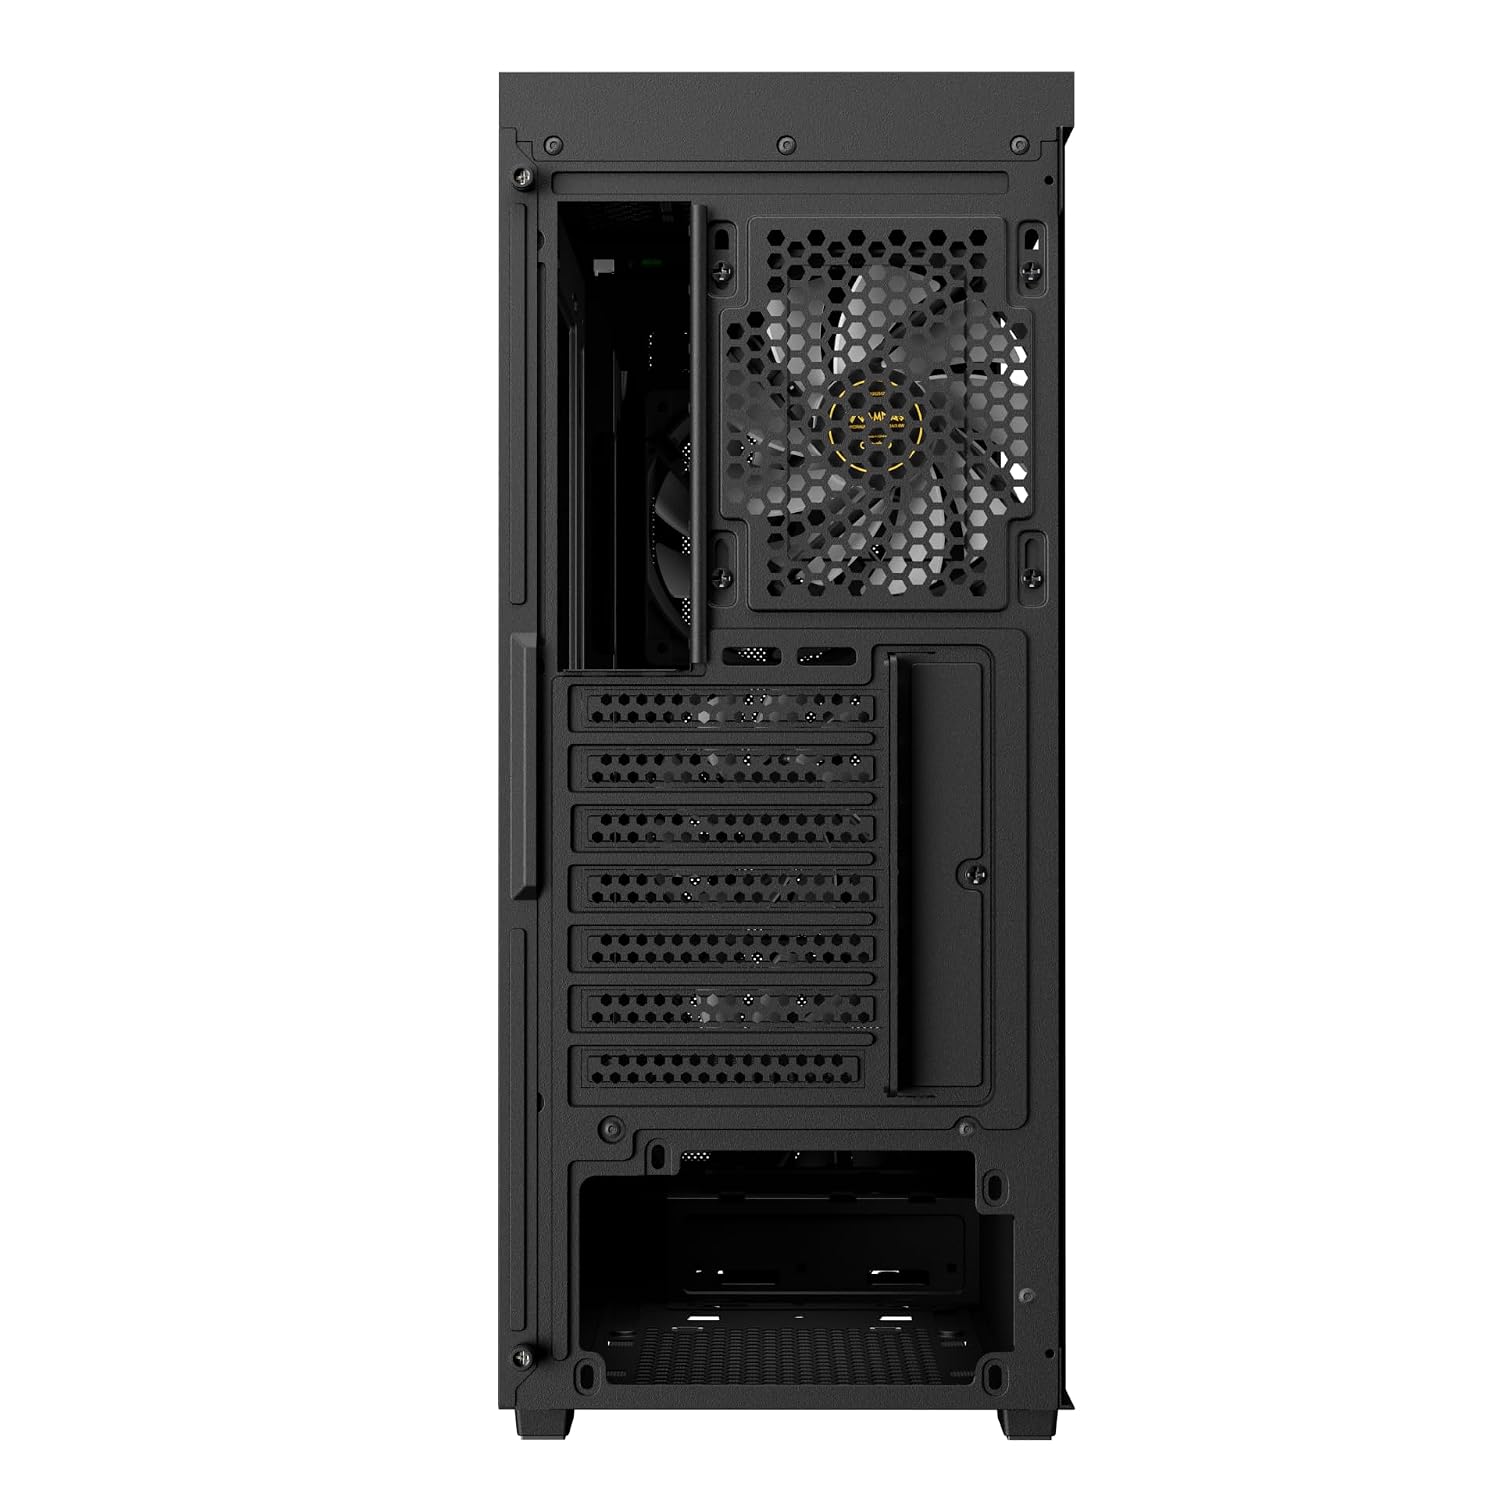
Imej: Belakang view of the GAMDIAS Aura GC11 ARGB PC case, highlighting the power supply unit mounting bracket at the bottom and the expansion slots for graphics cards and other components.
5. Pemasangan Pemacu Storan
The case supports multiple storage drives. Refer to the accessory kit for specific mounting hardware.
- SSD 2.5": Mount SSDs to the designated trays or mounting points behind the motherboard tray.
- HDD 3.5": Pasang HDD ke dalam sangkar pemacu yang terletak di bawah penutup PSU.
6. Pemasangan Kad Grafik (VGA) dan Kad Pengembangan
- Tanggalkan penutup slot pengembangan yang diperlukan dari bahagian belakang bekas.
- Insert your graphics card or other expansion cards into the appropriate PCIe slots on your motherboard.
- Selamatkan kad dengan skru.
7. Cable Management and Front Panel Connections
Route all power and data cables through the cutouts in the motherboard tray for a clean build. Connect the front panel I/O cables (USB, HD Audio, Power, Reset, LED) to their corresponding headers on your motherboard. The case features a Type-C port, two USB 2.0 ports, HD Audio, and Reset button on the top panel.

Imej: Bahagian hadapan atas view of the GAMDIAS Aura GC11 ARGB PC case, displaying the front I/O panel with Type-C, USB 2.0 ports, and audio jacks, along with the top magnetic dust filter.
8. Menutup Kes
Once all components are installed and cables are managed, reattach the side panels, starting with the solid panel, then the tempered glass panel. Secure them with the thumbscrews.
Arahan Operasi
1. First Power-On
After ensuring all connections are secure, connect your PC to a power outlet and press the power button on the top panel of the case. The pre-installed ARGB fans will illuminate, and your system should begin to boot.

Imej: Depan view of the GAMDIAS Aura GC11 ARGB PC case, with the four pre-installed ARGB fans visible and illuminated behind the bar-patterned mesh front panel.
2. ARGB Fan Control
The pre-installed ARGB fans are typically connected to a controller or directly to an ARGB header on your motherboard. Refer to your motherboard's manual or the fan controller's instructions for details on how to customize the lighting effects.
Penyelenggaraan
1. Pembersihan Penapis Habuk
The GAMDIAS Aura GC11 ARGB case includes a magnetic dust filter on the top panel and a removable filter for the PSU intake. Regularly clean these filters to maintain optimal airflow and prevent dust buildup inside your system.
- Gently remove the magnetic dust filter from the top of the case.
- Slide out the PSU dust filter from the bottom rear of the case.
- Clean the filters using compressed air or by rinsing them with water. Ensure they are completely dry before reattaching.
2. Pembersihan Am
Gunakan yang lembut, damp cloth to wipe down the exterior surfaces of the case. Avoid using harsh chemicals or abrasive materials that could damage the finish or tempered glass.
Menyelesaikan masalah
No Power After Assembly
- Pastikan PSU dihidupkan dan disambungkan dengan betul ke salur keluar dinding.
- Verify that the 24-pin ATX and 8-pin CPU power cables are securely connected to the motherboard.
- Periksa sama ada kabel suis kuasa panel hadapan disambungkan dengan betul ke pengepala panel hadapan papan induk.
Fans Not Spinning or ARGB Not Working
- Confirm that the fan power cables are connected to the motherboard or fan controller.
- Ensure ARGB cables are properly connected to the motherboard's ARGB header or the fan controller.
- Check your motherboard's BIOS/UEFI settings or ARGB software for fan and lighting control.
Isu Terlalu Panas
- Ensure all case fans are spinning correctly and oriented for optimal airflow (intake at front, exhaust at rear/top).
- Clean all dust filters and internal components to remove dust buildup.
- Verify that CPU cooler and GPU fans are functioning properly.
Spesifikasi
| Ciri | Perincian |
|---|---|
| Jenama | GAMDIAS |
| Nama Model | Aura GC11 ARGB |
| Jenis Kes | Mid Tower |
| Keserasian Papan Induk | Mini-ITX, Mikro-ATX, ATX |
| Peminat prapasang | Kipas ARGB 4 x 120mm |
| Kaedah Penyejukan | Udara |
| Bahan Kepungan | Logam, Kaca Tempered |
| Pelabuhan I/O | 1 x Type-C, 2 x USB 2.0, 1 x HD Audio, 1 x Reset |
| Batasan Tinggi Pendingin CPU | 160mm |
| VGA Length Limitation | 300mm |
| Had Panjang PSU | 150mm |
| Internal Bays Quantity | 3 (for 2.5"/3.5" drives) |
| Ciri Khas | Bar Patterned Mesh Front Panel, Magnetic Dust Filter |
| Berat Barang | 4000 Gram |
| Dimensi Item (D x W x H) | 46D x 20W x 40H Sentimeter |
| Negara Asal | China |
Maklumat Waranti
Produk ini disertakan dengan a 1 YEAR MANUFACTURER warranty. Please retain your proof of purchase for warranty claims. For detailed terms and conditions, refer to the official GAMDIAS webtapak atau hubungi sokongan pelanggan.
Sokongan
If you encounter any issues or have questions regarding your GAMDIAS Aura GC11 ARGB PC Case that are not covered in this manual, please contact GAMDIAS customer support. You can find contact information on the official GAMDIAS webtapak atau melalui peruncit anda.
Manufacturer Contact Information: GAMDIAS TAIWAN, No. 113, Jian 2nd Rd., Zhonghe, Dist., New Taipei City 235, Taiwan
Importer Contact Information: Allway Distributions Pvt Ltd, No-49, H.B. Samajha Road, Baswangudi, Bengaluru- 560004, Contact -8904307700