1. Pengenalan
Thank you for choosing the ACASIS 40Gbps Mac mini M4 Dock. This device is designed to expand the capabilities of your Mac mini M4, offering ultra-fast data transmission, additional storage, and enhanced display options. This manual provides detailed instructions for setup, operation, and troubleshooting to ensure optimal performance.
2. Ciri-ciri Utama
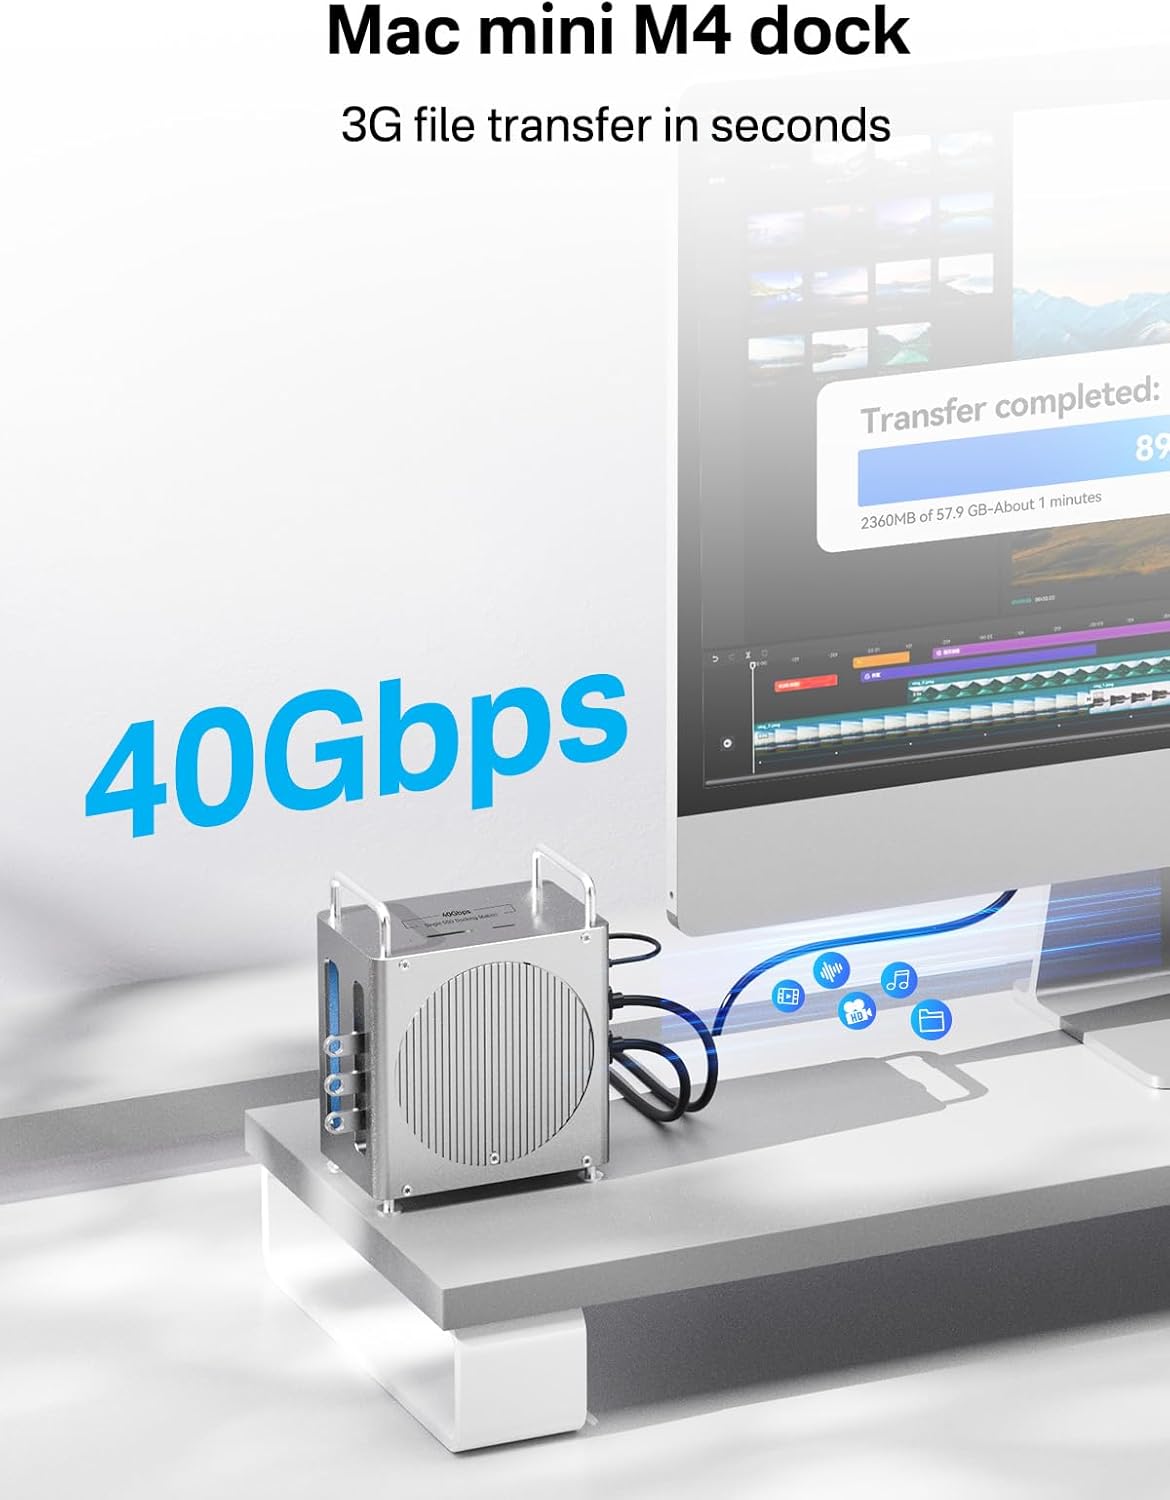
- 40Gbps Ultra-Fast Transmission: Experience rapid data transfer speeds for demanding tasks.
- Kandang SSD Bersepadu: Supports a single NVMe SSD up to 8TB for massive storage expansion.
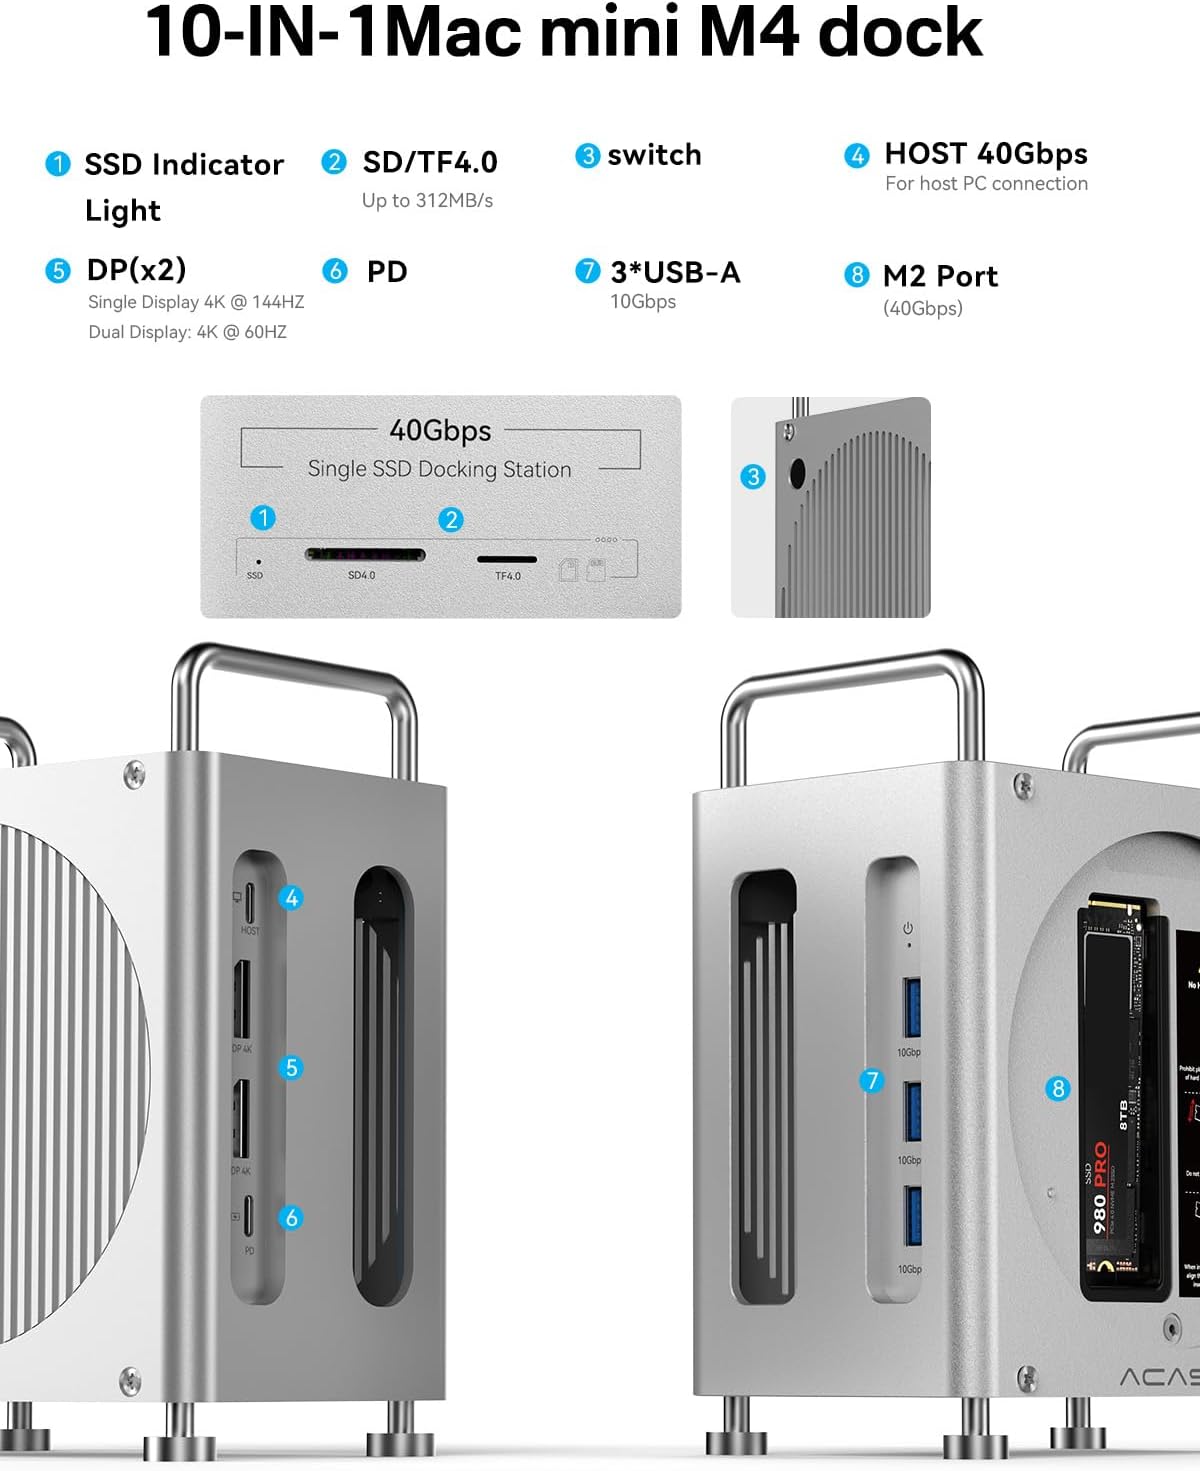
- Dual DisplayPort Outputs: Connect two external monitors for high-resolution displays (4K@144Hz single, 4K@60Hz dual).
- Kesambungan 10-dalam-1: Includes 3x USB-A 10Gbps ports and SD/TF 4.0 card slots for wide compatibility.
- Dedicated Power Button: For convenient control of the dock.
- Durable Aluminum Alloy Design: Provides robust protection and efficient heat dissipation.
3. Kandungan Pakej
Sila sahkan bahawa semua item terdapat dalam pakej anda:
- ACASIS Mac mini M4 Dock
- 40Gbps USB-C to USB-C Cable
- Penyesuai Kuasa
- Pemutar skru
- SSD Snap
- Thermal Pads for SSD
- Manual Pengguna

4. Panduan Persediaan
4.1 Installing the SSD (Optional)
- Sediakan Lampiran: Use the provided screwdriver to remove the four screws on the bottom panel of the dock. Gently remove the bottom cover.
- Masukkan SSD: Align your M.2 NVMe SSD with the slot. Insert the drive at a 45-degree angle and secure it with the rubber plug. Apply the thermal pad(s) to the SSD for optimal heat dissipation.
- Gantikan Penutup: Replace the bottom cover and tighten the four screws.

4.2 Placing Your Mac mini M4
- Ensure the Mac mini M4 is powered off.
- Carefully align the Mac mini M4 with the top opening of the dock. The power button on the Mac mini should align with the auxiliary power button on the dock.
- Gently slide the Mac mini M4 into the dock until it is securely seated.
4.3 Menyambungkan Dok
- Sambungan Kuasa: Connect the provided power adapter to the dock's PD port.
- Sambungan Hos: Use the 40Gbps USB-C to USB-C cable to connect the dock's HOST port to a Thunderbolt port on your Mac mini M4.
- Peranti: Connect your DisplayPort monitors, USB-A devices (keyboard, mouse, USB drives), and SD/TF cards to the respective ports on the dock.
- Hidupkan kuasa: Press the power switch on the dock to begin use.

Video: An official ACASIS video demonstrating the setup and features of the Mac mini M4 Dock, including port connections and SSD installation.
5. Arahan Operasi
5.1 Pemindahan Data
The 40Gbps host connection allows for ultra-fast data transfer between your Mac mini M4 and connected devices, including the internal NVMe SSD. Simply drag and drop files as you would with any external storage device. The 10Gbps USB-A ports also provide high-speed connectivity for compatible USB devices.
5.2 Paparan Output
Utilize the dual DisplayPort outputs to extend or mirror your Mac mini M4's display. For optimal performance, use direct DP to DP cables without adapters. Adjust display settings in your macOS System Settings.
- Single Display: Up to 4K resolution at 144Hz.
- Dual Display: Up to 4K resolution at 60Hz for each monitor.
5.3 Card Reader Functionality
Insert SD 4.0 or TF 4.0 cards into the designated slots on the top of the dock. The card reader supports speeds up to 312MB/s, ideal for photographers and videographers.

6. Penyelenggaraan
- Pembersihan: Use a soft, dry cloth to clean the exterior of the dock. Avoid liquid cleaners or abrasive materials.
- Pelesapan Haba: The aluminum alloy design and perforated structure aid in heat dissipation. Ensure proper airflow around the dock to prevent overheating, especially during heavy use.
- SSD Care: If you experience issues with your SSD, ensure it is properly seated and the thermal pads are correctly applied.

7. Penyelesaian masalah
Q1: My DisplayPort isn't detecting the monitor. Is this a product defect?
If your monitor shows 'No Signal', here are a few possible reasons:
- You might be using a DP to HDMI cable, which can cause compatibility issues. We recommend using a direct DP to DP cable without any adapters.
- The monitor's input source may be set incorrectly. Make sure to set the monitor input to DP.
- The HOST cable must be connected to a Thunderbolt port on your Mac Mini M4 for the dock to work.
Cuba langkah ini:
- Connect the dock's HOST port to your computer's Thunderbolt port using the original USB-C to USB-C cable. Press the power button on the dock to turn it on.
- Plug the original power adapter into the dock's PD charging port.
- Use a DP to DP cable to connect your monitor to the dock's DP port, and set your monitor's input source to DP.
- Note: If the issue continues, try connecting your monitor to another device with a DP port to see if it works properly.
Q2: My USB port isn't recognizing devices. Is this a product defect?
(Regarding issue: USB port not working)
If your USB devices aren't working, here's what might be happening:
- The HOST connection might be unstable.
- The dock may not be powered on.
Cuba yang berikut:
- Use the original USB-C to USB-C cable to connect the HOST port to your computer's Thunderbolt port. Make sure the dock is turned on.
- Connect the original power adapter to the dock's PD power port.
- Plug your USB device (flash drive, mouse, keyboard, etc.) into the dock and check if it works.
- Note: If the device still doesn't work, try plugging it into another computer to see if the issue is with the device itself.
Q3: My dock disconnected during use, and my SSD isn't being detected.
If your dock disconnects or your SSD isn't detected during use, here's why that might happen:
- The M.2 SSD or HOST connection may be loose.
- Your SSD may require more power—make sure the dock is connected to a power source.
Here's what you can do:
- Turn off the dock and unplug it. Remove the SSD and gently clean the gold connectors with an eraser before reinserting it.
- Always use the power adapter when connecting high-power devices like SSDs to ensure stable performance.
- Note: When using multiple devices at once, always keep the dock plugged into power for best results.
Q4: Do I need to connect the dock to a power source during use?
Think of the external power adapter as your dock's "gas station." It makes sure every connected device gets enough "fuel" to run at full speed, reliably, without draining your Mac's battery.
Q5: The indicator lights on the device are too bright. Why are they there?
The power light shows whether your Mac Mini M4 is on, and the SSD light tells you if your SSD is installed correctly. These lights help you understand what's happening—like whether the device is powered on, transferring data, or experiencing an error—without needing to check your computer. If the lights are too bright, you can place a small piece of tape over them to soften the glow.

8. Spesifikasi
| Ciri | Perincian |
|---|---|
| Model | B0FQTZ2BN4 |
| Jenama | ACASIS |
| Antara Muka Hos | USB-C (40Gbps) |
| Pagar SSD | Single M.2 NVMe, up to 8TB capacity |
| Paparan Output | 2 x DisplayPort (4K@144Hz single, 4K@60Hz dual) |
| Port USB | 3 x USB-A (10Gbps) |
| Pembaca Kad | SD 4.0, TF 4.0 (up to 312MB/s) |
| Penghantaran Kuasa (PD) | 20W |
| bahan | Aloi Aluminium |
| Peranti Serasi | Mac mini M4 |
| Dimensi Produk | 5.35"L x 4.43"W x 6.69"H |
| Berat Barang | 900 Gram (1.98 paun) |
9. Waranti dan Sokongan
ACASIS provides a Perkhidmatan waranti 24 bulan for this product. Additionally, lifetime technical support is available.
For technical assistance or warranty claims, please contact ACASIS customer support:
- e-mel: support@acasis.com
- Waktu Perkhidmatan: 7x24 hours online service
