
1. Pengenalan
Terima kasih kerana membeliasing the WOOPKER AK50 Home Audio Stereo Amppengikat. ini amplifier is designed to provide high-quality audio for your home theater, garage, or other personal audio setups. It features Bluetooth 5.0 connectivity, USB and SD card inputs, RCA inputs, and two microphone inputs for versatile use. Please read this manual carefully before operating the device to ensure proper use and to maximize its performance.
2. Arahan Keselamatan
- Sumber Kuasa: Pastikan bekalan kuasa voltage matches the requirements specified on the amplifier. Use only the provided power cable.
- Pengudaraan: Do not block any ventilation openings. Place the amppenyangga di kawasan pengudaraan yang baik untuk mengelakkan terlalu panas.
- Air dan Kelembapan: Jangan dedahkan amplifier to rain, moisture, or dripping/splashing liquids. Do not place objects filled with liquids, such as vases, on the apparatus.
- Sumber Haba: Simpan amplifier away from heat sources such as radiators, heat registers, stoves, or other apparatus (including amppenghidup) yang menghasilkan haba.
- Pembersihan: Cabut plag ampkipas dari soket kuasa sebelum membersihkan. Gunakan kain kering untuk membersihkan.
- Servis: Jangan cuba servis produk ini sendiri. Rujuk semua perkhidmatan kepada pegawai perkhidmatan yang berkelayakan.
- Impedans Pembesar Suara: Ensure connected speakers have an impedance between 4-16 ohms. Connecting speakers with incorrect impedance may damage the amplebih hidup.
3. Kandungan Pakej
Sahkan bahawa semua item yang disenaraikan di bawah disertakan dalam pakej anda:
- 1x WOOPKER AK50 Audio Amplebih hidup
- 1x Kabel Kuasa
- 1x Manual Pengguna
- 1x Remote Control (Note: Battery for remote is not included. Please purchase 2x AAA batteries separately.)

Image: Package contents of the AK50 amplifier, showing the main unit, power cable, user manual, and remote control.
4. Produk Lebihview
4.1 Panel Depan

Imej: Terperinci view daripada AK50 amplifier's front panel, highlighting the USB/SD port, LED display, control buttons, microphone inputs, and various adjustment knobs.
- Port USB/SD: For connecting USB flash drives or SD cards.
- Paparan led: Shows current mode, track number, or volume level.
- Butang Mod: Switches between input modes (Bluetooth, USB/SD, RCA, FM).
- Butang Sebelumnya: Melangkau ke trek/stesen sebelumnya.
- Butang Main/Jeda: Memainkan atau menjeda main balik audio.
- Butang Seterusnya: Melangkau ke trek/stesen seterusnya.
- Butang Kitaran: Mengulang trek atau senarai main semasa.
- Kelantangan mikrofon: Melaraskan kelantangan mikrofon yang disambungkan.
- Butang Gema: Activates/deactivates or adjusts microphone echo effect.
- Mic Input Jacks (MIC1, MIC2): Bicu 6.35mm untuk menyambung mikrofon.
- Tombol Bes: Melaraskan output audio frekuensi rendah.
- Tombol Treble: Melaraskan output audio frekuensi tinggi.
- Jumlah Induk: Mengawal volum keluaran keseluruhan amplebih hidup.
4.2 Panel Belakang

Imej: Terperinci view daripada AK50 amplifier's back panel, showing all input and output connections, including power inputs and speaker terminals.
- FM Antenna Jack: Connect the included FM antenna for radio reception.
- Suis kuasa: Berpusing amphidup atau mati.
- Audio Input Jacks (AUX, LINE): RCA inputs for connecting external audio sources (e.g., CD player, DVD player, TV).
- Speaker Output Jacks: Terminals for connecting passive speakers (4-16 ohms).
- DC 12V/5A Power: Input kuasa DC alternatif.
- AC 90-240V Power: Main AC power input.
5. Persediaan
5.1 Sambungan Pembesar suara
Follow these steps to connect your passive speakers to the amplebih hidup:
- Before connecting the speakers, identify the positive and negative terminals. The positive terminal is typically red, and the negative terminal is black.
- Tekan pengapit di bahagian belakang AK50 amplifier's speaker output terminals and insert the bare speaker wires. Ensure the positive wire from the speaker connects to the positive terminal on the amplifier, and the negative wire to the negative terminal.
- Ensure a secure connection for both left and right channels.
- Awas: Elakkan memasang dan mencabut pemacu USB, kad SD, kabel audio RCA atau kabel pembesar suara semasa amppenyambung dihidupkan.

Image: Speaker connection diagram, illustrating the proper wiring of passive speakers to the amplifier and RCA input connections for other devices.
5.2 Sambungan Kuasa
Connect the provided power cable to the AC 90-240V power input on the back panel of the amplifier, then plug the other end into a standard wall outlet.
6. Arahan Operasi
6.1 Hidupkan/Mati Kuasa
Flip the Power Switch on the back panel to the 'ON' position to power on the amplifier. Flip it to 'OFF' to power off.
6.2 Mod Input
Tekan ke Mod button on the front panel or the remote control to cycle through available input modes: Bluetooth, USB, SD, RCA (AUX/LINE), and FM Radio.
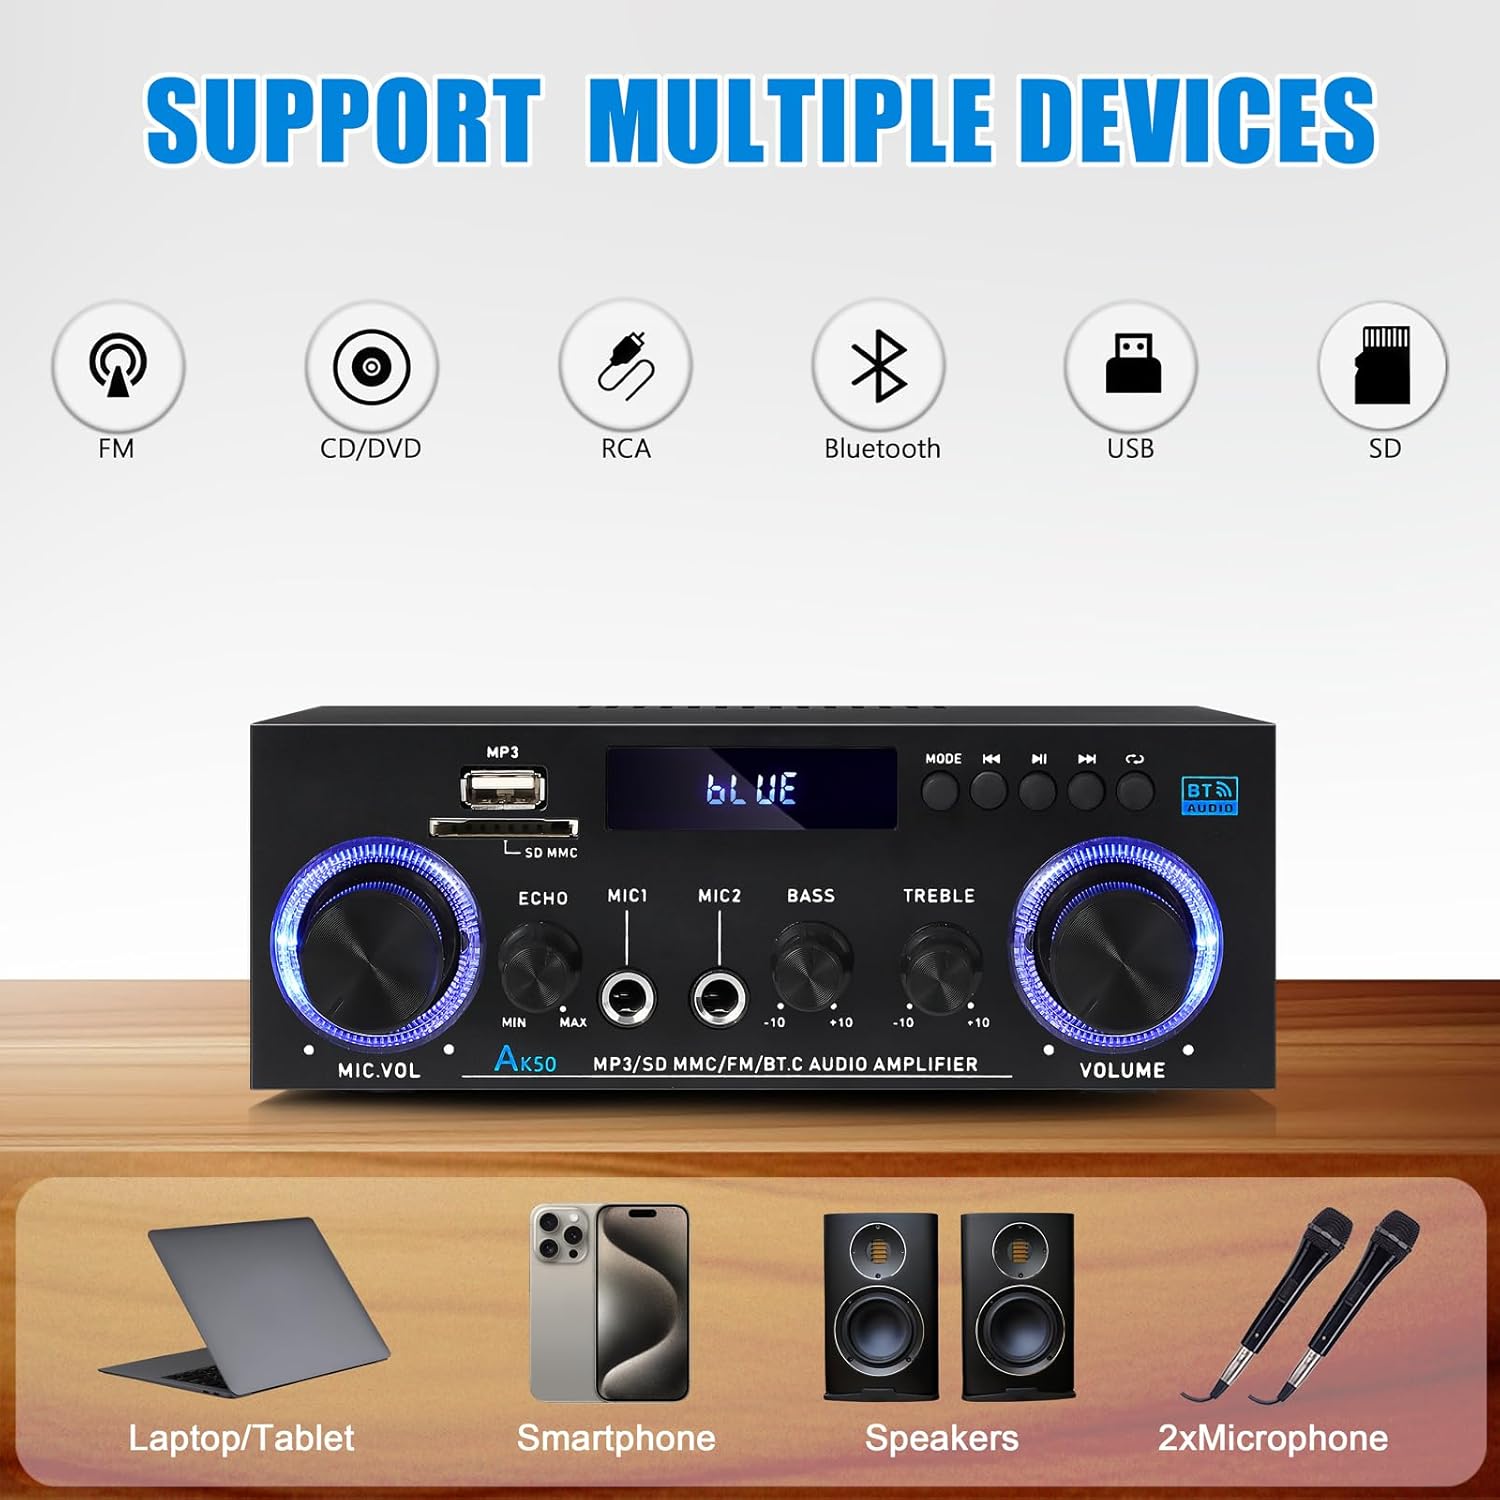
Image: Visual representation of the AK50 amplifier's compatibility with various input sources like FM, CD/DVD, RCA, Bluetooth, USB, and SD.
6.2.1 Mod Bluetooth
- Tukar amplifier to Bluetooth mode using the Mod button. The LED display will show 'BLUE'.
- Pada peranti mudah alih anda (telefon pintar, tablet, komputer riba), dayakan Bluetooth dan cari peranti yang tersedia.
- Select 'AK50' from the list of devices to pair. Once paired, you will hear a confirmation sound, and the LED display will indicate a successful connection.
- Anda kini boleh memainkan audio daripada peranti anda melalui amplebih hidup.

Image: Demonstrates connecting a mobile device to the AK50 amplifier via Bluetooth for wireless music streaming.
6.2.2 USB/SD Card Mode
- Masukkan pemacu kilat USB atau kad SD yang mengandungi audio MP3 files ke dalam port masing-masing pada panel hadapan.
- Tukar amplifier to USB or SD mode using the Mod butang. The amplifier will automatically detect and begin playing audio files.
- Gunakan Sebelumnya, Seterusnya, dan Main/Jeda butang untuk mengawal main balik.
6.2.3 RCA (AUX/LINE) Input Mode
- Connect external audio devices (e.g., CD player, DVD player, TV, computer) to the AUX or TALIAN RCA input jacks on the back panel using an RCA audio cable.
- Tukar amplifier to the corresponding RCA input mode using the Mod butang.
- Audio from the connected device will now play through the amplebih hidup.
6.2.4 Input Mikrofon
- Sambungkan sehingga dua mikrofon ke MIC1 dan MIC2 bicu input pada panel hadapan.
- Laraskan kelantangan mikrofon menggunakan Isipadu Mik tombol.
- Gunakan Gema button to add or remove an echo effect to the microphone audio.

Image: Two individuals using microphones connected to the AK50 amplifier, demonstrating its dual microphone support for karaoke or public speaking.
Mod Radio 6.2.5 FM
- Sambungkan antena FM yang disertakan ke FM SEMUT bicu pada panel belakang.
- Tukar amplifier to FM Radio mode using the Mod butang.
- Gunakan Sebelumnya dan Seterusnya butang untuk mengimbas stesen radio.
6.3 Kawalan Kelantangan dan Nada
- Jumlah Induk: Putarkan yang besar JILID knob on the front panel to adjust the overall output volume.
- Kawalan Bes: Gunakan BASS knob to increase or decrease the low-frequency response of the audio.
- Kawalan Treble: Gunakan TREBLE knob to increase or decrease the high-frequency response of the audio.

Imej: Jarak dekat view of the Bass and Treble adjustment knobs, indicating their function in sound customization.
6.4 Penggunaan Alat Kawalan Jauh
The included remote control allows for convenient operation from a distance. Insert 2x AAA batteries (not included) into the remote before use.
- Butang Kuasa: Berpusing amplifier on/off (standby).
- Butang Mod: Berkitar melalui mod input.
- Kelantangan Naik/Turun: Melaraskan kelantangan induk.
- Sebelumnya/Seterusnya: Skips tracks or tunes FM stations.
- Main/Jeda: Memainkan atau menjeda audio.
- Butang Nombor: For direct track selection (USB/SD) or FM station input.

Image: A user operating the AK50 amplifier with its remote control, demonstrating ease of volume and input adjustment.
6.5 Demonstrasi Video
Watch this video for a demonstration of the AK50 Stereo Audio Amplifier's sound and control features.
Video: A demonstration of the AK50 Stereo Audio Amppenguat, pertunjukancasing its sound output and the functionality of its controls, including volume and tone adjustments.
7. Penyelenggaraan
- Pembersihan: Gunakan kain lembut dan kering untuk mengelap bahagian luar amppenghidrat. Jangan gunakan pembersih cecair atau semburan aerosol.
- Pengudaraan: Regularly check that the ventilation openings are clear of dust and debris to ensure proper airflow.
- Storan: Jika menyimpan ampkuasa untuk tempoh yang lama, cabutnya daripada bekalan kuasa dan simpan di tempat yang sejuk dan kering.
8. Penyelesaian masalah
| Masalah | Kemungkinan Punca | Penyelesaian |
|---|---|---|
| Tiada kuasa | Kabel kuasa tidak disambungkan; Suis kuasa dimatikan; Kerosakan soket. | Pastikan kabel kuasa disambungkan dengan kukuh; HIDUPKAN suis kuasa; Uji soket dengan peranti lain. |
| Tiada keluaran bunyi | Incorrect input mode; Speaker wires loose/incorrectly connected; Volume too low; Mute activated; Faulty audio source. | Select correct input mode; Check speaker connections (positive/negative); Increase Master Volume; Ensure not muted; Test with a different audio source. |
| Bluetooth tidak bersambung | Amplifier not in Bluetooth mode; Device not in pairing mode; Amplifier already paired with another device; Out of range. | Tukar amplifier to Bluetooth mode; Ensure device's Bluetooth is on and discoverable; Disconnect from other devices; Move device closer to amplebih hidup. |
| Kad USB/SD tidak dimainkan | tak betul file format; Card/drive not inserted correctly; Corrupted files. | pastikan files are MP3 format; Reinsert card/drive; Try a different USB/SD card. |
| Penerimaan radio FM yang lemah | Antenna not connected; Weak signal. | Connect FM antenna securely; Adjust antenna position for better reception. |
9. Spesifikasi
| Ciri | Spesifikasi |
|---|---|
| Model | AK50 |
| Output Kuasa Puncak | 500W + 500W |
| Output Kuasa Dinilai (RMS) | 60W x 2 |
| Saluran | Stereo 2.0 Saluran |
| Versi Bluetooth | 5.0 |
| Antara Muka Input | Bluetooth, USB, SD Card, RCA (AUX/LINE), 2x MIC |
| Antaramuka Output | Speaker Output (4-16 Ohm) |
| Kawalan Nada | Bes, Treble |
| Ciri Mikrofon | Volume, Echo Control |
| Bekalan Kuasa | AC 90-240V or DC 12V/5A |
| Dimensi (L x W x H) | lebih kurang 7.09 x 5.47 x 2.56 inci (180 x 139 x 65 mm) |
| Berat Barang | 1.5 paun (lebih kurang 680g) |
10. Waranti dan Sokongan
WOOPKER products are designed and manufactured to the highest quality standards. For warranty information or technical support, please refer to the contact details provided with your purchase or visit the official WOOPKER webtapak. Simpan resit pembelian anda sebagai bukti pembelian.