
1. Pengenalan
Thank you for choosing the Pisichen 24 inch Touch Screen Gaming Monitor. This manual provides essential information for setting up, operating, and maintaining your monitor. Please read it thoroughly before use to ensure optimal performance and safety.
This monitor features a 24-inch QHD (2560x1440P) display with a 165Hz refresh rate, 2ms response time, and 10-point projected capacitive touchscreen functionality. It supports FreeSync and HDR, offering a vibrant and responsive visual experience for both gaming and professional applications.

Image: The Pisichen 24-inch 2K 165Hz Touch Screen Monitor highlighting its key features like HDR, IPS Panel, and 10-point Touch.
2. Kandungan Pakej
Sebelum meneruskan persediaan, sila sahkan bahawa semua komponen terdapat di dalam pakej:
- Pisichen 24 inch Touch Screen Monitor
- Stand Monitor (Asas dan Leher)
- Kabel DP
- Kabel HDMI
- Kabel Sentuh USB B
- Kabel CC USB
- Penyesuai Kuasa DC
- Manual Pengguna (dokumen ini)
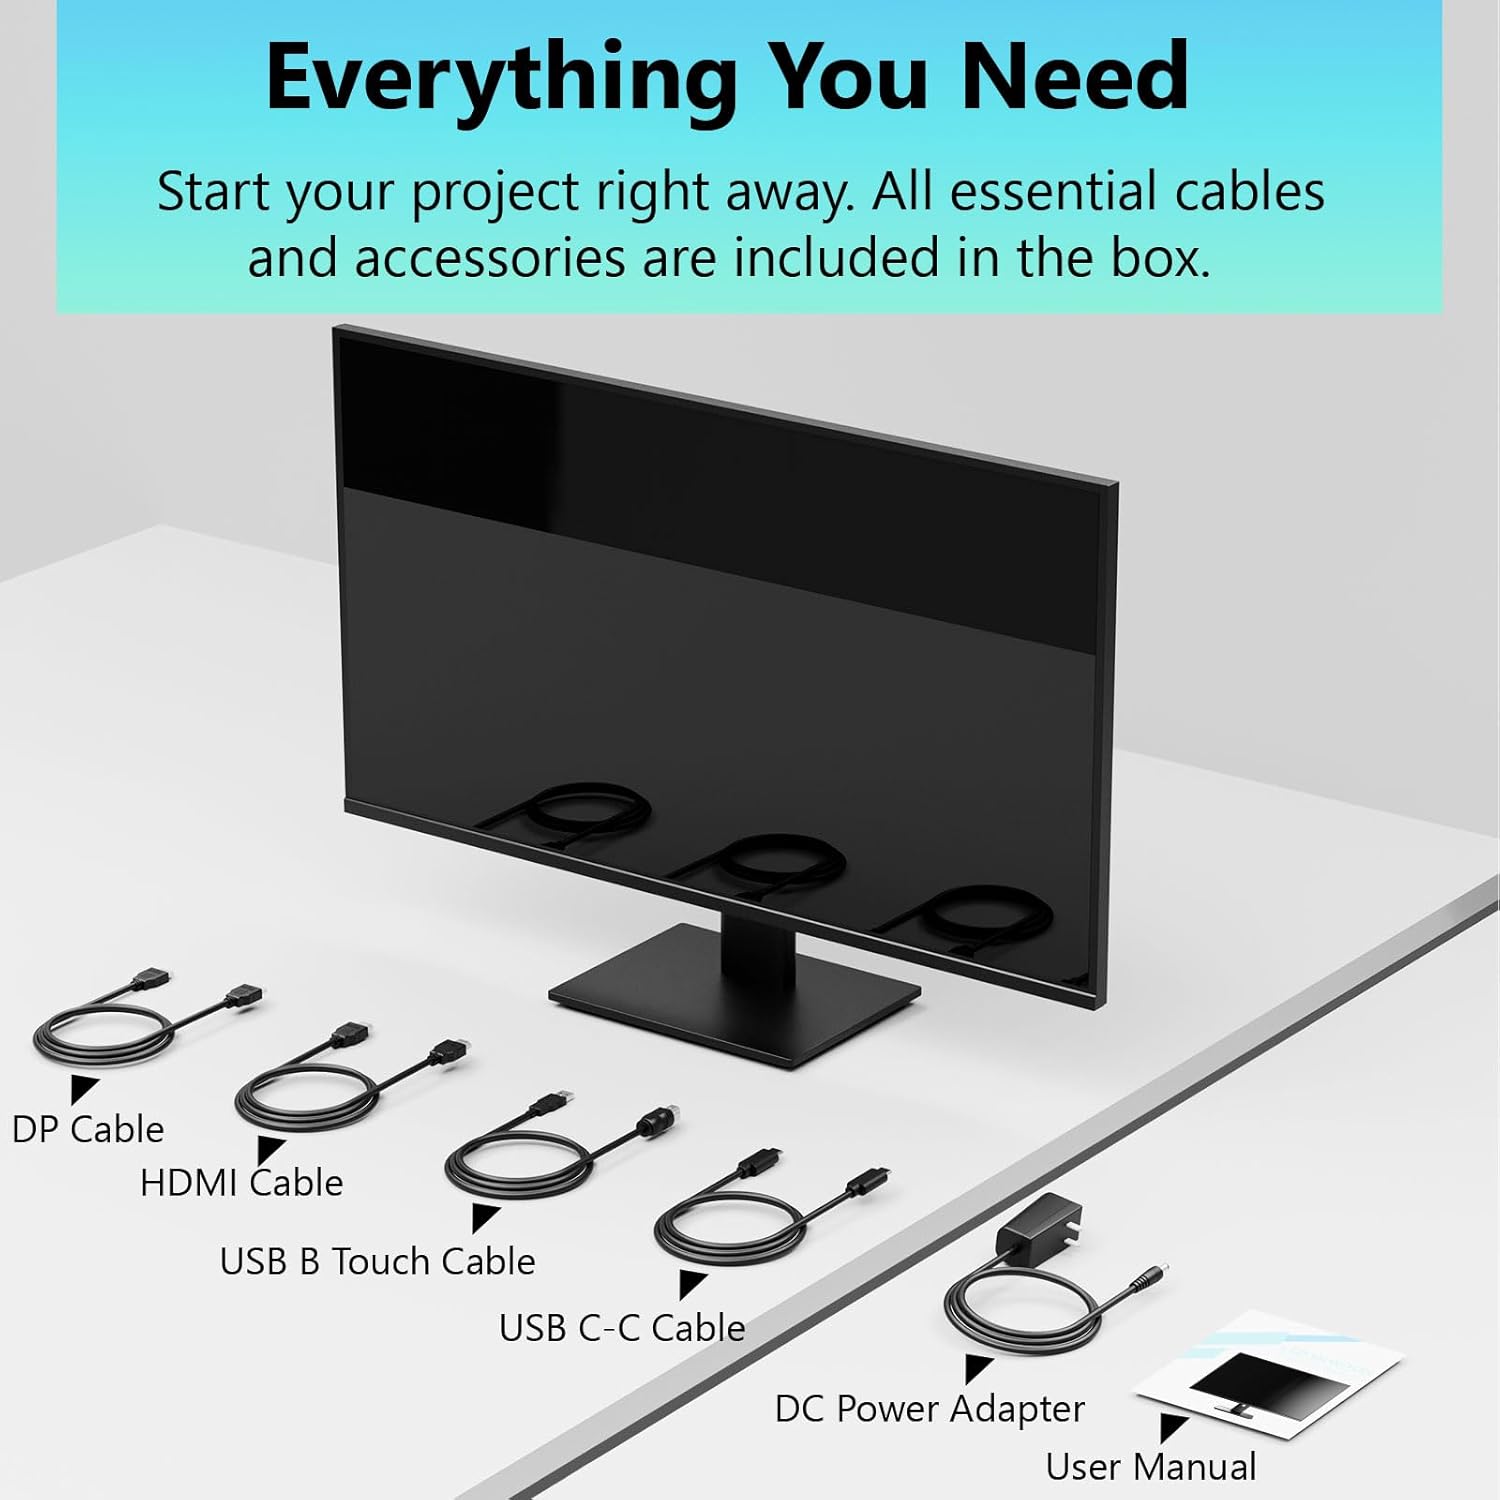
Image: All essential cables and accessories included in the box for the monitor setup.
3. Arahan Persediaan
3.1 Memasang Pendirian
- Keluarkan monitor dari pembungkusnya dengan berhati-hati, letakkannya menghadap ke bawah di atas permukaan yang lembut dan bersih untuk mengelakkan calar.
- Attach the stand neck to the monitor's rear panel.
- Pasangkan tapak penyangga pada leher penyangga menggunakan skru yang disediakan.
- Ensure all connections are firm before placing the monitor upright.
3.2 Pemasangan Pemasangan VESA (Pilihan)
This monitor supports VESA mounting. If you plan to use a VESA-compatible arm or wall mount, remove the stand and attach the VESA mount according to the mount's instructions. The VESA pattern is typically 75x75mm or 100x100mm (refer to specifications for exact details).
3.3 Menyambung ke Peranti
Monitor menawarkan pelbagai pilihan sambungan:
- HDMI: Sambungkan satu hujung kabel HDMI ke port HDMI monitor dan hujung yang satu lagi ke output HDMI komputer anda.
- DisplayPort (DP): Connect one end of the DP cable to the monitor's DP port and the other end to your computer's DP output.
- USB Jenis-C: For compatible devices, connect the USB C-C cable to the monitor's USB Type-C port and your device's USB Type-C port. This single cable can transmit video, data, and power (charging).
- USB Type-B (for Touch Functionality): To enable the touch screen feature, connect the USB B Touch Cable from the monitor's USB Type-B port to an available USB Type-A port on your computer.

Image: The monitor's rear panel with various connectivity options, including HDMI, DisplayPort, and USB-C ports.
3.4 Sambungan Kuasa
Connect the DC Power Adapter to the monitor's power input port, then plug the adapter into a power outlet.
3.5 Initial Power On and Touch Compatibility
Press the power button on the monitor. The display should light up. If no image appears, ensure all cables are securely connected and the correct input source is selected on the monitor (via the OSD menu).
For touch functionality, ensure the USB B Touch Cable is connected to your computer. Touch compatibility may vary by operating system and device. Most Windows PCs support multi-touch. For Mac devices, single-touch click is generally supported, but multi-touch may require specific drivers or configurations. Game consoles (PS3/4/5, Xbox, Steam Deck) and some other devices (Fire TV, Apple products like iPhone/iPad) typically do not support touch functionality.

Image: A compatibility chart illustrating which devices support multi-touch or single-touch, and which devices do not support touch functionality with the monitor.
4. Arahan Operasi
4.1 Hidupkan/Mati Kuasa
Press the power button located on the monitor to turn it on or off. The power indicator light will show the monitor's status.
4.2 Menu Paparan Pada Skrin (OSD).
The OSD menu allows you to adjust various monitor settings. Use the control buttons (usually located on the back or bottom of the monitor) to navigate the menu. Common menu options include:
- Tetapan Gambar: Brightness, Contrast, Sharpness, Color Temperature, HDR mode.
- Tetapan Paparan: Aspect Ratio, Input Source selection (HDMI, DP, USB-C).
- Tetapan Permainan: FreeSync, Response Time (Overdrive), Crosshair.
- Tetapan Audio: Volume (if internal speakers or audio output are present).
- Tetapan Sistem: Bahasa, Ketelusan OSD, Tetapkan Semula kepada Lalai Kilang.
4.3 Touch Screen Functionality
The monitor supports 10-point multi-touch, allowing for intuitive interaction directly on the screen. Ensure the USB B Touch Cable is connected to your computer for this feature to work.
- Ketuk tunggal: Equivalent to a left-click.
- Ketik dan Tahan: Setara dengan klik kanan.
- Cubit-untuk-Zum: Gunakan dua jari untuk mengezum masuk atau keluar.
- Leret: Navigate through content or scroll.

Image: A user interacting with the monitor's touch screen, highlighting its precision and responsiveness for creative tasks.
4.4 Pelarasan Ergonomik
The monitor stand allows for tilt adjustments to achieve the most comfortable viewing and touch angle. Gently adjust the screen to your preferred position.
4.5 Ciri Penjagaan Mata
The monitor includes advanced eye-comfort features such as Flicker-Free technology and Low Bluelight mode to reduce eye strain during prolonged use. These settings can typically be adjusted within the OSD menu.

Image: Visual representation of the monitor's advanced eye-comfort features, including Flicker-Free and Low Bluelight technologies.
5. Penyelenggaraan
5.1 Membersihkan Monitor
- Sentiasa matikan monitor dan cabut palam kuasa sebelum membersihkan.
- Gunakan kain lembut yang tidak berbulu dampdisapu dengan air atau pembersih skrin yang lembut dan tidak melelas.
- Jangan sembur pembersih terus ke skrin. Sapukan pada kain terlebih dahulu.
- Avoid using benzene, thinner, ammonia-based cleaners, or abrasive materials, as these can damage the screen surface.
5.2 Penyimpanan
Apabila menyimpan monitor untuk tempoh yang lama, pastikan ia dimatikan, dicabut daripada stereng dan disimpan di tempat yang sejuk dan kering, jauh daripada cahaya matahari langsung dan suhu yang melampau. Gunakan pembungkusan asal jika ada untuk perlindungan terbaik.
6. Penyelesaian masalah
Jika anda menghadapi masalah dengan monitor anda, rujuk langkah penyelesaian masalah biasa berikut:
- Tiada Kuasa: Pastikan penyesuai kuasa disambungkan dengan selamat pada monitor dan soket kuasa yang berfungsi. Periksa sama ada lampu penunjuk kuasa menyala.
- Tiada Imej/Isyarat:
- Verify that the video cable (HDMI, DP, or USB-C) is securely connected to both the monitor and your computer.
- Pastikan sumber input yang betul dipilih dalam menu OSD monitor.
- Semak tetapan paparan komputer anda untuk memastikan monitor dikesan dan diaktifkan.
- Fungsi Tanpa Sentuhan:
- Confirm the USB B Touch Cable is connected from the monitor to your computer.
- Check your computer's device manager to see if the touch screen driver is installed and functioning correctly.
- Refer to the "Initial Power On and Touch Compatibility" section for device-specific limitations.
- Imej Berkelip atau Herot:
- Periksa kabel video untuk kerosakan atau sambungan yang longgar.
- Cuba kabel atau port video lain.
- Laraskan kadar muat semula dalam tetapan paparan komputer anda.
- Piksel Mati: A small number of bright or dark pixels are common in LCD/LED technology and are not considered a defect unless they exceed manufacturer specifications.
Jika masalah berterusan selepas mencuba langkah ini, sila hubungi sokongan pelanggan.
7. Spesifikasi
| Ciri | Spesifikasi |
|---|---|
| Jenama | Pisichen |
| Nombor Model | 24IN165HZ-QHD |
| Saiz Skrin | 23.8 inci |
| Resolusi | QHD Wide 1440p (2560 x 1440) |
| Nisbah Aspek | 16:9 |
| Kadar Segar Semula | 165 Hz |
| Masa Tindak Balas | 2 milisaat |
| Jenis Paparan | LED IPS |
| Kecerahan | 400 Candela (cd/m²) |
| Nisbah Kontras | 3000:1 |
| Viewsudut | 178 Darjah |
| Warna Gamut | 99% |
| Picture Quality Enhancement | HDR |
| Penyegerakan Adaptif | FreeSync |
| Teknologi Ketersambungan | DisplayPort, HDMI, USB Type-C, USB Type-B |
| Ciri-ciri Tambahan | Tilt Adjustment, 10-Point Touchscreen |
| Dimensi Item (D x W x H) | 0.75"D x 21.5"W x 12.7"H |
| Berat Barang | 5.38 Kilogram |
| warna | Hitam |
8. Maklumat Waranti
This product comes with a 1-year limited warranty from the date of purchase. The warranty covers manufacturing defects and workmanship under normal use. It does not cover damage caused by misuse, accidents, unauthorized modifications, or external factors. Please retain your proof of purchase for warranty claims.
9. Sokongan Pelanggan
For technical assistance, warranty claims, or further inquiries, please contact Pisichen customer support. You may find contact information on the official Pisichen webtapak atau melalui peruncit anda.
Untuk sumber tambahan dan maklumat produk, lawati laman web Pisichen Store on Amazon.