1. Maklumat Keselamatan
Please read all safety instructions carefully before installing and operating the AUTO-VOX Solar5 Wireless Backup Camera. Failure to follow these instructions may result in product damage, property damage, or personal injury.
- Pemasangan: Ensure the camera and monitor are securely mounted to prevent detachment during vehicle operation. Do not obstruct the driver's view atau mengganggu kawalan kenderaan.
- Sumber Kuasa: Use only the provided power cable and connect to a compatible 12V vehicle power outlet.
- Tahan Air: The camera is designed for outdoor use and is waterproof. However, avoid submerging the camera in water or exposing it to high-pressure water jets.
- Suhu: Operate and store the device within the specified temperature range to prevent damage.
- Pembersihan: Gunakan yang lembut, damp cloth for cleaning. Avoid abrasive cleaners or solvents.
- Penafian: This device is an aid for safe driving and parking. It does not replace the driver's responsibility to operate the vehicle safely and observe surroundings.
2. Kandungan Pakej
Sahkan bahawa semua item terdapat dalam pakej anda:
- AUTO-VOX Solar5 Wireless Backup Camera (with integrated solar panel)
- 7.2-inch Wireless Monitor
- Car Charger (for monitor power)
- Pendakap Pemasangan untuk Monitor
- Magnetic Mounting Plate for Camera (for non-magnetic surfaces)
- Screws and Tools for Installation
- Manual Pengguna

Image: AUTO-VOX Solar5 Wireless Backup Camera and Monitor with accessories.
3. Produk Lebihview
3.1. Komponen Kamera
- Kanta Kamera: Captures the rear view.
- Panel Suria: Mengecas bateri dalaman.
- Antena: Untuk penghantaran isyarat tanpa wayar.
- Butang/Penunjuk Kuasa: Turns the camera on/off and shows status.
- Pangkalan Magnetik: Membolehkan pelekatan mudah pada permukaan logam.
3.2. Monitor Components
- Skrin Paparan: Shows the camera feed.
- Antena: For wireless signal reception.
- Butang Kawalan: Untuk navigasi menu dan pelarasan tetapan.
- Input Kuasa: Connects to the car charger.
- Slot Pemasangan: For attaching the monitor to its bracket.
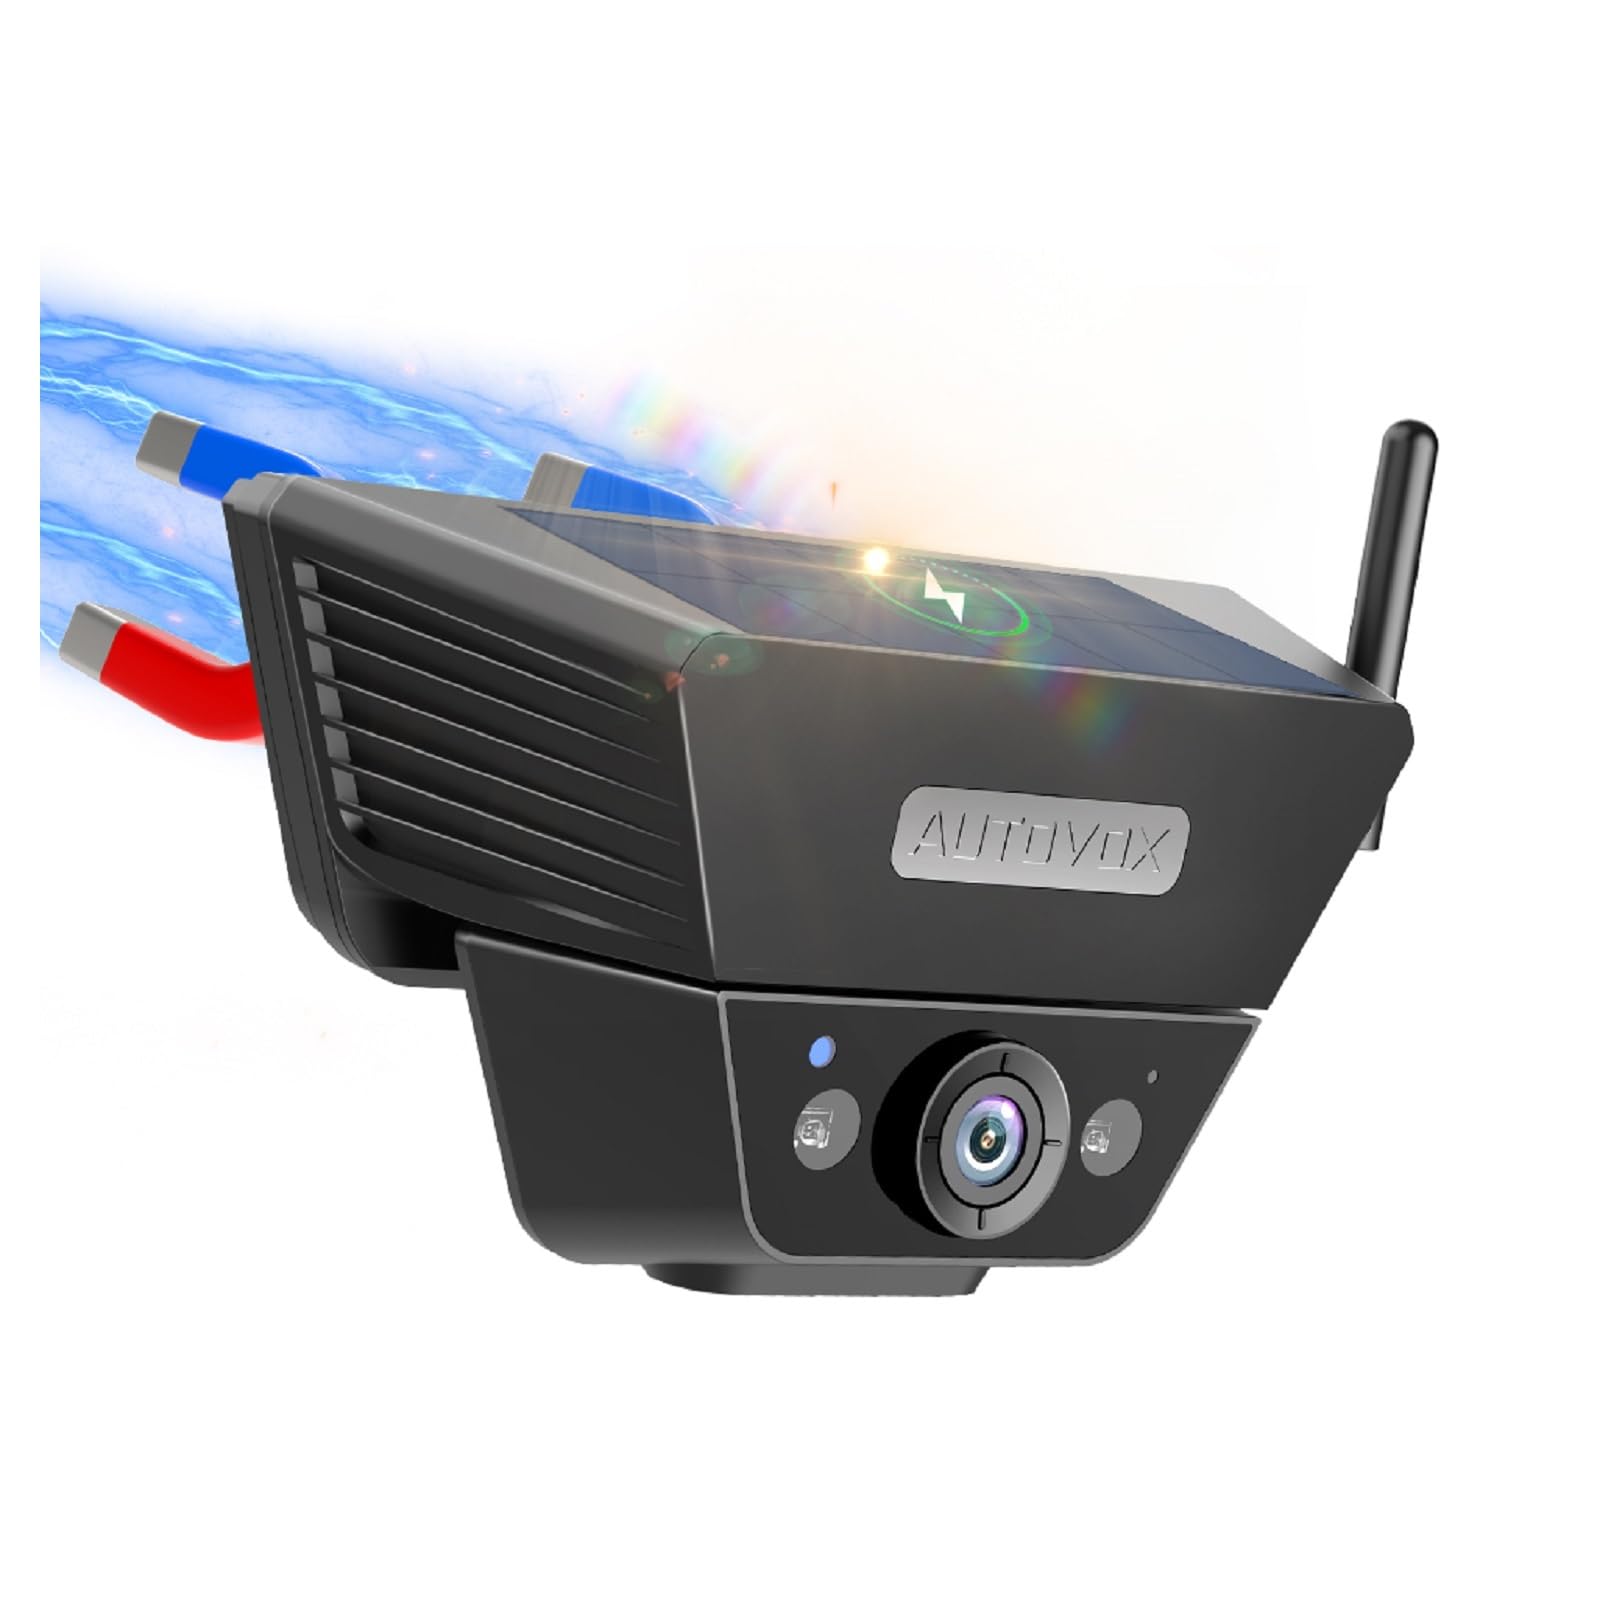
Image: The AUTO-VOX Solar5 wireless backup camera and its monitor, showcasing their design and key features.
4. Pemasangan
4.1. Pemasangan Kamera
The Solar5 camera features a strong magnetic base for easy attachment to metal surfaces on your vehicle, such as the license plate area or the rear of a trailer. If your desired mounting location is not magnetic, use the provided magnetic mounting plate and screws to create a secure attachment point.
- Pilih Lokasi: Select a suitable location at the rear of your vehicle that provides a clear view and does not obstruct the license plate or other essential components.
- Lekapan Magnet: If the surface is metal, simply place the camera onto it. The strong magnet will hold it in place.
- Non-Magnetic Mount (Optional): If the surface is not magnetic, attach the magnetic mounting plate using the provided screws. Then, attach the camera to this plate.
- Laraskan Sudut: Laraskan sudut kamera untuk mencapai sudut yang diingini viewperspektif.
- Hidupkan Kamera: Press and hold the power button on the camera for 3 seconds until the green indicator light illuminates.
Video: This video demonstrates the simple installation process of the AUTO-VOX Solar5 wireless backup camera, including magnetic attachment and angle adjustment.

Image: A blue car with the AUTO-VOX Solar5 camera mounted, illustrating its discreet and secure placement.
4.2. Monitor Pemasangan
The monitor can be easily mounted on your dashboard using the provided bracket.
- Lampirkan Kurungan: Secure the mounting bracket to the back of the monitor.
- Pilih Lokasi: Select a flat, stable surface on your dashboard that does not obstruct your view jalan raya.
- Secure Monitor: Peel off the protective film from the adhesive base of the bracket and firmly press it onto the dashboard. Lock the monitor into position.
- Sambungkan Kuasa: Insert the car charger into your vehicle's 12V power outlet (cigarette lighter socket) and connect the other end to the monitor's power input.
- Power On Monitor: The monitor should automatically power on when the vehicle's ignition is turned on. If not, press the power button on the monitor.
Video: This video demonstrates the setup of the AUTO-VOX Solar5 monitor, including mounting on the dashboard and connecting to the car's power supply.
5. Arahan Operasi
5.1. Hidupkan/Mati Kuasa
- kamera: Press and hold the power button for 3 seconds to turn on or off. The green light indicates it's on.
- Pantau: The monitor typically powers on automatically with the vehicle's ignition. Press the power button briefly to turn the screen on/off manually.
5.2. Viewing the Camera Feed
- Once both the camera and monitor are powered on, the monitor will automatically display the live feed from the backup camera.
- When the vehicle is put into reverse gear, the monitor will prioritize the camera view.
5.3. Tetapan Pantau
Use the buttons on the monitor to navigate the menu and adjust settings such as brightness, contrast, and parking guidelines.
- Butang Menu: Akses menu tetapan utama.
- Butang Naik / Turun: Navigasi melalui pilihan menu atau laraskan nilai.
- Butang OK/Pilih: Sahkan pilihan.
- Garis Panduan Tempat Letak Kereta: Enable or disable parking lines, and adjust their position or width if supported by the model.
6. Penyelenggaraan
- Kanta Kamera: Regularly clean the camera lens with a soft, lint-free cloth to ensure a clear image. Avoid scratching the lens.
- Panel Suria: Keep the solar panel clean and free from dirt, dust, or snow to maximize charging efficiency.
- Skrin Monitor: Clean the monitor screen with a soft, dry cloth. Do not use harsh chemicals.
- Pengecasan Bateri: While the camera is solar-powered, occasional direct charging via USB may be necessary during prolonged periods of low sunlight or heavy use.
- Pemasangan selamat: Periodically check that both the camera and monitor are securely mounted and that all cables are properly connected.
7. Penyelesaian masalah
| Masalah | Kemungkinan Punca | Penyelesaian |
|---|---|---|
| Tiada imej pada monitor | Camera or monitor not powered on; poor wireless connection; damaged cable. | Ensure both camera and monitor are powered on. Check all cable connections. Re-pair the camera and monitor if necessary (refer to pairing instructions in full manual). Move closer if range is an issue. |
| Imej kabur atau herot | Dirty camera lens; condensation; interference. | Clean the camera lens. Allow time for condensation to clear. Check for sources of electromagnetic interference. |
| Camera battery drains quickly | Insufficient sunlight for solar charging; frequent use in low-light conditions. | Ensure solar panel is clean and exposed to direct sunlight. Charge the camera directly via USB if needed. |
| Monitor not turning on automatically | Car charger not receiving power; faulty connection. | Check the vehicle's 12V power outlet. Ensure the car charger is fully inserted and functional. |
8. Spesifikasi
- model: Suria5
- Jenama: AUTO VOX
- Ketersambungan: Tanpa wayar
- Ciri-ciri kamera: Solar power, strong magnetic mount, night vision, waterproof
- Saiz Monitor: 7.2 inches (display)
- Input Kuasa: 12V (for monitor)
- Bateri: Rechargeable (for camera)
- Bidang View: 180 darjah
- Persekitaran Penggunaan: Luar
- Komponen yang Disertakan: Backup camera cam7
9. Waranti dan Sokongan
The AUTO-VOX Solar5 Wireless Backup Camera comes with an Waranti 18 bulan dari tarikh pembelian. Waranti ini meliputi kecacatan pembuatan dan kerosakan dalam penggunaan biasa.
For technical support, warranty claims, or any questions regarding your product, please contact AUTO-VOX customer service:
- Webtapak: www.auto-vox.com
- e-mel: Refer to your product packaging or the official AUTO-VOX webtapak untuk alamat e-mel sokongan terkini.
Please have your purchase receipt and product model number (Solar5) ready when contacting support.

Image: An illustration representing customer support, encouraging users to reach out for assistance.