
1. Pengenalan
This manual provides detailed instructions for setting up, operating, maintaining, and troubleshooting your GMKtec EVO-T1 AI Mini PC Workstation. The EVO-T1 is designed for high performance, featuring an Intel Core Ultra 9 285H processor, Intel Arc 140T GPU, and extensive connectivity options, making it suitable for gaming, video editing, and multitasking.
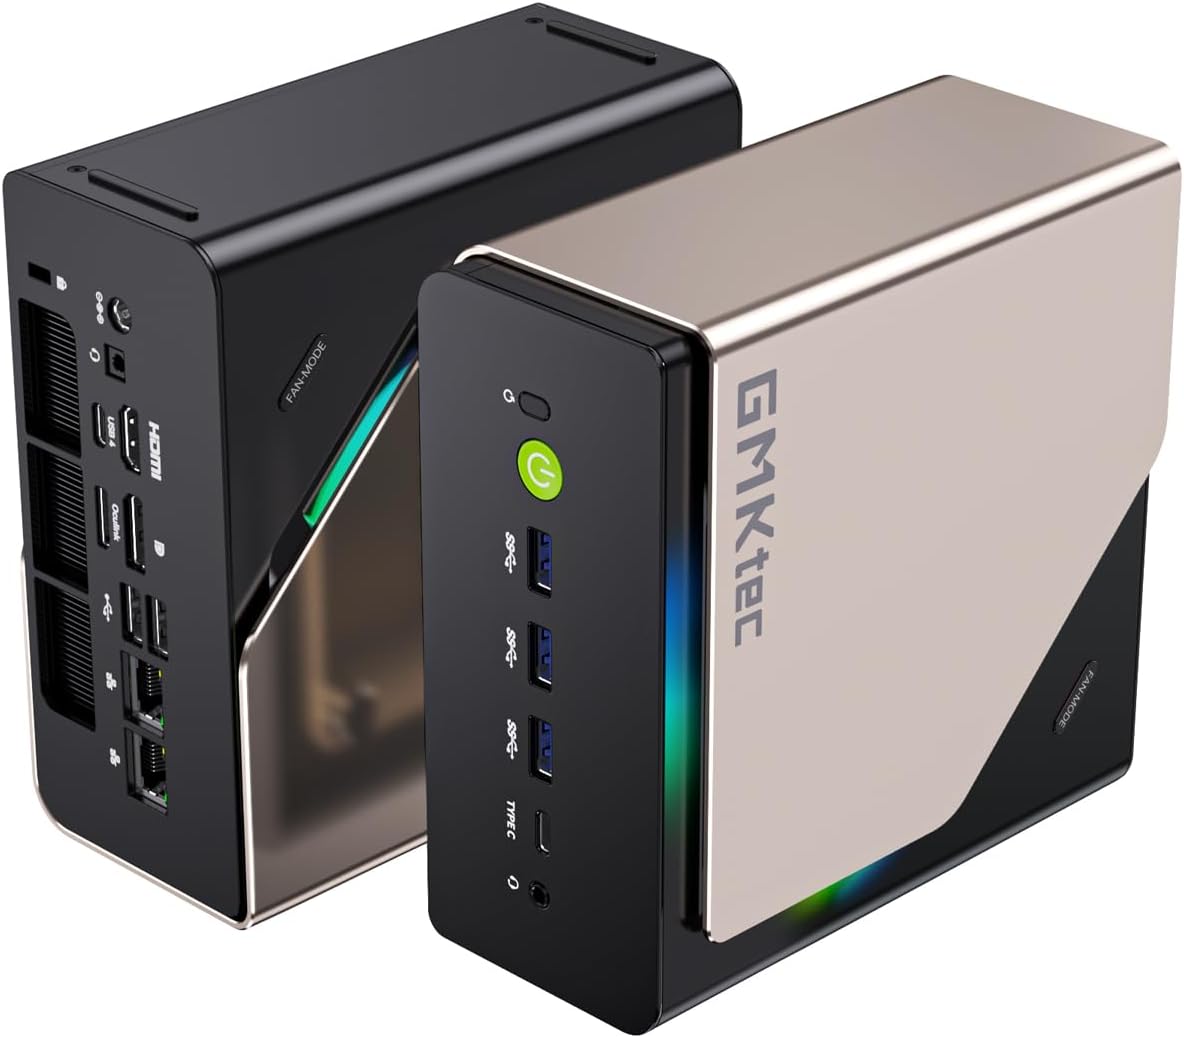
Figure 1: GMKtec EVO-T1 AI Mini PC
Sila baca manual ini dengan teliti sebelum menggunakan peranti ini untuk memastikan prestasi dan jangka hayat yang optimum.
2. Apa yang ada di dalam Kotak
Sahkan bahawa semua item terdapat dalam pakej:
- GMKtec Nucbox EVO T1 Intel Core Ultra 9 285H Mini PC Computer
- Bekalan Kuasa & Kabel
- Kabel HDMI
- Manual Pengguna
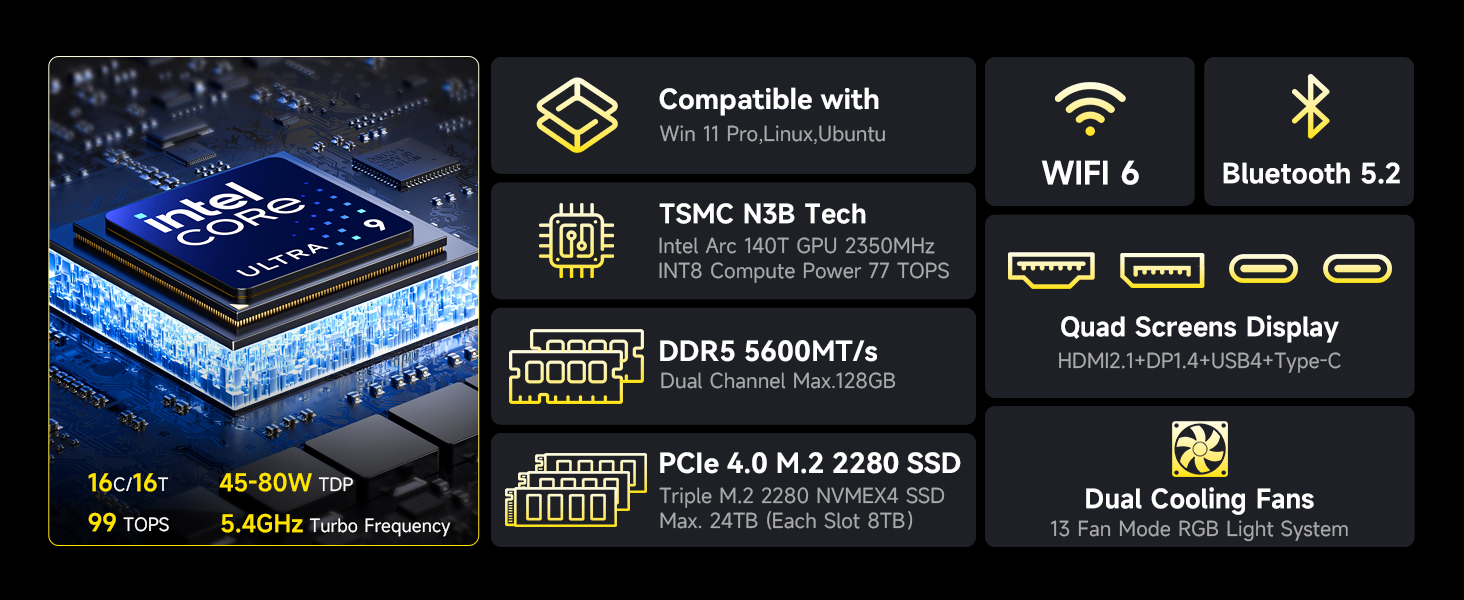
Figure 2: Retail Boxed Packaging and Contents
3. Persediaan
3.1 Sambungan Awal
- Sambungkan Kuasa: Plug the power supply cable into the DC IN 5525 port on the back of the Mini PC, then connect the power adapter to a wall outlet.
- Paparan Sambungkan: Use the provided HDMI cable to connect your monitor to the HDMI 2.1 port on the Mini PC. For multi-display setups, utilize the DisplayPort 1.4 and USB Type-C ports.
- Sambung Peranti: Connect your keyboard and mouse to the available USB ports (USB 3.0 or USB 2.0).
- Sambungan Rangkaian: For wired internet, connect an Ethernet cable to the 2.5GbE LAN port. For wireless, ensure Wi-Fi is enabled in the operating system.
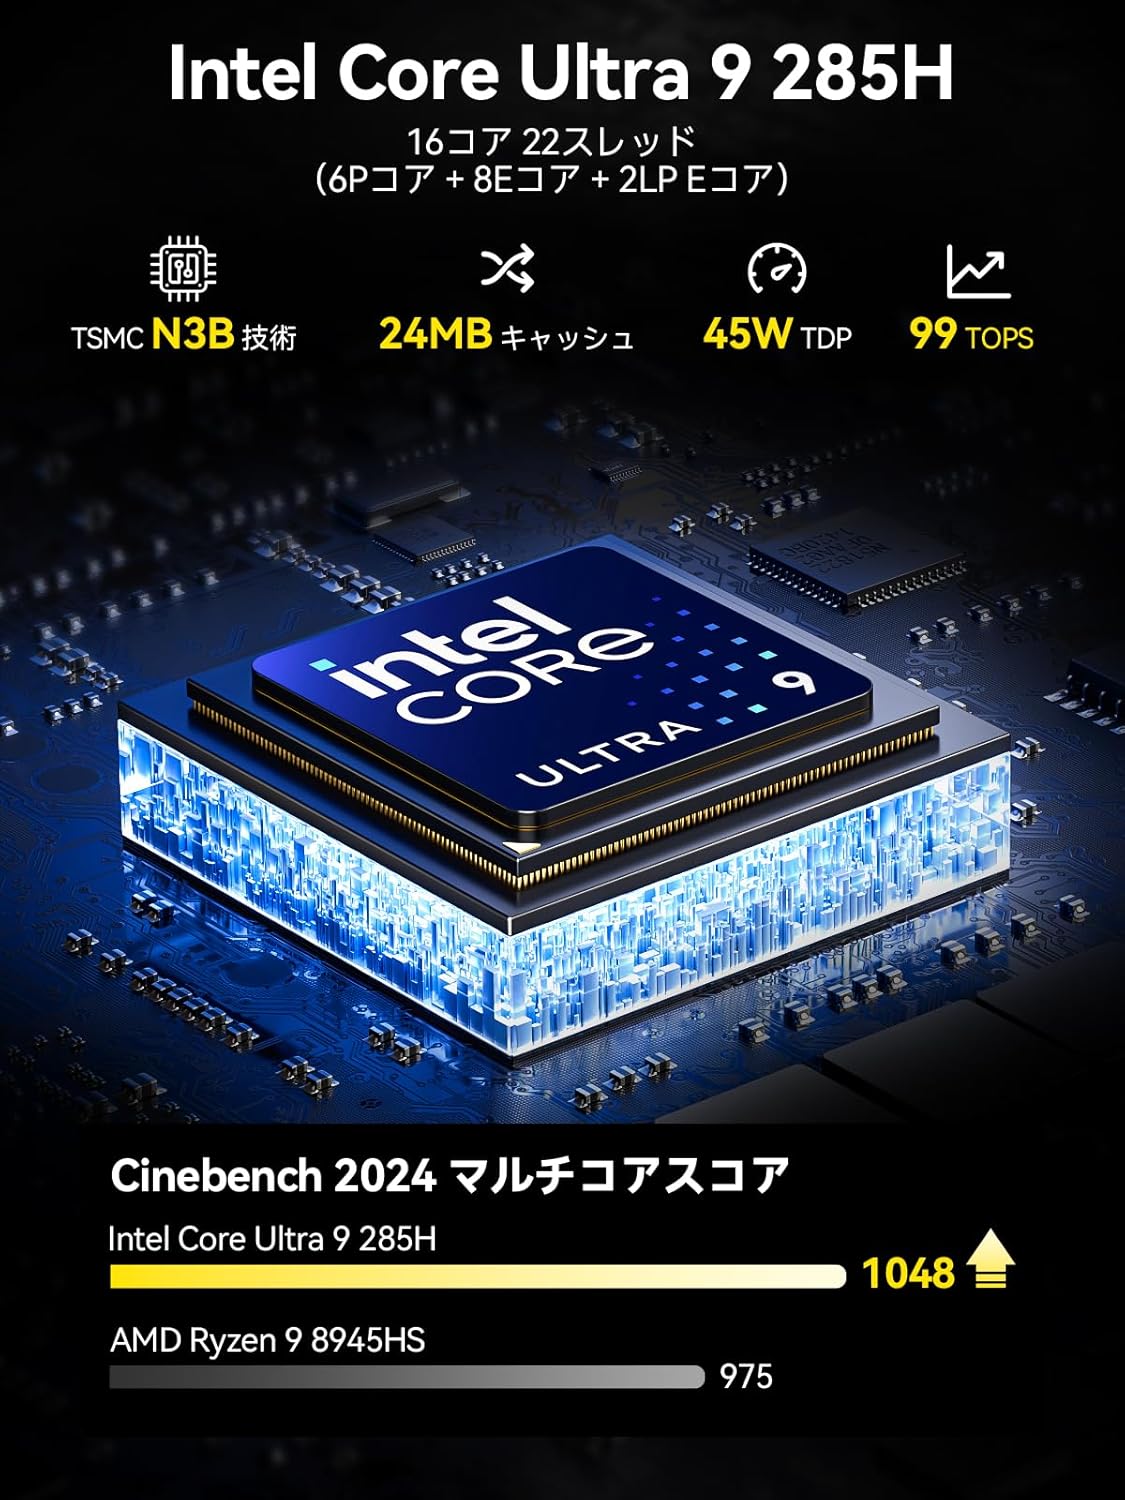
Figure 3: Rich Interface Ports (Front and Rear)
3.2 Pemasangan Pemasangan VESA (Pilihan)
If your package includes a VESA mount, you can attach the Mini PC to the back of a compatible monitor. Follow the instructions provided with the VESA mount kit for secure installation.
4. Beroperasi
4.1 Hidupkan/Mati Kuasa
- Hidupkan kuasa: Tekan butang kuasa yang terletak di hadapan Mini PC. Lampu penunjuk kuasa akan menyala.
- Matikan: To shut down, use the operating system's shutdown function. Avoid direct power disconnection during operation to prevent data loss.
4.2 Tatarajah Paparan
The EVO-T1 supports quad-screen display output with up to 8K resolution. Connect multiple monitors using the HDMI 2.1 (8K@60Hz), DisplayPort 1.4 (4K@60Hz), and USB Type-C (supporting PD3.0/DP1.4/DATA) ports. Adjust display settings within your operating system.

Figure 4: Quad Screen 8K Display Support
4.3 Ketersambungan
The Mini PC features a 2.5GbE LAN port for high-speed wired networking. For wireless connectivity, it includes built-in Wi-Fi 6 and Bluetooth 5.2, ensuring stable and efficient connections for various wireless devices.
4.4 Pengembangan Storan
The EVO-T1 comes with a 1TB PCIe 4.0 SSD and offers three M.2 2280 expansion slots, each capable of supporting up to 4TB, for a maximum total storage of 12TB. This allows for significant storage upgrades.

Figure 5: Triple PCIe 4.0 SSD Slots and Dual-Channel DDR5 Memory
4.5 Oculink Port Usage
The Oculink port provides higher bandwidth (64Gbps) compared to Thunderbolt's 40Gbps, making it ideal for eGPU setups and professional workloads requiring high data transfer rates and lower latency. Nota: Oculink does not support hot-plugging. Always power off the Mini PC before connecting or disconnecting Oculink devices.

Figure 6: Oculink Port for Enhanced Performance
5. Penyelenggaraan
5.1 Penjagaan Am
- Keep the Mini PC in a clean, dry environment away from direct sunlight and excessive heat.
- Elakkan meletakkan objek berat di atas peranti.
- Bersihkan bahagian luar dengan kain lembut dan kering. Jangan gunakan pembersih cecair.
5.2 Penyelenggaraan Sistem Penyejukan
The EVO-T1 features dual turbo CPU fans and a dedicated DDR5/SSD cooling fan. To maintain optimal cooling performance:
- Pastikan lubang udara tidak tersumbat.
- Bersihkan habuk dari lubang udara secara berkala menggunakan udara termampat.
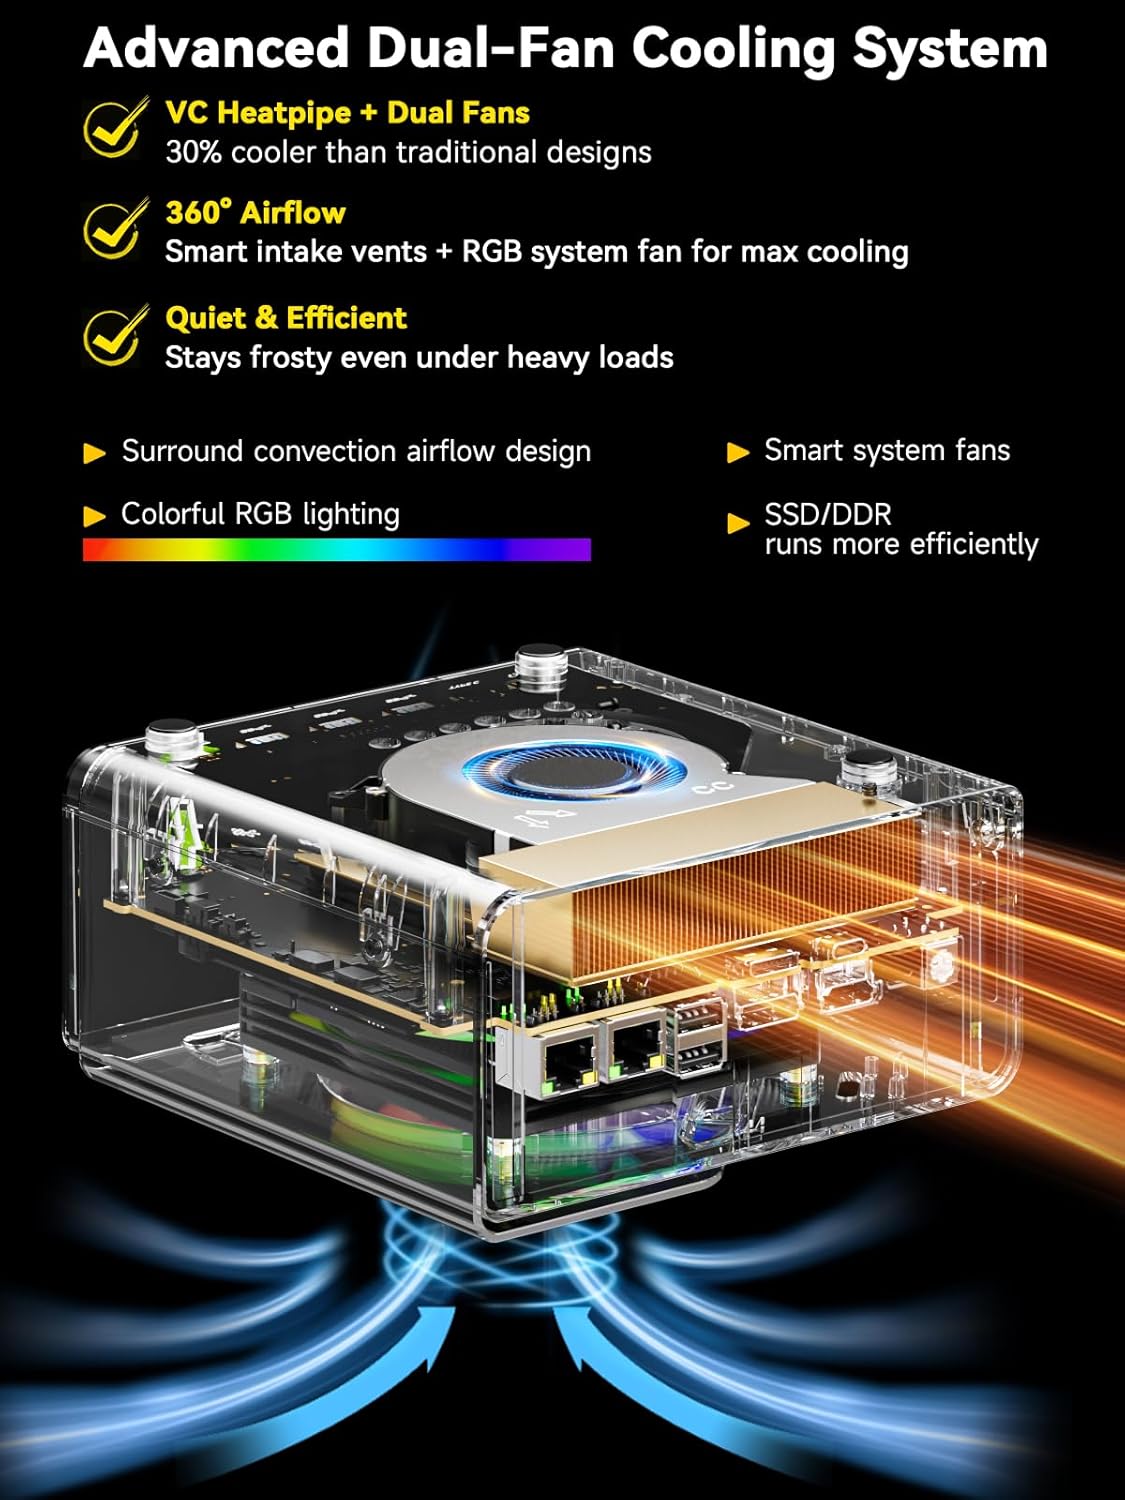
Figure 7: Advanced Dual-Fan Cooling System
6. Penyelesaian masalah
If you encounter issues with your Mini PC, try the following basic troubleshooting steps:
- Tiada Kuasa: Check if the power cable is securely connected to both the Mini PC and the power outlet. Try a different outlet.
- Tiada Paparan: Ensure the monitor is powered on and the display cable (HDMI, DisplayPort, USB-C) is securely connected to both the Mini PC and the monitor. Try a different cable or monitor if possible.
- Tiada sambungan internet: For wired connections, check the Ethernet cable and router. For Wi-Fi, ensure Wi-Fi is enabled in the OS and you are connected to the correct network.
- Sistem Membeku/Ranap: Restart the Mini PC. Ensure the operating system and drivers are up to date. Check for overheating (ensure vents are clear).
If problems persist, please refer to the Warranty & Support section for contact information.
7. Spesifikasi
| Ciri | Spesifikasi |
|---|---|
| Pemproses | Intel Core Ultra 9 285H (up to 5.4 GHz, 16 Cores, 22 Threads) |
| Pemproses bersama Grafik | Intel Arc 140T GPU 2.35GHz |
| RAM | 64GB DDR5 5600MT/S (Dual 32GB SO-DIMM) |
| Pemacu Keras | 1TB PCIe 4.0 M.2 2280 SSD (3x M.2 2280 Expansion Slots, Max. 12TB total) |
| Screen Resolution Support | Up to 7680x4320 (8K) |
| Paparan Output | HDMI 2.1 (8K@60Hz), DisplayPort 1.4 (4K@60Hz), USB Jenis-C (PD3.0/DP1.4/DATA) |
| Jenis Wayarles | Wi-Fi 6 (802.11ax), Bluetooth 5.2 |
| Ethernet | Port LAN 2.5GbE |
| Port USB | 3x USB 3.0, 2x USB 2.0, USB Type-C |
| Pelabuhan Khas | Oculink Port (PCIe x4 speeds) |
| Sistem Operasi | OS Pro |
| Berat Barang | 2.01 paun |
| Dimensi Produk | 6.06 x 5.94 x 2.87 inci |
| warna | Champagne Emas/Hitam |
8. Waranti dan Sokongan
GMKtec offers a 1-year limited warranty for each Mini PC, starting from the date of purchase. All defects due to design and workmanship are covered. For any inquiries or support, please use the following channels:
- Sokongan Amazon: Log masuk ke akaun Amazon anda, navigasi ke 'Pesanan Anda' dan pilih 'Ajukan Soalan Produk' untuk bantuan.
- Sokongan Selepas Jualan: Hantar e-mel kepada Pasukan Selepas Jualan di support@gmktec.com. GMKtec provides 24/7 customer support.
Figure 8: Warranty & Support Contact Information
GMKtec is committed to providing a satisfying experience with professional after-sales service.