
GMKtec G10-16+1TB
GMKtec G10 Mini PC Instruction Manual
Model: G10-16+1TB
1. Pengenalan
This manual provides detailed instructions for the setup, operation, maintenance, and troubleshooting of your GMKtec G10 Mini PC. Please read this manual thoroughly before using the device to ensure proper functionality and longevity.
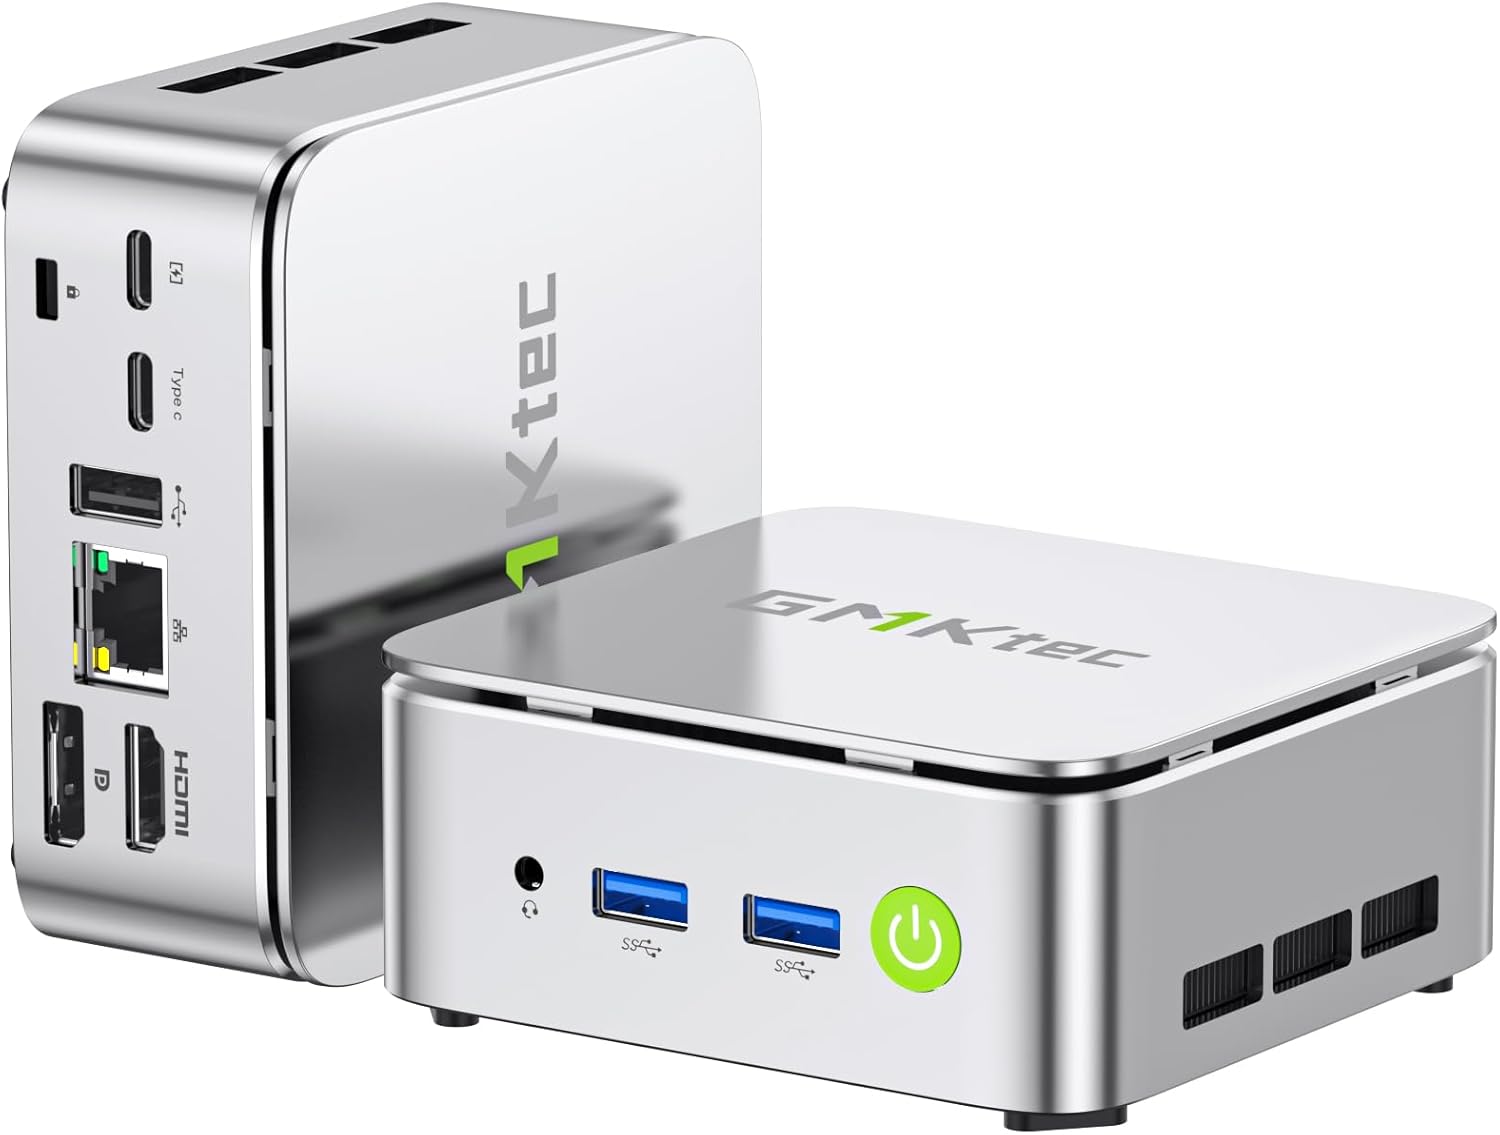
Figure 1: GMKtec G10 Mini PC, showcasing reka bentuknya yang padat dan pelbagai port.
2. Apa yang ada di dalam Kotak
Sahkan bahawa semua item yang disenaraikan di bawah disertakan dalam pakej anda:
- GMKtec Nucbox G10 Mini PC Ryzen 5 3500U Mini PC Computer
- Kabel HDMI
- Bekalan Kuasa Jenis-C
- Gunung VESA
- Manual Pengguna (dokumen ini)
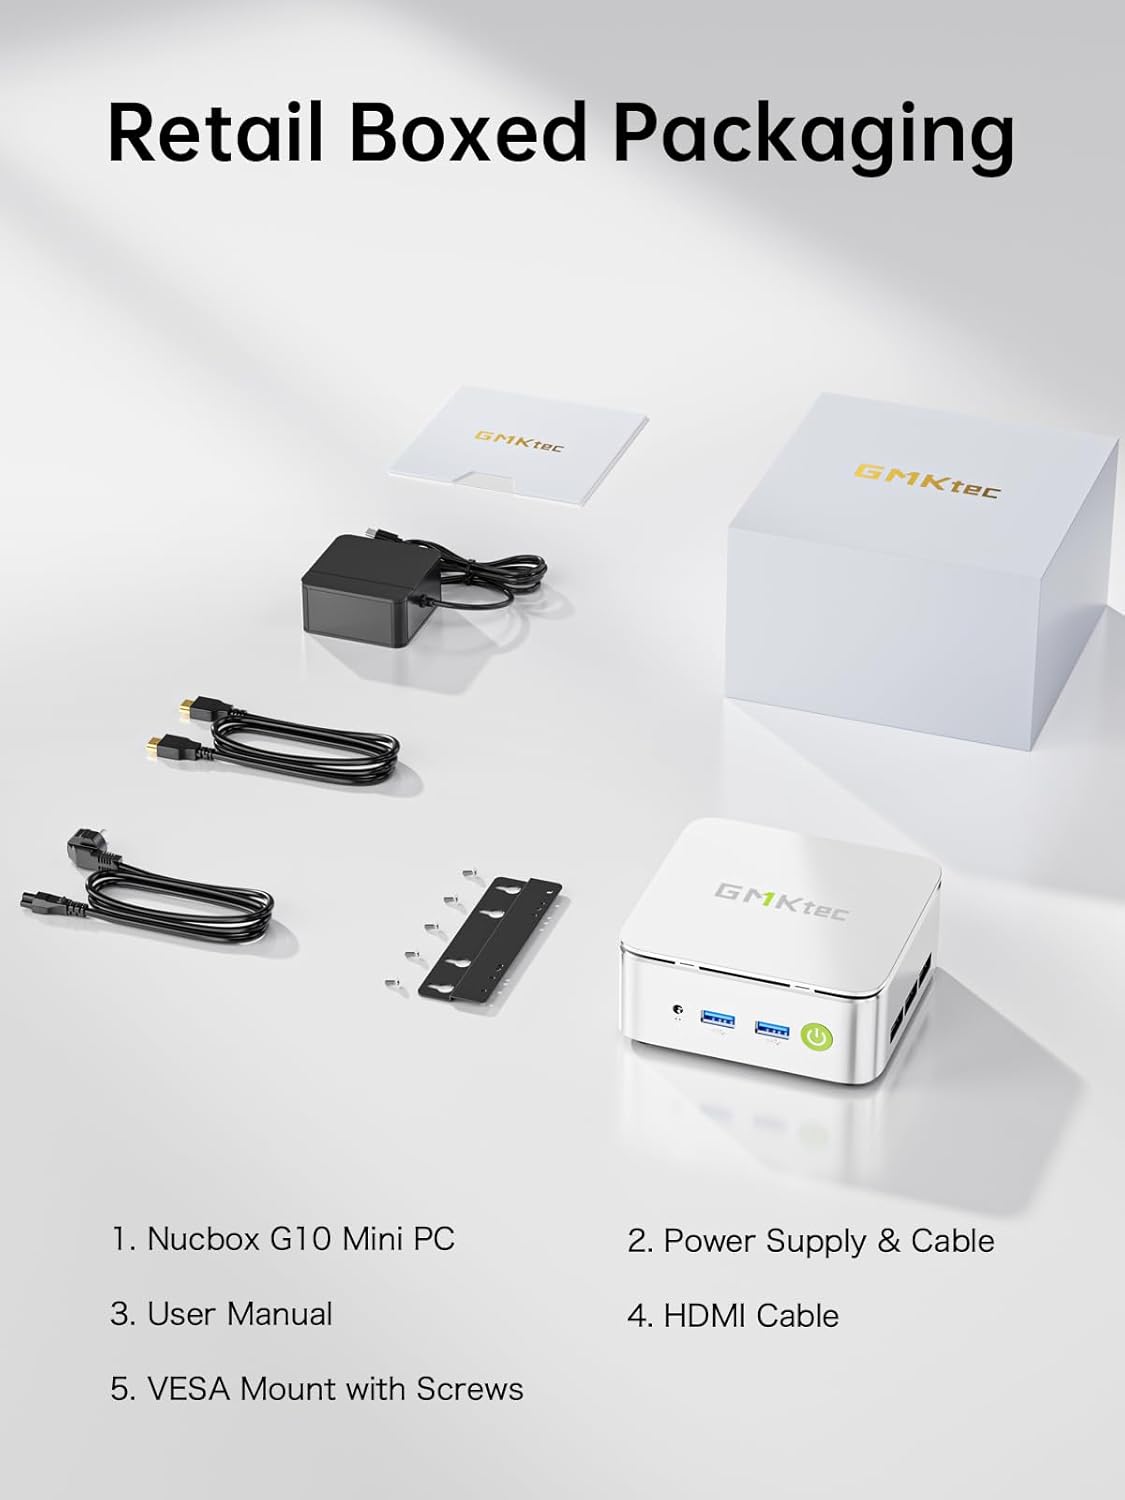
Figure 2: Package contents including the Mini PC, power supply, HDMI cable, VESA mount, and user manual.
3. Spesifikasi Produk
The GMKtec G10 Mini PC is equipped with the following technical specifications:
| Ciri | Spesifikasi |
|---|---|
| Pemproses | AMD Ryzen 5 3500U (4C/8T, up to 3.7GHz) |
| Grafik | AMD Radeon Vega 8 Graphics (up to 1200MHz) |
| RAM | 16GB Dual-channel DDR4 (2x8GB), expandable up to 32GB |
| Penyimpanan | 1TB M.2 PCIe 3.0 SSD, expandable up to 2x8TB SSDs with dual M.2 2280 PCIe 3.0 slots |
| Paparan Output | Triple 4K@60Hz via HDMI 2.1 TMDS, DisplayPort 1.4, and USB-C |
| Rangkaian | 2.5GbE RJ45 LAN port, WiFi 5, Bluetooth 5.2 |
| Pelabuhan | 2x USB 3.2 Gen1, 1x USB 2.0, 1x USB-C (Full-Function: PD/DP/Data), 1x DisplayPort, 1x HDMI, 1x 3.5mm audio jack |
| Sistem Operasi | Windows 11 Pro (preinstalled) |
| Dimensi (LxWxH) | 3.86 x 1.65 x 4.06 inci |
| Berat badan | 2.35 paun |
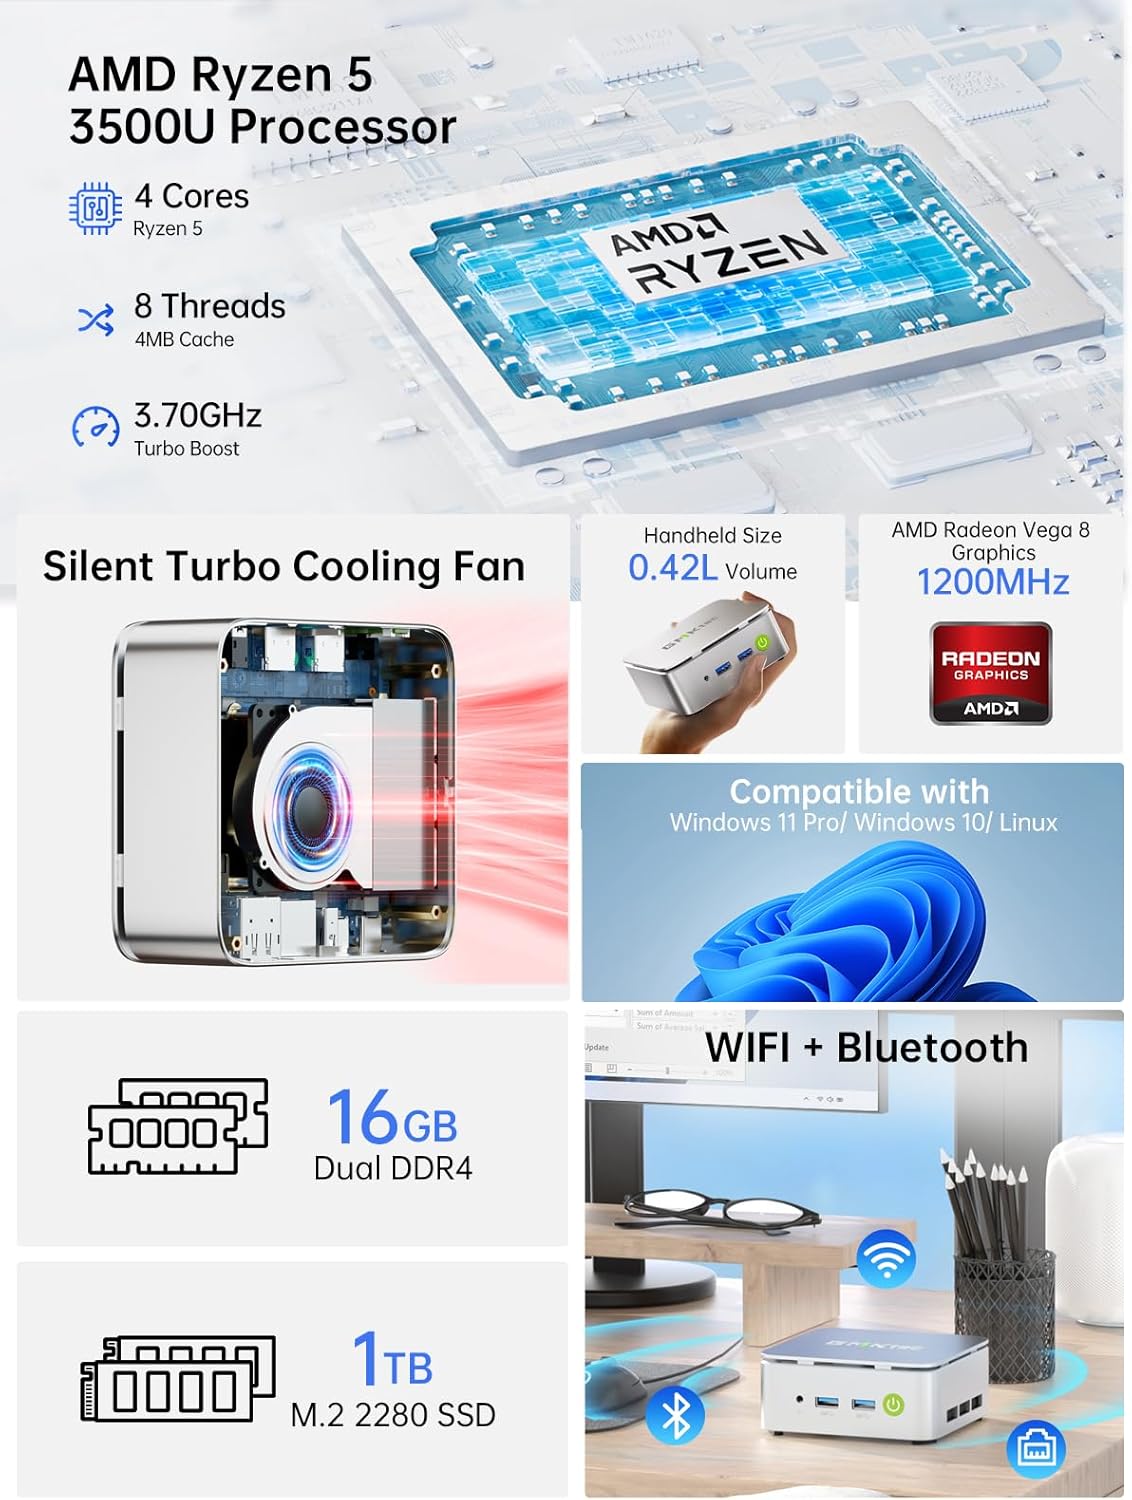
Gambar 3: Lebihview of the GMKtec G10's core components and features.

Figure 4: Memory and storage expansion capabilities of the G10 Mini PC.
4. Panduan Persediaan
4.1 Menyambung Peranti
Before powering on your Mini PC, connect all necessary peripherals:
- paparan: Connect your monitor(s) using the HDMI, DisplayPort, or USB-C port. The G10 supports up to three 4K@60Hz displays simultaneously.
- Papan Kekunci dan Tetikus: Connect your USB keyboard and mouse to the available USB 3.2 Gen1 or USB 2.0 ports. Wireless peripherals can be connected via Bluetooth 5.2.
- Rangkaian: For a wired connection, connect an Ethernet cable to the 2.5GbE RJ45 LAN port. For wireless, ensure your WiFi network is available.
- Audio: Connect speakers or headphones to the 3.5mm audio jack if needed.

Rajah 5: Terperinci view of the G10 Mini PC's rich interface ports.
4.2 Menghidupkan
- Connect the Type-C power supply to the USB-C (PD Only) port on the Mini PC and then to a power outlet.
- Tekan butang kuasa yang terletak di hadapan Mini PC. Lampu penunjuk kuasa akan menyala.
- The system will boot into Windows 11 Pro. Follow the on-screen instructions for initial setup if it's your first time using the device.
4.3 Pemasangan Pemasangan VESA (Pilihan)
The GMKtec G10 Mini PC can be mounted to the back of a compatible monitor using the included VESA mount:
- Attach the VESA mount bracket to the back of your monitor using the provided screws. Ensure the mount is securely fastened to the VESA holes on your monitor.
- Luncurkan Mini PC ke atas braket pemasangan VESA sehingga ia klik pada tempatnya.
- Ensure all cables are connected securely after mounting.
5. Arahan Operasi
5.1 Operasi Asas
- Hidupkan/Mati Kuasa: Press the power button once to turn on. To turn off, use the Windows shutdown option or press and hold the power button for 5 seconds.
- Mulakan semula: Use the restart option within the Windows operating system.
- Mod tidur: Press the power button briefly while the PC is on to enter sleep mode. Press it again to wake the PC.
5.2 Tatarajah Paparan
To configure multiple displays or adjust resolution:
- Right-click on the desktop and select "Display settings" (Windows 11).
- From here, you can detect, arrange, and set the resolution for your connected monitors.

Gambar 6: Cthample of a triple screen HD display setup with the G10 Mini PC.
5.3 Kesambungan Rangkaian
- Berwayar (Ethernet): Once the Ethernet cable is connected, the system should automatically establish a network connection.
- Wireless (WiFi): Click the network icon in the system tray, select your desired WiFi network, enter the password, and connect.
- Bluetooth: To pair Bluetooth devices, go to "Settings" > "Bluetooth & devices" and follow the on-screen instructions.

Figure 7: Wireless connectivity options: WiFi 5 and Bluetooth 5.2.
6. Penyelenggaraan
6.1 Pembersihan
- Bersihkan bahagian luar Mini PC dengan kerap menggunakan kain lembut dan kering.
- Jangan gunakan pembersih cecair atau aerosol terus pada peranti.
- Ensure ventilation openings are clear of dust and debris to maintain optimal airflow.
6.2 Kemas Kini Perisian
Keep your operating system and drivers updated to ensure optimal performance and security. Windows Update will typically handle OS updates automatically.
6.3 Pengembangan Storan
The GMKtec G10 Mini PC supports storage expansion. You can add or upgrade M.2 2280 PCIe 3.0 SSDs. Refer to the internal structure diagram for component location.

Figure 8: Internal structure of the G10 Mini PC, highlighting key components.
6.4 Sistem Penyejukan
The G10 Mini PC features an efficient cooling system designed for quiet operation. While the fan noise is minimal during normal use, it may increase under heavy load. Ensure proper ventilation around the device.

Figure 9: Noise level comparison for the G10 Mini PC's silent cooling system.
7. Penyelesaian masalah
| Masalah | Kemungkinan Punca | Penyelesaian |
|---|---|---|
| Tiada kuasa/PC tidak akan dihidupkan | Kabel kuasa tidak disambungkan; penyesuai kuasa rosak; masalah soket kuasa. | Ensure power cable is securely connected to the PC and outlet. Try a different power outlet. Contact support if issue persists. |
| Tiada paparan pada monitor | Monitor not connected; incorrect input source selected on monitor; faulty cable. | Check display cable connections. Ensure monitor is set to the correct input (HDMI, DP, USB-C). Try a different cable or monitor. |
| Tiada sambungan internet (berwayar) | Kabel Ethernet longgar; masalah penghala/modem; masalah pemacu rangkaian. | Check Ethernet cable connection. Restart router/modem. Check network adapter status in Device Manager. |
| Tiada sambungan internet (wayarles) | WiFi disabled; incorrect password; router too far; WiFi driver issue. | Ensure WiFi is enabled. Re-enter WiFi password. Move closer to router. Update WiFi drivers. |
| System slow or unresponsive | Too many applications running; insufficient RAM/storage; overheating. | Close unnecessary applications. Check disk space. Ensure proper ventilation. Consider RAM/SSD upgrade if frequently slow. |
8. Waranti dan Sokongan
GMKtec provides a full Waranti 1 tahun from the purchase date, covering all hardware faults due to workmanship. For technical assistance or warranty claims, please contact our professional after-sales team.
- Sokongan E-mel: support@gmktec.com
- Sokongan dalam talian: Lawati GMKtec Store on Amazon and navigate to the "Ask a Product Question" section.
- Sokongan Teknikal Seumur Hidup: GMKtec offers lifetime technical support for its products.
Ask a question about this manual
Ask about setup, troubleshooting, compatibility, parts, safety, or missing instructions. Manuals+ will review the question and use this page’s manual context to help answer it.