
1. Pengenalan
Thank you for choosing the Soundstream WRX-4.300 4-Channel Car Amppengikat. ini amplifier is designed to deliver powerful and clear audio performance for your vehicle's sound system. This manual provides essential information for proper installation, operation, and maintenance of your amppenghawa dingin. Sila baca dengan teliti sebelum cuba memasang atau menggunakan.
2. Maklumat Keselamatan
Sentiasa patuhi langkah berjaga-jaga keselamatan berikut semasa pemasangan dan operasi:
- Disconnect the vehicle's negative battery terminal before any electrical work.
- Pastikan semua pendawaian dijalurkan dan dipasang dengan betul untuk mengelakkan kerosakan atau litar pintas.
- Gunakan pendawaian tolok yang sesuai untuk sambungan kuasa, pembumian dan pembesar suara seperti yang dinyatakan.
- Pasangkan amplifier in a well-ventilated area, away from direct sunlight, heat sources, or moisture.
- Jangan kendalikan amplifier if it is damaged or malfunctioning. Refer to the troubleshooting section or contact support.
- Pemasangan profesional disyorkan untuk prestasi dan keselamatan yang optimum.
3. Kandungan Pakej
Sahkan bahawa pakej anda mengandungi item berikut:
- Soundstream WRX-4.300 Amplebih hidup
- Skru Pemasangan
- High-Level Input Harnesses (2)
- Manual Pemilik
- Fius Ganti

Image: Contents of the Soundstream WRX-4.300 package, showing the amplifier, wiring harnesses, mounting screws, and the owner's manual.
4. Produk Lebihview
The Soundstream WRX-4.300 is a compact Class D 4-channel amplifier designed for versatility and high performance. It features adjustable crossovers, gain controls, and the ability to operate in full-range or bridged modes.
4.1 Kawalan Panel Atas
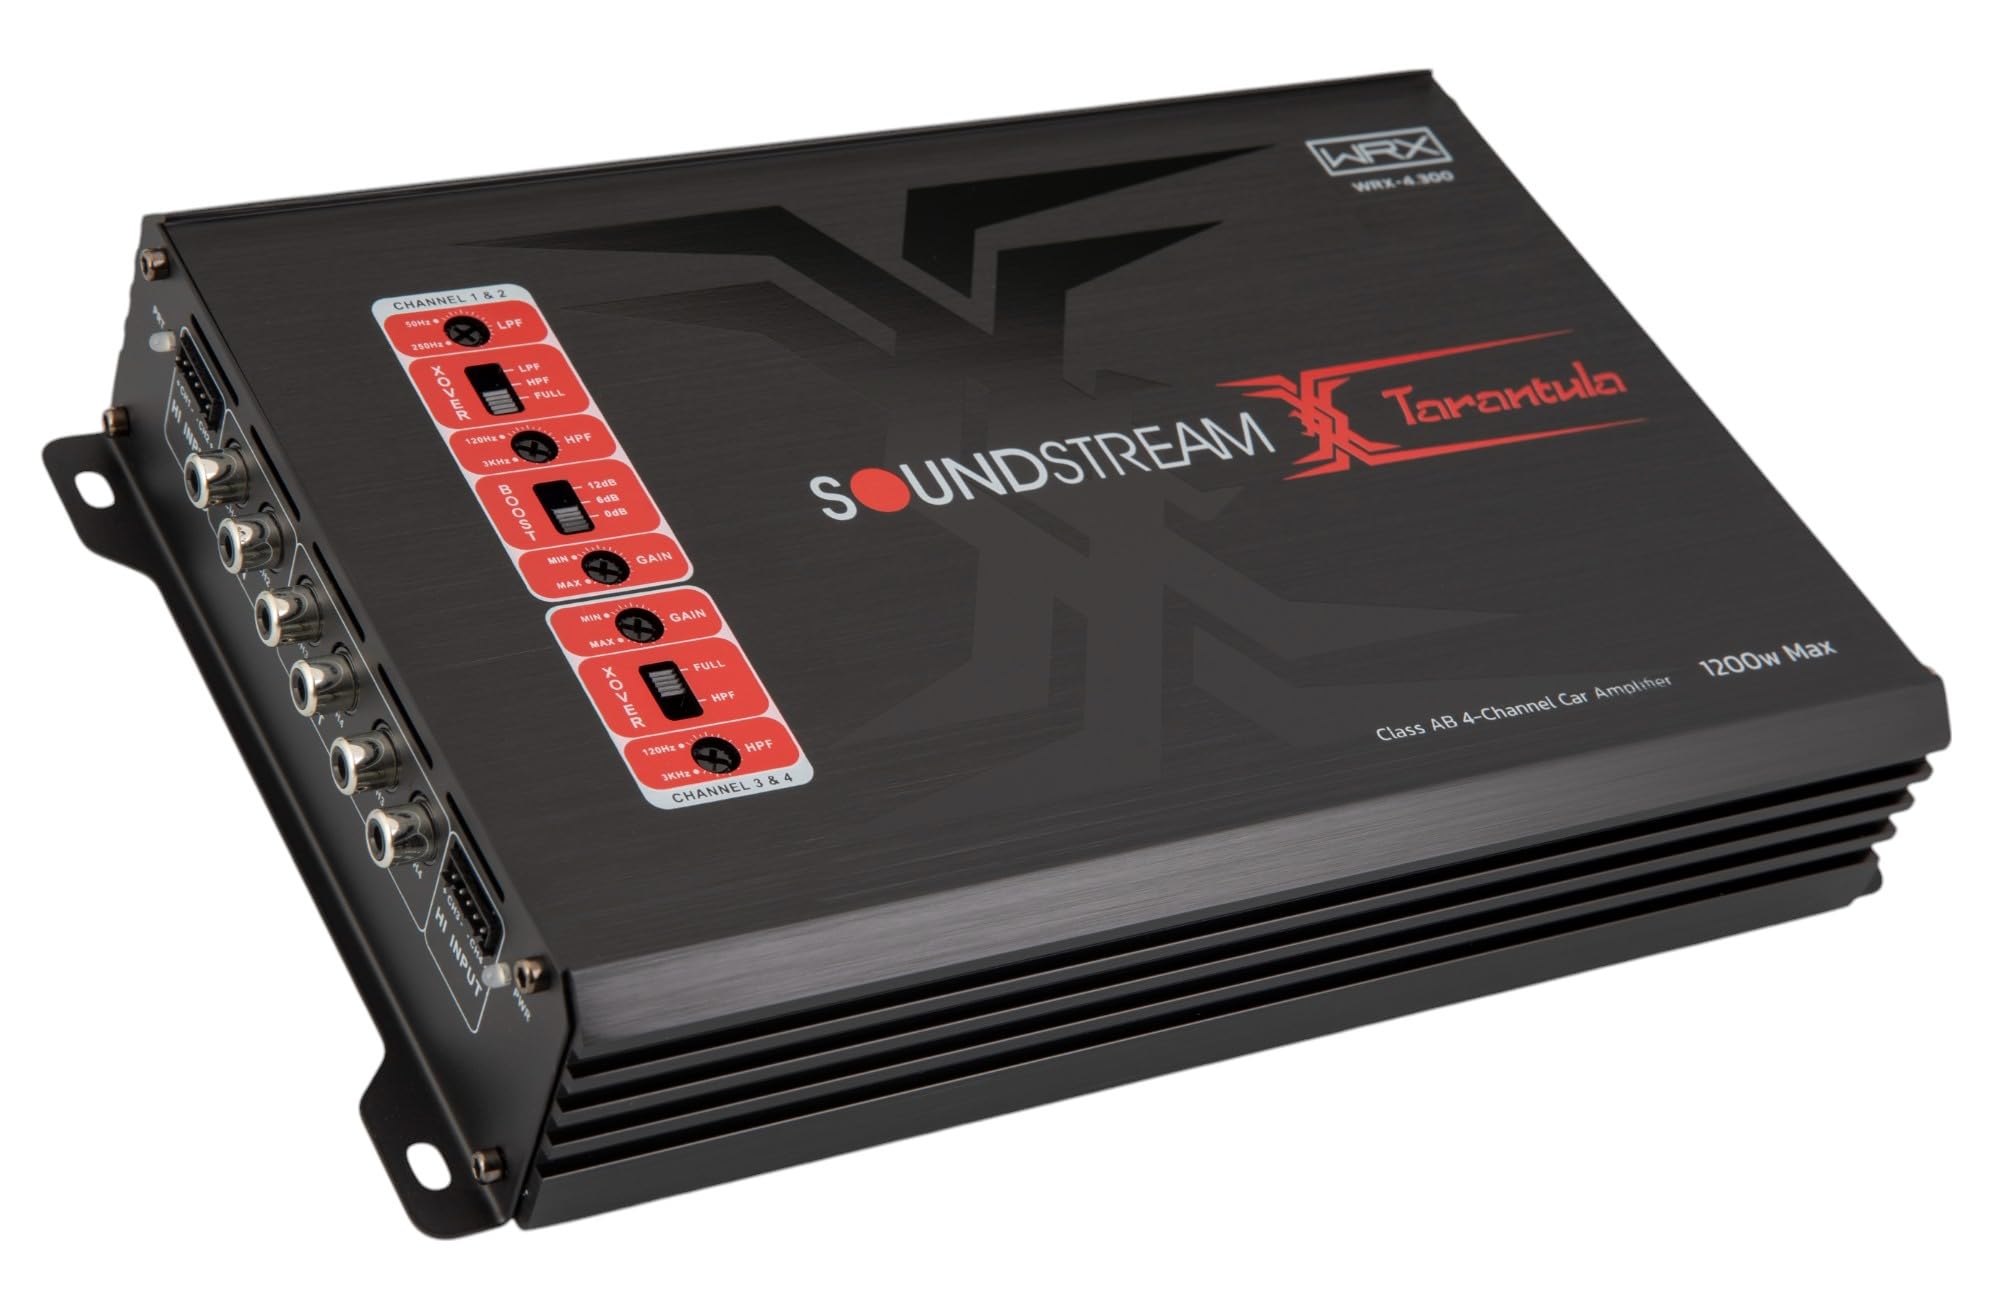
Imej: Atas view of the WRX-4.300 amplifier, highlighting the control panel with gain, crossover, and boost settings for channels 1&2 and 3&4.
- X-OVER (Crossover) Switches: Select between LPF (Low Pass Filter), FULL (Full Range), or HPF (High Pass Filter) for each channel pair.
- LPF/HPF Frequency Controls: Adjust the cutoff frequency for the selected crossover mode.
- BOOST (Bass Boost) Control: Adjust the bass boost level for channels 3&4.
- GAIN Controls: Adjust the input sensitivity for each channel pair to match the output of your head unit.
4.2 Input and Output Terminals

Imej: Belakang view of the WRX-4.300 amplifier, showing the RCA input and output jacks, and high-level input connectors for channels 1&2 and 3&4.

Imej: Belakang view of the WRX-4.300 amplifier, displaying the power (GND, REM, +12V), fuse, and speaker output terminals (CH1, CH2, CH3, CH4).
- HI INPUT: Connects to your head unit's speaker outputs for high-level input.
- IN (RCA Input): Connects to your head unit's RCA pre-outs for low-level input.
- OUT (RCA Output): Provides a pass-through RCA signal for connecting additional amppenyelamat.
- GND (Tanah): Bersambung ke pembumian casis kenderaan.
- REM (Jauh): Connects to the head unit's remote turn-on lead.
- +12V (Kuasa): Connects directly to the vehicle's positive battery terminal.
- JAUH: Contains replaceable fuses for protection.
- CH1-CH4 (Speaker Outputs): Connects to your speakers or subwoofers.
5. Persediaan & Pemasangan
Pemasangan yang betul adalah penting untuk prestasi dan jangka hayat peranti anda amplampu. Jika anda tidak pasti tentang sebarang langkah, rujuk pemasang profesional.
5.1 Memasang Amplebih hidup
- Choose a mounting location that is dry, well-ventilated, and away from direct heat or moisture. Ensure sufficient airflow around the ampheatsink lifier.
- Tandakan lubang pelekap menggunakan amplifier sebagai templat.
- Gerudi lubang pandu untuk skru pelekap.
- Selamatkan amppengalir menggunakan skru pelekap yang disediakan.
5.2 Sambungan Pendawaian
Pastikan semua sambungan selamat dan terlindung dengan betul untuk mengelakkan litar pintas.
5.2.1 Pendawaian Kuasa
- Tanah (GND): Connect a short, heavy-gauge wire (e.g., 8 AWG or larger) from the amplifier's GND terminal to a clean, unpainted metal point on the vehicle's chassis.
- Alat Kawalan Jauh (REM): Sambungkan wayar tolok yang lebih kecil (cth., 18 AWG) daripada amplifier's REM terminal to the remote turn-on output of your head unit.
- +12V (Kuasa): Connect a heavy-gauge wire (e.g., 8 AWG or larger) from the amplifier's +12V terminal directly to the positive terminal of the vehicle's battery. Install an in-line fuse holder (not included) within 18 inches (45 cm) of the battery.
5.2.2 Signal Input (RCA or High-Level)
- Input RCA: Use high-quality RCA cables to connect the head unit's pre-out jacks to the amplifier's IN (RCA Input) jacks.
- Input Tahap Tinggi: If your head unit does not have RCA outputs, use the provided high-level input harnesses. Connect the harnesses to your head unit's speaker wires and then plug them into the amplifier's HI INPUT connectors.
5.2.3 Pendawaian Pembesar Suara
- Sambungkan pembesar suara anda ke amplifier's CH1, CH2, CH3, and CH4 speaker output terminals.
- Pastikan kekutuban yang betul (+ ke + dan - ke -) untuk semua sambungan pembesar suara.
- For 4-channel operation, connect one speaker to each channel.
- For 2-channel (bridged) operation, connect speakers across channel pairs (e.g., CH1+ and CH2- for one speaker). Refer to the operating instructions for details on bridged mode.
6. Arahan Operasi
Once installed, follow these steps to configure and operate your amplebih hidup.
6.1 Persediaan Awal dan Pelarasan Gain
- Turn the GAIN controls on the amppengalir ke kedudukan minimum (lawan arah jam sepenuhnya).
- Tetapkan kelantangan unit kepala anda kepada kira-kira 75% daripada tahap maksimumnya.
- Tingkatkan kawalan GAIN secara perlahan-lahan pada amppenekan sehingga anda mendengar herotan, kemudian perlahankannya sedikit sehingga bunyinya jelas.
- Repeat for all active channel pairs.
6.2 Tetapan Crossover
The crossover filters allow you to direct specific frequency ranges to your speakers or subwoofers.
- PENUH: For full-range speakers, allowing all frequencies to pass.
- HPF (Penapis Lulus Tinggi): For mid-range or tweeter speakers, allowing only frequencies above the set point to pass. Adjust the HPF frequency control to the desired cutoff.
- LPF (Penapis Lulus Rendah): For subwoofers, allowing only frequencies below the set point to pass. Adjust the LPF frequency control to the desired cutoff.
6.3 Peningkatan Bass
The BASS BOOST control (for channels 3&4) allows you to enhance low frequencies. Use this feature sparingly to avoid distortion or speaker damage. Start with the boost at minimum and increase gradually if desired.
6.4 Bridged Mode Operation
The WRX-4.300 can be bridged to provide higher power output to fewer channels, typically for subwoofers. When bridging, connect the speaker's positive terminal to the positive output of one channel (e.g., CH1+) and the speaker's negative terminal to the negative output of the adjacent channel (e.g., CH2-). Ensure the connected speakers have an impedance compatible with bridged operation (typically 4 ohms minimum).
7. Penyelenggaraan
Minimal maintenance is required for your amplebih hidup.
- Pembersihan: Lap secara berkala ampLap bahagian luar penapis dengan kain yang lembut dan kering. Jangan gunakan bahan kimia yang keras atau pembersih yang kasar.
- Penggantian fius: Sekiranya amplifier does not power on, check the fuses. Always replace blown fuses with new ones of the exact same type and rating to prevent damage.
- Pengudaraan: Memastikan amplifier's heatsink fins remain clear of obstructions to maintain proper cooling.
8. Penyelesaian masalah
Jika anda mengalami masalah dengan anda amplifier, rujuk kepada masalah dan penyelesaian biasa berikut:
| Masalah | Kemungkinan Punca | Penyelesaian |
|---|---|---|
| Amplifier does not power on (PWR LED off) | Blown fuse, poor power/ground connection, no remote signal. | Check and replace fuses. Verify +12V, GND, and REM connections. Ensure head unit is on. |
| Amplifier powers on but no sound | Incorrect input connection, speaker wiring issues, gain too low, head unit muted. | Check RCA/high-level input cables. Verify speaker connections and polarity. Increase gain. Check head unit volume/mute. |
| Bunyi herot | Set gandaan terlalu tinggi, tetapan crossover yang tidak betul, pembesar suara yang rosak. | Reduce gain. Adjust crossover frequencies. Inspect speakers for damage. |
| Amplifier goes into protection mode (PRT LED on) | Overheating, short circuit in speaker wiring, impedance too low. | benarkan amplifier to cool. Check speaker wiring for shorts. Ensure speaker impedance is within amplifier's limits. |
| Engine noise/whining sound | Poor ground connection, RCA cables routed near power wires, ground loop. | Improve ground connection. Reroute RCA cables away from power wires. Consider a ground loop isolator. |
9. Spesifikasi
Key technical specifications for the Soundstream WRX-4.300 amplebih hidup:
- Kuasa Output: 1200 Watt (Maksimum)
- Bilangan Saluran: 4
- AmpKelas penguat: Kelas D
- Voltage: 12 Volt (AC)
- Bahan: aluminium
- Jenis Pemasangan: Lekapan Permukaan
- Dimensi Produk (L x W x H): 7.2 x 6.69 x 1.97 inci
- Berat Barang: 2.2 paun
- Nombor Model: WRX-4.300
- UPC: 709483072411
10. Waranti & Sokongan
Soundstream products are designed for reliability and performance. For warranty information, please refer to the warranty card included with your product or visit the official Soundstream website. For technical support or service inquiries, please contact Soundstream customer service through their official channels.