1. Pengenalan
Terima kasih kerana membeliasing the Supersonic Professional Stereo Amplifier AV-972SA. This amplifier is designed to provide high-fidelity audio for your home entertainment or karaoke system. With its versatile features, including USB/SD card playback, FM radio, and microphone inputs, it offers a powerful and clear sound experience. Please read this manual carefully before operating the unit to ensure proper use and to maximize its performance.
2. Arahan Keselamatan Penting
- Bekalan Kuasa: Pastikan bekalan kuasa voltage matches the requirements specified on the unit (220V~250V/50Hz).
- Pengudaraan: Jangan sekat sebarang bukaan pengudaraan. Pasang mengikut arahan pengilang.
- Air dan Kelembapan: Jangan dedahkan peralatan ini kepada hujan atau kelembapan. Jangan letakkan objek yang berisi cecair, seperti pasu, di atas peralatan.
- haba: Jangan pasang berhampiran mana-mana sumber haba seperti radiator, daftar haba, dapur, atau radas lain (termasuk amppenghidup) yang menghasilkan haba.
- Pembersihan: Bersihkan hanya dengan kain kering.
- Servis: Jangan cuba servis produk ini sendiri. Rujuk semua perkhidmatan kepada pegawai perkhidmatan yang berkelayakan.
- Sambungan Pembesar Suara: Ensure correct polarity when connecting speakers to prevent damage to the amppembesar dan pembesar suara.
3. Ciri-ciri Utama
- Luxury Color Pointer Screen Display
- High-Fidelity Stereo Dynamic AmpReka Bentuk yang lebih hidup
- Bass-enhancement Technology
- Output 3000W yang berkuasa
- Professional Karaoke FM Radio Tuner
- USB/SD Card Playback for MP3 files
- Low Leak Magnetic Ring type Voltage
- Optimized for use with 12", 15", and 18" loudspeakers
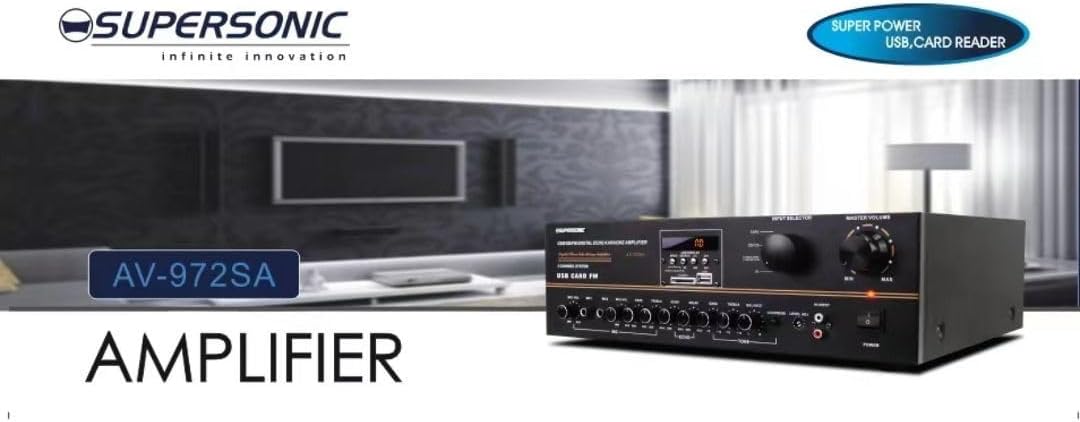
Imej 3.1: A visual representation of the key features of the Supersonic AV-972SA amplifier, including its display, power output, and connectivity options.
4. Produk Lebihview
The Supersonic AV-972SA amplifier features a user-friendly front panel for easy control and a rear panel for all necessary connections.
4.1 Panel Depan

Imej 4.1: Depan view of the Supersonic AV-972SA amppenguat, pertunjukancasing its controls, display, and input ports in a home setting.
Panel hadapan termasuk:
- Butang Kuasa: Berpusing amphidup atau mati.
- Kawalan Kelantangan Induk: Melaraskan volum keluaran keseluruhan.
- Kawalan Bass/Treble: Adjusts low and high frequency response.
- Pemilih Input: Switches between different audio sources (e.g., USB, SD, FM, AUX).
- USB/SD Card Slot: Untuk memainkan audio files directly from USB drives or SD cards.
- FM Tuner Controls: For radio station selection and tuning.
- Input Mikrofon: For connecting microphones for karaoke or public address.
- Skrin Paparan: Menunjukkan mod semasa, maklumat trek atau frekuensi FM.
4.2 Panel Belakang
The rear panel provides all necessary connections for speakers, power, and external audio sources.
- Terminal Pembesar suara: Connect your loudspeakers here. Ensure correct polarity (+ to + and - to -).
- Input Audio (RCA): For connecting external audio devices like CD players, DVD players, or other audio sources.
- Input Kord Kuasa: Connect the provided power cord here.
- Input Antena FM: Connect the FM antenna for improved radio reception.
5. Panduan Persediaan
Follow these steps to set up your Supersonic AV-972SA amplebih hidup:
- penempatan: Letakkan amplifier on a stable, flat surface with adequate ventilation around it. Avoid direct sunlight, heat sources, or areas with high humidity.
- Sambungan Pembesar Suara: Connect your loudspeakers to the speaker terminals on the rear panel. Match the positive (+) terminal on the amplifier to the positive (+) terminal on your speaker, and the negative (-) to the negative (-). Ensure all connections are secure. This amplifier is designed to work best with 12", 15", or 18" loudspeakers.
- Sambungan Sumber Audio:
- Peranti Luaran: Connect your CD player, DVD player, or other audio sources to the RCA audio input jacks on the rear panel.
- Kad USB/SD: Insert a USB flash drive or SD card into the respective slot on the front panel.
- Antena FM: Connect the FM antenna to the designated input on the rear panel for optimal radio reception.
- Sambungan Kuasa: Memastikan amplifier's power switch is in the OFF position. Connect the power cord to the amplifier's power input and then plug it into a suitable 220V~250V/50Hz AC power outlet.
6. Arahan Operasi
6.1 Menghidupkan/Mematikan
Tekan ke Butang Kuasa pada panel hadapan untuk memusingkan amplifier ON. The display will illuminate. Press it again to turn the amppenguat MATI.
6.2 Selecting Audio Source
Gunakan Pemilih Input button or knob on the front panel to cycle through available audio sources: USB, SD, FM, or AUX (RCA input).
6.3 Kawalan Kelantangan dan Nada
- Jumlah Induk: Putar Jilid Induk knob to adjust the overall sound level. Start with a low volume and gradually increase it.
- Bes/Trebel: Gunakan Bass dan Treble knobs to fine-tune the low and high frequencies of the audio output to your preference.
6.4 Main Semula USB/Kad SD
Once a USB drive or SD card containing MP3 audio files is inserted, the amplifier will automatically switch to USB/SD mode and begin playback. Use the control buttons (Play/Pause, Next, Previous) on the front panel to manage playback.
6.5 Operasi Radio FM
Select the FM input using the Pemilih Input. Use the FM tuner controls to scan for and select radio stations. The display will show the current frequency.
6.6 Penggunaan Mikrofon (Karaoke)
Connect your microphones to the microphone input jacks on the front panel. Adjust the microphone volume and echo effects (if available) using the dedicated controls. Ensure the main volume is set appropriately to avoid feedback.
7. Penyelenggaraan
- Pembersihan: Disconnect the power before cleaning. Use a soft, dry cloth to wipe the exterior of the amppenghidrat. Jangan gunakan pembersih cecair atau semburan aerosol.
- Pengudaraan: Regularly check that the ventilation openings are clear of dust and debris to prevent overheating.
- Storan: Jika menyimpan amppenyejuk untuk tempoh yang lama, pastikan ia berada di tempat yang sejuk dan kering, jauh daripada cahaya matahari langsung dan suhu yang melampau.
8. Penyelesaian masalah
| Masalah | Kemungkinan Punca | Penyelesaian |
|---|---|---|
| Tiada kuasa | Kord kuasa tidak disambungkan; Soket kuasa rosak; Amplifier power switch off | Check power cord connection; Try a different outlet; Ensure power switch is ON |
| Tiada keluaran bunyi | Volume too low; Incorrect input selected; Speaker wires loose or incorrectly connected; Faulty audio source | Increase master volume; Select correct input; Check speaker connections and polarity; Test with a different audio source |
| Penerimaan FM yang lemah | Antenna not connected or poorly positioned; Weak signal | Connect FM antenna securely; Adjust antenna position; Try manual tuning |
| USB/SD tidak dimainkan | tak betul file format; USB/SD card faulty or not inserted correctly; Amplifier not in USB/SD mode | pastikan files are MP3 format; Reinsert USB/SD card; Select USB/SD input mode |
9. Spesifikasi
| Ciri | Spesifikasi |
|---|---|
| Jenama | Supersonik |
| Nombor Model | AMP-AV972SA |
| Output Wattage | 3000W |
| Teknologi Ketersambungan | USB |
| Ciri Khas | Reka Bentuk Padat |
| warna | Hitam |
| Dimensi Produk | 25D x 45W x 26H sentimeter |
| Berat Barang | 1 Kilogram |
| Kaedah Kawalan | Sentuh |
| Bekalan Kuasa | 220V~250V/50Hz |
10. Waranti dan Sokongan
This Supersonic AV-972SA ampliifier dilengkapi dengan a Waranti Pengilang 6 Bulan from the date of purchase. This warranty covers manufacturing defects under normal use. It does not cover damage caused by misuse, accidents, unauthorized modifications, or improper installation.
For warranty claims or technical support, please contact your retailer or the Supersonic customer service department. Please have your proof of purchase and product model number (AMP-AV972SA) ready when contacting support.