1. Pengenalan
This manual provides detailed instructions for the installation, operation, and maintenance of your ANNKE AU-DT81DX200-V1 4K 8-Channel Digital Video Recorder (DVR). This DVR is designed for security surveillance systems, offering 4K (8MP) high-definition live viewing and recording capabilities. It features advanced H.265+ video compression, AI human/vehicle detection, and supports various camera types for flexible integration.

Image 1.1: The ANNKE 4K 8CH DVR connected to a display, illustrating its 4K Ultra HD video capability.
2. Kandungan Pakej
Verify that all items listed below are included in your package. If any items are missing or damaged, contact ANNKE customer support.
- 1x ANNKE 4K 8CH DVR with 2TB Hard Drive
- 1x Kabel HDMI 5.9 kaki/1.8 m
- 1x 3.2 ft/1 m Ethernet Cable
- 1x Penyesuai Kuasa
- 1x USB Tetikus
- 1x Manual Pengguna (dokumen ini)
- 1x Pelekat Dinding

Image 2.1: Visual representation of all components included in the ANNKE 4K 8CH DVR package.
3. Sistem Selesaiview
The ANNKE AU-DT81DX200-V1 DVR is a hybrid 5-in-1 system, supporting various camera technologies. It can operate in two primary modes:
- Mod DVR: Supports up to 8 BNC (TVI/AHD/CVI/CVBS) cameras and an additional 4 IP cameras.
- NVR Mode: Can be configured to support up to 12 IP cameras exclusively.
This flexibility allows for integration with existing analog systems while providing options for future IP camera expansion.
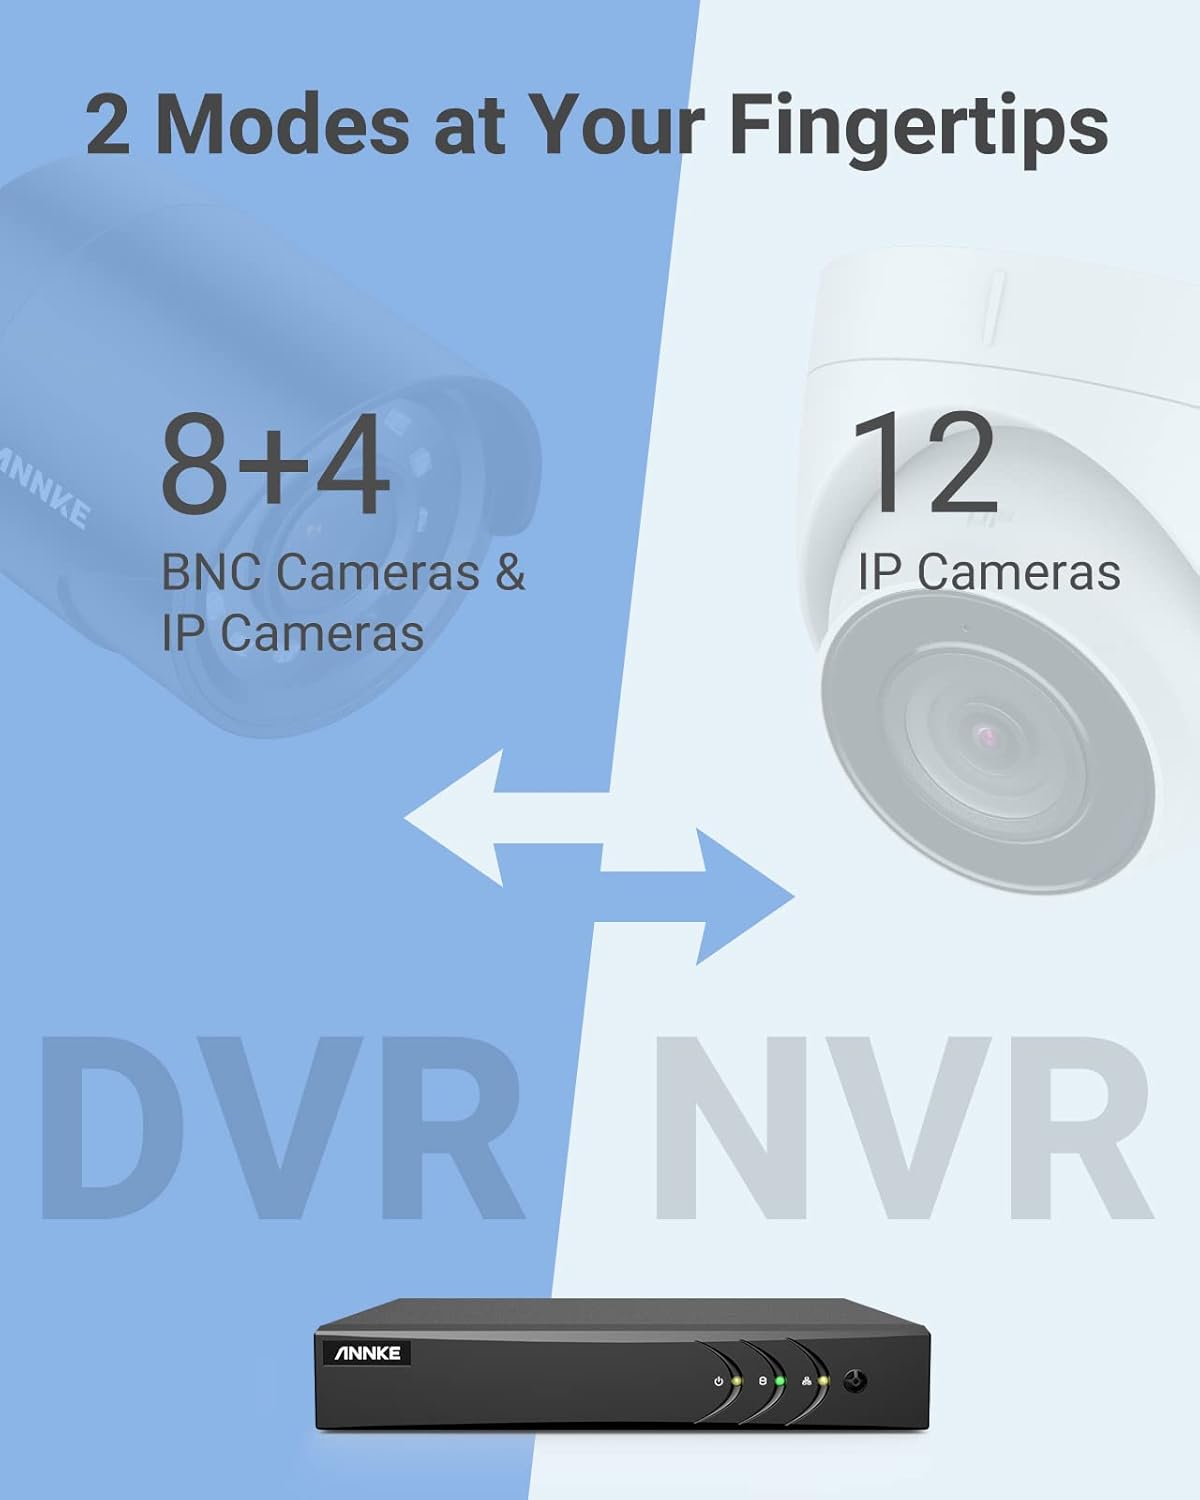
Image 3.1: Illustration of the DVR's dual operational modes, supporting both BNC and IP cameras or IP cameras exclusively.
4. Panduan Pemasangan
4.1 Persediaan Fizikal
- Sambungkan Kamera: Connect your security cameras to the BNC video input ports on the back of the DVR. For IP cameras, connect them to your network switch/router, and ensure the DVR is also connected to the same network via the Ethernet cable.
- Sambung Monitor: Connect a monitor to the DVR's HDMI or VGA output port using the provided HDMI cable or a VGA cable (not included).
- Sambungkan Tetikus USB: Pasangkan tetikus USB ke salah satu port USB pada DVR.
- Sambungkan Kuasa: Connect the power adapter to the DVR's power input and then plug it into a power outlet. The DVR will power on automatically.
4.2 Tatarajah Awal
Sebaik sahaja but pertama, DVR akan membimbing anda melalui wizard persediaan awal. Ikuti arahan pada skrin untuk:
- Sediakan kata laluan yang kukuh untuk akaun pentadbir.
- Konfigurasikan tetapan rangkaian (DHCP disyorkan untuk kebanyakan pengguna).
- Tetapkan tarikh dan masa.
- Scan and add IP cameras if applicable.
5. Mengendalikan DVR
5.1 Langsung View
Selepas persediaan awal, DVR akan memaparkan secara langsung view from connected cameras. Use the USB mouse to navigate the interface. Right-click to access the main menu.
5.2 Rakaman
The DVR is pre-configured for continuous recording. You can customize recording schedules, motion-triggered recording, or alarm-triggered recording via the main menu under Rekod > Jadual.
5.3 Main semula
Untuk kembaliview dirakam footage:
- Dari siaran langsung view, klik kanan dan pilih Main balik.
- Select the desired camera(s) and date.
- Use the timeline to navigate through recordings. Events (like motion detection) are often marked on the timeline for quick access.

Image 5.1: The DVR's playback interface, demonstrating how to locate and review recorded events on a timeline.
6. Ciri Lanjutan
6.1 AI Pengesanan Manusia/Kenderaan
The DVR incorporates deep learning-based motion detection 2.0, which can differentiate between human and vehicle movements. This significantly reduces false alarms caused by environmental factors such as leaves or light changes.
- Konfigurasi: Enable and configure AI detection for each analog channel via the main menu under AI > Motion Detection 2.0.
- Smart Events: Supports line crossing and intrusion detection for specific areas.
- Makluman: Configure the DVR to send app push notifications, email alerts, or trigger a buzzer when human or vehicle motion is detected.
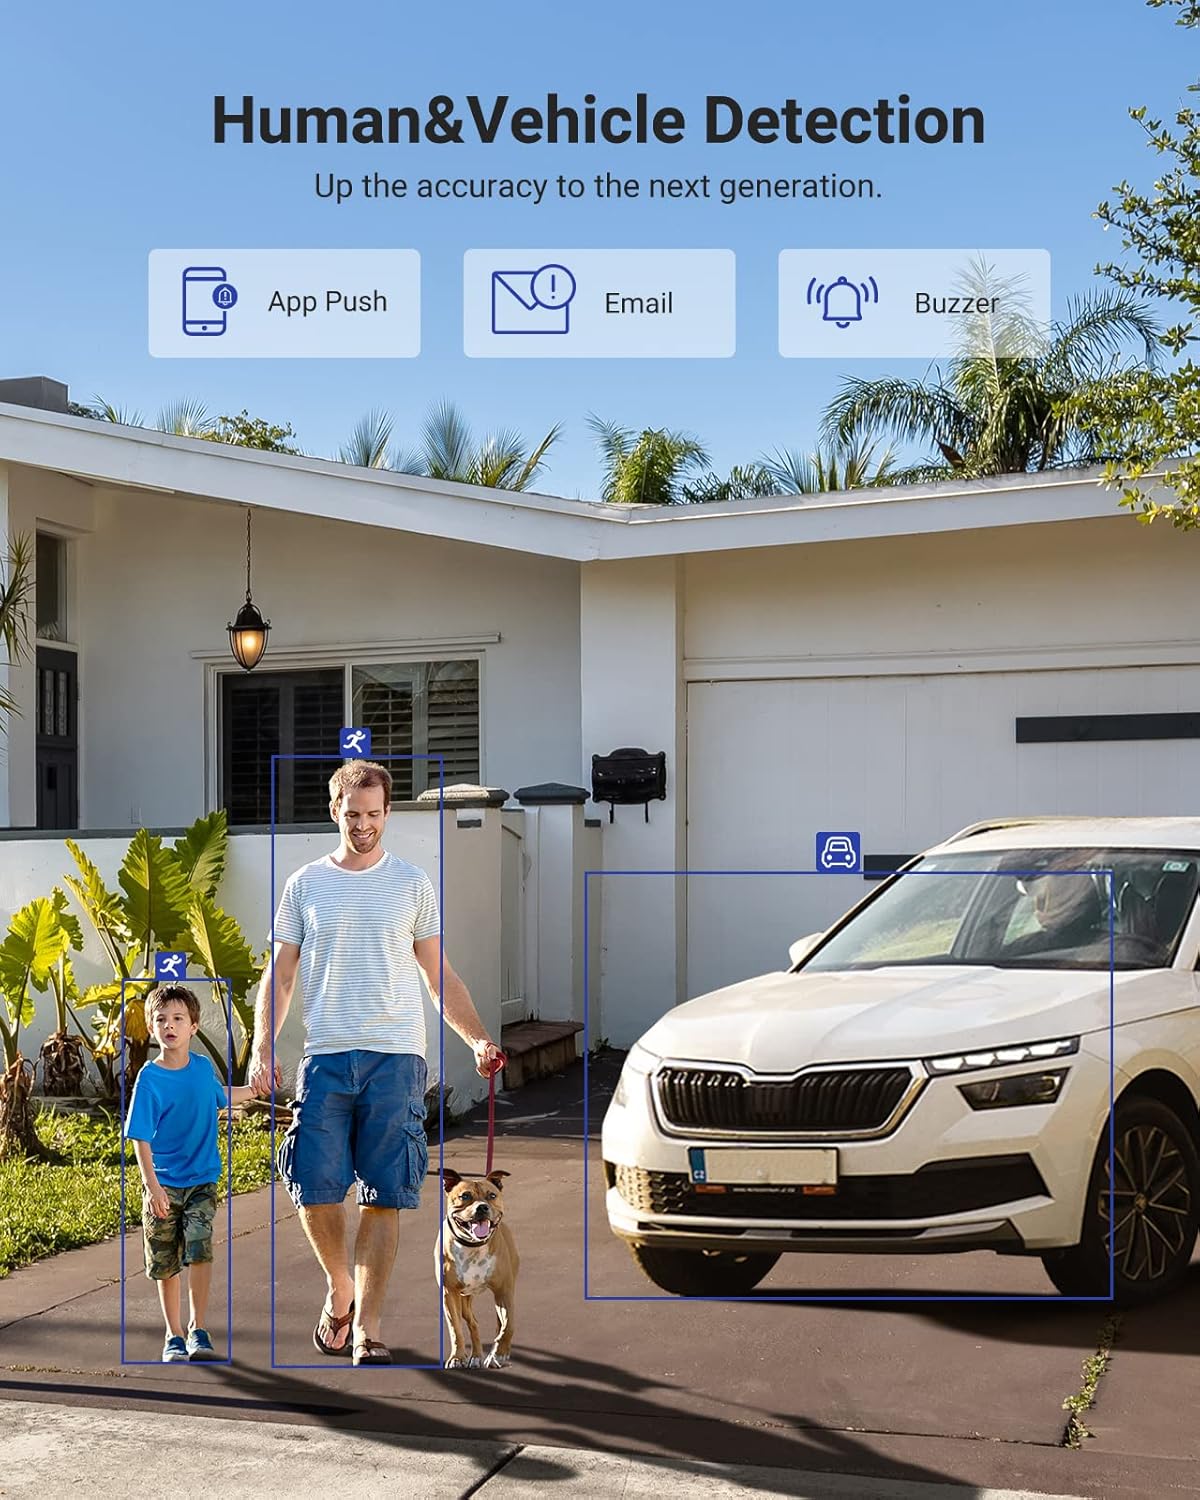
Image 6.1: Visual demonstration of the AI human and vehicle detection capability, showing how the system identifies and distinguishes between people and vehicles.
6.2 Akses Jauh
Access your DVR remotely from anywhere using the ANNKE Vision App or a web pelayar.
- Apl Visi ANNKE: Download the app from the App Store (iOS) or Google Play Store (Android). Register an account and add your DVR by scanning the QR code or entering its serial number.
- Web pelayar: Access the DVR's web antara muka dengan memasukkan alamat IPnya dalam a web pelayar pada komputer anda.
- Keserasian: The system is compatible with various devices including smartphones, tablets, laptops, and personal computers. It also supports integration with Alexa for voice control.

Image 6.2: Remote access via the ANNKE Vision App, showing compatibility with mobile devices and Alexa.
7. Video Management
Mampatan Video 7.1 H.265+
The DVR utilizes advanced H.265+ video compression technology. This technology significantly reduces file sizes, saving up to 80% of storage space compared to H.264 compression, while maintaining video quality. This allows for longer recording durations on the same 2TB hard drive.

Image 7.1: Comparison illustrating the storage efficiency of H.265+ compression versus H.264.
8. Keserasian
The ANNKE AU-DT81DX200-V1 is a versatile 5-in-1 hybrid DVR, designed to be compatible with a wide range of security cameras:
- HD TVI Input: Supports 8 MP@15 fps, 5 MP@20 fps, 3K@20 fps, 4 MP@30 fps.
- AHD Input: Supports 5 MP@20 fps, 4 MP@30 fps, 1080p@25 fps, 1080p@30 fps.
- HD CVI Input: Supports 4 MP@30 fps, 4 MP@25 fps, 1080p@25 fps, 1080p@30 fps.
- Input CVBS: Supports PAL/NTSC standards.
- IPC Input: Supports up to 8MP IP cameras.
This broad compatibility ensures that the DVR can integrate with both older analog cameras and modern IP cameras, providing a flexible upgrade path for existing surveillance systems.

Image 8.1: The DVR's compatibility with various camera technologies, including TVI, CVI, AHD, and IP cameras.
9. Spesifikasi
| Ciri | Spesifikasi |
|---|---|
| Jenama | ANNKE |
| Nombor Model | AU-DT81DX200-V1 |
| Teknologi Ketersambungan | berwayar |
| Resolusi Tangkapan Video | 4K (8MP) |
| Bilangan Saluran | 8 (Analog) + 4 (IP) or 12 (IP) |
| Pemampatan Video | H.265 Pro+/H.265 Pro/H.265/H.264+/H.264 |
| Jenis Kamera yang Disokong | TVI, AHD, CVI, CVBS, IPC |
| Ciri AI | Human Detection, Vehicle Detection, Line Crossing, Intrusion Detection |
| Kapasiti Penyimpanan Memori | 2 TB HDD (Up to 10 TB supported) |
| Akses Jauh | ANNKE Vision App, Web pelayar |
| Peranti Serasi | Kamera, Komputer riba, Komputer Peribadi, Telefon Pintar, Tablet |
| Sumber Kuasa | Elektrik Bertali |
| warna | Hitam |
| Dimensi Item | 17.13 x 12.4 x 3.86 inci |
10. Penyelenggaraan
Penyelenggaraan berkala memastikan prestasi optimum dan jangka hayat sistem DVR anda.
- Pembersihan: Pastikan DVR bebas daripada habuk. Gunakan kain lembut dan kering untuk membersihkan bahagian luar. Jangan gunakan pembersih cecair.
- Pengudaraan: Pastikan DVR diletakkan di kawasan yang mempunyai pengudaraan yang baik untuk mengelakkan terlalu panas. Jangan halang bukaan pengudaraan.
- Kemas kini Firmware: Periksa pegawai ANNKE secara berkala website for firmware updates. Keeping your DVR's firmware updated can improve performance, add new features, and enhance security.
- Sandaran Data: Sandarkan fail video penting secara berkalatage to an external storage device.
- Kesihatan Cakera Keras: The DVR's menu may offer options to check the health status of the installed hard drive. Monitor this periodically.
11. Penyelesaian masalah
This section addresses common issues you might encounter with your DVR.
- Tiada Output Video:
- Check HDMI/VGA cable connections to both the DVR and the monitor.
- Pastikan monitor ditetapkan kepada sumber input yang betul.
- Verify the DVR is powered on (power indicator light should be active).
- No Camera Display:
- Check camera power supply and video cable connections.
- For IP cameras, ensure they are on the same network as the DVR and properly added in the DVR's camera management settings.
- Verify camera compatibility with the DVR (refer to Section 8).
- Akses Jauh Tidak Berfungsi:
- Ensure the DVR is connected to the internet.
- Check network settings on the DVR (e.g., DHCP enabled, correct IP address).
- Verify the ANNKE Vision App is updated to the latest version.
- Ensure the DVR is properly added to your ANNKE Vision account.
- Penggera Gerakan Palsu:
- Adjust the sensitivity of motion detection in the DVR settings.
- Utilize the AI Human/Vehicle Detection feature (Section 6.1) to filter out irrelevant movements.
- Define specific detection zones to exclude areas with frequent non-threatening movement.
If you continue to experience issues, please contact ANNKE customer support.
12. Waranti dan Sokongan
ANNKE products typically come with a limited warranty. Please refer to the warranty card included in your package or visit the official ANNKE webtapak untuk terma dan syarat waranti terperinci khusus untuk wilayah anda.
For technical support, product inquiries, or warranty claims, please contact ANNKE customer service through their official website or the contact information provided in your product documentation. Have your model number (AU-DT81DX200-V1) and purchase details ready when contacting support.
Rasmi ANNKE Webtapak: www.annke.com