
pengenalan
This manual provides essential information for the installation, operation, and maintenance of your Vexilar accessory kit for Cleanova W11 and W9 robot vacuum cleaners. Regular replacement and proper care of these accessories are crucial for maintaining the optimal performance and extending the lifespan of your robot vacuum.
Kit termasuk:
- 1 Main Brush
- 6 Berus Sisi
- 6 Penapis HEPA
- 3 Kain Mop
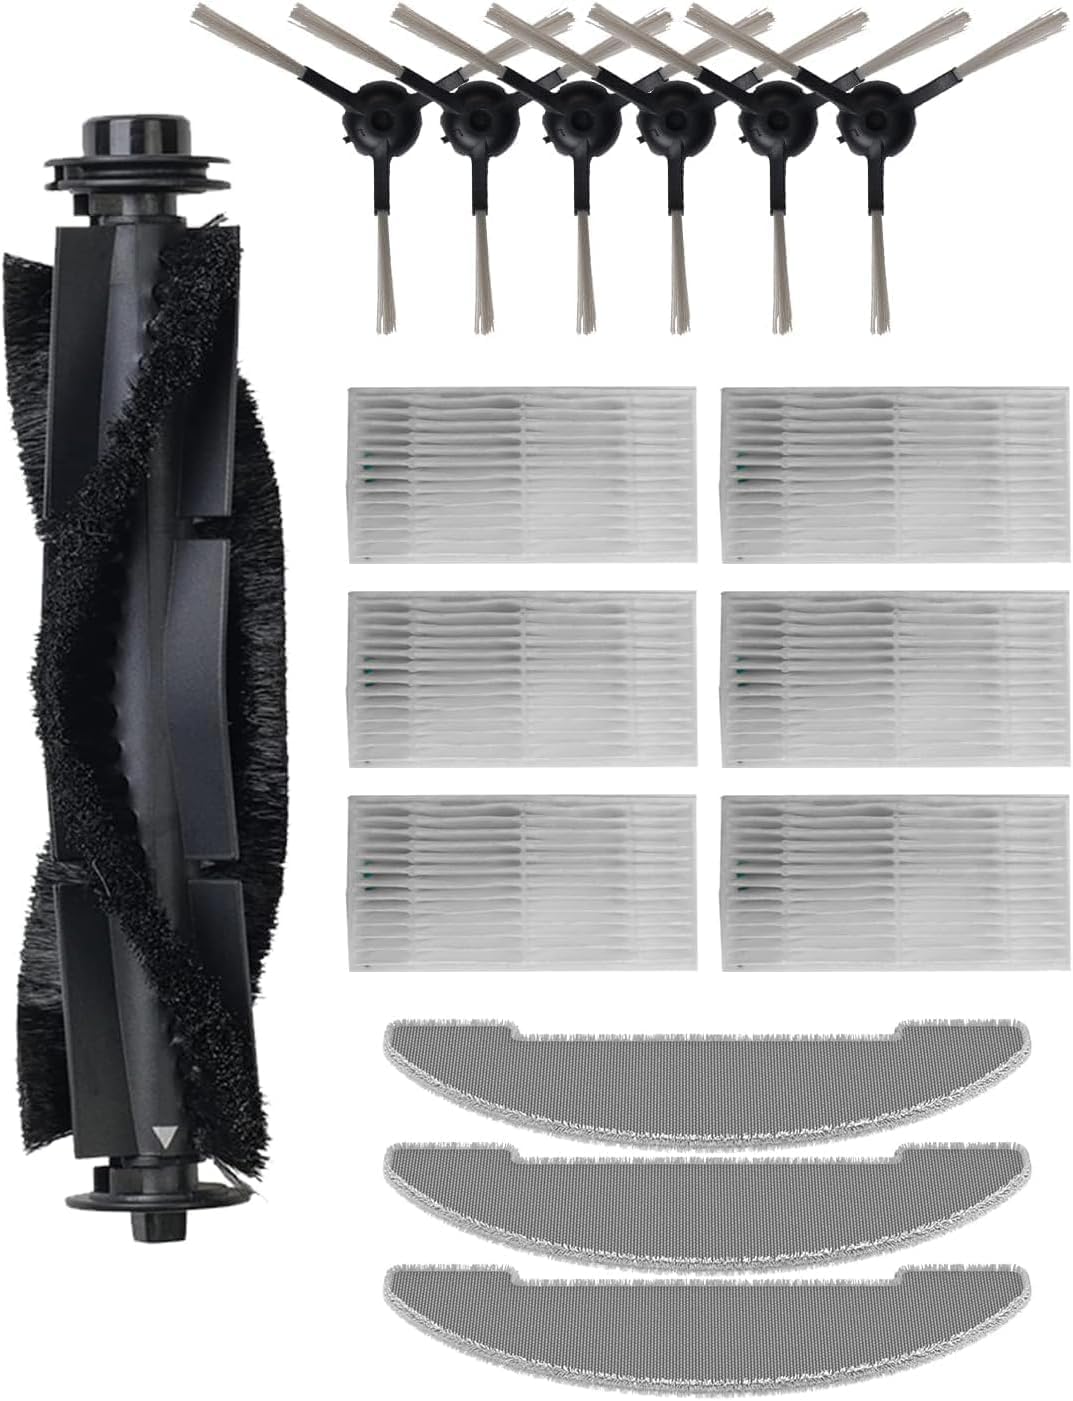
Imej: Selesaiview of the Vexilar accessory kit, showing the main brush, side brushes, HEPA filters, and mop cloths.
Panduan Pemasangan
Before installing any accessories, ensure your robot vacuum cleaner is powered off and disconnected from its charging base.
1. Main Brush Installation
- Terbalikkan pembersih vakum robot.
- Locate the main brush cover, usually secured by two tabs or screws.
- Press the tabs or unscrew the screws to remove the cover.
- Lift out the old main brush.
- Insert the new main brush, ensuring its ends align with the slots in the vacuum cleaner.
- Replace the main brush cover and secure it.

Image: A robot vacuum cleaner actively cleaning a spill, demonstrating the effectiveness of its brushes and mop.
2. Pemasangan Berus Sisi
- Terbalikkan pembersih vakum robot.
- Locate the side brushes. They are typically held in place by a single screw or snap into position.
- If screwed, use a screwdriver to remove the old side brush. If snap-on, gently pull it off.
- Align the new side brush with the corresponding post on the vacuum cleaner.
- Push it firmly until it clicks into place or secure it with the screw.
3. HEPA Filter Installation
- Buka petak tong sampah pembersih vakum robot anda.
- Keluarkan tong sampah.
- Cari pemasangan penapis di dalam tong sampah.
- Keluarkan penapis HEPA lama.
- Insert the new HEPA filter into the designated slot, ensuring it fits snugly.
- Tutup tong sampah dan masukkan semula ke dalam pembersih vakum.
4. Mop Cloth Installation
- Locate the mop cloth attachment plate on the underside of the robot vacuum cleaner.
- Remove the old mop cloth, typically attached with Velcro or by sliding it off.
- Attach the new mop cloth to the plate, ensuring it is evenly spread and securely fastened.
- Reattach the mop cloth plate to the robot vacuum cleaner if it was removed.
Operating with New Accessories
Once the new accessories are installed, your robot vacuum cleaner is ready for operation. These components work together to provide comprehensive cleaning:
- Berus Sisi: Sweep debris from edges and corners into the main cleaning path.
- Berus Utama: Agitates and lifts dirt from various floor types, including hard floors, parquet, and low-pile carpets.
- Penapis HEPA: Captures fine dust, allergens, and pet dander, improving air quality.
- Kain Mop: Provide wet cleaning for hard floors, removing stains and leaving surfaces sparkling.
For optimal cleaning results, ensure the water tank (if applicable to your model) is filled before mopping cycles.

Image: A Vexilar robot vacuum cleaner operating in a kitchen environment, demonstrating its ability to clean various floor types.
Penyelenggaraan dan Penggantian
Regular cleaning and timely replacement of accessories are vital for maintaining your robot vacuum's efficiency and longevity.
Kekerapan Pembersihan:
- Berus Utama: Clean weekly, removing tangled hair and debris.
- Berus Sisi: Clean every 2-3 weeks, checking for wear and entanglement.
- Penapis HEPA: Tap clean after every 1-2 uses. Do not wash with water unless specified by your vacuum's manual.
- Kain Mop: Wash after each use. Hand washing or machine washing (delicate cycle) is recommended.
Jadual Penggantian:
- Berus Utama: Replace every 6-12 months, depending on usage.
- Berus Sisi: Replace every 3-6 months, or when visibly worn or bent.
- Penapis HEPA: Replace every 2-3 months to maintain filtration efficiency.
- Kain Mop: Replace every 1-3 months, or when they show signs of significant wear or reduced cleaning effectiveness.
Note: These are general guidelines. Actual replacement frequency may vary based on usage, pet presence, and environmental factors.
Menyelesaikan Masalah Isu Biasa
If you experience issues after installing new accessories, refer to the following table:
| Masalah | Kemungkinan Punca | Penyelesaian |
|---|---|---|
| Daya sedutan berkurang | Clogged HEPA filter; full dustbin. | Clean or replace HEPA filter. Empty dustbin. |
| Side brushes not rotating or tangled | Hair or debris caught; brush not installed correctly. | Remove tangled debris. Reinstall side brush, ensuring it clicks into place. |
| Main brush not rotating or making noise | Hair or debris caught; brush not installed correctly. | Remove main brush and clean thoroughly. Reinstall, ensuring proper alignment. |
| Prestasi mengemop yang lemah | Mop cloth dirty or worn; water tank empty (if applicable). | Wash or replace mop cloth. Refill water tank. |
Spesifikasi Produk
- Jenama: Vexilar
- Model yang Serasi: Cleanova W11, Cleanova W9
- Komponen Termasuk: 1 Main Brush, 6 Side Brushes, 6 HEPA Filters, 3 Mop Cloths
- Bahan: Polyester (for mop cloths), various plastics and bristles for brushes and filters.
- warna: Black (accessories may vary slightly in color)
- Dimensi Produk (L x W x H): Approximately 30 x 16 x 8.5 cm (packaging dimensions)
- Berat Barang: Lebih kurang 110 gram
- Jenis Penapis: HEPA
- Syor Permukaan: Multi-Surface (for vacuum operation with these accessories)
Waranti dan Sokongan
This manual provides instructions for the Vexilar accessory kit. For specific warranty information regarding these replacement parts or for technical support related to your Vexilar Cleanova W11 or W9 robot vacuum cleaner, please refer to the original product manual or contact Vexilar customer service directly.
You can often find contact details on the official Vexilar webtapak atau melalui platform pembelian anda.