1. Pengenalan
The Fanvil V66-Pro is a professional IP phone designed for modern business communication. It features a 7-inch adjustable touch screen, supports 20 SIP lines, and includes built-in 2.4G/5G Wi-Fi (Wi-Fi 6) and a wireless Bluetooth handset. This manual provides detailed instructions for the proper installation, configuration, and operation of your Fanvil V66-Pro IP Phone.
2. Kandungan Pakej
Verify that all items are present in your package. If any item is missing or damaged, contact your vendor immediately.
- Fanvil V66-Pro IP Phone Unit
- Telefon bimbit Bluetooth Tanpa Wayar
- Kabel Telefon bimbit
- Kabel Ethernet
- Penyesuai Kuasa
- Stand Meja
- Panduan Pemasangan Pantas
3. Fizikal Overview
Familiarize yourself with the components of your Fanvil V66-Pro IP Phone.
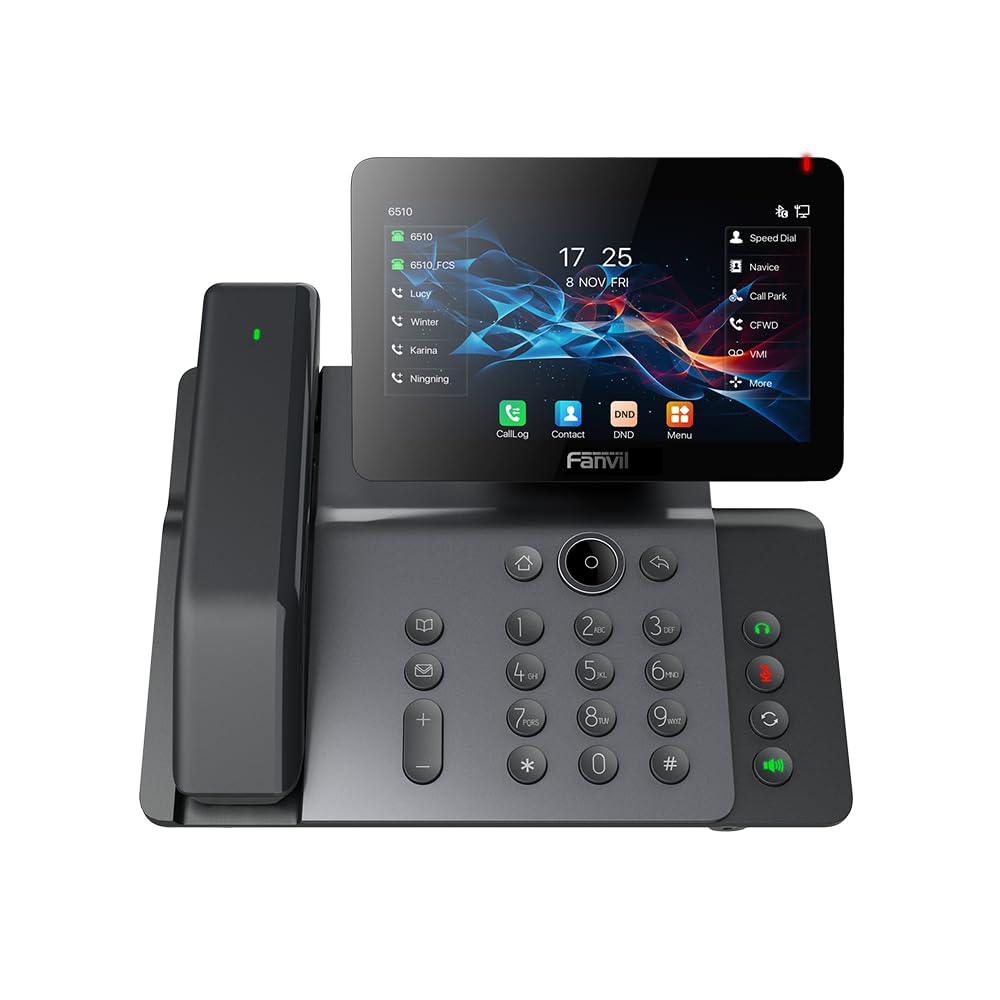
Figure 3.1: Fanvil V66-Pro IP Phone with its wireless Bluetooth handset shown separately.
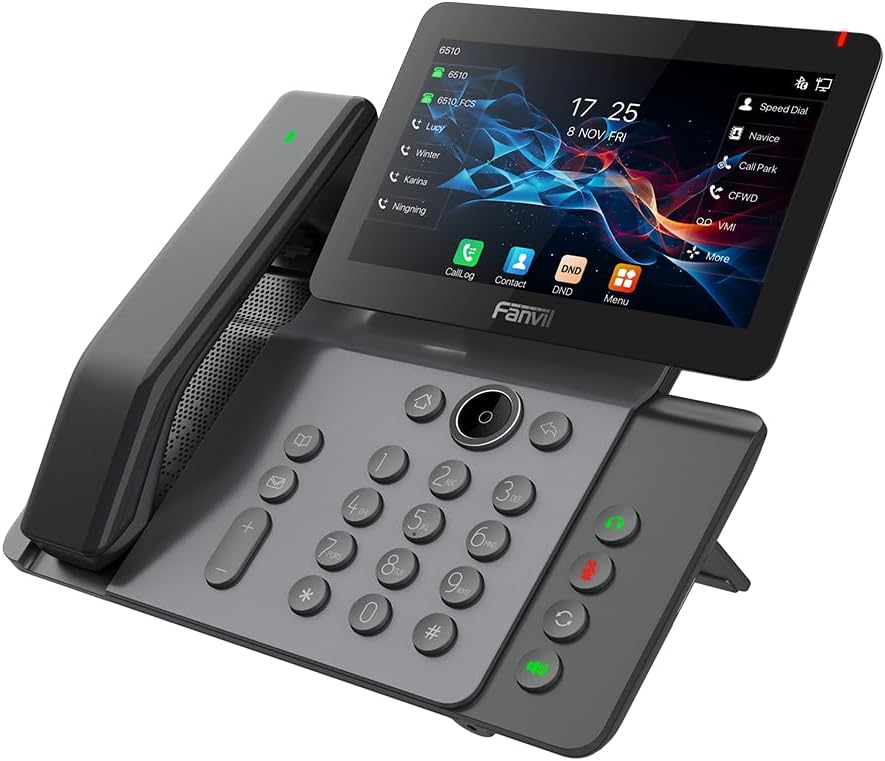
Rajah 3.2: Depan view of the Fanvil V66-Pro IP Phone with the handset attached to the main unit.
3.1 Komponen Utama
- Adjustable Touch Screen: 7-inch color display for navigation and information.
- Pad kekunci: Standard numeric and function keys for dialing and control.
- Wireless Bluetooth Handset: For cordless communication.
- Telefon pembesar suara: Integrated speaker and microphone for hands-free calls.
- Kekunci Fungsi: Dedicated buttons for common features like message, hold, transfer, and conference.
- Pelabuhan: Ethernet ports (LAN/PC), Power port, USB port, Headset port.
4. Persediaan
4.1 Memasang Telefon
- Attach the desk stand to the main phone unit.
- Connect the coiled handset cord to the main unit and the wired handset (if using a wired handset). For the wireless Bluetooth handset, ensure it is placed on the charging cradle.
4.2 Connecting to Network and Power
- Sambungan Rangkaian: Connect one end of the Ethernet cable to the LAN port on the back of the phone and the other end to your network switch or router. If connecting a PC, use the PC port on the phone.
- Sambungan Kuasa: Connect the power adapter to the power port on the phone and then plug it into an electrical outlet. The phone will automatically power on.
4.3 Initial Boot-Up and Configuration
Upon first power-up, the phone will display a boot-up sequence. Once complete, it will attempt to obtain network settings via DHCP. If your network requires static IP configuration or specific SIP server details, these can be configured via the phone's menu or a web interface. Consult your network administrator for specific settings.
5. Arahan Operasi
5.1 Membuat dan Menerima Panggilan
- Untuk Membuat Panggilan: Pick up the handset, press the speakerphone button, or press a line key. Dial the number and press the Dial soft key or #.
- Untuk Menjawab Panggilan: Pick up the handset, press the speakerphone button, or press the Answer soft key.
- Untuk Menamatkan Panggilan: Hang up the handset, press the speakerphone button again, or press the End Call soft key.
5.2 Menggunakan Skrin Sentuh
The 7-inch touch screen allows for intuitive navigation. Tap icons to access features like Call Log, Contacts, DND (Do Not Disturb), and Menu. Swipe gestures may be supported for additional screens or options.
5.3 Ciri Panggilan Asas
- Tahan: Semasa panggilan aktif, tekan tahan soft key. Press it again to resume the call.
- Pemindahan: Semasa panggilan aktif, tekan Pemindahan soft key. Dial the number to transfer to, then press the Pemindahan soft key again (blind transfer) or wait for the party to answer and then press Pemindahan (perpindahan yang dihadiri).
- Persidangan: Semasa panggilan aktif, tekan Persidangan soft key. Dial the second party's number and wait for them to answer. Press the Persidangan kekunci lembut sekali lagi untuk menyertai semua pihak.
5.4 Wi-Fi and Bluetooth Setup
- Wi-Fi: Navigate to the phone's menu, select 'Settings' > 'Wi-Fi'. Enable Wi-Fi, scan for available networks, select your network, and enter the password if required.
- Bluetooth: Navigate to the phone's menu, select 'Settings' > 'Bluetooth'. Enable Bluetooth. For the wireless handset, ensure it is charged and in pairing mode. Select the handset from the discovered devices list to pair.
6. Penyelenggaraan
6.1 Membersihkan Peranti
Use a soft, dry cloth to clean the phone's surface and screen. Avoid using liquid cleaners or abrasive materials, as they may damage the device. For stubborn marks, a slightly damp cloth with water may be used, ensuring no moisture enters openings.
6.2 Kemas Kini Perisian
Periodically check for firmware updates to ensure optimal performance and access to new features. Updates can typically be performed via the phone's web interface or through your service provider's provisioning system. Consult your network administrator or service provider for guidance on updates.
7. Penyelesaian masalah
7.1 Tiada Nada Dail
- Check all cable connections (Ethernet, power, handset).
- Ensure the phone is powered on and the screen is active.
- Sahkan ketersambungan rangkaian.
- Contact your service provider to confirm SIP registration status.
7.2 Cannot Connect to Network
- Ensure the Ethernet cable is securely connected to the LAN port and your network.
- Check if your network switch or router is functioning correctly.
- If using Wi-Fi, verify the correct network is selected and the password is entered accurately.
- Mulakan semula telefon dan peralatan rangkaian anda.
7.3 Isu Paparan
- If the screen is blank, ensure the phone is powered on.
- Adjust screen brightness settings in the phone's menu.
- Mulakan semula telefon.
8. Spesifikasi
| Ciri | Perincian |
|---|---|
| Dimensi Produk | 9 x 7 x 5.6 inci |
| Berat Barang | 3.3 paun |
| ASIN | B0DYKWF779 |
| Pengeluar | Fanvil |
| warna | hitam |
| Jenis Telefon | Corded |
| bahan | Logam, Plastik |
| Sumber Kuasa | Elektrik Bertali |
| Jenis Sistem Menjawab | digital |
| Peranti Serasi | VoIP Services, Traditional Phone Networks |
| Keupayaan Panggilan Persidangan | asas |
| Operasi Berbilang Baris | Operasi Berbilang Talian |
9. Maklumat Waranti
Fanvil products are typically covered by a limited manufacturer's warranty. The specific terms and duration of the warranty may vary by region and retailer. Please refer to the warranty card included with your product or visit the official Fanvil weblaman web untuk maklumat jaminan terperinci. Simpan resit pembelian anda sebagai bukti pembelian untuk tuntutan jaminan.
10. Sokongan
For technical assistance, product inquiries, or further support, please contact your vendor or visit the official Fanvil support webtapak:
Rasmi Fanvil Webtapak: www.fanvil.com
You may find FAQs, firmware downloads, and additional documentation on their support pages.


