
1. Pengenalan
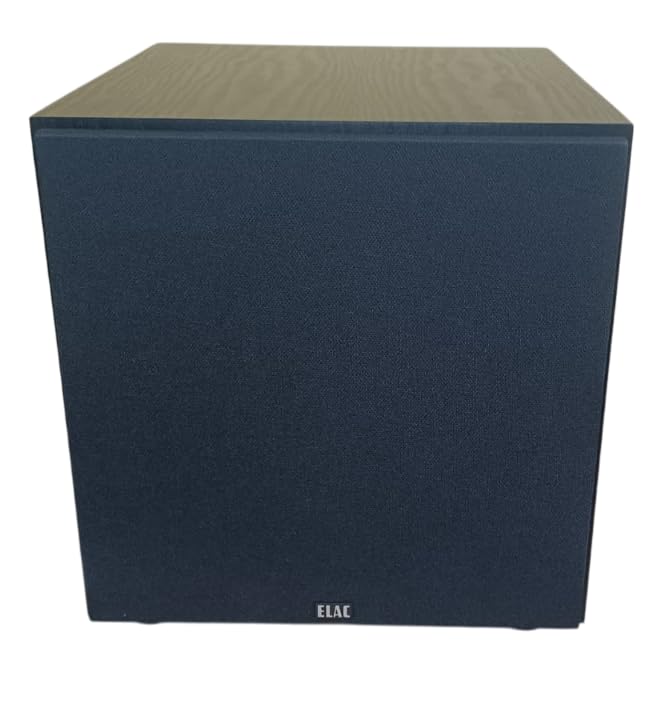
Thank you for choosing the Elac SUB1015 Powered Subwoofer. This high-performance subwoofer is engineered to deliver powerful and deep bass, enhancing your home audio experience. Featuring a 10-inch polypropylene cone, the SUB1015 handles low frequencies with clarity and precision. This manual provides essential information for proper setup, operation, and maintenance to ensure optimal performance and longevity of your subwoofer.
2. Kandungan Pakej
Sila sahkan bahawa semua item terdapat dalam pakej:
- Elac SUB1015 Powered Subwoofer
- jeriji
- Kord Kuasa AC
3. Persediaan dan Sambungan
Proper setup is crucial for achieving the best sound quality from your subwoofer. Follow these steps for installation:
3.1 Penempatan
The placement of your subwoofer significantly impacts its performance. Experiment with different locations in your room to find the optimal spot. Generally, placing the subwoofer in a corner can enhance bass output, but may also lead to boomy sound. Placing it along a wall or near your main speakers can provide a more balanced sound. Ensure there is adequate ventilation around the unit.
3.2 Menyambungkan Subwoofer
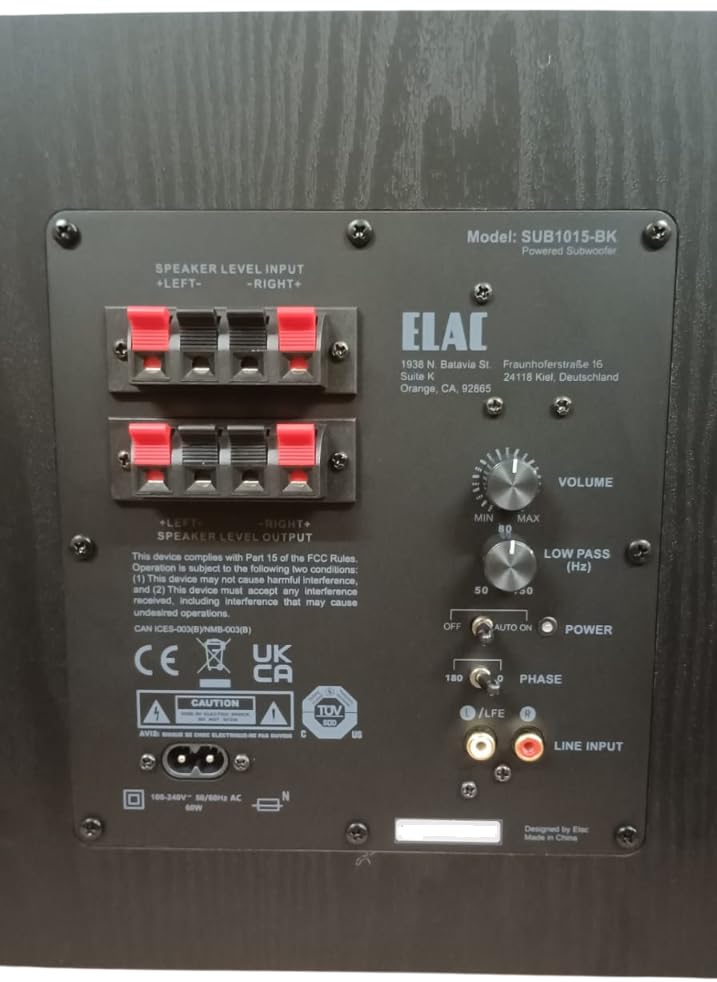
The SUB1015 offers both RCA line-level and speaker-level inputs for compatibility with various audio systems.
RCA Line-Level Input (Recommended)
Jika penerima AV atau pra-amplifier has a dedicated subwoofer output (often labeled LFE, Sub Out, or Pre-Out Sub), use an RCA cable to connect this output to the LINE INPUT (LFE) on the subwoofer's rear panel. This method typically provides the best performance and control.
Input Tahap Pembesar suara
Jika penerima anda atau amplifier does not have a dedicated subwoofer output, you can connect the subwoofer using the speaker-level inputs. Connect the speaker outputs from your amplebih hidup ke INPUT PERINGKAT SPEAKER terminals on the subwoofer. Ensure correct polarity (positive to positive, negative to negative). You can then connect your main speakers to the OUTPUT TAHAP SPEAKER terminals on the subwoofer, or directly to your amplifier if your main speakers are full-range.
3.3 Sambungan Kuasa
Once all audio connections are made, connect the supplied AC power cord to the subwoofer's power inlet and then to a suitable wall outlet. The subwoofer is designed for 230 Volts input.
4. Arahan Operasi
After connecting your subwoofer, use the controls on the rear panel to fine-tune its performance.
4.1 Kawalan Ke Atasview
- JILID: Melaraskan tahap output keseluruhan subwoofer. Mulakan dengan tetapan rendah dan tingkatkan secara beransur-ansur sehingga bes sebati dengan pembesar suara utama anda.
- LOW PASS (Hz): Controls the upper frequency limit of the subwoofer. This setting determines where the subwoofer takes over from your main speakers. A common starting point is 80 Hz, but adjust based on your main speakers' low-frequency capabilities.
- KUASA: Suis ini mempunyai tiga kedudukan:
- MATI: Turns the subwoofer off.
- ON: Keeps the subwoofer continuously on.
- AUTO: The subwoofer will automatically turn on when an audio signal is detected and enter standby mode after a period of inactivity. This mode consumes less than 0.5W in standby.
- FASA: Adjusts the phase of the subwoofer's output relative to your main speakers. Set to 0° or 180°. Experiment with both settings to find which provides the most coherent and impactful bass in your listening position.
5. Penyelesaian masalah
If you encounter issues with your Elac SUB1015 subwoofer, refer to the following common problems and solutions:
- Tiada Bunyi:
- Ensure the power cord is securely connected and the subwoofer is plugged into a live outlet.
- Semak KUASA switch position. If set to AUTO, ensure an audio signal is present.
- Verify all audio cables (RCA or speaker-level) are correctly and securely connected.
- Tingkatkan JILID control on the subwoofer.
- Check your receiver/amplifier settings to ensure the subwoofer output is enabled and volume is not muted.
- Weak or Distorted Bass:
- Laraskan JILID control on the subwoofer.
- Laraskan LOW PASS (Hz) control. If set too low, you might not hear enough bass.
- Eksperimen dengan PHASE switch (0° or 180°) to see if it improves bass integration.
- Check subwoofer placement. Moving it to a different location, especially closer to a wall or corner, might improve bass response.
- Ensure speaker wires are connected with correct polarity (+ to +, - to -).
- Bunyi berdengung atau berdengung:
- Cuba pasangkan subwoofer ke soket elektrik yang berbeza.
- Ensure all audio cables are properly shielded and not running parallel to power cables.
- If using RCA connections, try a different RCA cable.
- Disconnect all audio inputs from the subwoofer. If the hum disappears, the issue is likely with the source equipment or cabling.
6. Spesifikasi
Detailed technical specifications for the Elac SUB1015 Powered Subwoofer:
| Ciri | Spesifikasi |
|---|---|
| Jenama | Elac |
| Nombor Model | SUB1015-BK |
| Jenis Pembesar Suara | Subwoofer berkuasa |
| Woofer Driver Diameter | 10 Inches (Polypropylene Cone) |
| AmpJenis yang lebih hidup | Kelas D |
| Pengendalian Kuasa (RMS/Peak) | 60W RMS / 120W Puncak |
| Respons Kekerapan | 36 Hz hingga 150 Hz |
| Teknologi Ketersambungan | RCA, Berwayar |
| Mod Keluaran Audio | Mono |
| Input Voltage | 230 Volt |
| Penggunaan Kuasa Siap Sedia Rendah | Kurang daripada 0.5W |
| Kemasan Kabinet | Abu Hitam |
| Dimensi Item (D x W x H) | 36.8D x 31W x 32.5H Sentimeter |
| Berat Barang | 9.8 Kilogram |
| Negara Asal | USA |
7. Penyelenggaraan
To maintain the appearance and performance of your subwoofer:
- Pembersihan: Gunakan kain lembut dan kering untuk mengelap kabinet. Elakkan daripada menggunakan pembersih yang melelas, lilin atau pelarut.
- penempatan: Jauhkan subwoofer daripada cahaya matahari langsung, sumber haba dan kelembapan berlebihan.
- Pengudaraan: Ensure the rear panel and any vents are not obstructed to allow for proper heat dissipation.
8. Produk Lebihview Video
Tonton video ini untuk visual seterusnyaview of the Elac SUB1015 Powered Subwoofer and its key features.
9. Waranti dan Sokongan
The Elac SUB1015 Powered Subwoofer comes with a Waranti pengilang 1 Tahun.
Maklumat Pengilang:
ELAC Americas Inc.
1938 N. Batavia St. Suite K
Jingga, CA 92865
Importer Contact Information (India):
Kripa Electronics (india) Pvt.Ltd
Gala No 4 5 6, Building No. C, Shreeram Complex,
Village Dapoda, Bhiwandi Thane-421032