
1. Pengenalan
The Daitsu Aral ADD-12XB Dehumidifier is designed to efficiently remove excess moisture from indoor environments, helping to prevent mold, mildew, and musty odors. This manual provides essential information for the safe and effective operation, maintenance, and troubleshooting of your dehumidifier. Please read it thoroughly before first use and retain it for future reference.
2. Arahan Keselamatan
Untuk memastikan operasi selamat, sentiasa patuhi langkah berjaga-jaga berikut:
- Pastikan bekalan kuasa sepadan dengan voltage dinyatakan pada label penarafan unit.
- Jangan kendalikan penyahlembap dengan kord kuasa atau palam yang rosak.
- Pastikan unit tegak semasa pengangkutan dan pengendalian.
- Maintain at least 20 cm (8 inches) of clearance around the unit for proper airflow.
- Jangan masukkan objek ke dalam saluran masuk atau keluar udara.
- Cabut plag unit sebelum membersihkan atau melakukan sebarang penyelenggaraan.
- Jangan gunakan dehumidifier di kawasan di mana gas atau cecair mudah terbakar disimpan.
- Perkakas ini tidak dimaksudkan untuk digunakan oleh orang (termasuk kanak-kanak) yang kurang keupayaan fizikal, deria atau mental, atau kurang pengalaman dan pengetahuan, melainkan mereka telah diberi pengawasan atau arahan mengenai penggunaan perkakas oleh orang yang bertanggungjawab untuk keselamatan mereka.
3. Produk Lebihview
Familiarize yourself with the main components of your Daitsu Aral ADD-12XB Dehumidifier.
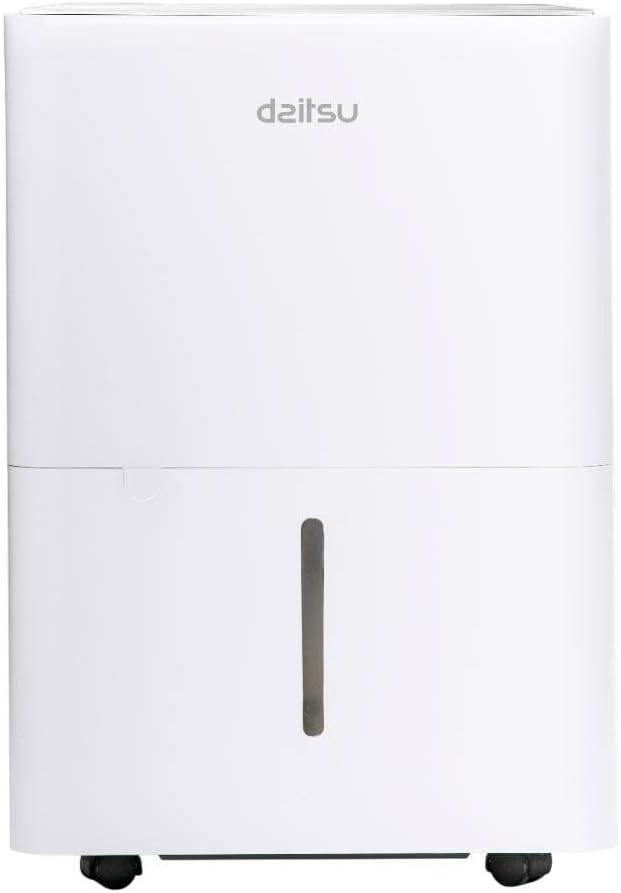
Rajah 1: Depan view of the Daitsu Aral ADD-12XB Dehumidifier. This image displays the front of the Daitsu Aral ADD-12XB Dehumidifier, featuring its clean white design and the visible water level indicator on the collection tank.

Rajah 2: belakang view of the Daitsu Aral ADD-12XB Dehumidifier. The rear view of the dehumidifier shows the removable air filter cover for maintenance and the continuous drainage outlet, typically used for connecting a hose for extended operation.

Rajah 3: Control panel of the Daitsu Aral ADD-12XB Dehumidifier. This close-up image shows the top control panel of the dehumidifier, featuring intuitive buttons for power, mode selection (Continuous, Dry, Turbo, Comfort), and timer settings, along with indicator lights.
4. Persediaan
4.1 Membongkar
- Keluarkan dehumidifier dengan berhati-hati daripada pembungkusnya.
- Tanggalkan semua bahan pembungkusan, termasuk sebarang pita atau filem pelindung.
- Periksa unit untuk sebarang tanda kerosakan. Jika rosak, jangan kendalikan dan hubungi khidmat pelanggan.
4.2 Penempatan
- Place the dehumidifier on a firm, level surface to minimize vibration and noise.
- Ensure there is at least 20 cm (8 inches) of clear space around the air inlet and outlet to allow for efficient airflow.
- Elakkan meletakkan unit berhampiran sumber haba atau di bawah cahaya matahari langsung.
- For optimal performance, place the unit in the center of the room where dehumidification is needed most.
4.3 Sambungan Kuasa
Pasangkan kord kuasa ke soket elektrik yang dibumikan. Pastikan soket memenuhi keperluan elektrik yang dinyatakan pada label penarafan unit.
5. Arahan Operasi
5.1 Fungsi Panel Kawalan
Rujuk Rajah 3 untuk susun atur panel kawalan.
- Butang Kuasa: Tekan untuk menghidupkan atau MATI unit.
- Butang Mod: Press to cycle through available operating modes:
- Cont. (Continuous): The unit operates continuously regardless of the ambient humidity level.
- kering: Designed for drying clothes or in very humid conditions.
- Turbo: Operates at maximum fan speed for rapid dehumidification.
- Keselesaan: Mengekalkan tahap kelembapan yang selesa secara automatik.
- Butang Pemasa: Press to set the auto-on or auto-off timer (e.g., 24-hour timer).
- Petunjuk Penuh Tangki: Illuminates when the water tank is full and needs to be emptied. The unit will automatically stop operating.
5.2 Mengosongkan Tangki Air
When the 'Tank Full' indicator lights up, the unit will stop operating. To empty the tank:
- Tarik keluar tangki air perlahan-lahan dari hadapan unit.
- Bawa tangki ke sinki atau longkang dengan berhati-hati.
- Tuangkan air yang terkumpul.
- Luncurkan tangki kosong kembali ke dalam unit sehingga ia berbunyi klik pada tempatnya. Unit akan menyambung semula operasi.
5.3 Saliran Berterusan (Pilihan)
Untuk operasi yang lebih lama tanpa perlu mengosongkan tangki air, anda boleh menyediakan saliran berterusan:
- Locate the continuous drainage outlet at the back of the unit (refer to Figure 2).
- Tanggalkan penyumbat getah dari saluran keluar.
- Connect a suitable drain hose (not included) to the outlet. Ensure the connection is secure to prevent leaks.
- Direct the other end of the hose to a floor drain or a large container, ensuring the hose is sloped downwards for gravity drainage.
- The unit will now drain water continuously, bypassing the internal water tank.
6. Penyelenggaraan
Penyelenggaraan tetap memastikan prestasi optimum dan memanjangkan jangka hayat penyahlembap anda.
6.1 Membersihkan Penapis Udara
Penapis udara hendaklah dibersihkan setiap dua minggu atau lebih kerap bergantung pada penggunaan dan kualiti udara.
- Matikan penyahlembap dan cabut plagnya dari salur keluar kuasa.
- Locate the air filter cover on the back of the unit (refer to Figure 2).
- Remove the filter cover and carefully pull out the air filter.
- Clean the filter using a vacuum cleaner to remove dust and debris. For heavy dirt, wash the filter with lukewarm water and a mild detergent.
- Bilas penapis dengan teliti dan biarkan ia kering sepenuhnya sebelum dipasang semula.
- Place the dry filter back into the unit and close the cover.
6.2 Membersihkan Tangki Air
Bersihkan tangki air dengan kerap untuk mengelakkan pertumbuhan acuan dan bakteria.
- Keluarkan dan kosongkan tangki air.
- Basuh tangki dengan air suam dan detergen ringan.
- Bilas dengan teliti dan keringkan sebelum memasukkannya semula ke dalam unit.
6.3 Pembersihan Luaran
Lap bahagian luar unit dengan lembut, damp kain. Jangan gunakan bahan kimia, bahan kasar atau pelarut yang keras, kerana ini boleh merosakkan permukaan.
6.4 Penyimpanan
Jika unit tidak akan digunakan untuk tempoh lanjutan:
- Empty and clean the water tank and air filter.
- Cabut plag unit dan lilitkan kord kuasa dengan kemas.
- Tutup unit dengan beg plastik atau kain untuk melindunginya daripada habuk.
- Simpan penyahlembap dalam kedudukan tegak di tempat yang sejuk dan kering.
7. Penyelesaian masalah
Sebelum menghubungi sokongan pelanggan, sila rujuk isu dan penyelesaian biasa berikut:
| Masalah | Kemungkinan Punca | Penyelesaian |
|---|---|---|
| Unit tidak dihidupkan | Tiada bekalan kuasa Kord kuasa tidak disambungkan dengan betul Tangki air penuh | Periksa salur keluar kuasa Pastikan kord kuasa dipasang dengan selamat Kosongkan tangki air |
| Tiada air yang dikumpulkan | Kelembapan bilik terlalu rendah Penapis udara tersumbat Suhu terlalu rendah Unit in continuous drainage mode | Dehumidification may not be needed Bersihkan penapis udara Unit may not operate efficiently below 5°C (41°F) Check if continuous drainage hose is connected and draining |
| Unit bising | Unit bukan pada permukaan yang rata Penapis udara tersumbat | Letakkan unit pada permukaan yang rata dan stabil Bersihkan penapis udara |
| Penyahlembapan yang lemah | Pintu/tingkap terbuka Penapis udara tersumbat Saiz bilik terlalu besar | Tutup semua pintu dan tingkap Bersihkan penapis udara Ensure unit capacity matches room size |
8. Spesifikasi
Technical specifications for the Daitsu Aral ADD-12XB Dehumidifier:
| Ciri | Spesifikasi |
|---|---|
| Nama Model | TAMBAH-12XB |
| Jenama | Daitsu |
| Kapasiti Dehumidifikasi | 12 Liters/day (at specified conditions) |
| Isipadu Tangki Air | 1.5 Liter |
| Dimensi (H x W x D) | 38.6 x 28 x 19.5 cm (lebih kurang 15.2 x 11 x 7.7 inci) |
| Berat Produk | 23.5 kg (kira-kira 51.8 paun) |
| Voltage | 230 Volt |
| kuasa | 2.5 kW (This value seems unusually high for a dehumidifier, typically it would be in Watts, e.g., 250W. Please verify with product label if possible.) |
| Tahap Kebisingan | 54 Desibel |
| Ciri Khas | Automatic Shut-off, Continuous Drainage, Timer |
| warna | putih |
Note: Specifications are subject to change without notice. Please refer to the product label for the most accurate information.
9. Waranti dan Sokongan
9.1 Maklumat Waranti
This Daitsu product is covered by a manufacturer's warranty. The warranty period and terms may vary by region. Please retain your proof of purchase for warranty claims. For specific warranty details, refer to the warranty card included with your product or contact Daitsu customer service.
9.2 Sokongan Pelanggan
If you encounter any issues not covered in the troubleshooting section or require further assistance, please contact Daitsu customer support. Contact information can typically be found on the official Daitsu webtapak atau pada pembungkusan produk.