
1. Pengenalan
This manual provides essential information for setting up, operating, and maintaining your AITRIP Nano V3.0 microcontroller board. The Nano V3.0 is a compact, breadboard-friendly development board based on the ATmega328P microcontroller, featuring a CH340 USB-to-serial converter and a Type-C USB connector. It is designed for various electronics projects and is compatible with the Arduino IDE.
2. Kandungan Pakej
Sahkan bahawa semua item yang disenaraikan di bawah disertakan dalam pakej anda:
- 3 x AITRIP Nano V3.0 Microcontroller Boards (ATmega328P, CH340, Type-C USB)
- 1 x Kabel USB Jenis-C
- Pin headers (typically included for soldering)

Image: Contents of the AITRIP Nano V3.0 package, showing three Nano boards, a Type-C USB cable, and pin headers.
3. Susun Atur dan Komponen Papan
Familiarize yourself with the key components and pinout of the AITRIP Nano V3.0 board.

Image: Detailed diagram illustrating the various components and pin functions on the AITRIP Nano V3.0 board, including digital pins, analog pins, power pins, Type-C USB, ATmega328P, reset button, and LEDs.
- Mikropengawal ATmega328P: The main processing unit.
- CH340 USB-to-Serial Chip: Facilitates communication between the board and your computer via USB.
- Type-C USB Connector: For power and data communication.
- Digital I/O Pins (D0-D13): 14 pins for digital input/output, 6 of which support PWM (Pulse Width Modulation).
- Analog Input Pins (A0-A7): 8 pins for analog input.
- Pin Kuasa: 5V, 3.3V, GND (Ground), VIN (External Voltage Input).
- Butang Tetapkan Semula: Menetapkan semula mikropengawal.
- TX/RX LEDs: Indicate data transmission and reception.
- LED kuasa: Indicates the board is powered on.
4. Spesifikasi
Key technical specifications of the AITRIP Nano V3.0 board:
| Ciri | Spesifikasi |
|---|---|
| Pengawal mikro | ATMega328P |
| USB to Serial Chip | CH340 |
| Vol Operasitage | 5V |
| Input Voltage (Disyorkan) | 7-12V |
| Input Voltage (Limit) | 6-20V |
| Pin I/O Digital | 14 (6 provide PWM output) |
| Pin Input Analog | 8 |
| Arus DC setiap Pin I / O | 40 mA |
| Memori Kilat | 32 KB (ATmega328P), 2 KB used by bootloader |
| SRAM | 2 KB (ATmega328P) |
| EEPROM | 1 KB (ATmega328P) |
| Kelajuan Jam | 16 MHz |
| Dimensi | 43 mm x 18 mm (1.69 inci x 0.70 inci) |
| Penyambung USB | Jenis-C |

Image: AITRIP Nano V3.0 board showing its dimensions (43mm x 18mm) and the included Type-C USB cable with its length (22cm).
5. Panduan Persediaan
Follow these steps to prepare your AITRIP Nano V3.0 board for use with the Arduino IDE.
5.1. Driver Installation (CH340)
The AITRIP Nano V3.0 uses the CH340 chip for USB-to-serial communication. You may need to install specific drivers for your operating system if they are not automatically recognized.
- Download CH340 Driver: Search online for "CH340 driver" for your operating system (Windows, macOS, Linux). Reputable sources include the manufacturer's website or Arduino community forums.
- Pasang Pemacu: Follow the installation instructions provided with the driver package. On Windows, this usually involves running an executable. On macOS, it might involve installing a
.pkgfile and potentially restarting your computer. - Sahkan Pemasangan: After installation, connect the Nano board to your computer using the provided Type-C USB cable. Open your computer's Device Manager (Windows) or System Information (macOS) and look for a new COM port (Windows) or USB serial device (macOS).
5.2. Persediaan IDE Arduino
To program your Nano V3.0 board, configure the Arduino IDE as follows:
- Pasang Arduino IDE: If you haven't already, download and install the Arduino IDE from the official Arduino webtapak (www.arduino.cc/en/software).
- Connect Board: Connect your AITRIP Nano V3.0 board to your computer using the Type-C USB cable.
- Pilih Papan: Dalam IDE Arduino, pergi ke Alatan > Papan dan pilih "Arduino Nano".
- Select Processor: This is a critical step for many clone boards. Go to Tools > Processor dan pilih "ATmega328P (Old Bootloader)". If this option is not available or if you encounter upload errors, try "ATmega328P".
- Pilih Port: Pergi ke Alatan > Pelabuhan and select the COM port (Windows) or
/dev/cu.usbserial-XXXX(macOS/Linux) corresponding to your connected Nano board.
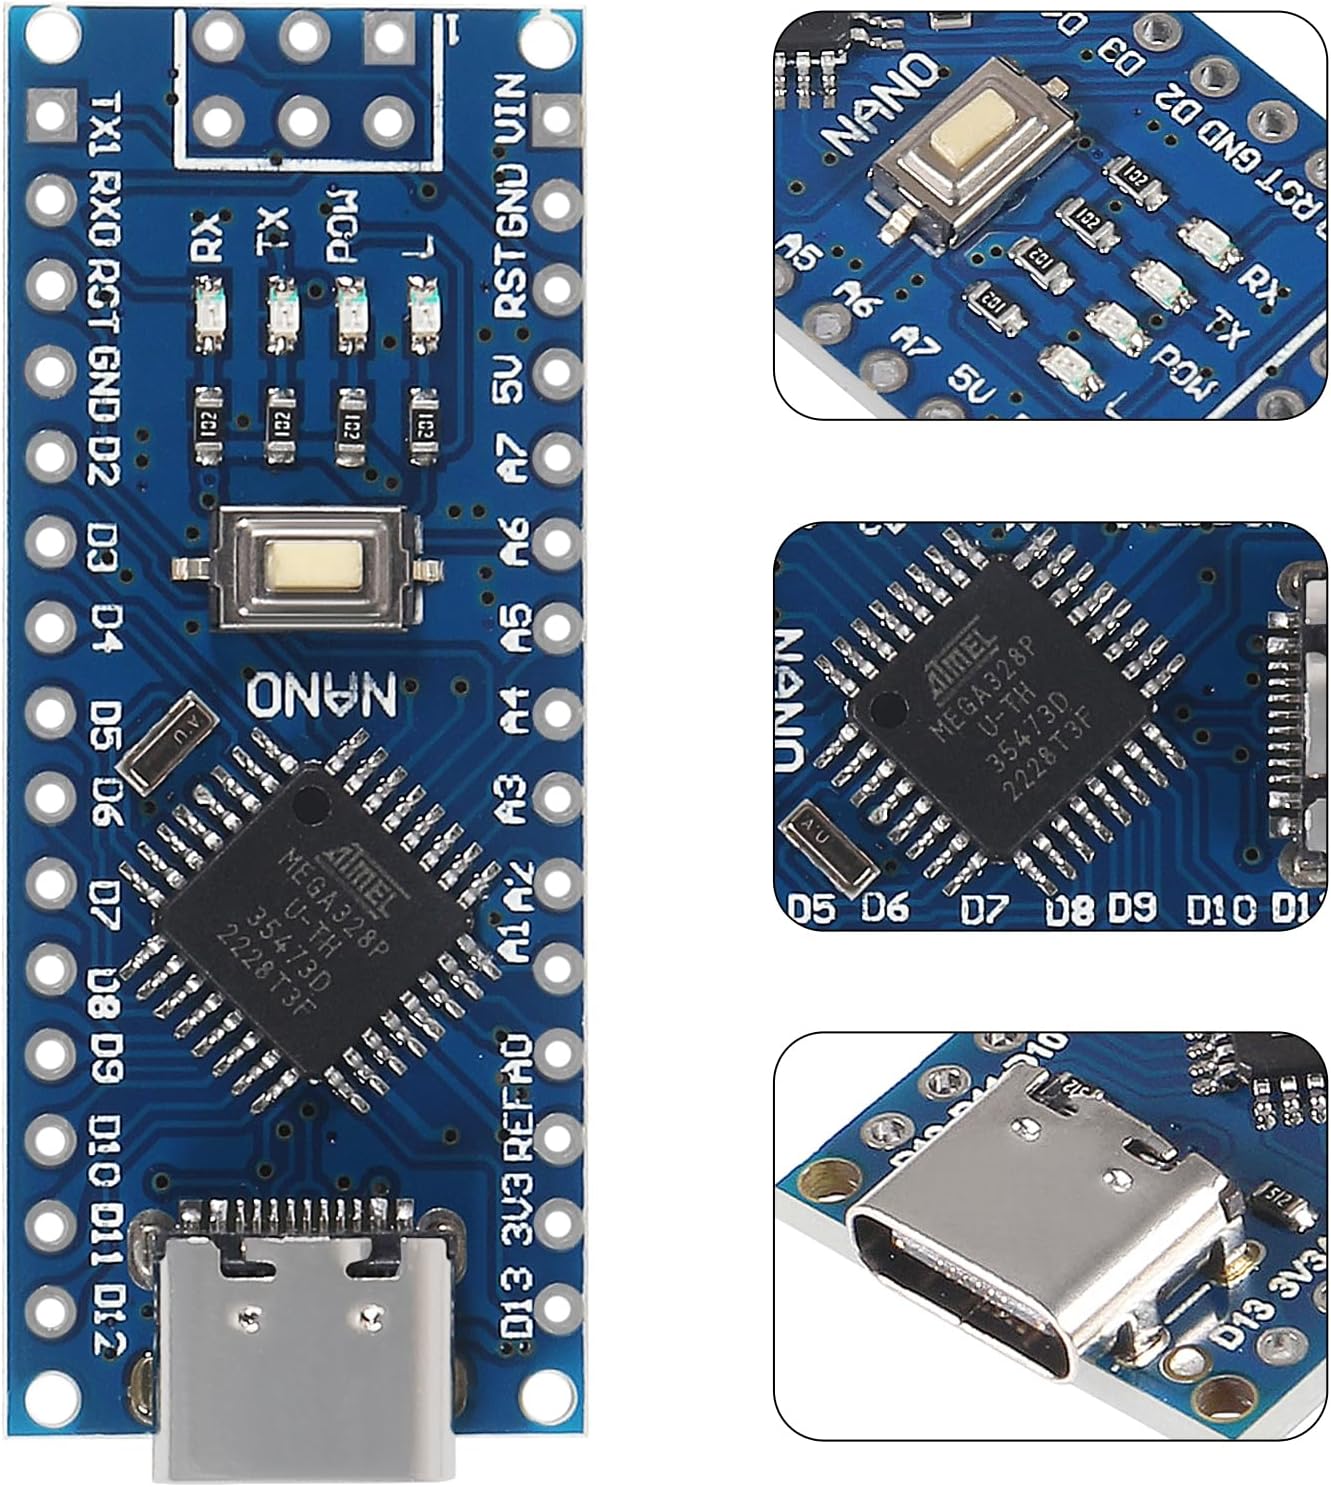
Imej: Jarak dekat view of the AITRIP Nano V3.0 board, highlighting the ATmega328P microcontroller and the CH340 USB-to-serial chip.
6. Arahan Operasi
Once your AITRIP Nano V3.0 board is set up, you can begin programming and using it in your projects.
6.1. Memberi Kuasa kepada Lembaga
The Nano V3.0 offers several power options:
- Sambungan USB-C: Connect the board to your computer via the Type-C USB cable. This provides 5V power and enables data communication.
- External Unregulated Power Supply (VIN pin): Provide 6-12V DC to the VIN pin. The onboard voltage regulator will convert this to 5V for the microcontroller.
- External Regulated 5V Power Supply: Provide a regulated 5V DC to the 5V pin.
The board automatically senses and switches to the higher potential power source, eliminating the need for a manual power selection jumper.
6.2. Uploading Sketches
To upload your code (sketch) to the Nano V3.0:
- Write or open a sketch in the Arduino IDE.
- Ensure the correct board (Arduino Nano), processor (ATmega328P (Old Bootloader)), and port are selected under the Alatan menu.
- Klik pada Muat naik button (right arrow icon) in the Arduino IDE. The TX/RX LEDs on the board will blink during the upload process.
- Upon successful upload, the IDE will display "Done uploading."
7. Penyelenggaraan
The AITRIP Nano V3.0 board requires minimal maintenance to ensure longevity.
- Storan: Store the board in an anti-static bag or container when not in use to protect it from electrostatic discharge.
- Pembersihan: If necessary, gently clean the board with a soft, dry brush or compressed air to remove dust. Avoid using liquids.
- Pengendalian: Handle the board by its edges to avoid touching components, especially the pins, which can be sensitive to static electricity.
- Bekalan Kuasa: Always ensure your power supply voltage is within the recommended limits (7-12V for VIN, 5V for 5V pin) to prevent damage.
8. Penyelesaian masalah
Here are solutions to common issues you might encounter with your AITRIP Nano V3.0 board.
8.1. Board Not Recognized by Computer
- CH340 Driver: Ensure the CH340 driver is correctly installed for your operating system. Refer to Section 5.1.
- Wayar USB: Try a different Type-C USB cable. Some cables are for charging only and do not support data transfer.
- Port USB: Cuba sambungkan ke port USB lain pada komputer anda.
8.2. Upload Errors (e.g., "avrdude: stk500_getsync(): not in sync")
- Processor Selection: The most common issue. Go to Tools > Processor dan memastikan "ATmega328P (Old Bootloader)" is selected. If this option is not present, ensure you have the correct board package installed in the Arduino IDE.
- Pemilihan Pelabuhan: Verify that the correct COM port is selected under Alatan > Pelabuhan.
- Board Selection: sahkan "Arduino Nano" dipilih di bawah Alatan > Papan.
- Butang Tetapkan Semula: Sometimes pressing the reset button on the Nano board just before or during the upload process can help.
8.3. Board Not Powering On
- Sumber Kuasa: Check your USB cable or external power supply. Ensure the power source is providing adequate voltage dan semasa.
- LED kuasa: If the power LED does not light up, there might be an issue with the power input or the board itself.
9. Waranti dan Sokongan
Specific warranty details and official support contact information for the AITRIP Nano V3.0 board are not provided in the product information. For any issues or inquiries, please refer to the retailer or vendor from whom the product was purchased.