1. Maklumat Keselamatan Penting
To ensure safe operation and prevent damage to the projector, observe the following precautions:
- Bekalan Kuasa: Use only the power cord and adapter specified for this projector. Ensure the power outlet matches the projector's voltage keperluan.
- Pengudaraan: Jangan halang bukaan pengudaraan. Pastikan ruang yang mencukupi di sekeliling projektor untuk aliran udara yang betul bagi mengelakkan terlalu panas.
- Cecair dan Kelembapan: Keep the projector away from water or other liquids. Do not operate in high humidity environments.
- Objek Asing: Do not insert any objects into the projector's openings.
- Lens Warning: Jangan lihat terus ke dalam kanta projektor apabila lamp sedang dihidupkan, kerana cahaya terang boleh menyebabkan kerosakan mata.
- Pembersihan: Putuskan kord kuasa sebelum membersihkan. Gunakan kain lembut dan kering. Elakkan pembersih cecair atau aerosol.
- Perkhidmatan: Jangan cuba menservis projektor sendiri. Rujuk semua servis kepada kakitangan servis yang berkelayakan.
2. Produk Lebihview
Familiarize yourself with the various parts and controls of your Casio XJ-A155V projector.
2.1 Depan View

The front of the projector features the projection lens and front ventilation grilles. The lens is where the image is projected from.
2.2 Belakang View dan Ketersambungan

The rear panel provides all the necessary ports for connecting external devices.

Ports include:
- DARI: For composite video and audio input.
- COMPUTER/YCbCr/YPbPr: VGA port for computer connection, also supports component video.
- HDMI: High-Definition Multimedia Interface for digital video and audio input.
- USB: Untuk menyambungkan peranti USB.
- SIRI: For control and service connections.
2.3 Kawalan Panel Atas

The top panel houses the main control buttons for operating the projector.
- KUASA/SEDIA: Menghidupkan atau mematikan projektor.
- MASUKKAN: Selects the input source (HDMI, Computer, AV, etc.).
- AUTO: Automatically adjusts the image.
- ZOMAN: Melaraskan saiz imej.
- FOKUS: Melaraskan kejelasan imej.
- MENU: Membuka menu paparan pada skrin (OSD).
- MASUK: Mengesahkan pilihan dalam menu.
- ESC: Keluar dari menu atau fungsi semasa.
- Arrow Keys (< ^ v >): Navigasi melalui pilihan menu dan laraskan tetapan.
2.4 Bawah View dan Label Produk

The bottom of the projector includes adjustable feet for tilt and stability, along with the product information label.
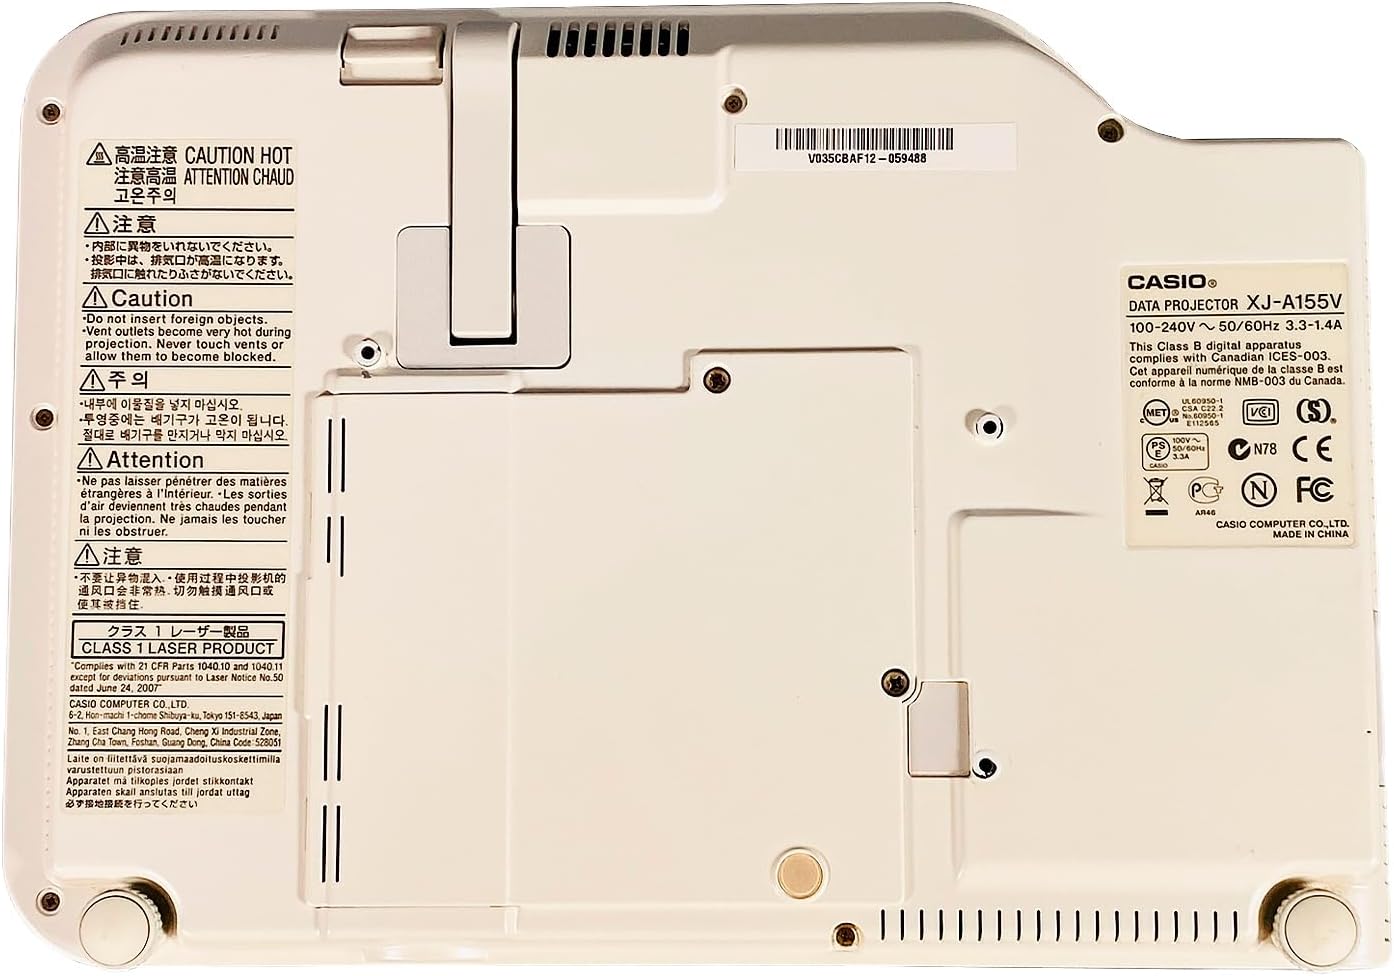
The product label provides important details such as the model number (XJ-A155V), power requirements (100-240V ~ 50/60Hz), and various compliance certifications.
3. Persediaan
3.1 Membongkar
Carefully remove the projector and all accessories from the packaging. Retain the packaging for future transport or storage.
3.2 Penempatan
Place the projector on a stable, level surface. Ensure there is sufficient space around the projector for ventilation. Adjust the projector's feet to achieve the desired projection angle and image alignment.
3.3 Kuasa Penyambung
- Sambungkan kabel kuasa ke port input kuasa projektor.
- Palamkan hujung kabel kuasa yang satu lagi ke salur keluar elektrik yang sesuai.
3.4 Menyambungkan Sumber Input
Connect your desired video and audio sources to the appropriate ports on the rear of the projector.
- HDMI: For high-quality digital video and audio from devices like Blu-ray players, laptops, or gaming consoles.
- COMPUTER (VGA): Untuk menyambung ke output VGA komputer.
- DARI: For standard definition video and stereo audio from devices like DVD players or older video sources.
- USB: For connecting USB storage devices or for certain control functions.
4. Mengendalikan Projektor
4.1 Hidupkan/Mati Kuasa
- Untuk Menghidupkan: Tekan ke KUASA/STANDBY button on the top panel or remote control. The power indicator light will illuminate.
- Untuk Mematikan: Tekan ke KUASA/STANDBY button again. Confirm power off if prompted. The projector will enter a cool-down cycle before fully shutting down.
4.2 Pemilihan Input
Tekan ke INPUT button on the top panel or remote control to cycle through available input sources (HDMI, Computer, AV, etc.) until your desired source is displayed.
4.3 Adjusting Focus and Zoom
- Fokus: Gunakan FOKUS buttons (or corresponding controls on the remote) to sharpen the image until it is clear.
- Zum: Gunakan ZOOM buttons (or corresponding controls on the remote) to adjust the size of the projected image.
4.4 Menu Navigasi
Tekan ke MENU button to open the On-Screen Display (OSD) menu. Use the arrow keys to navigate through options and MASUK untuk memilih. Tekan ESC untuk keluar dari menu.
4.5 Image Adjustments
Within the OSD menu, you can adjust various image settings such as Brightness, Contrast, Color, Aspect Ratio, and Keystone Correction to optimize your viewpengalaman dalam.
5. Penyelenggaraan
5.1 Membersihkan Projektor
- Kanta: Lap kanta dengan lembut menggunakan kain lembut dan tidak berbulu yang direka khas untuk permukaan optik. Jangan gunakan pembersih yang kasar.
- Casing: Lap projektor casing with a soft, dry cloth. For stubborn dirt, dampen the cloth slightly with water, then wipe dry.
- Gril Pengudaraan: Use a soft brush or a vacuum cleaner with a brush attachment to remove dust from the ventilation grilles.
5.2 Penyelenggaraan Penapis Udara
Regularly check and clean the air filter (if accessible) to maintain optimal cooling and projector performance. Refer to the on-screen prompts or specific model documentation for filter location and cleaning instructions.
6. Penyelesaian masalah
Jika anda menghadapi masalah dengan projektor anda, rujuk kepada masalah dan penyelesaian biasa berikut:
- Tiada gambar:
- Pastikan projektor dihidupkan dan penunjuk kuasa menyala.
- Verify the input source is correctly selected and the source device is on.
- Check all cable connections (HDMI, VGA, etc.) are secure.
- Imej Kabur:
- Laraskan fokus menggunakan FOKUS butang.
- Pastikan permukaan projektor rata dan projektor berada pada jarak yang sesuai.
- Tiada Bunyi:
- Periksa tetapan kelantangan pada kedua-dua projektor dan peranti sumber.
- Pastikan kabel audio disambungkan dengan betul (jika tidak menggunakan HDMI untuk audio).
- Alat Kawalan Jauh Tidak Berfungsi:
- Gantikan bateri dalam alat kawalan jauh.
- Pastikan tiada halangan antara alat kawalan jauh dan penerima IR projektor.
7. Spesifikasi
Key technical specifications for the Casio XJ-A155V DLP Projector:
| Ciri | Spesifikasi |
|---|---|
| Jenama | Casio |
| Model | XJ-A155V |
| Kecerahan | 3,000 ANSI Lumen |
| Resolusi | 1024x768 (XGA) |
| Nisbah Kontras | 1800:1 |
| Jenis Paparan | DLP |
| Sumber Cahaya | Hibrid Laser/LED |
| Teknologi Ketersambungan | HDMI, USB, VGA, AV, Serial |
| Ciri Khas | Mudah alih |
| Dimensi Produk | 8 x 11.7 x 1.7 inci |
8. Waranti dan Sokongan
Untuk maklumat jaminan dan sokongan teknikal, sila rujuk dokumentasi yang disediakan bersama pembelian anda atau hubungi peruncit. Simpan bukti pembelian anda untuk tuntutan jaminan.


