
1. Produk Lebihview
The OBEST TPMS (Tire Pressure Monitoring System) is designed to monitor the tire pressure and temperature of your motorcycle in real-time. This system enhances riding safety by providing immediate alerts for abnormal tire conditions. It features a digital LCD display, two external sensors, and a durable, waterproof design.
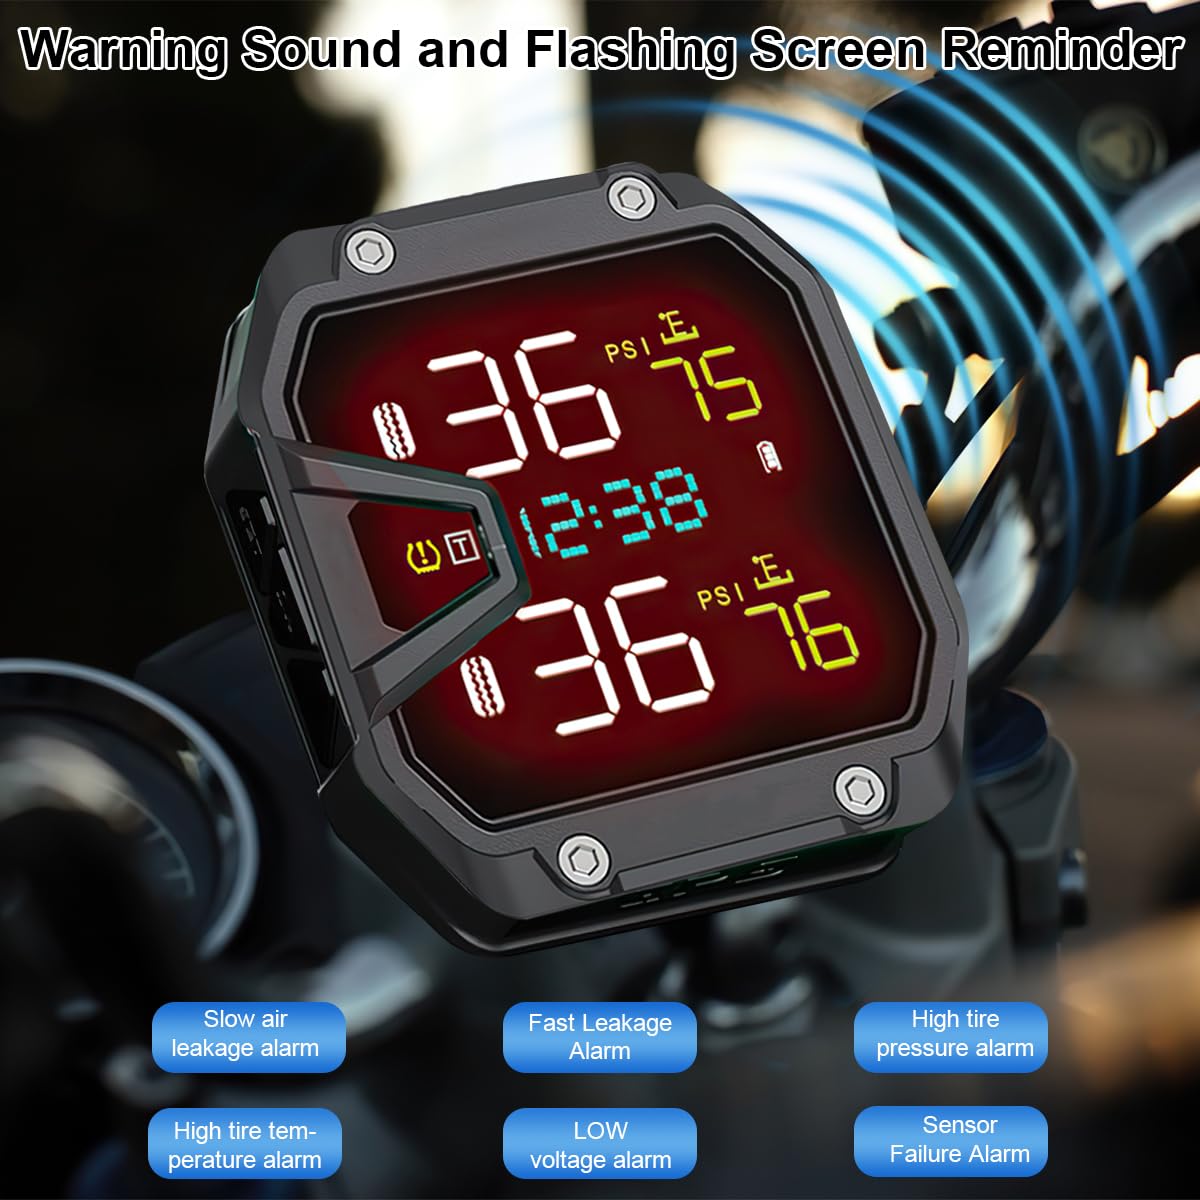
Image 1.1: OBEST TPMS display unit and external sensors.
2. Kandungan Pakej
Sila semak pakej untuk item berikut:
- 1 x TPMS Display Unit
- 2 x Penderia Tekanan Tayar Luaran
- 1 x Pendakap Pemasangan untuk Hendal
- 1 x Kabel Pengecas USB (1.5m)
- 1 x Sensor Installation Tool Kit (wrench, anti-disassembly rings)
- 1 x Manual Pengguna
3. Spesifikasi
| Ciri | Spesifikasi |
|---|---|
| Nombor Model | PIK32041 |
| Pengeluar | OBEST |
| Display Dimensions (L x W x H) | 5.2 x 2.6 x 5.8 cm |
| Berat badan | 211 Gram |
| bahan | plastik |
| warna | Hitam |
| Mengecas | USB (1.5m cable included) |
| Jenis Sensor | External, Schrader valve compatible |
| Penilaian Kalis Air | IP65 |
| Pressure Monitoring Accuracy | ±0.1 Bar |
| Temperature Monitoring Accuracy | ±2°C |
| Kekerapan Kemas Kini Data | Setiap 3 saat |

Image 3.1: Product dimensions and Type-C port detail.

Image 3.2: System accuracy specifications.
4. Arahan Persediaan
4.1 Memasang Unit Paparan
- Attach the handlebar mounting bracket to your motorcycle's handlebar using the provided screws and tools. Ensure it is securely fastened and positioned for optimal viewing.
- Slide the TPMS display unit onto the bracket until it clicks into place.
- Connect the 1.5m USB charging cable to the display unit's Type-C port and route it to a 12V USB power source on your motorcycle.

Image 4.1: Display unit mounted on a handlebar with the USB cable connected.
4.2 Installing the External Sensors
The sensors are labeled for front (F) and rear (R) tires. Install them accordingly.
- Tanggalkan penutup injap asal dari batang injap tayar.
- Screw on the anti-disassembly ring (if included) onto the valve stem first, but do not tighten it yet.
- Screw the corresponding external sensor (F for front, R for rear) onto the tire valve stem until it is hand-tight.
- Use the provided wrench to tighten the anti-disassembly ring counter-clockwise against the sensor to secure it and prevent theft.
- Adjust the angle of the sensor if necessary.

Image 4.2: Sensor installation steps.
5. Arahan Operasi
5.1 Fungsi Paparan
The LCD display provides real-time information about your motorcycle's tires:
- Front Tire Pressure: Displays the current pressure of the front tire.
- Front Tire Temperature: Displays the current temperature of the front tire.
- Rear Tire Pressure: Displays the current pressure of the rear tire.
- Rear Tire Temperature: Displays the current temperature of the rear tire.
- Masa/Jilidtage Paparan: Shows the current time or system voltage.

Image 5.1: Real-time monitoring display with labeled indicators.
Sistem Penggera 5.2
The system provides visual and audible warnings for various tire conditions:
- Slow Air Leakage Alarm: Alerts when a gradual pressure drop is detected.
- Fast Leakage Alarm: Alerts for a rapid loss of tire pressure.
- Penggera Tekanan Tayar Tinggi: Warns if tire pressure exceeds a safe limit.
- High Tire Temperature Alarm: Indicates if tire temperature becomes excessively high.
- Vol. Rendahtage Penggera: Alerts if the system's power supply voltage adalah rendah.
- Sensor Failure Alarm: Indicates a malfunction or loss of signal from a sensor.

Image 5.2: Warning indicators and alarm types.
5.3 Setting Parameters (e.g., Pressure Units, Alarm Thresholds)
Refer to the detailed instructions in the included printed manual for how to access and adjust system settings such as pressure units (PSI/BAR), temperature units (°C/°F), and custom alarm thresholds for high/low pressure and temperature. Typically, this involves pressing and holding specific buttons on the display unit.
6. Penyelenggaraan
6.1 Penggantian Bateri Sensor
The external sensors use replaceable button cell batteries. When a sensor's battery is low, the display unit will typically show a low battery indicator for that specific sensor.
- Remove the anti-disassembly ring and unscrew the sensor from the tire valve stem.
- Use the provided wrench tool to carefully unscrew the sensor housing.
- Keluarkan bateri lama dan masukkan yang baharu, memastikan kekutuban yang betul.
- Screw the sensor housing back on tightly to maintain its waterproof seal.
- Reinstall the sensor onto the tire valve stem and secure it with the anti-disassembly ring.

Image 6.1: Sensor battery replacement steps.
6.2 Pembersihan
Lap unit paparan dan penderia dengan lembut, damp cloth. Do not use abrasive cleaners or solvents, as these can damage the unit's surface or internal components. Ensure the USB port cover is securely closed to maintain waterproofing.

Image 6.2: The TPMS unit is IP65 waterproof and dustproof.
7. Penyelesaian masalah
- Paparan tidak dihidupkan:
Ensure the USB cable is securely connected to both the display unit and a powered 12V USB source. Check the motorcycle's power supply. - No sensor data / Sensor failure alarm:
Verify that the sensors are correctly installed on the valve stems. Check if the sensor batteries need replacement (refer to Section 6.1). Ensure the sensors are within range of the display unit. Re-pair sensors if necessary (refer to the full manual for pairing instructions). - Bacaan tidak tepat:
Ensure tires are at ambient temperature before checking pressure. Calibrate the system if an option is available (refer to the full manual). Verify sensors are installed on the correct tires (front/rear). - Display not waterproof:
Ensure the USB port cover is fully sealed. Avoid submerging the unit; IP65 rating protects against water jets and dust, not full immersion.
8. Waranti dan Sokongan
Warranty information for the OBEST TPMS Motorcycle Tire Pressure Monitoring System is typically provided with your purchase documentation or by the seller. Please retain your proof of purchase for any warranty claims. For technical support or further assistance, contact the seller or manufacturer directly.