
1. Pengenalan
The MECCANIXITY MPPT Solar Charge Controller is designed to optimize the energy utilization efficiency of photovoltaic systems. It features a built-in maximum power tracking program to ensure your solar panels operate at their peak output point. This intelligent regulator is suitable for 12V/24V auto-adaptive systems and includes an LCD display for monitoring and configuration, along with dual USB ports for convenience.
2. Maklumat Keselamatan
- Pastikan bateri mempunyai volum yang mencukupitage for the controller to recognize the correct battery type during first use.
- Only use photovoltaic panels as a charging source. Do not connect DC or other power sources.
- Always connect the battery to the charge controller first, then connect the solar panel. When disconnecting, disconnect the solar panel first, then the battery.
- Ensure all wiring connections are secure and properly insulated to prevent short circuits or damage to equipment.
- Avoid touching bare wires. If necessary, use electrical tape to cover exposed wire ends.
3. Produk Lebihview

Rajah 3.1: Depan view of the MECCANIXITY MPPT Solar Charge Controller 100A, showing the LCD display, control buttons, and dual USB ports.

Rajah 3.2: Terperinci view of the controller's features, including the LCD display, Menu, Page Up, Page Down/Manual buttons, and 2 USB ports.
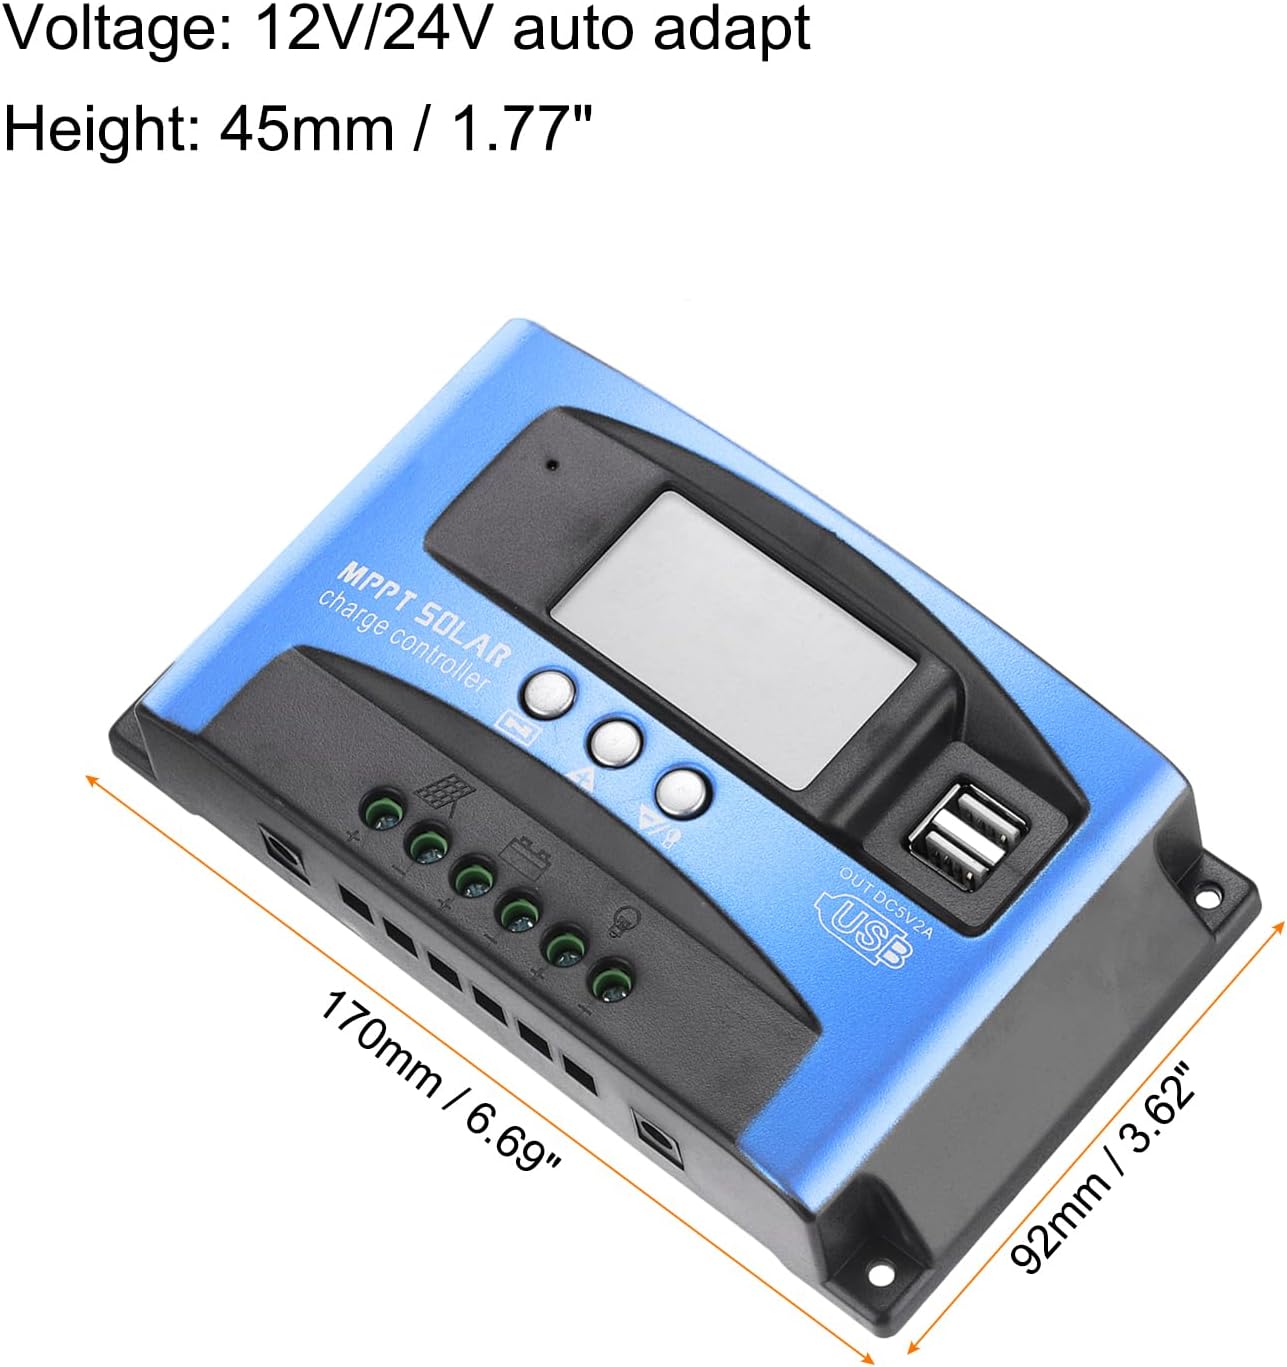
Figure 3.3: Dimensions of the MECCANIXITY MPPT Solar Charge Controller 100A, measuring 170mm (6.69") in length, 92mm (3.62") in width, and 45mm (1.77") in height.
Ciri-ciri Utama:
- Teknologi MPPT: Maximizes energy harvest from solar panels.
- Paparan LCD: Provides real-time status and data, allowing for easy mode switching and parameter configuration.
- Pelabuhan Dual USB: 5V/2A Max output for charging external devices.
- Vol. Automatiktage Adaptation: Supports 12V/24V systems.
- Perlindungan Komprehensif: Termasuk vol-overtage, short circuit, overload, over-charge, and over-discharge protection.
4. Persediaan dan Pemasangan
Rajah Pendawaian:

Figure 4.1: Wiring diagram illustrating connections for solar panel, battery, load, and inverter.
Langkah Pemasangan:
- Sambungkan Bateri: Connect the battery to the charge regulator's positive and negative terminals first. Ensure correct polarity.
- Sambungkan Panel Suria: Connect the photovoltaic module (solar panel) to the charge regulator's positive and negative terminals.
- Sambungkan Beban: Connect the consumer (load) to the charge regulator's positive and negative terminals.
Important: Always connect the battery first and disconnect the solar panel first to prevent damage to the controller.
Video Pemasangan:
Video 4.1: This video demonstrates the proper installation sequence for the solar charge controller, emphasizing the importance of connecting the battery before the solar panel and disconnecting the solar panel first. It shows how to secure wiring and check connections.
5. Arahan Operasi
LCD Display and Button Functions:
The LCD display provides real-time information about your solar system. The control buttons (Menu, Page Up, Page Down/Manual) allow you to navigate through different screens and adjust parameters.
- Paparan Utama: Shows current battery voltage dan status pengecasan.
- Apungan Voltage: Memaparkan voltage at which the battery is maintained after full charge (e.g., 13.7V for 12V systems).
- Lepaskan semula: Jilidtage at which the load will be reconnected after being disconnected due to low battery (e.g., 12.6V for 12V systems).
- Hentian Pelepasan: Jilidtage at which the load will be disconnected to protect the battery from over-discharge (e.g., 10.7V for 12V systems).
- Jenis Bateri: Allows selection of battery type (e.g., Sealed, Gel, Flooded).
- Mod Kerja: Configures load output modes (e.g., 24-hour output, dusk-to-dawn, timed output).
Press the 'Menu' button to cycle through different display interfaces. Use the 'Page Up' and 'Page Down/Manual' buttons to adjust settings when in configuration mode (typically by long-pressing the 'Menu' button to enter setting mode).
6. Penyelenggaraan
- Periksa semua sambungan pendawaian secara berkala untuk kesesakan dan kakisan.
- Pastikan pengawal bersih dan bebas daripada habuk dan serpihan untuk memastikan pelesapan haba yang betul.
- Pastikan pengudaraan yang mencukupi di sekitar pengawal.
- Monitor the LCD display for any error codes or unusual readings.
7. Penyelesaian masalah
Isu dan Penyelesaian Biasa:
- Tiada Paparan/Tiada Kuasa: Semak sambungan bateri dan voltage. Ensure the battery has sufficient charge.
- Bateri Tidak Dicas: Verify solar panel connections and ensure adequate sunlight. Check for shading on solar panels. Confirm correct battery type setting.
- Beban Tidak Berfungsi: Check load connections. Ensure the battery voltage is above the discharge reconnect voltage. Verify load work mode settings.
- Lebih-voltage/Perlindungan Arus Lebih: The controller will automatically disconnect to protect the system. Identify the cause (e.g., too many solar panels, incorrect battery voltage) and rectify it before restarting.

Figure 7.1: The controller features a 7-point security protection system, including short circuit, open circuit, over current, over charge, over voltage, over load, and over discharge protection.
8. Spesifikasi
| Parameter | Nilai |
|---|---|
| Voltage | 12V/24V Auto Adapt |
| Nilai Pengecasan Semasa | 100A |
| Arus Pelepasan | 30A |
| Saiz | 170*92*45 mm (6.69 x 3.62 x 1.77 inches) |
| Suhu Operasi | -35-80℃ / -31°F-176°F |
| Caj Apungan Voltage (12V/24V) | 13.8V / 27.6V |
| Output USB | 5V / 2A Maks |
| Berat Barang | 10.1 auns |
9. Waranti dan Sokongan
For warranty information and technical support, please refer to the product packaging or contact MECCANIXITY customer service directly. Keep your purchase receipt for warranty claims.


