
pengenalan
The ROBOTIME LGX02 is a comprehensive 3-in-1 wooden marble run kit that combines three distinct modules: the LGA01 Night City, the LGC01 Marble Spaceport, and the LG01 Link Pack. This kit allows you to construct two separate, intricate marble runs and then connect them using the Link Pack to form a larger, integrated mechanical system. The completed model features both manual hand-crank operation and an electric mode with illuminated tracks, offering an engaging building and display experience.

Maklumat Keselamatan
WARNING: CHOKING HAZARD - SMALL PARTS. NOT FOR CHILDREN UNDER 3 YEARS.
This product contains small components that may pose a choking hazard. Keep all parts out of reach of young children. Adult supervision is recommended during assembly and operation, especially for users under the age of 14.
Apa yang Termasuk
Your ROBOTIME LGX02 kit includes the following main components:
- Pre-cut wooden sheets for LGA01 Night City, LGC01 Marble Spaceport, and LG01 Link Pack.
- LED Strip Light for illumination.
- Electric Motor for automated operation.
- Wax Block for lubricating moving parts.
- Detailed graphic instructions for each module.
- Steel marbles.
Note: A compatible Type-C charging cable for electric mode is not included and must be purchased separately.
Arahan Perhimpunan
Assembly of the LGX02 kit requires patience and attention to detail. It is recommended to build the three modules in stages for a more organized and manageable process.
1. Persediaan
- Buka bungkusan semua komponen dan sahkannya dengan senarai bahagian dalam manual arahan anda.
- Familiarize yourself with the instruction diagrams for each module (LGA01, LGC01, LG01).
- Pastikan anda mempunyai ruang kerja yang bersih dan terang.
2. Building Individual Modules
Start by constructing the LGA01 Night City and LGC01 Marble Spaceport as separate, independent projects. This allows for easier testing and adjustment of each mechanism.

- LGA01 Night City: Follow the dedicated instructions for assembling the Night City module. Pay close attention to gear alignment and track connections.
- LGC01 Marble Spaceport: Assemble the Marble Spaceport module according to its specific instructions. Test the hand-crank mechanism to ensure smooth marble movement.
During assembly, carefully remove parts from the wooden sheets. If a part does not fit easily, do not force it. Instead, gently sand the edges or re-check the instructions for correct orientation. Lubricate all moving gears and axles with the provided wax block to ensure smooth operation.
3. Connecting with the LG01 Link Pack
Once both LGA01 and LGC01 are fully assembled and tested for manual operation, proceed to integrate them using the LG01 Link Pack.
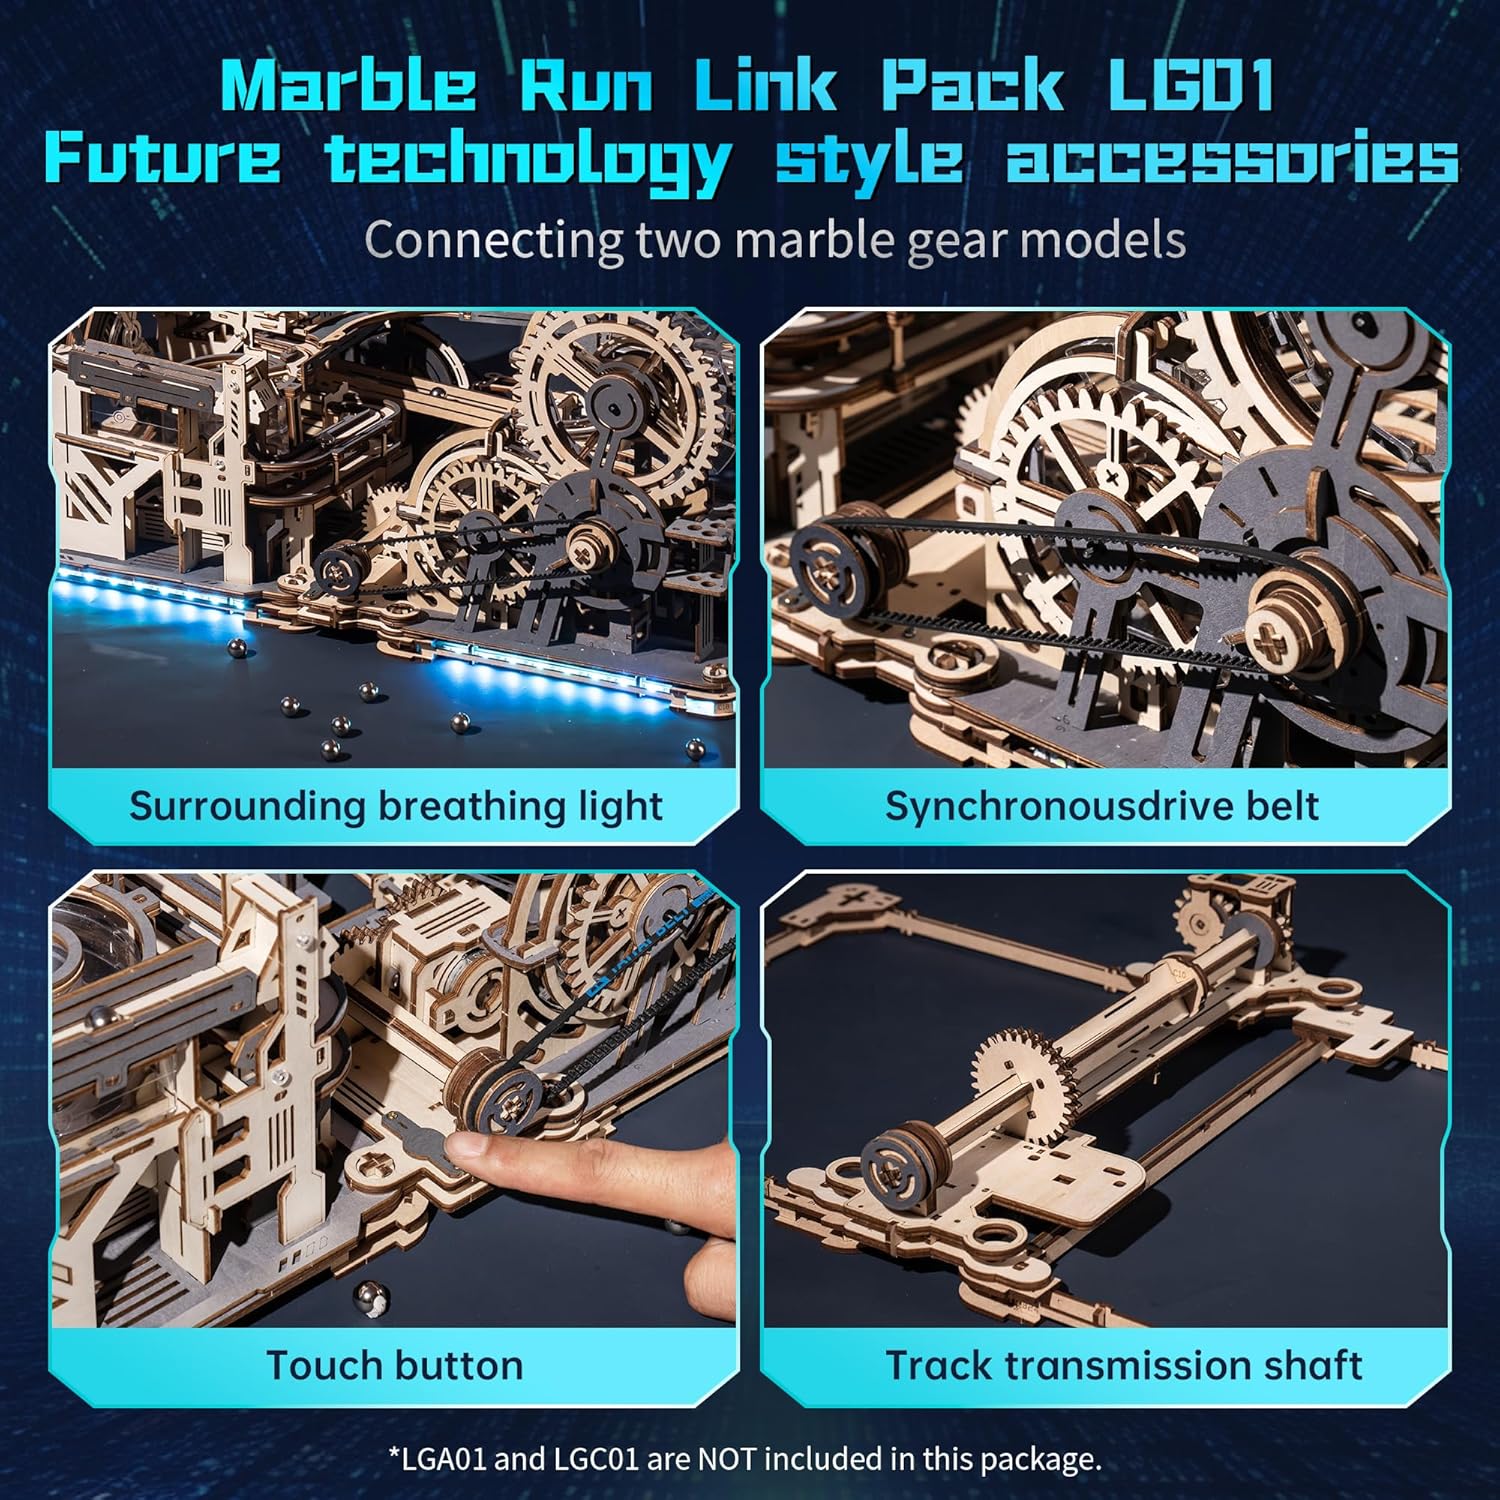
- Position the LGA01 and LGC01 modules as indicated in the Link Pack instructions.
- Carefully attach the connecting tracks and the synchronous drive belt mechanism from the LG01 Link Pack.
- Ensure all connections are secure and tracks are perfectly aligned to allow marbles to transition smoothly between modules.
- Connect the LED strip light and the motor as per the instructions.

Arahan Operasi
The ROBOTIME LGX02 offers both manual and electric operation modes, along with integrated lighting effects.
1. Operasi Manual
Before engaging electric mode, test the entire system using the hand crank. This allows you to identify and correct any friction points or misalignments. Turn the hand crank slowly and observe the marble path through all sections, including the transitions between modules.
2. Electric Mode and Lighting
Once manual operation is smooth, you can activate the electric mode and lighting. The system is powered via a Type-C charging cable (not included).

- Sambungan Kuasa: Connect a compatible Type-C charging cable to the designated port on the model. Ensure the power source provides sufficient current.
- Kawalan Butang Sentuh: The model features a touch button for controlling the motor and lighting.
| Tindakan | Hasilnya |
|---|---|
| Light Press (1st) | Ice blue breathing light activates, motor starts, steel balls begin rolling. |
| Light Press (2nd) | Ice blue breathing light changes to steady light, motor continues running. |
| Tekan Panjang | Both light and motor turn off. |

The system includes a 10-minute automatic power-off protection mechanism to conserve energy and prevent overheating.
Penyelenggaraan
To ensure the longevity and smooth operation of your ROBOTIME LGX02 marble run, follow these maintenance guidelines:
- Pelinciran: Regularly apply the provided wax block to all gears, axles, and moving parts to reduce friction and ensure smooth movement.
- Pembersihan: Use a soft, dry cloth to gently wipe dust from the wooden surfaces and tracks. Avoid using liquids or abrasive cleaners.
- Pemeriksaan: Periodically check all connections and track alignments. Ensure no parts have become loose or misaligned, which could impede marble flow.
- Storan: When not in use, store the model in a dry environment away from direct sunlight and extreme temperature changes to prevent wood warping.
Menyelesaikan masalah
If you encounter issues during assembly or operation, refer to the following common problems and solutions:
| Masalah | Kemungkinan Punca | Penyelesaian |
|---|---|---|
| Bahagian-bahagian tidak sesuai antara satu sama lain. | Incorrect orientation; excess material; part not fully extracted. | Re-check instructions for correct part orientation. Gently sand edges if necessary. Ensure parts are fully detached from the wooden sheet. Do not force parts. |
| Marbles get stuck or move slowly. | Insufficient lubrication; misaligned tracks; loose connections; debris on tracks. | Apply wax to all moving parts and tracks. Verify all track sections are perfectly aligned. Tighten any loose connections. Clean tracks of any dust or small particles. |
| Electric motor does not run or is weak. | No power; insufficient power from Type-C cable/adapter; motor connection issue. | Ensure Type-C cable is securely connected and power source is active. Use a power adapter with adequate output (e.g., a standard phone charger, not an iPhone charger if it's low power). Check motor wiring connections. |
| Lampu tidak menyala. | LED strip connection issue; power issue. | Verify LED strip is correctly connected to the main circuit. Check power supply as described for motor issues. |
Spesifikasi
| Ciri | Perincian |
|---|---|
| Nama Model | LGX02 (Combines LGA01, LGC01, LG01) |
| Jenama | ROBOTIME |
| bahan | kayu |
| Umur Disyorkan | 14+ tahun |
| Objektif Pendidikan | Koordinasi Tangan-Mata |
| Sumber Kuasa | Type-C USB (cable not included) |
| Mod Pencahayaan | Breathing Light Effect, Steady Light Effect |
| Pemadaman Automatik | 10-minute power-off protection |
| Komponen yang Disertakan | LED Strip Light, Motor, Wax Block |
Waranti dan Sokongan
ROBOTIME products are designed for quality and enjoyment. For any issues regarding missing parts, damaged components, or assembly difficulties, please contact ROBOTIME customer support. While specific warranty details are not provided in this manual, standard consumer rights and return policies apply. Please refer to your purchase documentation or the retailer's website for specific return and warranty information.
For direct assistance, visit the official ROBOTIME webtapak atau hubungi bahagian perkhidmatan pelanggan mereka.