
1. Pengenalan
Welcome to the user manual for the AITRIP ESP32-C6-WROOM-1-N4 Development Board. This guide provides essential information for setting up, operating, and maintaining your development board. Please read this manual thoroughly to ensure proper use and to maximize the functionality of your device.
2. Produk Lebihview
2.1 Ciri-ciri Utama
- Integrated ESP32-C6-WROOM-1-N4 module with 4MB SPI Flash.
- Onboard USB to serial port for convenient development and debugging.
- Dual USB Type-C interfaces for power, data, and native USB functionality.
- Full-color RGB LED for status indication.
- Dedicated Reset and Boot buttons.
- Operates at 160MHz with 512KB SRAM.
- Compatible with Windows and Linux operating systems.
- Supports WiFi and Bluetooth connectivity for IoT applications.
2.2 Kandungan Pakej
- 2 x AITRIP ESP32-C6-WROOM-1-N4 Development Boards
- 2 x Sets of Male Pin Headers

Figure 1: Two AITRIP ESP32-C6-WROOM-1-N4 development boards, each equipped with a USB Type-C port and an ESP32-C6-WROOM-1 module. Accompanying them are two sets of male pin headers for connectivity.
3. Persediaan
3.1 Sambungan Perkakasan
- Connect the ESP32-C6-WROOM-1-N4 development board to your computer using a standard USB Type-C cable. Use the USB port labeled 'USB' or 'COM' for initial programming and serial communication.
- If using a breadboard, solder the provided pin headers to the board and insert it into the breadboard.
- Ensure your computer recognizes the board. On most modern operating systems, drivers for the USB to serial converter (e.g., CH340 or CP210x) are installed automatically. If not, manual installation may be required.
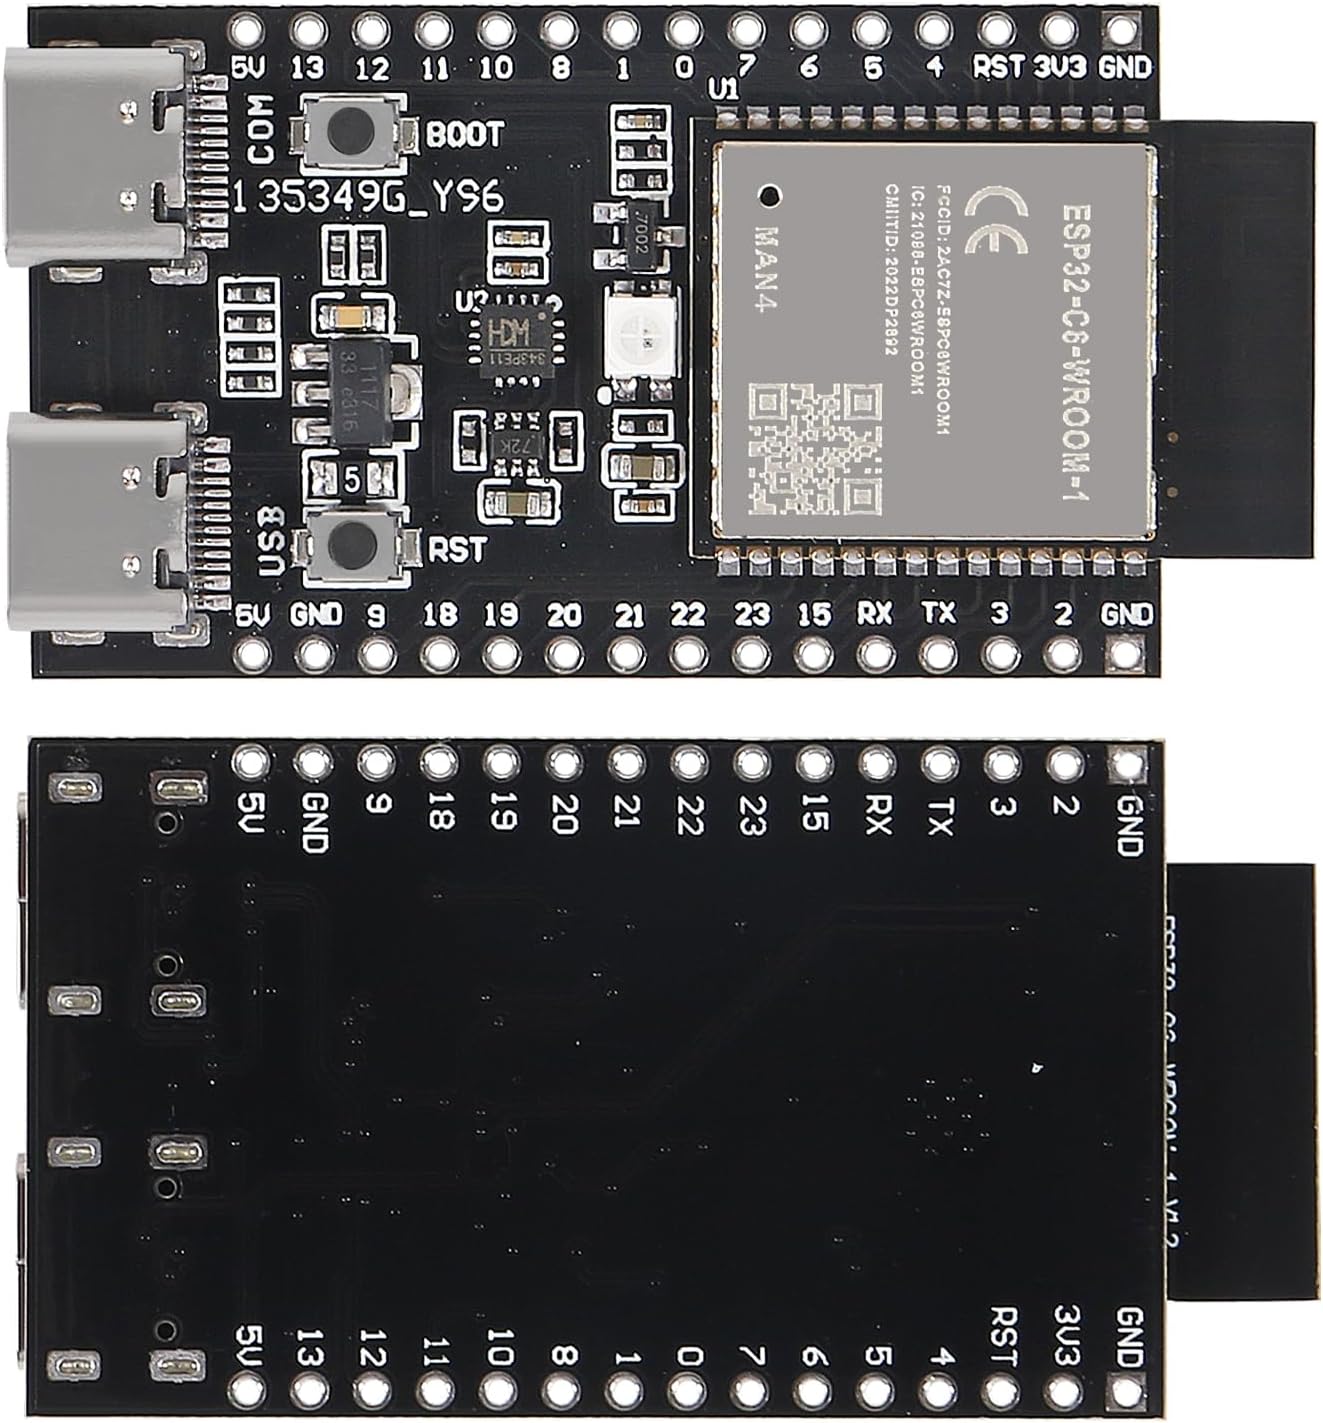
Figure 2: A detailed top-down view of the AITRIP ESP32-C6-WROOM-1-N4 development board, highlighting the ESP32-C6-WROOM-1 module, two USB Type-C ports, reset and boot buttons, and various surface-mount components. Pin labels are visible along the edges.
3.2 Persediaan Perisian
The ESP32-C6-WROOM-1-N4 is compatible with various development environments, including the Arduino IDE and Espressif's ESP-IDF.
- Install your preferred Integrated Development Environment (IDE), such as the Arduino IDE or ESP-IDF, on your computer.
- For Arduino IDE, add the ESP32 board support package by following the official Espressif instructions.
- In your IDE, select the correct board model (typically 'ESP32-C6 Dev Module' or similar) and the serial port corresponding to your connected board.
4. Arahan Operasi
4.1 Operasi Asas
Once the hardware is connected and the software environment is configured, you can upload firmware to the board.
- Write or load your desired code (e.g., a simple
Ask a question about this manual
Ask about setup, troubleshooting, compatibility, parts, safety, or missing instructions. Manuals+ will review the question and use this page’s manual context to help answer it.