1. Pengenalan
This user manual provides comprehensive instructions for the setup, operation, and maintenance of your Pro-Ject Debut EVO 2 Audiophile Turntable. The Debut EVO 2 represents the next generation of Pro-Ject's best-selling audiophile turntables, featuring a carbon fiber tonearm, electronic speed selection, and a pre-mounted Pick it MM EVO cartridge. Designed for longevity, this turntable offers premium vinyl listening experience.
2. Arahan Keselamatan
Please read these safety instructions carefully before operating your turntable. Keep this manual for future reference.
- Bekalan Kuasa: Hanya gunakan penyesuai kuasa yang dibekalkan bersama unit ini. Pastikan volumtage sepadan dengan bekalan kuasa tempatan anda.
- Air dan Kelembapan: Do not expose the turntable to rain or moisture. Do not place objects filled with liquids, such as vases, on the apparatus.
- Sumber Haba: Do not place the turntable near heat sources such as radiators, heat registers, stoves, or other apparatus (including amppenghidup) yang menghasilkan haba.
- Pengudaraan: Pastikan pengudaraan yang betul. Jangan sekat sebarang bukaan pengudaraan.
- Pembersihan: Bersihkan hanya dengan kain kering. Elakkan menggunakan cecair atau pembersih aerosol.
- Servis: Do not attempt to service the turntable yourself. Refer all servicing to qualified service personnel. Servicing is required when the apparatus has been damaged in any way, such as power-supply cord or plug is damaged, liquid has been spilled or objects have fallen into the apparatus, the apparatus has been exposed to rain or moisture, does not operate normally, or has been dropped.
- Kanak-kanak: Jauhkan daripada kanak-kanak. Bahagian-bahagian kecil boleh menyebabkan bahaya tercekik.
3. Apa yang ada di dalam Kotak
Carefully unpack all items from the packaging. Please ensure all components listed below are present:
- Pro-Ject Debut EVO 2 Turntable Unit
- Transparent Dustcover
- Connection Cable (RCA)
- Penyesuai Kuasa
- Protraktor Penjajaran
- Single Adapter (for 45 RPM records with large center hole)
- Platter
- Tali Pusing
- Kaunter berat badan
- Berat Anti-skate
4. Panduan Persediaan
Follow these steps to set up your Pro-Ject Debut EVO 2 turntable for optimal performance.
4.1. Penempatan dan Perataan
Place the turntable on a stable, level surface away from vibrations and direct sunlight. Use a spirit level to ensure the turntable is perfectly horizontal. The adjustable feet can be used for fine-tuning the level.

Image: The Pro-Ject Debut EVO 2 turntable in Satin Steel Blue, showcasing its sleek design and stable base. Proper placement on a level surface is crucial for optimal sound quality.
4.2. Pemasangan Pinggan dan Tali Pinggang Pemacu
- Carefully place the heavy die-cast aluminum platter onto the spindle.
- Locate the drive belt. Gently stretch the belt around the sub-platter and the motor pulley. Ensure the belt is not twisted.

Imej: A terperinci view of the turntable's platter and the drive belt mechanism. The belt connects the motor pulley to the sub-platter, ensuring consistent rotation.
4.3. Tonearm Balancing and Tracking Force Adjustment
The Debut EVO 2 comes with a pre-mounted Pick it MM EVO cartridge. Follow these steps to balance the tonearm and set the tracking force:
- Remove the stylus protector from the cartridge.
- Lower the tonearm lift.
- Carefully rotate the counterweight on the rear of the tonearm until the tonearm floats freely and is perfectly balanced horizontally.
- Once balanced, hold the counterweight steady and rotate the tracking force dial (the numbered ring on the front of the counterweight) to '0'.
- Rotate the entire counterweight (including the dial) counter-clockwise until the dial shows the recommended tracking force for the Pick it MM EVO cartridge, which is typically 1.8 grams. Refer to the cartridge specifications for precise values.

Image: A close-up of the tonearm assembly, showing the counterweight and the anti-skate mechanism. Proper adjustment of these components is vital for accurate tracking and sound reproduction.
4.4. Pelarasan Anti-Skate
The anti-skate mechanism prevents the tonearm from being pulled towards the center of the record. The Debut EVO 2 uses a weight-on-string anti-skate system.
- Locate the small anti-skate weight and the anti-skate stub on the tonearm.
- Hang the loop of the anti-skate weight's string over the second groove of the anti-skate stub. This setting is generally suitable for the pre-mounted cartridge.
4.5. Menyambung ke an Amplebih hidup
Connect the supplied RCA cable from the turntable's output jacks (L and R) to the PHONO input on your ampliifier atau phono praamplifier. Ensure the ground wire is connected from the turntable to the ground terminal on your amplebih hidup / praamppenggalak untuk meminimumkan dengungan.
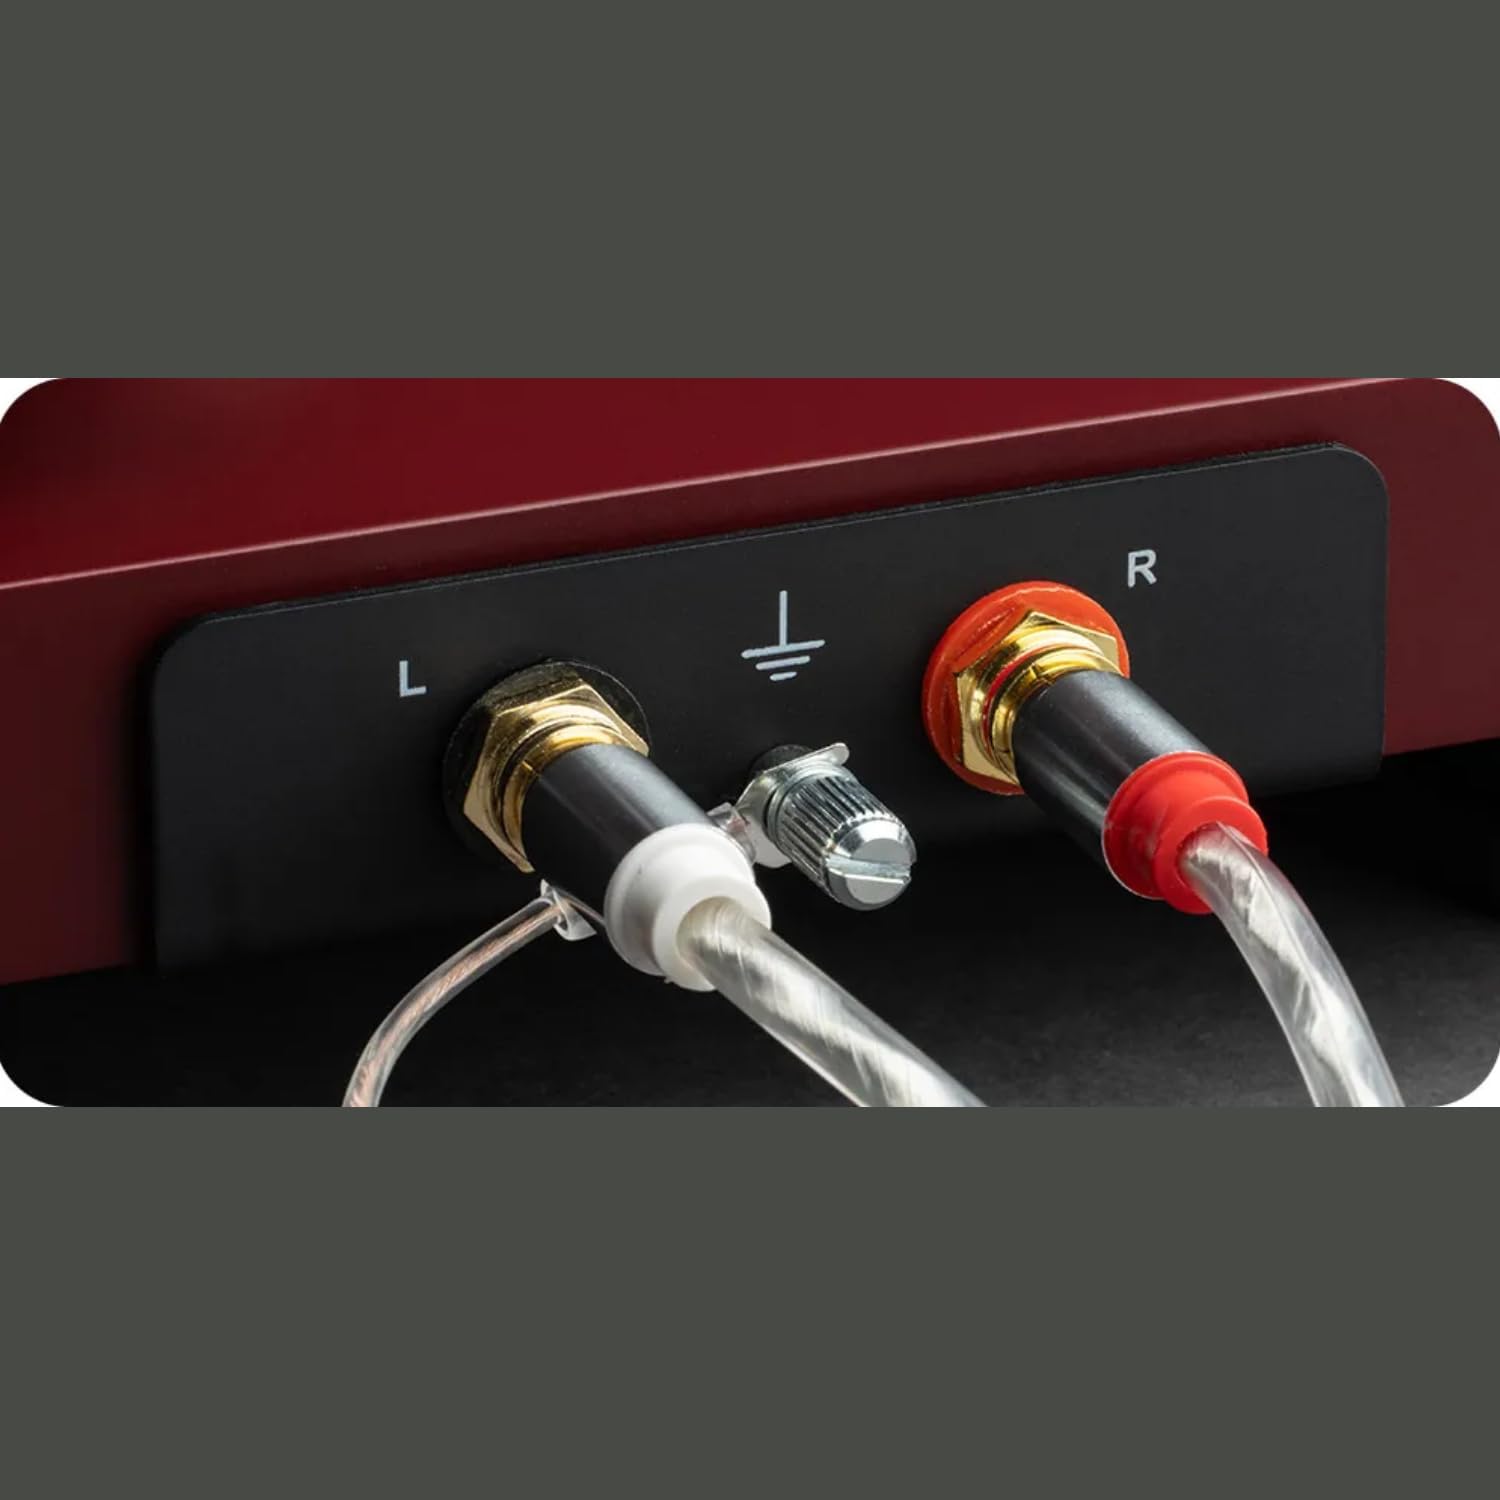
Imej: A terperinci view of the turntable's rear panel, showing the left (L) and right (R) RCA output jacks, along with the ground terminal. These connections are essential for transmitting the audio signal to an amplebih hidup.
4.6. Sambungan Kuasa
Sambungkan penyesuai kuasa kepada input DC pada meja putar dan kemudian pasangkannya ke soket dinding.
4.7. Dustcover Installation
Carefully insert the hinges of the transparent dustcover into the receptacles at the rear of the turntable plinth.
5. Arahan Operasi
5.1. Menghidupkan/Mematikan
The turntable is powered on when the power adapter is connected. There is no separate power switch. To turn off, disconnect the power adapter.
5.2. Pemilihan Kelajuan
The Debut EVO 2 features electronic speed selection. Use the switch located on the plinth to select between 33 ⅓ RPM and 45 RPM. For 78 RPM records, a special belt and stylus are required (sold separately), and the speed switch can be set to 78 RPM after installing the appropriate belt.
5.3. Memainkan Rekod
- Letakkan rekod di atas pinggan.
- Select the correct playback speed (33 ⅓ or 45 RPM).
- Angkat tonearm menggunakan tonearm lift tuil.
- Carefully position the stylus over the lead-in groove of the record.
- Gently lower the tonearm using the tonearm lift lever. The stylus will descend onto the record and playback will begin.
5.4. Menghentikan Main Semula
- At the end of a record, the tonearm will remain in the run-out groove.
- Angkat tonearm menggunakan tonearm lift tuil.
- Return the tonearm to its rest and secure it with the tonearm clamp.
- Keluarkan rekod dari platter.
6. Penyelenggaraan
Regular maintenance will ensure the longevity and optimal performance of your turntable.
6.1. Membersihkan Meja Putar
- Always disconnect the turntable from the power outlet before cleaning.
- Use a soft, lint-free cloth to wipe down the plinth and platter. Avoid abrasive cleaners or solvents.
- The dustcover can be cleaned with a soft, damp cloth. Avoid harsh chemicals that may scratch or cloud the acrylic.
6.2. Membersihkan Stylus
- Gunakan berus atau cecair pembersih stylus khusus.
- Always brush the stylus from back to front (from the pivot point towards the tip) to avoid damaging the cantilever.
- Clean the stylus regularly to remove dust and debris that can degrade sound quality and damage records.

Imej: Dari dekat view of the pre-mounted Pick it MM EVO cartridge on the carbon fiber tonearm. Regular cleaning of the stylus is important for maintaining audio fidelity.
7. Penyelesaian masalah
Jika anda menghadapi masalah dengan meja putar anda, rujuk kepada masalah dan penyelesaian biasa berikut.
| Masalah | Kemungkinan Punca | Penyelesaian |
|---|---|---|
| No power / No rotation | Power adapter not connected; Power outlet faulty; Drive belt dislodged or broken. | Check power connections; Try a different outlet; Re-seat or replace drive belt. |
| Tiada bunyi dari satu atau kedua-dua saluran | Cable connection issues; Cartridge wiring loose; Ampinput pengalir salah. | Check RCA and ground connections; Verify cartridge wires are secure; Ensure amplifier is set to PHONO input. |
| Bunyi bersenandung | Ground wire not connected; Nearby electronic interference; Faulty cable. | Connect ground wire; Move turntable away from other electronics; Try a different RCA cable. |
| Distorted or skipping sound | Incorrect tracking force; Incorrect anti-skate; Dirty stylus; Damaged record. | Re-adjust tracking force and anti-skate; Clean stylus; Inspect record for damage. |
| Kelajuan main balik yang salah | Kelajuan dipilih salah; Isu tali sawat pemacu. | Ensure correct speed (33/45 RPM) is selected; Check drive belt for proper seating. |
If the problem persists after attempting these solutions, please contact Pro-Ject customer support or your authorized dealer for assistance.
8. Spesifikasi
| Ciri | Perincian |
|---|---|
| Nama Model | Debut EVO 2 |
| Jenama | Pro-Ject |
| Dimensi Produk | 16.4 x 12.6 x 4.5 inci |
| Berat Barang | 13.2 paun (6 Kilogram) |
| bahan | Carbon Fiber (tonearm) |
| warna | Satin Steel Blue (as per current product) |
| Jenis Motor | Pemacu Tali Pinggang |
| Teknologi Ketersambungan | Auxiliary (RCA output) |
| Komponen yang Disertakan | Turntable, transparent dustcover, connection cable, power adapter, alignment protractor, single adapter |
| Kartrij | Pre-mounted Pick it MM EVO |
| Platter | 1.7kg anti-magnetic die-cast aluminum |
9. Waranti dan Sokongan
Pro-Ject Audio Systems stands behind the quality of its products. The Pro-Ject Debut EVO 2 turntable is designed for longevity and comes with a 25-year spare parts availability guarantee, ensuring that your turntable can be maintained for a lifetime.
For technical support, warranty claims, or further assistance, please contact your authorized Pro-Ject dealer or visit the official Pro-Ject Audio Systems webtapak. Simpan resit pembelian anda sebagai bukti pembelian untuk tujuan jaminan.
Anda boleh mendapatkan lebih banyak maklumat dan sumber sokongan di Kedai Pro-Ject di Amazon.