1. Produk Lebihview
The Pxton S1 Walkie Talkie is a versatile two-way radio designed for reliable communication across various environments. It features 16 communication channels, 155 privacy codes, and a range of functions including VOX, TOT, emergency alarm, and an LED flashlight, making it suitable for both personal and professional use.
Ciri-ciri Utama:
- 16 Saluran Komunikasi
- 155 Kod Privasi (CTCSS/DCS)
- 5-level VOX Sensitivity Adjustment for hands-free operation
- TOT (Time-Out Timer) to prevent accidental prolonged transmissions
- Fungsi Penggera Kecemasan
- Auto Squelch for clear audio
- Low Battery Alert and Power-Saving Mode
- Channel Scan and Monitoring functions
- Lampu suluh LED bersepadu
- Custom Programming Support (programming cable sold separately)
- Durable 1500mAh Li-ion Battery

Image 1.1: Pxton S1 Walkie Talkies in use, highlighting key features.
2. Kandungan Pakej
Sahkan bahawa semua item yang disenaraikan di bawah disertakan dalam pakej anda:
- 2 x Pxton S1 Walkie Talkies
- 2 x Tapak Pengecasan
- 2 x 1500mAh Lithium Batteries
- 2 x Klip Tali Pinggang
- 2 x Alat Telinga
- 1 x Manual Pengguna

Image 2.1: Included components in the Pxton S1 Walkie Talkie package.
3. Rajah Produk
Familiarize yourself with the various parts and controls of your Pxton S1 Walkie Talkie:

Image 3.1: Labeled diagram of the Pxton S1 Walkie Talkie components.
- Integrated Sensitive Antenna: Untuk menghantar dan menerima isyarat.
- Lampu suluh: Lampu LED terbina dalam untuk pencahayaan.
- Penunjuk LED: Menunjukkan status (cth., menghantar, menerima, bateri lemah).
- Butang PTT (Tekan untuk Bercakap): Tekan dan tahan untuk menghantar, lepaskan untuk menerima.
- Clear Speaker: Untuk output audio.
- Mikrofon terbina dalam: Untuk input suara.
- Bicu SP/MIC: Untuk menyambungkan alat dengar atau mikrofon luaran.
- MONI Button (Monitor): Temporarily disables squelch to listen to weak signals.
- Butang lampu suluh: Mengaktifkan lampu suluh LED.
- Suis Saluran: Tombol berputar untuk memilih saluran komunikasi.
- Suis Kuasa/Kawalan Kelantangan: Tombol berputar untuk menghidupkan/mematikan radio dan melaraskan kelantangan.
4. Persediaan
4.1 Pemasangan dan Pengecasan Bateri
Sebelum penggunaan awal, cas sepenuhnya bateri.
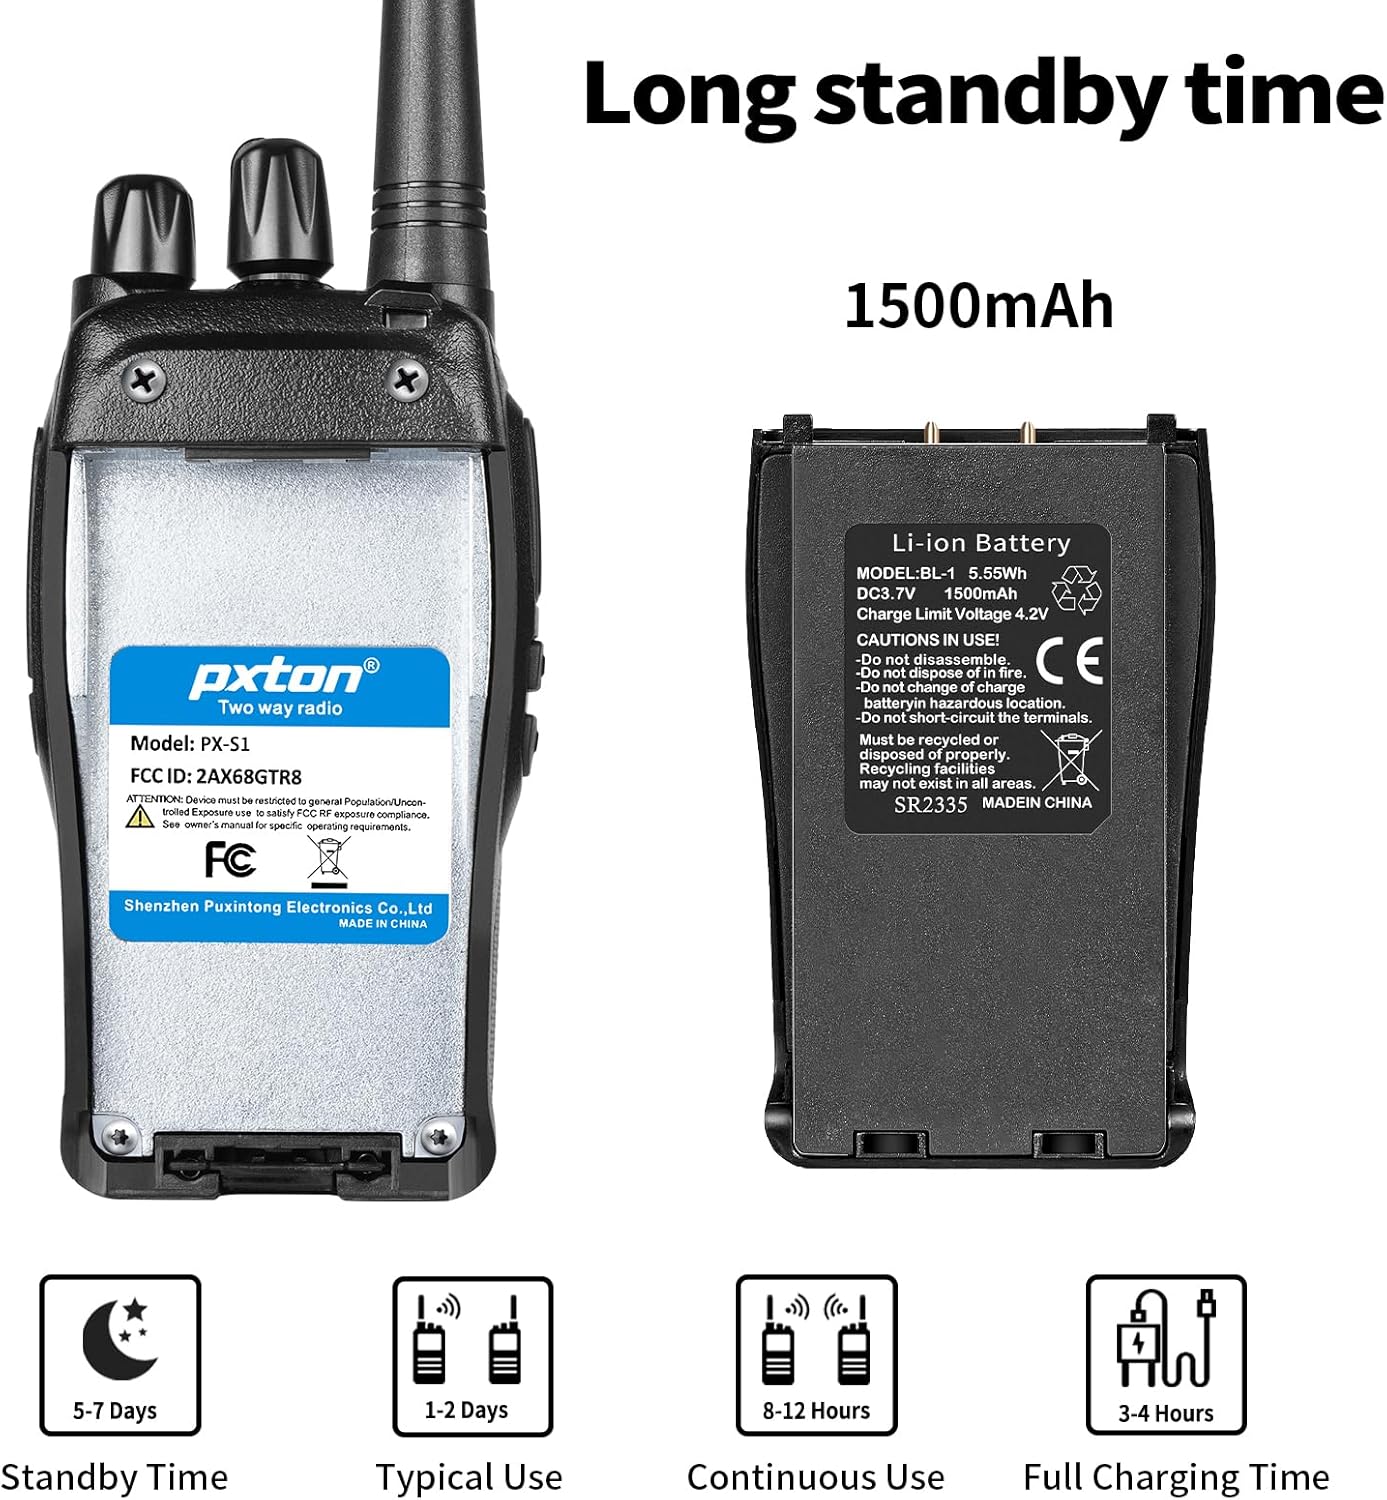
Image 4.1: Battery details and charging information.
- Pasang Bateri: Align the 1500mAh Li-ion battery with the battery compartment on the back of the walkie talkie and slide it into place until it clicks securely.
- Place in Charging Base: Insert the walkie talkie (with battery installed) into the charging base. Ensure the charging contacts on the radio align with those on the base.
- Sambungkan Kuasa: Plug the charging base's adapter into a standard wall outlet. The LED indicator on the charging base will typically show red while charging and turn green when fully charged.
- Masa Pengecasan: Pengecasan penuh biasanya mengambil masa 3-4 jam.
4.2 Attaching the Belt Clip and Earpiece
- Klip tali pinggang: Secure the belt clip to the designated slot on the back of the walkie talkie using the provided screws.
- Alat dengar: Insert the earpiece plug into the SP/MIC jacks on the side of the walkie talkie. Ensure it is fully inserted for proper connection.
5. Arahan Operasi
5.1 Kuasa Hidup/Mati dan Kawalan Kelantangan
- Hidupkan kuasa: Rotate the Power Switch/Volume Control knob clockwise until you hear a click. The radio will emit a tone, and the LED indicator may flash.
- Laraskan Kelantangan: Continue rotating the Power Switch/Volume Control knob clockwise to increase volume, or counter-clockwise to decrease volume.
- Matikan: Rotate the Power Switch/Volume Control knob counter-clockwise until you hear a click.
5.2 Pemilihan Saluran
The Pxton S1 has 16 channels. To select a channel:
- Rotate the Channel Switch knob to select your desired channel (1-16).
- Ensure all radios you wish to communicate with are set to the same channel and privacy code.
5.3 Menghantar dan Menerima
- Untuk Menghantar: Press and hold the PTT (Push-to-Talk) button on the side of the radio. Speak clearly into the microphone. The LED indicator will typically glow red.
- Untuk Menerima: Release the PTT button. The radio will automatically switch to receive mode. The LED indicator will typically glow green when receiving a signal.
5.4 Fungsi VOX (Voice Operated Exchange).
VOX allows for hands-free transmission. When VOX is enabled, the radio will automatically transmit when it detects your voice, without needing to press the PTT button.

Image 5.1: Illustration of VOX/Hands-free function.
- VOX sensitivity can be adjusted (5 levels) to suit your environment and voice volume. This feature typically requires programming software to enable and adjust.
5.5 TOT (Pemasa Tamat Masa)
The TOT function limits the duration of a single transmission to prevent accidental prolonged transmissions and conserve battery life. If the PTT button is held down for longer than the preset time, the radio will stop transmitting and emit a warning tone.
5.6 Penggera Kecemasan
The emergency alarm function can be activated to send out an alert signal. The method of activation may vary depending on programming, but it is typically assigned to a programmable side button.
5.7 Fungsi Imbasan
The scan function allows the radio to automatically scan through all programmed channels to detect active conversations. When an active channel is found, the radio will stop on that channel until the transmission ends.
5.8 Lampu suluh
The built-in LED flashlight provides convenient illumination.

Image 5.2: Walkie Talkie flashlight in use.
- Press the dedicated Flashlight Button (refer to Product Diagram) to turn the flashlight on or off.
6. Julat Komunikasi
The actual communication range of the Pxton S1 Walkie Talkie can vary significantly based on terrain, obstacles, and electromagnetic interference. General estimates are:
- Flat or Unobstructed Areas: Up to 3 miles (approximately 4.8 km)
- Suburban or Rural Areas: Approximately 1.2 miles (approximately 1.9 km)
- Urban Settings: Approximately 0.6 miles (approximately 1 km)

Image 6.1: Communication range in various environments.
7. Penyelenggaraan
7.1 Penjagaan Bateri
- Elakkan menyahcas sepenuhnya bateri dengan kerap untuk memanjangkan jangka hayatnya.
- Cas bateri di tempat yang sejuk dan kering.
- Jika menyimpan radio untuk tempoh yang lama, cas bateri sehingga kira-kira 50% dan keluarkannya dari radio. Cas semula setiap 3-6 bulan.
- Buang bateri lama secara bertanggungjawab mengikut peraturan tempatan.
7.2 Pembersihan
- Lap bahagian luar radio dengan lembut, damp kain. Jangan gunakan bahan kimia yang keras atau pembersih yang kasar.
- Ensure the radio is powered off and the charging port cover is securely closed before cleaning.
8. Penyelesaian masalah
| Masalah | Kemungkinan Punca | Penyelesaian |
|---|---|---|
| Radio tidak dihidupkan | Bateri mati atau tidak dipasang dengan betul. | Charge the battery. Reinstall the battery ensuring proper contact. |
| Tidak boleh menghantar atau menerima | Incorrect channel or privacy code. Volume too low. Battery low. | Verify channel and privacy code settings. Increase volume. Charge battery. |
| Kualiti audio yang lemah / Statik | Out of range. Interference. Squelch level too low. | Move closer to other radios. Avoid sources of interference. Adjust squelch level. |
| Bateri cepat habis | Frequent transmissions. VOX sensitivity too high. Battery nearing end of life. | Reduce transmission time. Adjust VOX sensitivity. Consider replacing battery if old. |
9. Spesifikasi
| Ciri | Perincian |
|---|---|
| Nombor Model | PX-S1-0001 |
| Jenama | pxton |
| warna | Hitam |
| Bilangan Saluran | 16 |
| Julat Kekerapan | UHF |
| Julat Percakapan Maksimum | 3 Miles (unobstructed) |
| Jenis Bateri | 1500mAh Lithium Ion (termasuk) |
| Voltage | 3.7 Volt (DC) |
| Purata Hayat Bateri | 7 days (standby) / 12 hours (continuous use) |
| Masa Mengecas | 3-4 jam |
| Tahap Ketahanan Air | Tahan Air |
| Dimensi Produk (D x W x H) | 9.9" x 2.2" x 6.9" (including antenna) |
| Berat Barang | 1.4 paun |
| Julat Suhu Operasi | -10°C hingga 40°C |
| ID FCC | 2AX68GTR8 |

Image 9.1: Pxton S1 Walkie Talkie dimensions.
10. Keserasian
The Pxton S1 walkie talkie is compatible with the following models:
- PX-888S
- PX-777S
- PX-666S
- PX-888S Pro
These models can work together and utilize the same programming tools and cables. Note that the programming cable must be purchased separately and is not included with the PX-S1.
11. Waranti dan Sokongan
11.1 Maklumat Waranti
Pxton offers a 30-day unconditional exchange and refund policy from the date of purchase. Additionally, the product comes with lifetime after-sales service.
11.2 Sokongan Pelanggan
If you encounter any issues or have questions regarding your Pxton S1 Walkie Talkie, please contact Pxton customer support. You can reach us via Amazon messages for assistance.