pengenalan
Thank you for choosing the WORKPRO 1/4" Torque Wrench. This manual provides essential information for the safe and effective operation, maintenance, and care of your new tool. Please read this manual thoroughly before use and retain it for future reference.
Kandungan Pakej:
- 1 x WORKPRO 1/4" Torque Wrench
- 1 x Sarung Pembawa
- 1 x Manual Arahan (dokumen ini)
Maklumat Keselamatan
Always observe basic safety precautions when using tools to reduce the risk of personal injury. Read and understand all instructions.
- Pakai peralatan pelindung diri (PPE) yang sesuai, seperti cermin mata keselamatan.
- Ensure the workpiece is stable and secured before applying torque.
- Do not exceed the maximum torque capacity of the wrench (25 Nm).
- Jangan gunakan sepana tork sebagai palang pemutus.
- Jauhkan kanak-kanak dan orang ramai semasa mengendalikan alat.
- Simpan alat di tempat yang kering dan selamat apabila tidak digunakan.
- Do not attempt to modify or repair the torque wrench yourself. Contact qualified service personnel.
Komponen
Familiarize yourself with the parts of your WORKPRO 1/4" Torque Wrench.
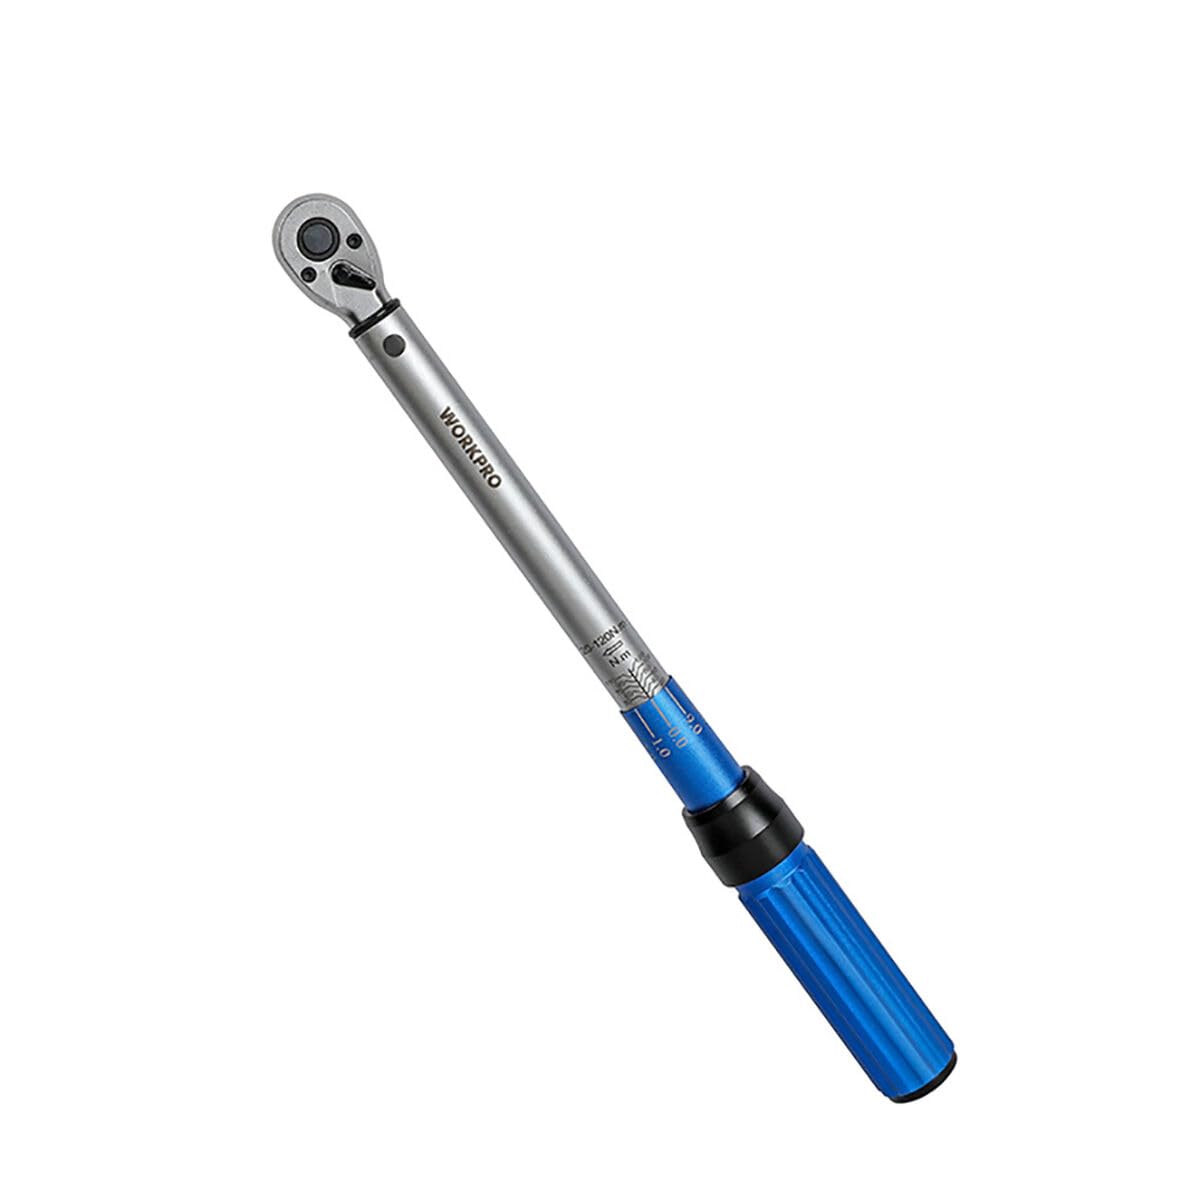
Image: The WORKPRO 1/4" Torque Wrench, typically shown with its protective carrying case. Key components include the drive head, main body with torque scale, adjustment collar, and handle.
Bahagian Utama:
- Drive Head: 1/4" square drive for sockets.
- Torque Scale: Markings for setting desired torque values (Nm).
- Adjustment Collar/Knob: Used to set the torque value.
- Mekanisme Mengunci: Secures the set torque value.
- pemegang: Provides grip during operation.
Persediaan
1. Membongkar dan Pemeriksaan:
Carefully remove the torque wrench from its carrying case. Inspect the tool for any signs of damage that may have occurred during shipping. Do not use the tool if it appears damaged.
2. Setting the Torque Value:
- Unlock the adjustment collar by rotating the locking mechanism (usually a knob at the end of the handle or a collar at the base of the handle).
- Rotate the handle or adjustment collar to align the desired torque value on the main scale with the zero mark on the thimble scale. For example, to set 20 Nm, align the '20' mark on the main scale with the '0' mark on the thimble.
- For finer adjustments, continue rotating the handle until the desired increment on the thimble scale aligns with the main scale line. For example, to set 22 Nm, set to 20 Nm on the main scale, then rotate the thimble until the '2' mark aligns with the main scale line.
- Once the desired torque is set, lock the adjustment collar by rotating the locking mechanism back into its locked position. Ensure it is securely locked to prevent accidental changes during use.
Arahan Operasi
1. Attaching the Socket:
Select the correct size socket for your fastener and firmly attach it to the 1/4" square drive head of the torque wrench.
2. Applying Torque:
- Place the socket onto the fastener (nut or bolt).
- Hold the torque wrench by the handle and apply steady, increasing pressure in a clockwise direction for right-hand threads.
- Continue applying pressure until you feel and hear a distinct "click" or "break" from the wrench. This indicates that the preset torque value has been reached.
- Immediately stop applying force once the click is felt/heard. Do not continue to tighten the fastener beyond this point.
- Remove the torque wrench from the fastener.
Nota Penting:
- Always pull the wrench, do not push, to maintain better control and safety.
- Do not use extensions between the drive head and the socket unless specifically designed for torque wrenches, as this can affect accuracy.
- After use, always return the torque wrench to its lowest torque setting (but not below the minimum) before storing to relieve spring tension and maintain calibration accuracy.
Penyelenggaraan
Pembersihan:
Wipe the torque wrench clean with a soft, dry cloth after each use. Do not use solvents or harsh chemicals, as these can damage the finish or internal components.
Storan:
Store the torque wrench in its original carrying case in a dry, clean, and temperature-controlled environment. Always set the wrench to its lowest torque setting before storage to preserve the calibration spring.
Penentukuran:
Torque wrenches are precision instruments and require periodic calibration to ensure accuracy. It is recommended to have your torque wrench calibrated by a qualified service center annually, or more frequently with heavy use.
Menyelesaikan masalah
Wrench does not click:
- Kemungkinan Punca: Torque setting is too high for the fastener, or the fastener is already overtightened.
- Penyelesaian: Recheck the required torque specification. Ensure the wrench is set correctly. Do not force the wrench beyond its capacity.
- Kemungkinan Punca: Wrench is being used incorrectly (e.g., too fast, not a steady pull).
- Penyelesaian: Apply steady, increasing pressure. Listen and feel for the click.
Inaccurate torque:
- Kemungkinan Punca: Wrench is out of calibration.
- Penyelesaian: Have the wrench professionally calibrated.
- Kemungkinan Punca: Incorrect torque setting.
- Penyelesaian: Double-check the torque setting against the required specification.
Spesifikasi
| Ciri | Spesifikasi |
|---|---|
| Nombor Model | S7923395 |
| Saiz Pemacu | 1/4 inci |
| Julat Tork | 5-25 Nm |
| Bilangan Gigi | 72 tpi |
| Bahan Pemegang | aluminium |
| Dimensi (L x W x H) | 7 x 49 x 6.8 cm |
| Berat badan | 729 gram |
| Termasuk Aksesori | Membawa Sarung |
Waranti dan Sokongan
WORKPRO products are manufactured to high-quality standards. For warranty information, technical support, or service inquiries, please refer to the contact information provided with your purchase documentation or visit the official WORKPRO webtapak.
Nota: Specific warranty terms may vary by region and retailer. Please retain your proof of purchase for warranty claims.
For further assistance, please contact WORKPRO customer service via their official webtapak: www.workprotools.com