
pengenalan
This manual provides detailed instructions for the Svetaecho Wireless Controller. This controller is designed for use with Nintendo Switch, Switch Lite, Switch OLED, Windows PC (wired connection), iOS, and Android devices. Please read this manual thoroughly before use to ensure proper operation and to maximize your gaming experience.
Nota: This controller does not support Xbox games.
Ciri-ciri Produk
- Customizable Macro Buttons: Two back buttons (ML/MR) can be programmed to map 1-20 combined functions from A/B/X/Y/L/ZL/R/ZR/L3/R3/D-pad for enhanced gameplay. Double-click SR/SL to temporarily enable/disable macro functions.
- Adjustable Turbo Function: Supports both Auto and Manual Turbo modes with three adjustable speeds: 5 shots/s, 12 shots/s, and 20 shots/s.
- Motor Getaran Dwi: Built-in motors provide 3-level vibration feedback (None, Weak, Strong) for Switch and Windows PC games. Adjust intensity by pressing and holding L, R, ZL, ZR simultaneously.
- Sensor Giro 6-Paksi: High-sensitivity gyro sensors offer precise motion control for Nintendo Switch games.
- One-Key Wake-Up (Switch Only): After initial connection, press the HOME button to wake up and reconnect the Switch console.
- Bateri Berkapasiti Tinggi: Integrated 1000mAh battery provides over 16 hours of playtime in LED lit mode. Fully charges in approximately 3 hours via USB Type-C.
- Mod Tidur Automatik: The controller automatically shuts down after 20 minutes of inactivity in a connected state. Press the HOME button to wake and reconnect.
Kandungan Pakej
- 1x Svetaecho Wireless Controller
- 1x Kabel Pengecas USB Jenis-C
- 1x Manual Pengguna (dokumen ini)
Susun atur Pengawal

Imej: Depan view of the Svetaecho Wireless Controller, highlighting the main buttons, joysticks, D-pad, and the M1/M2 back buttons.
The controller features standard gaming buttons including A, B, X, Y, L, R, ZL, ZR, D-pad, Left and Right Analog Sticks, HOME button, SHARE button, TURBO button, and two programmable back buttons (M1/ML and M2/MR).

Imej: belakang view of the Svetaecho Wireless Controller, showing the SR, SL, and M buttons, along with the ML and MR programmable back buttons.
Persediaan & Berpasangan
1. Nintendo Switch Pairing
- From the Switch HOME Menu, select 'Controllers' > 'Change Grip/Order'.
- Press and hold the HOME button on the Svetaecho controller for 3-5 seconds until the LED indicators begin to flash rapidly.
- Once connected, the corresponding player LED(s) on the controller will light up solid.
- To wake up the Switch console after the first connection, simply press the HOME button on the controller.
2. PC (Wired Connection)
- Connect the controller to your Windows PC using the provided USB Type-C cable.
- The controller will be automatically recognized as a wired gamepad.
- Vibration function is supported on Windows PC.
3. iOS/Android Pairing (Wireless)

Imej: The Svetaecho Wireless Controller shown alongside various compatible devices including Nintendo Switch, PC, iOS, and Android phones/tablets.
- Ensure Bluetooth is enabled on your iOS or Android device.
- Press and hold the HOME button on the controller for 3-5 seconds until the LED indicators flash rapidly.
- On your device, search for Bluetooth devices and select the controller (e.g., 'Pro Controller' or similar).
- Once paired, the LED indicators will become solid.
Arahan Operasi
1. Custom Macro Buttons (ML/MR)
- Pengaturcaraan: Press and hold the 'M' button, then press the ML or MR button you wish to program. The LED will flash. Now, press the sequence of buttons (up to 20) you want to assign. Press ML or MR again to save the macro.
- Using Macro: Simply press the programmed ML or MR button to execute the assigned sequence.
- Enable/Disable Macro: Double-click the SR or SL button to temporarily enable or disable the macro function.
2. Fungsi Turbo

Imej: The Svetaecho Wireless Controller illustrating the three adjustable Turbo speeds: 5 shots/s, 12 shots/s, and 20 shots/s.
- Turbo Manual: Press and hold the TURBO button, then press the desired action button (A/B/X/Y/L/R/ZL/ZR) to enable Turbo for that button. Release TURBO. Now, holding the action button will trigger rapid presses.
- Auto Turbo: Press and hold the TURBO button, then double-press the desired action button. Release TURBO. The action button will now continuously trigger rapid presses without being held down.
- Melaraskan Kelajuan Turbo: With Turbo enabled for a button, press and hold the TURBO button, then move the Right Analog Stick Up or Down to cycle through the three speeds (5, 12, 20 shots/s).
- Clearing Turbo: To clear Turbo for a single button, press and hold TURBO, then press the action button twice. To clear all Turbo settings, press and hold the TURBO button for 5 seconds.
3. Vibration Adjustment (Switch/PC Only)

Imej: The Svetaecho Wireless Controller highlighting its 6-axis gyro sensor for precise motion control and dual motor vibration with adjustable intensity levels (None, Weak, Strong).
To cycle through vibration intensities (None, Weak, Strong), press and hold the L, R, ZL, and ZR buttons simultaneously.
4. Motion Control (Switch Only)
The built-in 6-axis gyro sensor provides motion control capabilities for compatible Nintendo Switch games. No special setup is required; the feature activates automatically when supported by the game.
5. Mod Pencahayaan LED
The controller features multi-RGB lighting. Specific instructions for changing LED modes are typically found in the quick start guide or by pressing a dedicated button (often indicated by a lightbulb icon) on the controller. Refer to the quick start guide for detailed steps on adjusting LED patterns and colors.
Bateri & Pengecasan
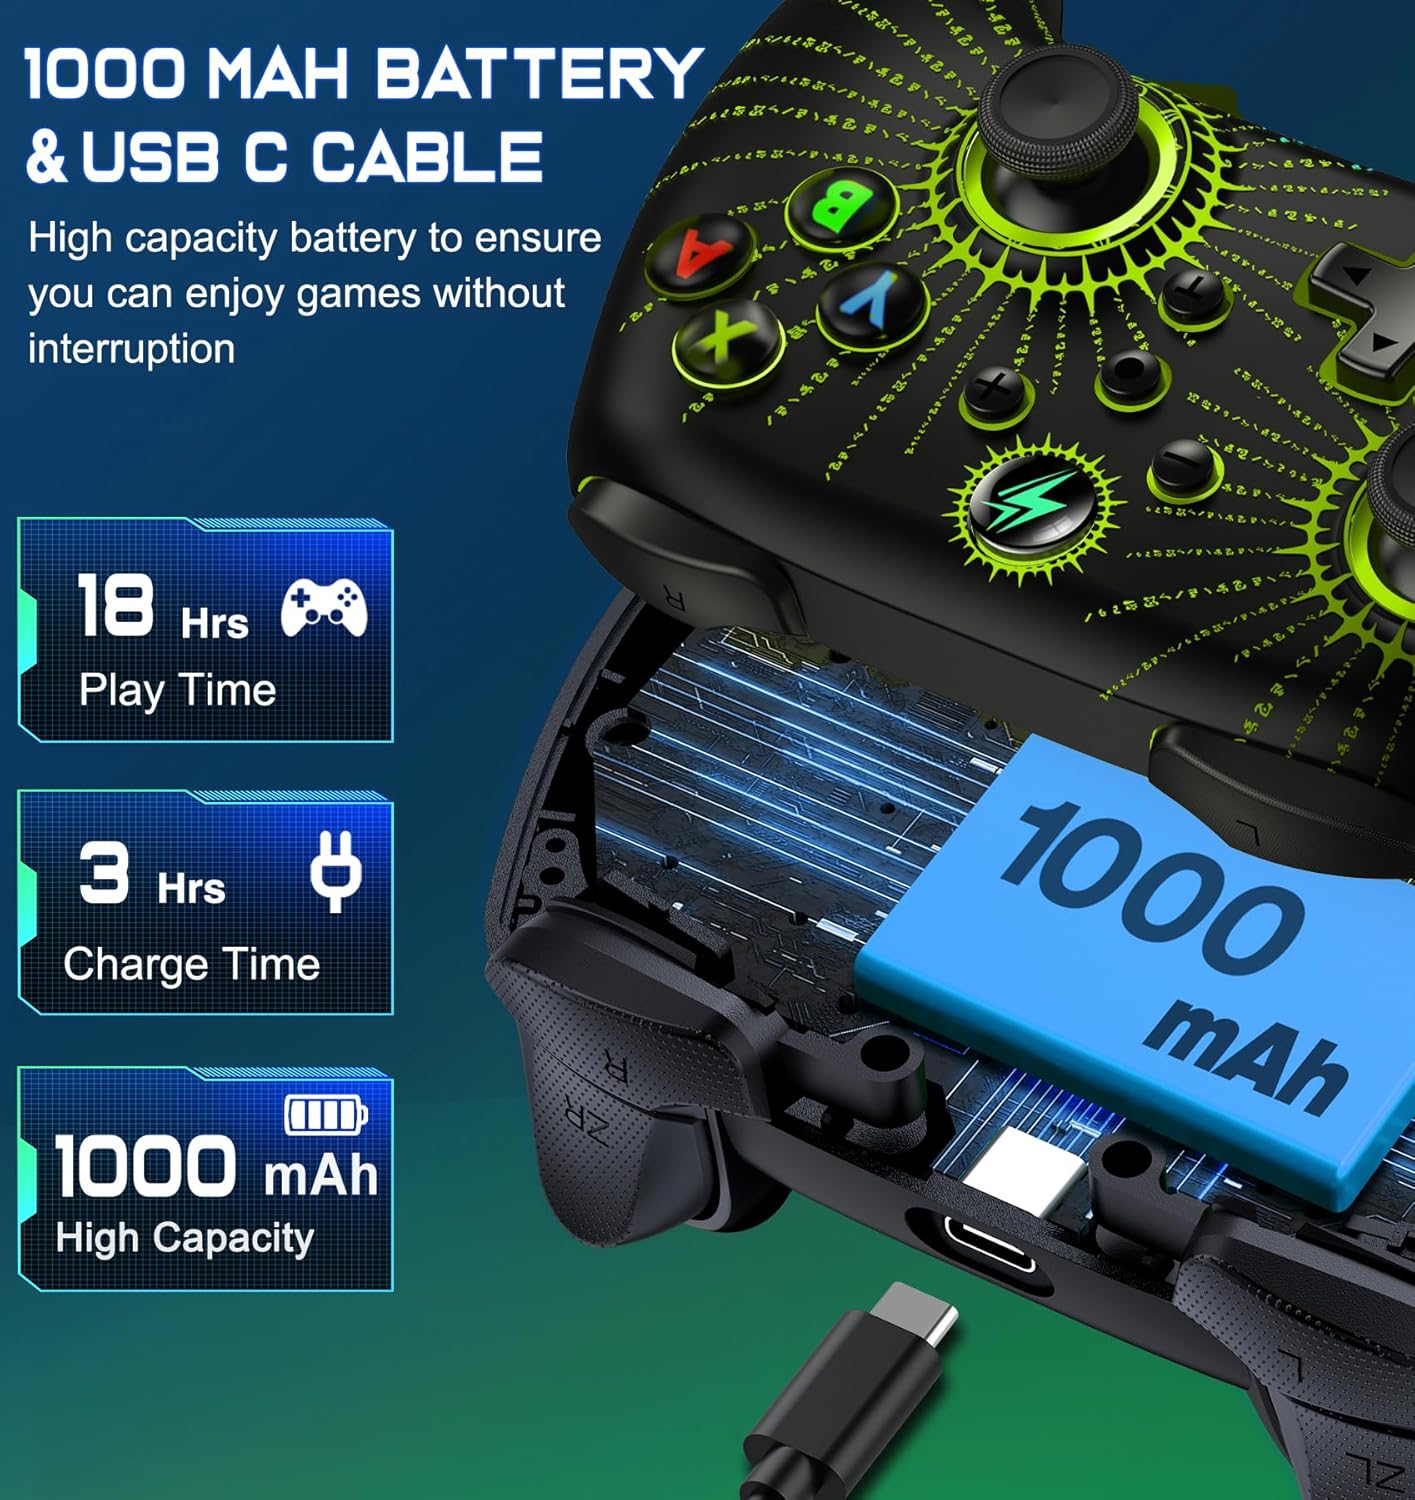
Imej: Sebuah meletup view of the Svetaecho Wireless Controller showing the internal 1000mAh battery and the USB Type-C charging port with cable.
- The controller is equipped with a 1000mAh rechargeable battery.
- Connect the controller to a USB power source (e.g., Switch dock, PC, USB wall adapter) using the provided USB Type-C cable to charge.
- Masa pengecasan adalah lebih kurang 3 jam untuk pengecasan penuh.
- A full charge provides over 16 hours of playtime with LED lighting active.
- The LED indicators will show charging status and turn off or change color when fully charged.
Penyelenggaraan
- Pastikan pengawal kering dan jauh dari suhu yang melampau.
- Bersihkan pengawal dengan kain lembut dan kering. Elakkan menggunakan bahan kimia yang keras atau bahan yang melelas.
- Do not attempt to disassemble the controller, as this may void the warranty and cause damage.
- Simpan alat kawalan jauh di tempat yang selamat apabila tidak digunakan untuk mengelakkan kerosakan yang tidak disengajakan.
Menyelesaikan masalah
- Pengawal tidak bersambung: Ensure the controller is charged. Re-attempt the pairing process. For Switch, ensure 'Pro Controller Wired Communication' is enabled in system settings if using wired mode.
- Kelewatan input atau pemutusan sambungan: Ensure there are no strong wireless interferences nearby. Move closer to the console/device. Ensure the controller battery is not low.
- Butang tidak bertindak balas: Check if the macro function is temporarily disabled (double-click SR/SL). If the issue persists, try resetting the controller (a small reset button may be located on the back, often requiring a pin to press).
- Getaran tidak berfungsi: Ensure the vibration intensity is not set to 'None'. Check game settings for vibration support.
- Pengawal tidak dicas: Ensure the USB-C cable is securely connected to both the controller and the power source. Try a different USB port or cable.
Firmware Update for Switch 2

Imej: A step-by-step guide demonstrating how to update the controller's firmware for Switch 2 compatibility using the 'KeyLinker' mobile application.
Nota: All functions are supported except "One Press Home key to Wake up the Switch 2 console" and "Open voice menu" after the update.
- Langkah 1: Cari untuk the "KeyLinker" app in your mobile app store, then download and install it.
- Langkah 2: Turn on Bluetooth on your phone and pair the controller with your phone. (Refer to the pairing method in this manual).
- Langkah 3: Open the "KeyLinker" app.
- Langkah 4: In the app, search for the Bluetooth name "NC100" and tap to pair. (If the controller's Bluetooth name does not appear on the screen, press and hold the screen, then pull down to refresh several times.)
- Langkah 5: Tap the three dots in the top right corner, then select "Update device".
- Langkah 6: Enter the upgrade interface, tap "Update Now" at the bottom of the screen, and confirm. (If the update button doesn't appear, please wait a few minutes.)
- Langkah 7: Wait for the update to complete. (If the upgrade fails, please try several more times.)
Spesifikasi
| Pengeluar | Svetaecho |
| Berat Barang | 11.3 auns |
| Dimensi Pakej | 6.38 x 4.72 x 2.64 inci |
| Kapasiti Bateri | 1000mAh |
| Masa Mengecas | lebih kurang 3 jam |
| Playtime (LED Lit Mode) | Lebih 16 jam |
| Ketersambungan | Wireless (Bluetooth), Wired (USB Type-C) |
| Keserasian | Nintendo Switch/Lite/OLED, Windows PC, iOS, Android |
Waranti & Sokongan
For warranty information or technical support, please refer to the contact details provided with your purchase or visit the official Svetaecho webtapak. Simpan resit pembelian anda untuk tuntutan waranti.