
1. Pengenalan
The JONSBO C6-ITX is a compact and versatile Mini ITX PC case designed for users seeking a small form factor build without compromising on component compatibility. Its mesh design on all sides ensures excellent airflow, while the integrated handle provides portability. This manual provides detailed instructions for setting up, operating, and maintaining your C6-ITX PC case.

Figure 1: JONSBO C6-ITX White Mini ITX Handled Mesh PC Case.
2. Ciri-ciri
- Reka bentuk padat: Simple and compact desktop ITX chassis, easy to place in various environments.
- Pemegang mudah alih: Features an adjustable carry handle on top with a Velcro fastener for easy movement.
- Aliran Udara Dioptimumkan: All sides are constructed with mesh panels (front, top, left, and right) to quickly dissipate internal heat.
- Tool-Free Disassembly: Quick release structure allows for easy and quick disassembly of the upper cover without tools. The other three side panels are topped from the inside.
- Removable Ventilation Grille: The front panel includes a removable ventilation grille for convenient installation of a hard disk drive or fan.
- Broad Component Support: Compatible with ITX/Mini-DTX motherboards, ATX power supplies (up to 140mm), CPU coolers up to 170mm, and GPUs up to 255mm.
- Pilihan Storan Fleksibel: Supports one 3.5" HDD or one 2.5" SSD.
- I/O Depan: Includes Type-C (20PIN), USB 3.0 x1, and a 2-in-1 AUDIO+MIC jack for convenient connectivity.
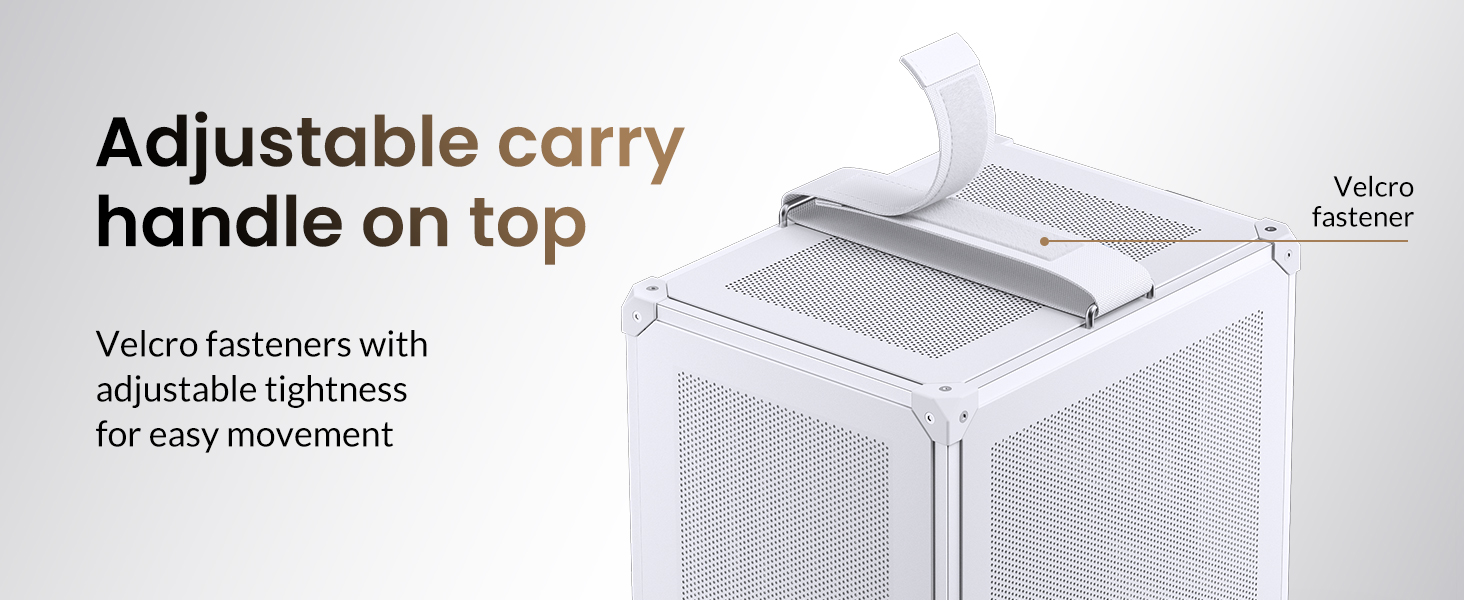
Figure 2: Adjustable carry handle for portability.
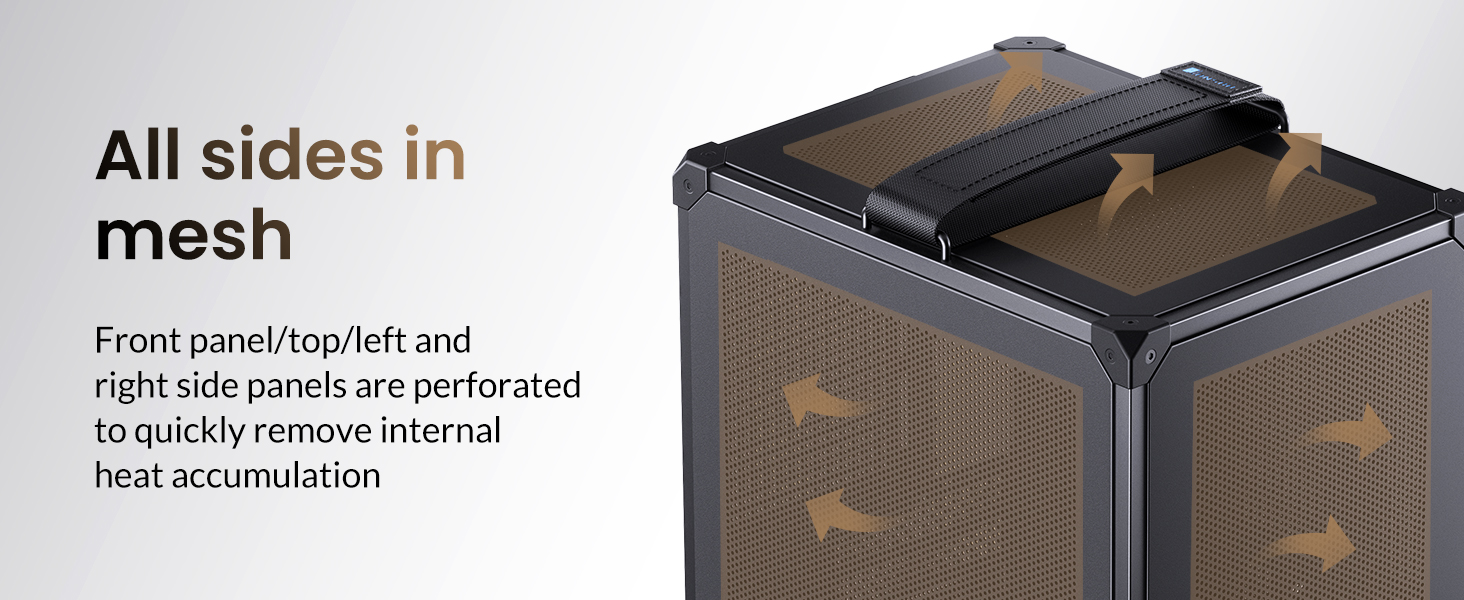
Figure 3: All-mesh design for optimal heat dissipation.
3. Spesifikasi
| Ciri | Spesifikasi |
|---|---|
| Model No. | C6-ITX |
| warna | putih |
| Dimensi (W x D x H) | 202mm x 266mm x 295.2mm (7.95in x 10.47in x 11.62in) (Includes footpad) |
| bahan | 0.7mm Steel Plate, Alloy Steel |
| Papan Induk yang Serasi | ITX / Mini-DTX |
| Sokongan Bekalan Kuasa | ATX/SFX (Length ≤ 140mm) |
| CPU Cooler Height Support | ≤ 170mm |
| Sokongan Panjang GPU | ≤ 255mm |
| Fan Positions | Top: 120mm x1 (Optional) Rear: 120mm x1 (Optional) Bottom: 120mm x1 or 3.5" HDD |
| Drive Bays | 1x 3.5" HDD or 1x 2.5" SSD |
| Slot Pengembangan | 4 |
| Antara Muka Depan | Type-C (20PIN) / USB 3.0 x1 / AUDIO + MIC (2-in-1) |
| Berat Bersih | 2.50KG / 5.51lb |
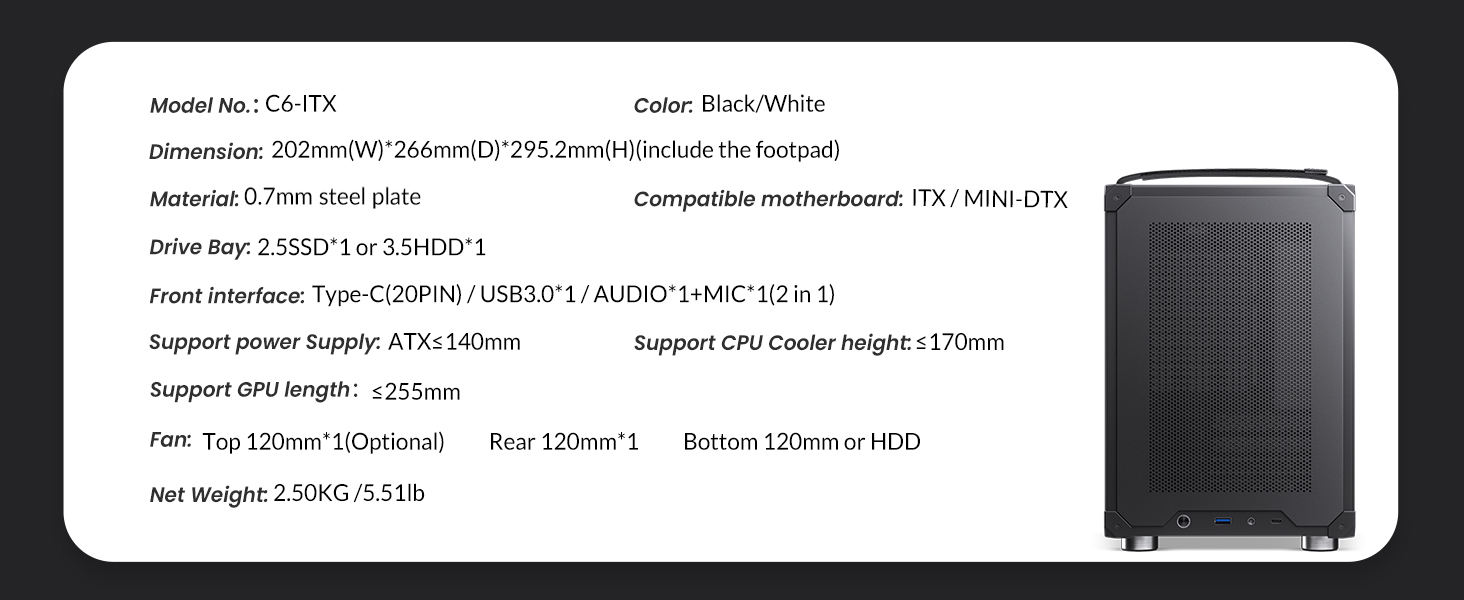
Figure 4: Detailed specifications of the C6-ITX case.
4. Panduan Persediaan dan Pemasangan
Follow these steps to properly set up and install components into your JONSBO C6-ITX case. It is recommended to lay the case on its side on a stable, flat surface during installation.
4.1. Pembuangan Panel
The C6-ITX features a tool-free design for easy access. To begin, gently push the snap mechanism on the rear of the top panel to release it. Once the top panel is removed, the front and side mesh panels can be detached by gently pulling them outwards from the inside of the chassis.

Rajah 5: Meletup view demonstrating panel removal.
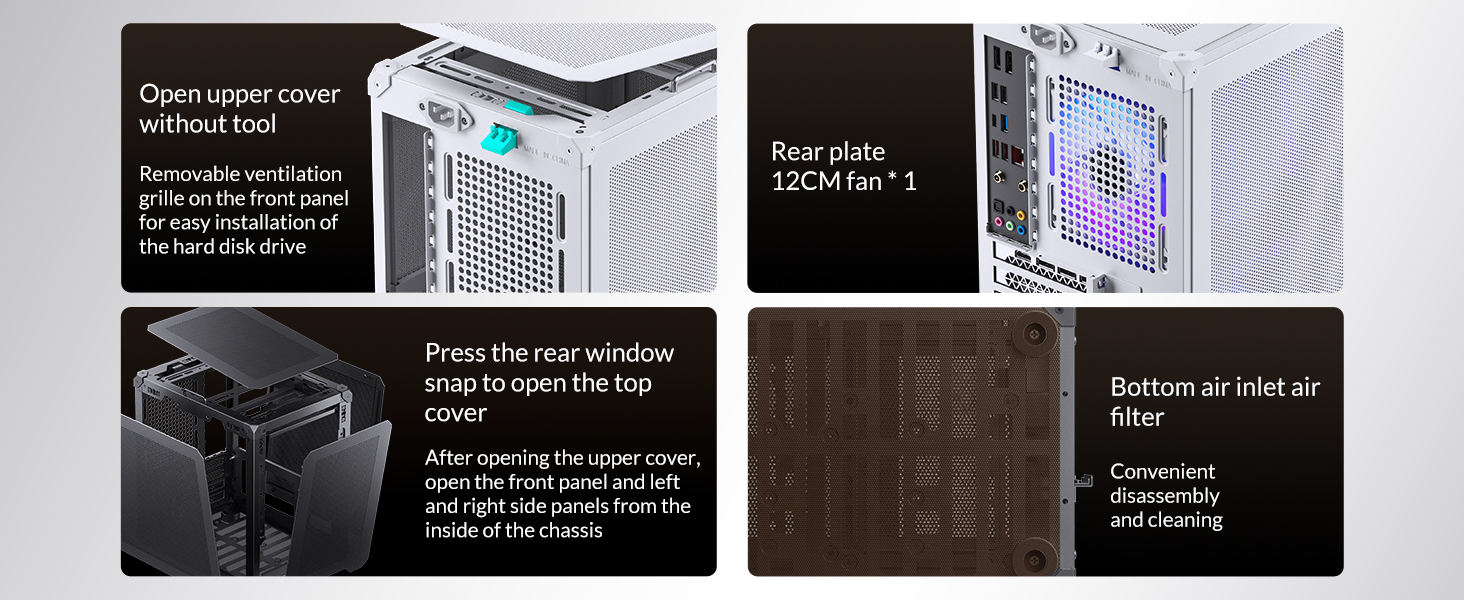
Figure 6: Step-by-step guide for quick panel disassembly.
4.2. Pemasangan Papan Induk
Install your Mini-ITX or Mini-DTX motherboard onto the designated standoffs inside the chassis. Secure it with the appropriate screws. Ensure all necessary cables (front I/O, power) are routed before fully securing the motherboard.
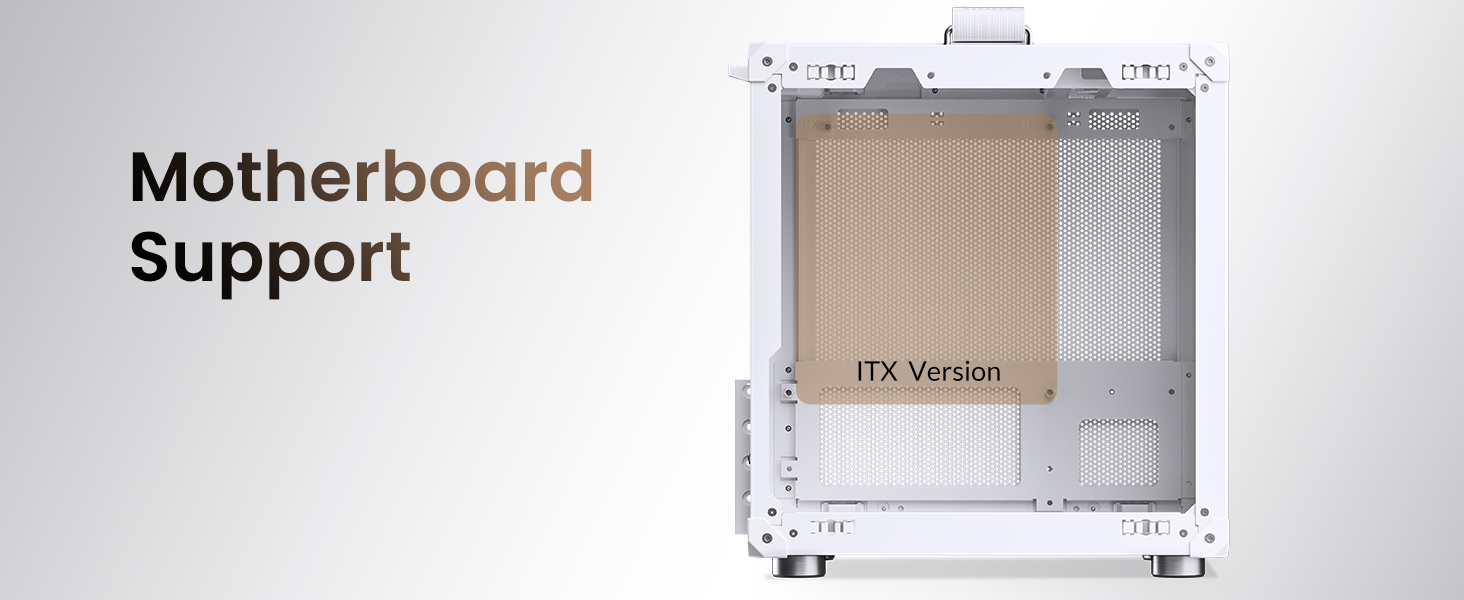
Figure 7: Motherboard mounting area.
4.3. Pemasangan Unit Bekalan Kuasa (PSU).
The C6-ITX supports ATX or SFX power supplies up to 140mm in length. Mount the PSU to its bracket at the top of the chassis. For ATX PSUs, ensure the half-break is removed before installation. For SFX PSUs, align the holes and mount directly with screws.
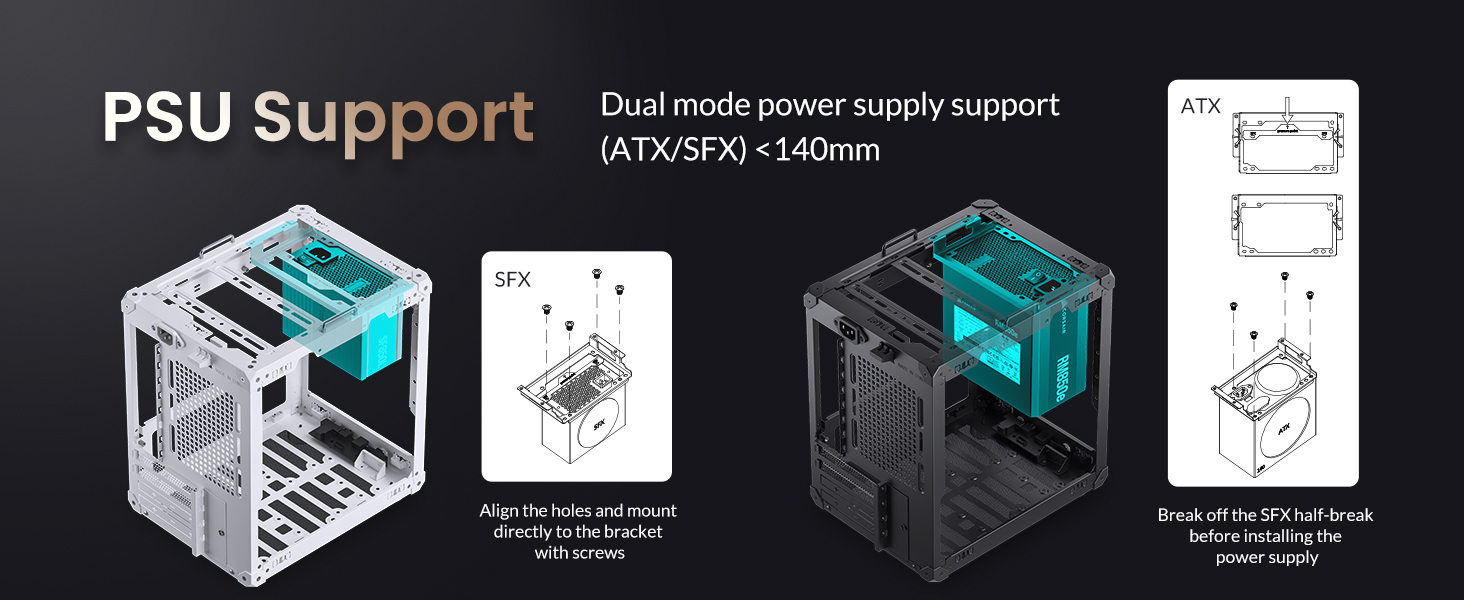
Figure 8: PSU installation options.
4.4. Pemasangan Unit Pemprosesan Grafik (GPU)
Install your GPU into the PCIe slot on your motherboard. The case supports GPUs up to 255mm in length. Ensure proper clearance and secure the GPU with the provided screws for the expansion slots.
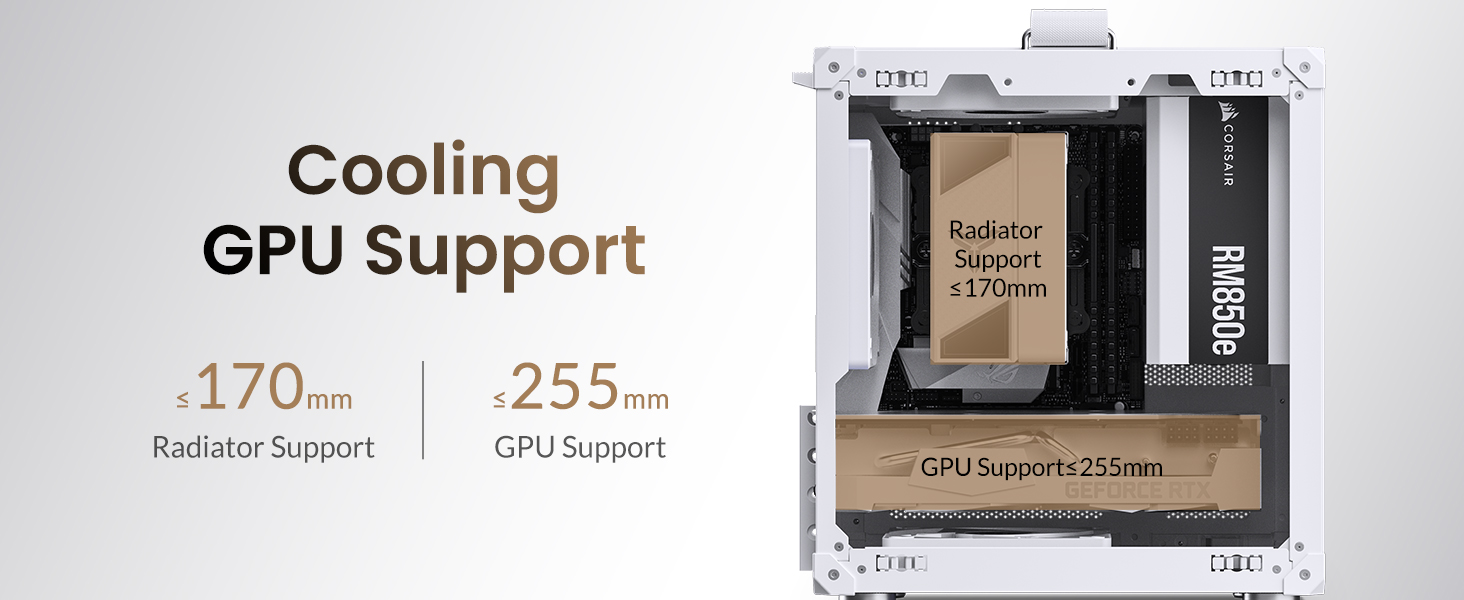
Figure 9: GPU and radiator support dimensions.
4.5. Pemasangan Drive
The case supports either one 3.5" HDD or one 2.5" SSD. The drive bay is located at the bottom of the chassis. For 3.5" HDDs, it shares space with the bottom 120mm fan. Choose your preferred storage option and secure it in place.
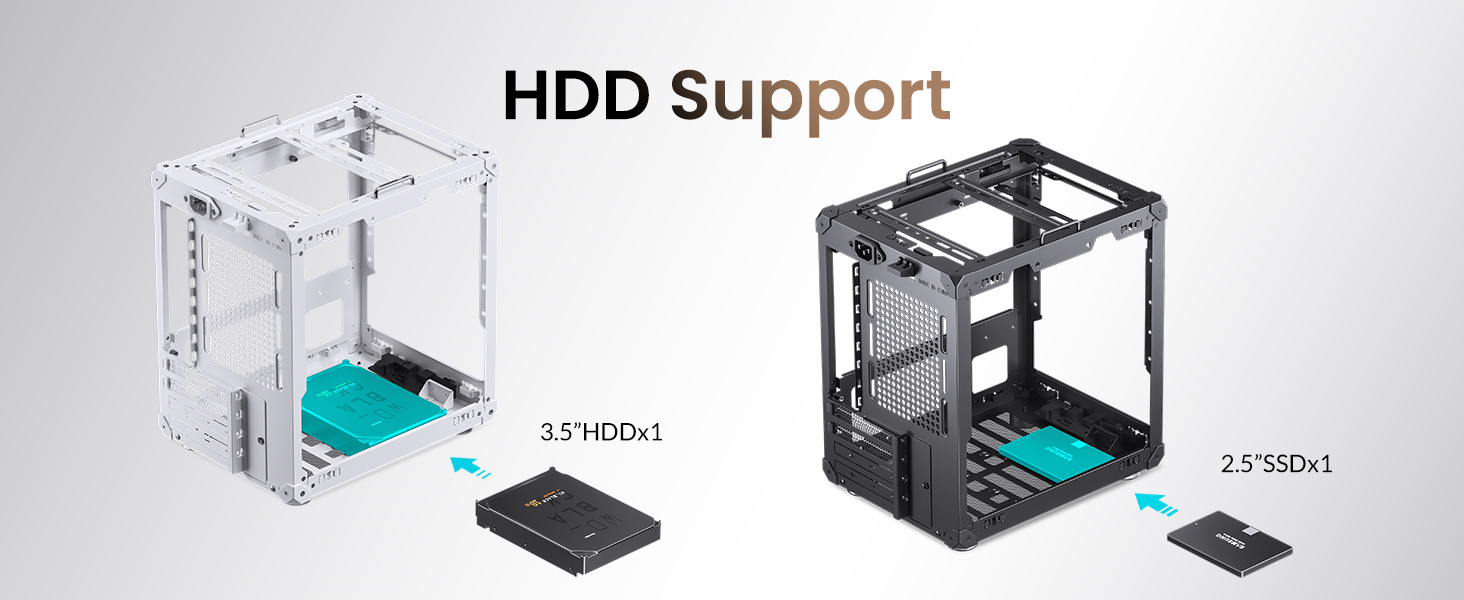
Figure 10: Drive bay options.
4.6. Pemasangan Kipas
The C6-ITX supports various fan configurations for optimal cooling:
- Atas: 1x 120mm fan (Optional)
- belakang: 1x 120mm fan (Optional)
- Bawah: 1x 120mm fan (Optional, shares space with 3.5" HDD)
Install fans in desired locations, ensuring proper airflow direction (intake/exhaust) for your setup. The removable ventilation grille on the front panel facilitates fan installation.

Gambar 11: Dalaman view with potential fan placements.
5. Arahan Operasi
Once all components are installed and secured, reattach all panels. Connect your peripherals (monitor, keyboard, mouse, etc.) to your PC. Connect the power cable to the PSU and then to a power outlet. Press the power button on the front I/O panel to start your system.
5.1. Panel I/O Hadapan
- Butang Kuasa: Press to power on/off the system.
- USB 3.0: Connect USB 3.0 compatible devices for high-speed data transfer.
- Type-C (20PIN): Connect compatible USB-C devices.
- AUDIO + MIC (2-in-1): Connect headphones or headsets with a combined audio/microphone jack.

Figure 12: Front I/O panel for easy access.
6. Penyelenggaraan
Regular maintenance ensures the longevity and optimal performance of your PC case and components.
- Pembersihan Habuk: Periodically remove the mesh panels and use compressed air or a soft brush to clean dust from the case interior, fans, and component heatsinks. The bottom air inlet features an air filter for convenient disassembly and cleaning.
- Pengurusan Kabel: Ensure cables are neatly routed to prevent obstruction of airflow.
- Faktor Persekitaran: Place the PC case in a well-ventilated area, away from direct sunlight, heat sources, and excessive humidity.

Rajah 13: Belakang view showing access for maintenance.
7. Penyelesaian masalah
If you encounter issues with your JONSBO C6-ITX case, consider the following common troubleshooting steps:
- Sistem Tidak Dihidupkan:
- Check all power connections, including the PSU to the wall outlet, and internal power cables to the motherboard and components.
- Ensure the power button cable is correctly connected to the motherboard's front panel header. - Isu Terlalu Panas:
- Verify that all case fans and CPU/GPU coolers are functioning correctly.
- Clean any accumulated dust from fans and mesh panels.
- Ensure proper airflow direction (intake/exhaust) for fans. - Tiada Output Paparan:
- Confirm that your monitor cable is securely connected to the GPU (or motherboard if using integrated graphics).
- Reseat the GPU in its PCIe slot. - Loose Panels:
- Ensure all panels are correctly aligned and snapped into place. Refer to Section 4.1 for proper panel reinstallation.
8. Video Produk Rasmi
Watch the official product video for a visual guide on the JONSBO C6-ITX case features and capabilities.
Video 1: JONSBO C6-ITX Mini ITX Mesh Case Overview. This video demonstrates the key features and design of the JONSBO C6-ITX case, including its compact size, mesh panels, and component compatibility.
9. Waranti dan Sokongan
For warranty information and technical support, please refer to the official Jonsbo webtapak atau hubungi perkhidmatan pelanggan mereka secara langsung. Simpan resit pembelian anda sebagai bukti pembelian untuk sebarang tuntutan waranti.