
1. Persediaan
This section provides step-by-step instructions for the initial setup of your URTOPIA Carbon 1Pro Electric Bike. Please follow these steps carefully to ensure proper assembly and functionality.
1.1 Membuka Kotak dan Pemeriksaan Awal
Carefully open the packaging and remove all components. Inspect all parts for any signs of damage during transit. Ensure all listed components are present before proceeding with assembly.
- Smartbar Box: Contains the Smartbar unit.
- Pedal: Left and right pedals.
- Pos Tempat Duduk Clamp: For securing the seatpost.
- Skru gandar: For front wheel installation.
- Stem Spacers (2x 15mm): For handlebar height adjustment.
- Battery Keys: For battery removal and locking.
- Hex Wrenches (2.5mm, 3mm, 5mm, 6mm): Essential tools for assembly.
- Lampu belakang: Rear safety light.
- Front Reflector: For front visibility.
- Rear Reflector: For rear visibility.
For a visual guide on unboxing and initial assembly, please refer to the video below:
Video: Assembly guide for the URTOPIA Carbon 1Pro Electric Bike, demonstrating unboxing and initial setup steps.
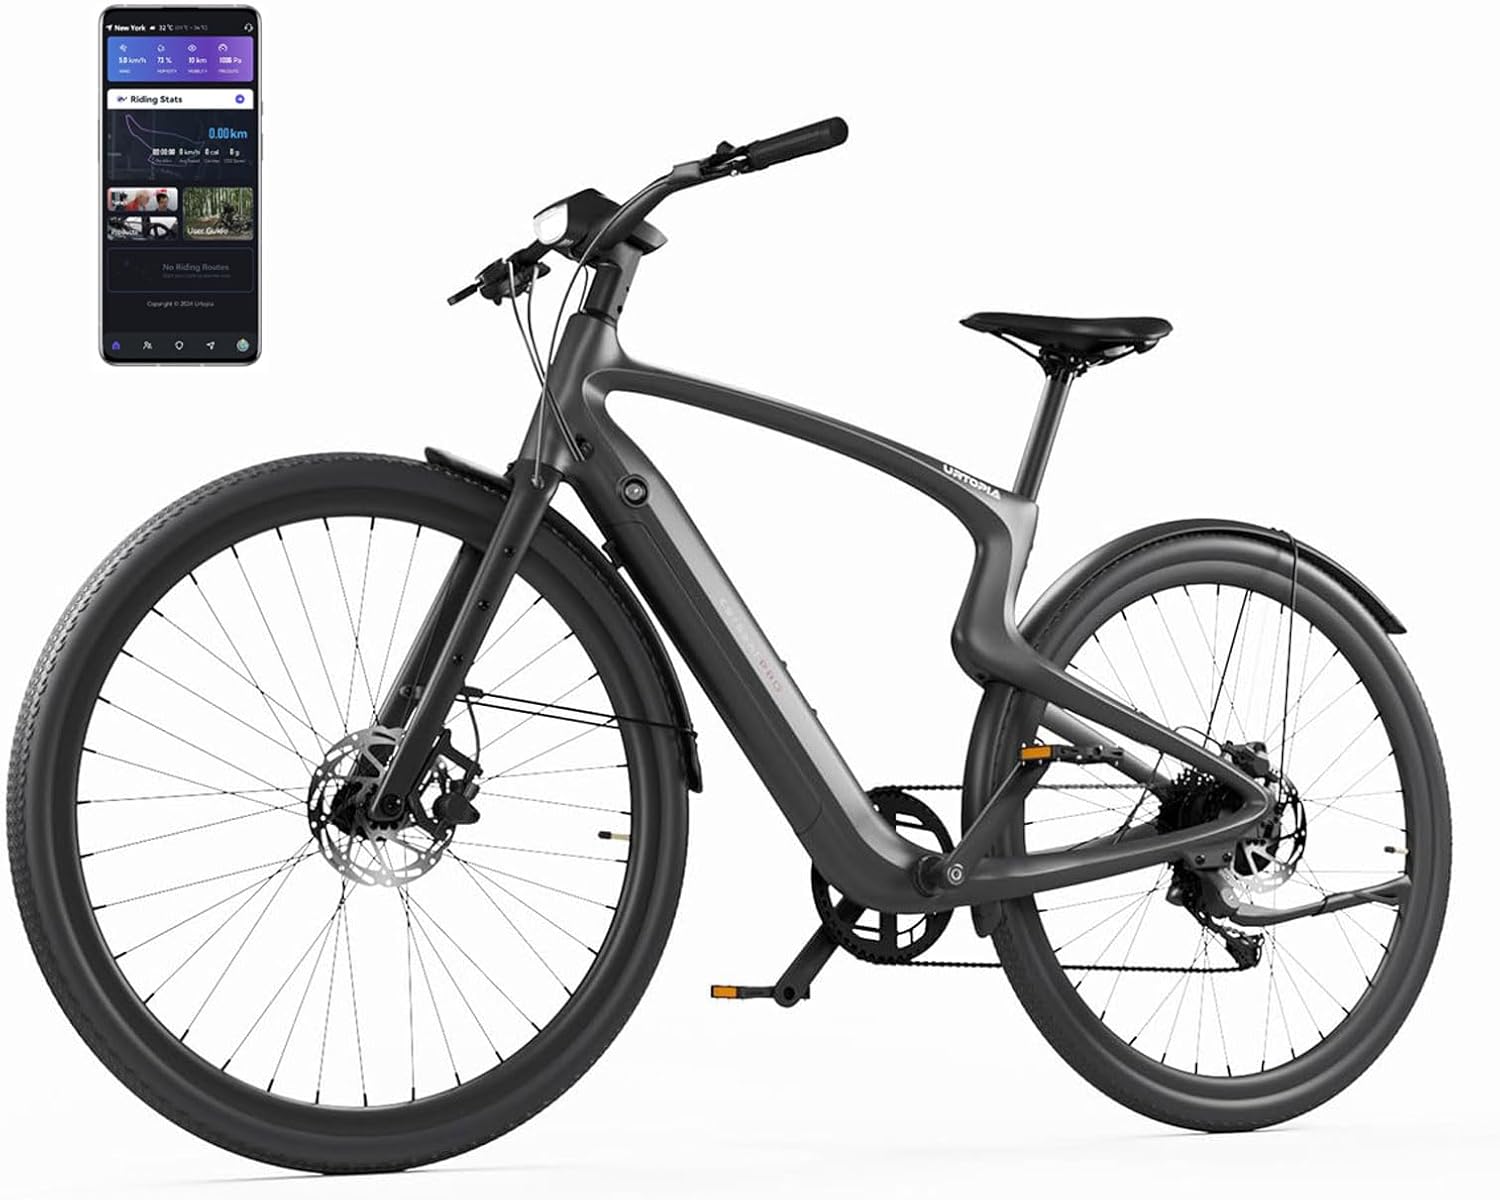
Imej: Utama view of the URTOPIA Carbon 1Pro Electric Bike, showcasing its sleek design and integrated Smartbar.
1.2 Pengaktifan Bateri
Before first use, the battery must be activated. Use the provided key to unlock and remove the battery from the bike frame. Connect the battery to the charger and a power source for at least one minute to activate it. This step is crucial for the battery's initial function.
1.3 Pemasangan Hendal
Longgarkan clamping screw on the top tube of the fork using the 5mm hex wrench. Remove the fork protection hose and cover. Insert the handlebar stem into the fork's top tube. Use the provided 15mm stem spacers as needed for desired height. Re-insert and tighten the clamping screw with the 5mm hex wrench.
1.4 Pemasangan Fender Depan
Retrieve the front fender. Loosen the screw for fixing the fender on the fork using the 3mm hex wrench. Remove the screw from the fork's fender stay. Position the front fender as shown in the assembly video, aligning the fender holding hole with the fork screw hole. Adjust the fender's height and tighten the screw. Install and tighten the fender stays.
1.5 Pemasangan Roda Hadapan
Remove the protective covers from the left and right sides of the front wheel. Take off the protection parts for the brake caliper and the front fork dropout. Align the wheel's brake disc in parallel with the braking pads and carefully seat the fork onto the wheel hub ends. Insert the axle screw through the wheel hub and tighten it with the 5mm hex wrench. Visually confirm the brake disc is centered within the brake caliper with even clearance on both sides. Ensure the fender stays are consistent; if not, loosen the thread sleeve, adjust the length, and re-tighten.
1.6 Align the Handlebar
Adjust the position of the front wheel and handlebar to ensure they are aligned and centered. Use the 5mm hex wrench to tighten the stem screws.
1.7 Smartbar Box Installation
Remove the Smartbar unit from its packaging. Align the bottom protrusion of the Smartbar box with the sunken platform of the handlebar stem. Ensure the Smartbar box fits perfectly onto the handlebar. Use the 2.5mm hex wrench to tighten the screws underneath the Smartbar box. Connect the two wires from the box, matching them by color and aligning the arrows on the connectors (one set is green, the other is black). Insert the connected wires into the hole in the handlebar to maintain a clean aesthetic.
1.8 Pemasangan Pedal
Identify the left (L) and right (R) pedals. The crank arm also indicates which pedal (L or R) should be installed. Use the 6mm hex wrench to install the pedals. Screw the pedal onto the crank arm and tighten it firmly.
1.9 Pemasangan Kickstand
Use the 5mm hex wrench to remove the locking screw on top of the kickstand. Align the screw holes of the kickstand with the holes on the bike frame. Use the 5mm hex wrench to tighten the screws. The kickstand should be positioned on the inner side of the frame.
1.10 Seatpost Installation
Insert the seatpost into the frame's seat tube. There is a cable inside the frame for accessories; stash it carefully into the seat tube to prevent damage. Insert the clamp and adjust the height of the seatpost so that the saddle and the top tube are aligned and centered. Use the 5mm hex wrench to tighten the clamp.
1.11 Pemasangan Lampu Belakang
First, install the taillight and rubber ring together by pressing down the lever and sliding the rubber ring onto the taillight. Then, place the taillight rubber ring onto the seatpost and secure it.
1.12 Bike Activation (App Setup)
This is the final step before your first ride. Download the URTOPIA app from your device's app store. Open the app, register your account, and log in. Ensure your device's Bluetooth is enabled. Press any button on the Smartbar to display the QR code. Scan the QR code using the app to activate your bike. You can also record your fingerprint for unlocking, or skip this step and do it later. Be aware that if a fingerprint is not recorded, anyone can turn on the bike.
2. Beroperasi
The URTOPIA Carbon 1Pro Electric Bike is designed for intuitive operation with advanced smart features.
2.1 Menghidupkan/Mematikan dan Membantu Pedal
To power on the bike, press the power button on the Smartbar. The bike features 5 pedal assist modes, which can be selected via controls on the handlebar. The torque sensor ensures smooth and responsive power delivery as you pedal.
2.2 Ciri Pintar
The integrated Smartbar provides access to various intelligent functions:
- Navigasi GPS: Utilize built-in GPS for navigation directly from the Smartbar display.
- Anti-theft Alarms: Enhanced security features to deter theft.
- Buka kunci cap jari: Securely unlock your bike with your registered fingerprint.
- Kawalan Suara: Adjust speed modes and other settings hands-free using voice commands.
- Urtopia App Integration: Connect to the Urtopia APP to track your routes, monitor calorie burn, and share data on platforms like Strava.

Imej: Selesaiview of the Smartbar features, including GPS tracking, fingerprint unlock, and Bluetooth music.

Image: Various usage scenarios for the URTOPIA Carbon 1Pro, including field trips, city rides, off-road, and trail rides.
3. Penyelenggaraan
Regular maintenance ensures the longevity and optimal performance of your URTOPIA Carbon 1Pro Electric Bike.
3.1 Penjagaan Am
- Pembersihan: Regularly clean the bike frame with a soft, damp kain. Elakkan mencuci tekanan tinggi terus pada komponen elektrik.
- Tekanan Tayar: Check tire pressure before each ride. Maintain recommended PSI for optimal performance and safety.
- Pelinciran rantai: Pastikan rantai bersih dan dilincirkan untuk memastikan pertukaran gear yang lancar dan mencegah haus.
3.2 Penjagaan Bateri
The URTOPIA Carbon 1Pro features a UL 2849 Certified Removable Battery with Samsung Li-ion Cells, designed for 1000 charging cycles.
- mengecas: Charge the battery using the provided charger. A full charge takes approximately 2.5 hours. The battery can be charged both on and off the bike.
- Storan: If storing the bike for an extended period, ensure the battery is charged to 50-70% and stored in a cool, dry place.
3.3 Brake System Checks
Regularly inspect the disc brakes for wear on the pads and rotors. Ensure the brake levers provide firm and consistent braking. Adjust as necessary or consult a professional for service.
4. Penyelesaian masalah
This section addresses common issues you might encounter with your URTOPIA Carbon 1Pro Electric Bike.
- Basikal Tidak Dihidupkan: Ensure the battery is fully charged and properly seated in the frame. Check that the battery is activated (refer to Section 1.2).
- Motor Tidak Membantu: Verify that the pedal assist level is set correctly. Check for any error codes on the Smartbar display. Ensure the battery has sufficient charge.
- Isu Ketersambungan Apl: Confirm Bluetooth is enabled on your device and the bike. Try restarting both the app and the bike.
- Brake Noise: This can be caused by dirt on the rotors or worn brake pads. Clean the rotors and inspect the pads for wear.
Untuk isu yang lebih kompleks atau jika langkah penyelesaian masalah tidak menyelesaikan masalah, sila hubungi khidmat pelanggan.
5. Spesifikasi
| Ciri | Spesifikasi |
|---|---|
| Jenis Basikal | Ultra Light Bike |
| Julat Umur (Perihalan) | Dewasa |
| Jenama | URTOPIA |
| Bilangan Kelajuan | 8 |
| warna | Matt Hitam |
| Saiz Roda | 29 Inci |
| Bahan Bingkai | Carbon Fiber, Aluminum |
| Jenis Penggantungan | Tegar |
| Ciri Khas | GPS-feature |
| Komponen yang Disertakan | Kickstand, Mudguard, Reflectors, Tool Kit |
| Saiz | Kecil |
| Gaya Brek | Cakera |
| Lebar Roda | 1.6 Inci |
| Kegunaan Khusus Untuk Produk | Kelikir |
| Berat Barang | 37 paun |
| Gaya | Bandar |
| Nama Model | EC1P |
| Sumber Kuasa | Motor elektrik |
| Wattage | 750W (Puncak) |
| Kandungan Tenaga Bateri Lithium | Jam 360 Watt |
| Cadangan Berat Maksimum | 240 paun |
| Perhimpunan Diperlukan | Ya (95% telah dipasang terlebih dahulu) |
| Jenis Penukar Gear Basikal | ibu jari |
| Jenis Drivetrain Basikal | Indexed drivetrain |
| Jenis Bantuan Elektrik | Pedal membantu |
| Pengeluar | New Urtopia Holdings HK Limited |
| Dimensi Pakej Item L x W x H | 66 x 33.4 x 11.2 inci |
| Berat Pakej | 69.9 paun |
| Tarikh Mula-mula Tersedia | 12 Jun 2024 |
6. Waranti dan Sokongan
6.1 Maklumat Waranti
The URTOPIA Carbon 1Pro Electric Bike comes with a Waranti Terhad 2 tahun. Please refer to the warranty description provided with your product for full details on coverage and terms.
6.2 Sokongan Pelanggan
URTOPIA is committed to providing excellent customer care. We offer a self-operated after-sales center, local spare parts stock, and 24/7 customer support to assist you with any inquiries or issues.
Untuk bantuan lanjut, sila hubungi kami di: support@newurtopia.com