Olelica B0D178HDS6
Olelica Automatic Pet Feeder 5L - User Manual
Model: B0D178HDS6
1. Arahan Keselamatan Penting
- Read all instructions carefully before operating the feeder.
- This appliance is intended for use with dry pet food only. Do not use wet food, canned food, or treats.
- Ensure kibble size is between 2mm and 12mm (0.07-0.47 inches) to prevent clogging.
- Keep the feeder away from direct sunlight and high temperatures.
- Do not immerse the main unit in water. Only the food hopper and bowl are washable.
- Sentiasa cabut plag pengumpan sebelum membersihkan atau melakukan penyelenggaraan.
- Keep out of reach of children and pets to prevent tampering or injury.
- Use only the original power adapter provided.
2. Kandungan Pakej
Sahkan bahawa semua komponen terdapat dalam pakej:
- Feeder Unit (Main Body with Control Panel)
- Food Hopper (Transparent Container)
- Mangkuk Makanan
- Penyesuai Kuasa
- Manual Pengguna (dokumen ini)
3. Produk Lebihview
Familiarize yourself with the main components of your Olelica Automatic Pet Feeder.

Imej 3.1: Depan view of the Olelica Automatic Pet Feeder, showing the transparent food hopper, control panel, and food bowl.
Komponen Utama:
- Food Hopper: Transparent container for storing dry pet food.
- Panel Kawalan: Features an LCD display and buttons for programming and manual operation.
- Mangkuk Makanan: Detachable bowl where food is dispensed.
- Dispenser Outlet: Where food exits the hopper into the bowl.
- Pelabuhan Kuasa: Untuk menyambungkan penyesuai kuasa AC.
- Petak Bateri: For optional battery backup (requires 3 x D-size batteries, not included).
4. Persediaan
4.1 Perhimpunan
- Letakkan unit pengumpan utama di atas permukaan yang rata dan stabil.
- Attach the food bowl to the base of the feeder unit, ensuring it clicks securely into place.
- Place the transparent food hopper onto the main unit, aligning it properly.
4.2 Bekalan Kuasa
Pengumpan menyokong bekalan kuasa berganda untuk operasi berterusan.
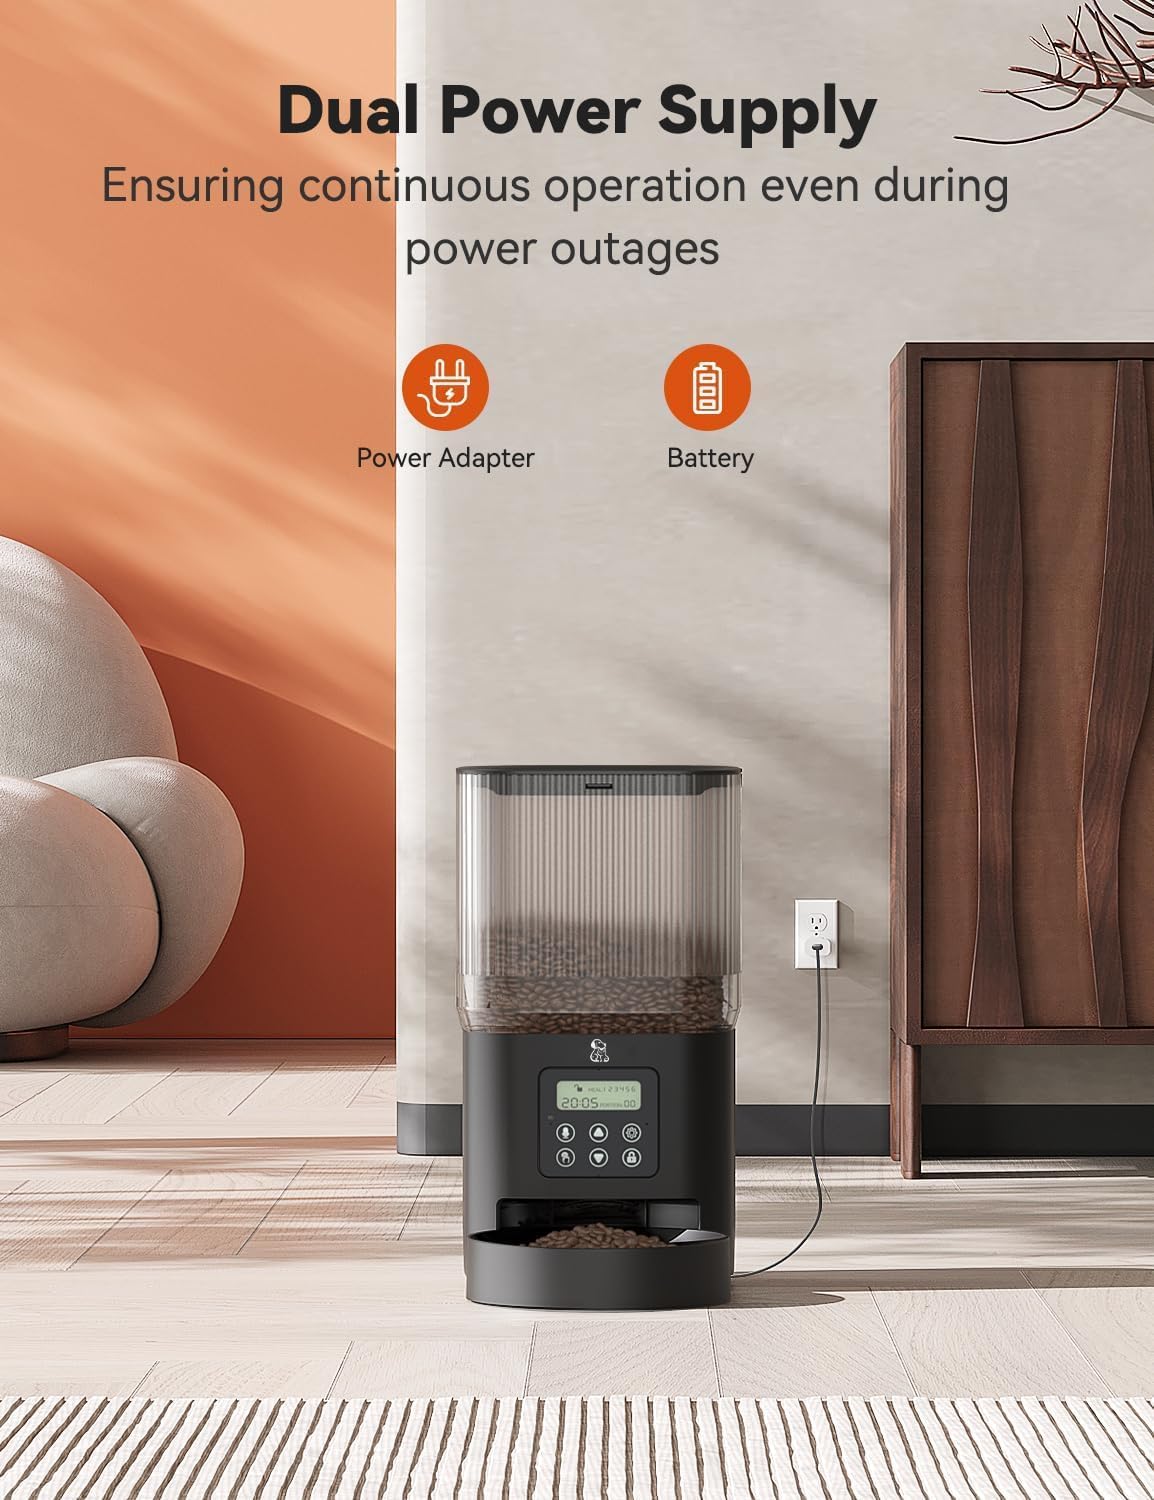
Image 4.1: The feeder operating with dual power supply, showing both AC adapter and battery icons.
- Kuasa AC: Connect the provided power adapter to the feeder's power port and plug it into a standard wall outlet. This is the primary power source.
- Bateri tambahan: Untuk kuasa outage protection, open the battery compartment on the bottom of the unit and insert 3 D-size batteries (not included). Ensure correct polarity. The feeder will automatically switch to battery power if AC power is lost.
4.3 Mengisi Corong Makanan
- Open the twist-lock lid on top of the food hopper.
- Pour dry pet food into the hopper. Ensure the kibble size is appropriate (2-12mm).
- Close the lid and twist it to secure. This twist-lock design helps maintain food freshness and prevents pets from accessing the food prematurely.
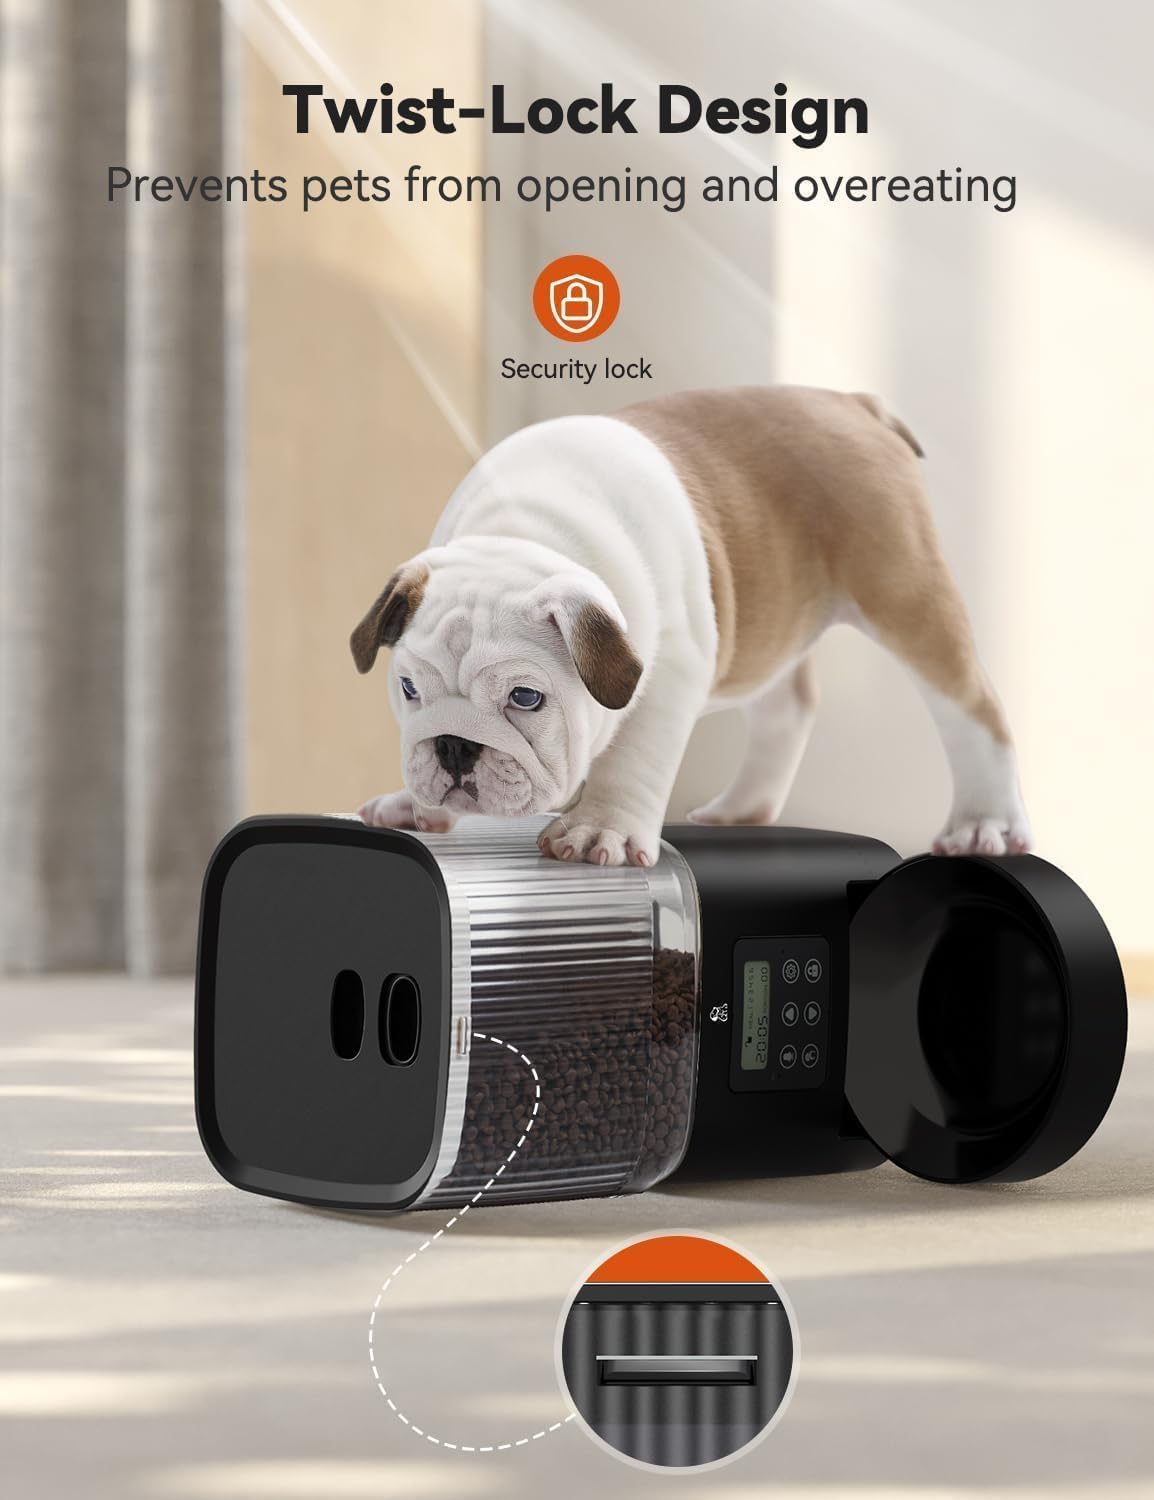
Image 4.2: The twist-lock lid design, which helps secure the food and prevent pets from opening it.
5. Arahan Operasi
5.1 Panel Kawalan Selesaiview
The control panel features an LCD display and several buttons for programming:
- Butang SET: Enters programming mode and confirms settings.
- Butang ATAS/BAWAH: Adjust values (time, meal number, portions).
- Butang REC: Records or plays back voice message.
- Butang MANUAL: Dispenses food manually.
- Butang Kunci: Locks/unlocks the control panel to prevent accidental changes.
5.2 Menetapkan Masa Semasa
- Tekan dan tahan butang SET butang sehingga digit jam berkelip.
- Gunakan ATAS/BAWAH butang untuk melaraskan jam.
- Tekan SET to confirm the hour and move to the minute setting.
- Gunakan ATAS/BAWAH butang untuk melaraskan minit.
- Tekan SET untuk menjimatkan masa semasa.
5.3 Jadual Pemakanan Pengaturcaraan
You can schedule 1 to 6 meals per day, with 1 to 8 portions per meal (1 portion = approximately 10g).

Image 5.1: Visual representation of the feeder's programmable feeding schedule, showing 1-6 meals/day, 0-8 portions/meal, and 5L capacity.
- Tekan ke SET button repeatedly until 'MEAL 1' appears on the display.
- guna ATAS/BAWAH to set the desired feeding time for Meal 1 (hour and minute). Press SET selepas setiap pelarasan.
- After setting the time, the portion number will flash. Use ATAS/BAWAH to select the number of portions (1-8) for Meal 1. Press SET untuk mengesahkan.
- Repeat steps 2-3 for additional meals (MEAL 2 to MEAL 6) as needed. If a meal is not required, set its portion to '0'.
- After setting all desired meals, press SET untuk keluar dari mod pengaturcaraan.
5.4 Recording Voice Message
You can record a 10-second voice message to call your pet at meal times.

Image 5.2: The feeder with a cat, illustrating the 10-second voice recording feature to call pets for meals.
- Tekan dan tahan butang REC button. The display will show 'REC'.
- Speak clearly into the microphone (usually located near the control panel) for up to 10 seconds.
- Lepaskan REC button to stop recording. The message will play back automatically.
- To disable the voice message, record a silent message.
5.5 Pemakanan Manual
To dispense a single portion of food immediately:
- Tekan ke MANUAL button once. One portion of food will be dispensed.
- You can press it multiple times for additional portions.
6. Penyelenggaraan dan Pembersihan
Regular cleaning ensures hygiene and proper functioning of the feeder.

Image 6.1: Detachable components of the feeder, including the hopper and bowl, shown being cleaned.
6.1 Pembongkaran untuk Pembersihan
- Unplug the power adapter and remove any batteries.
- Empty any remaining food from the hopper.
- Twist and lift the food hopper to remove it from the main unit.
- Detach the food bowl from the base.
6.2 Arahan Pembersihan
- The food hopper and food bowl are dishwasher-safe. Alternatively, wash them by hand with mild soap and water.
- Wipe the main feeder unit with a soft, damp cloth. Do not submerge the main unit in water or allow water to enter the control panel or battery compartment.
- Ensure all parts are completely dry before reassembly and refilling with food.
6.3 Pemasangan semula
- Reattach the food bowl to the base of the feeder unit.
- Place the dry food hopper back onto the main unit, ensuring it is properly seated.
- Refill with dry pet food and secure the twist-lock lid.
- Reconnect the power adapter and/or reinsert batteries.
7. Penyelesaian masalah
If you encounter issues with your Olelica Automatic Pet Feeder, refer to the following solutions:
| Masalah | Kemungkinan Punca | Penyelesaian |
|---|---|---|
| Pengumpan tidak mengagihkan makanan. | Kibble size too large or small. Food jammed in dispenser. Hopper empty. | Ensure kibble is between 2-12mm. Clear any blockages in the dispenser. Refill hopper. |
| Feeder has no power. | AC adapter unplugged. Batteries depleted or incorrectly installed. Kuasa outage. | Check AC adapter connection. Replace batteries if needed, ensuring correct polarity. If power outage, batteries should provide backup. |
| Scheduled meals not dispensing. | Penetapan masa yang salah. Meal schedule not programmed correctly. Panel kawalan dikunci. | Verify current time. Re-program meal schedule, ensuring portions are set above '0'. Unlock control panel if necessary. |
| Voice message not playing. | No message recorded or silent message recorded. | Re-record your voice message following the instructions in Section 5.4. |
| Food gets stuck occasionally. | Kibble shape/size not ideal. Moisture affecting food. | Use recommended kibble sizes (2-12mm). Ensure food is dry and stored in a cool, dry place. |

Image 7.1: Guide to recommended kibble sizes (2-12mm) and suitable dry food types for optimal feeder performance.
8. Spesifikasi
| Ciri | Spesifikasi |
|---|---|
| Model | B0D178HDS6 |
| Jenama | Olelica |
| Kapasiti | 5 Liter / 21 Cawan |
| Makanan Setiap Hari | 1-6 hidangan |
| Hidangan Setiap Hidangan | 1-8 hidangan (lebih kurang 10g setiap hidangan) |
| Saiz Kibble | 2-12 mm (0.07-0.47 inci) |
| Rakaman Suara | 10 saat |
| Bekalan Kuasa | AC Adapter (included), 3 x D-size Batteries (not included) |
| bahan | Plastik bebas BPA |
| Dimensi (LxWxH) | 7.1 x 7.1 x 8 inci |
| Berat badan | 2.92 paun |
| Arahan Penjagaan | Hand Wash Only (hopper and bowl are dishwasher-safe) |
| Spesies Sasaran | Dog, Cat, Small Animals |
9. Waranti dan Sokongan
For warranty information, technical support, or any questions not covered in this manual, please contact Olelica customer service. Refer to the product packaging or the official Olelica weblaman web untuk maklumat hubungan.