1. Pengenalan
This manual provides detailed instructions for the installation, operation, and maintenance of your ELUSH 100A MPPT Solar Charge Controller. This advanced controller is designed to efficiently manage power from your solar panels to your battery bank, ensuring optimal charging and system protection. It automatically recognizes 12V, 24V, 36V, and 48V systems and features dual USB 5V charging ports.
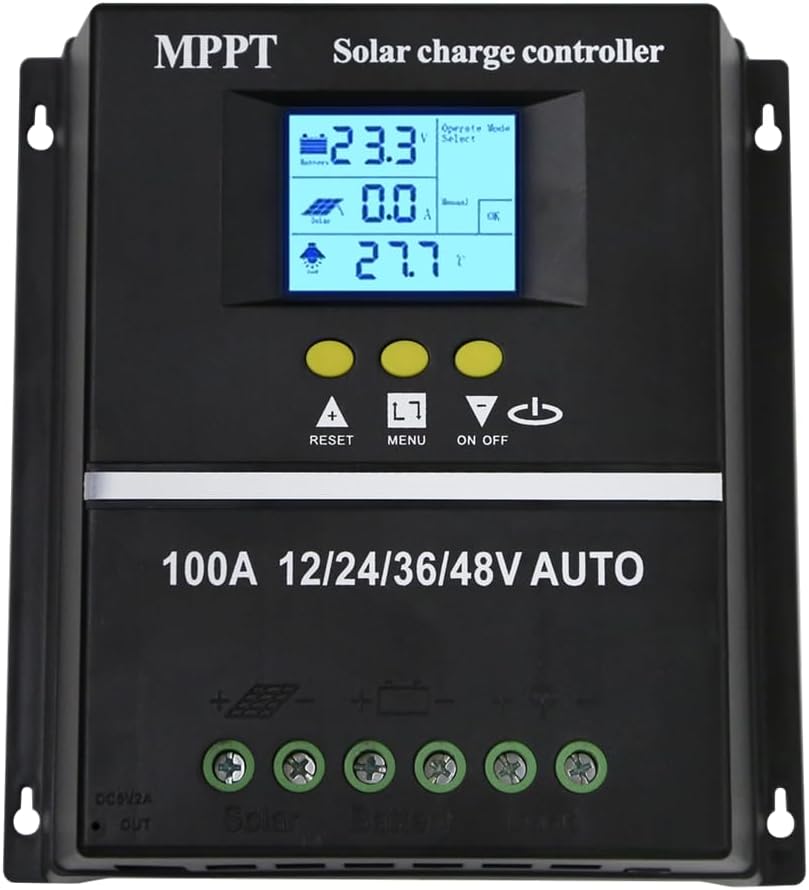
Rajah 1.1: Depan view of the ELUSH 100A MPPT Solar Charge Controller.
2. Arahan Keselamatan
Sila baca semua arahan dengan teliti sebelum pemasangan dan pengendalian. Kegagalan mematuhi arahan ini boleh mengakibatkan kerosakan pada unit, kecederaan diri atau kerosakan harta benda.
- Pastikan semua sambungan selamat dan betul sebelum menghidupkan sistem.
- Jangan buka atau cuba membaiki alat kawalan sendiri. Hubungi kakitangan yang berkelayakan untuk servis.
- Pasang pengawal di kawasan yang mempunyai pengudaraan yang baik, jauh daripada bahan mudah terbakar dan cahaya matahari langsung.
- The controller provides comprehensive voltage protection, including safeguards against battery over-voltage, over-current, power failure, overcharge, deep discharge, reverse connection, and overheating.
- Device Startup Reminder: When connecting the equipment, first connect the rechargeable battery and ensure it has power. After successful startup, then connect the solar panel. This sequence ensures proper operation.
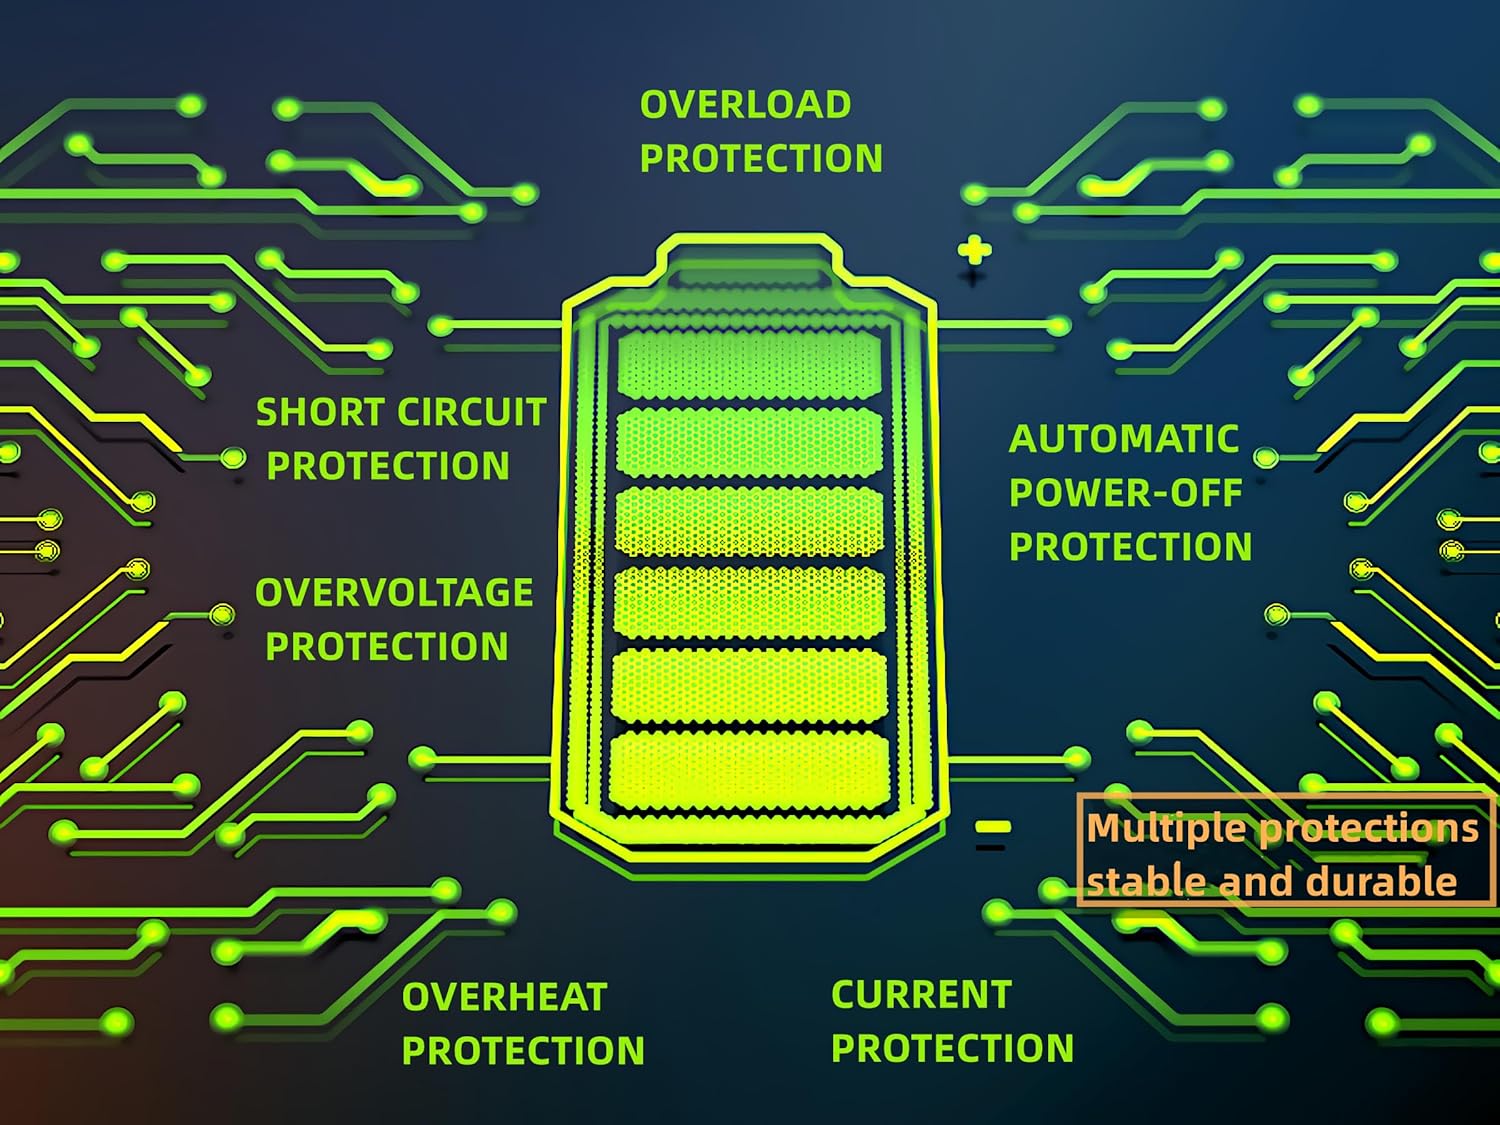
Figure 2.1: Built-in protection features for enhanced safety and durability.
3. Ciri-ciri Produk
The ELUSH MPPT Solar Charge Controller offers a range of features designed for efficient and reliable solar power management:
- Superior MPPT Technology: Equipped with an advanced Maximum Power Point Tracking algorithm, ensuring tracking efficiency of no less than 99.5% for enhanced energy utilization.
- Pengecaman Sistem Automatik: Automatically recognizes 12V, 24V, 36V, and 48V battery systems.
- Mod Operasi Serbaguna: Features seven operating modes including charging mode, light control mode, light control + time delay control mode, universal control mode, manual control mode, and timing control mode.
- Multi-function LCD Display: Dynamically displays operational data such as working mode, battery voltage, PV charging current, battery discharging current, product working temperature, and delay time.
- Pelabuhan Dual USB: Includes dual USB 5V charging ports for convenient device charging.
- Keserasian Bateri Luas: Compatible with various battery types, including Sealed, GEL, Flooded, and LifePO4.
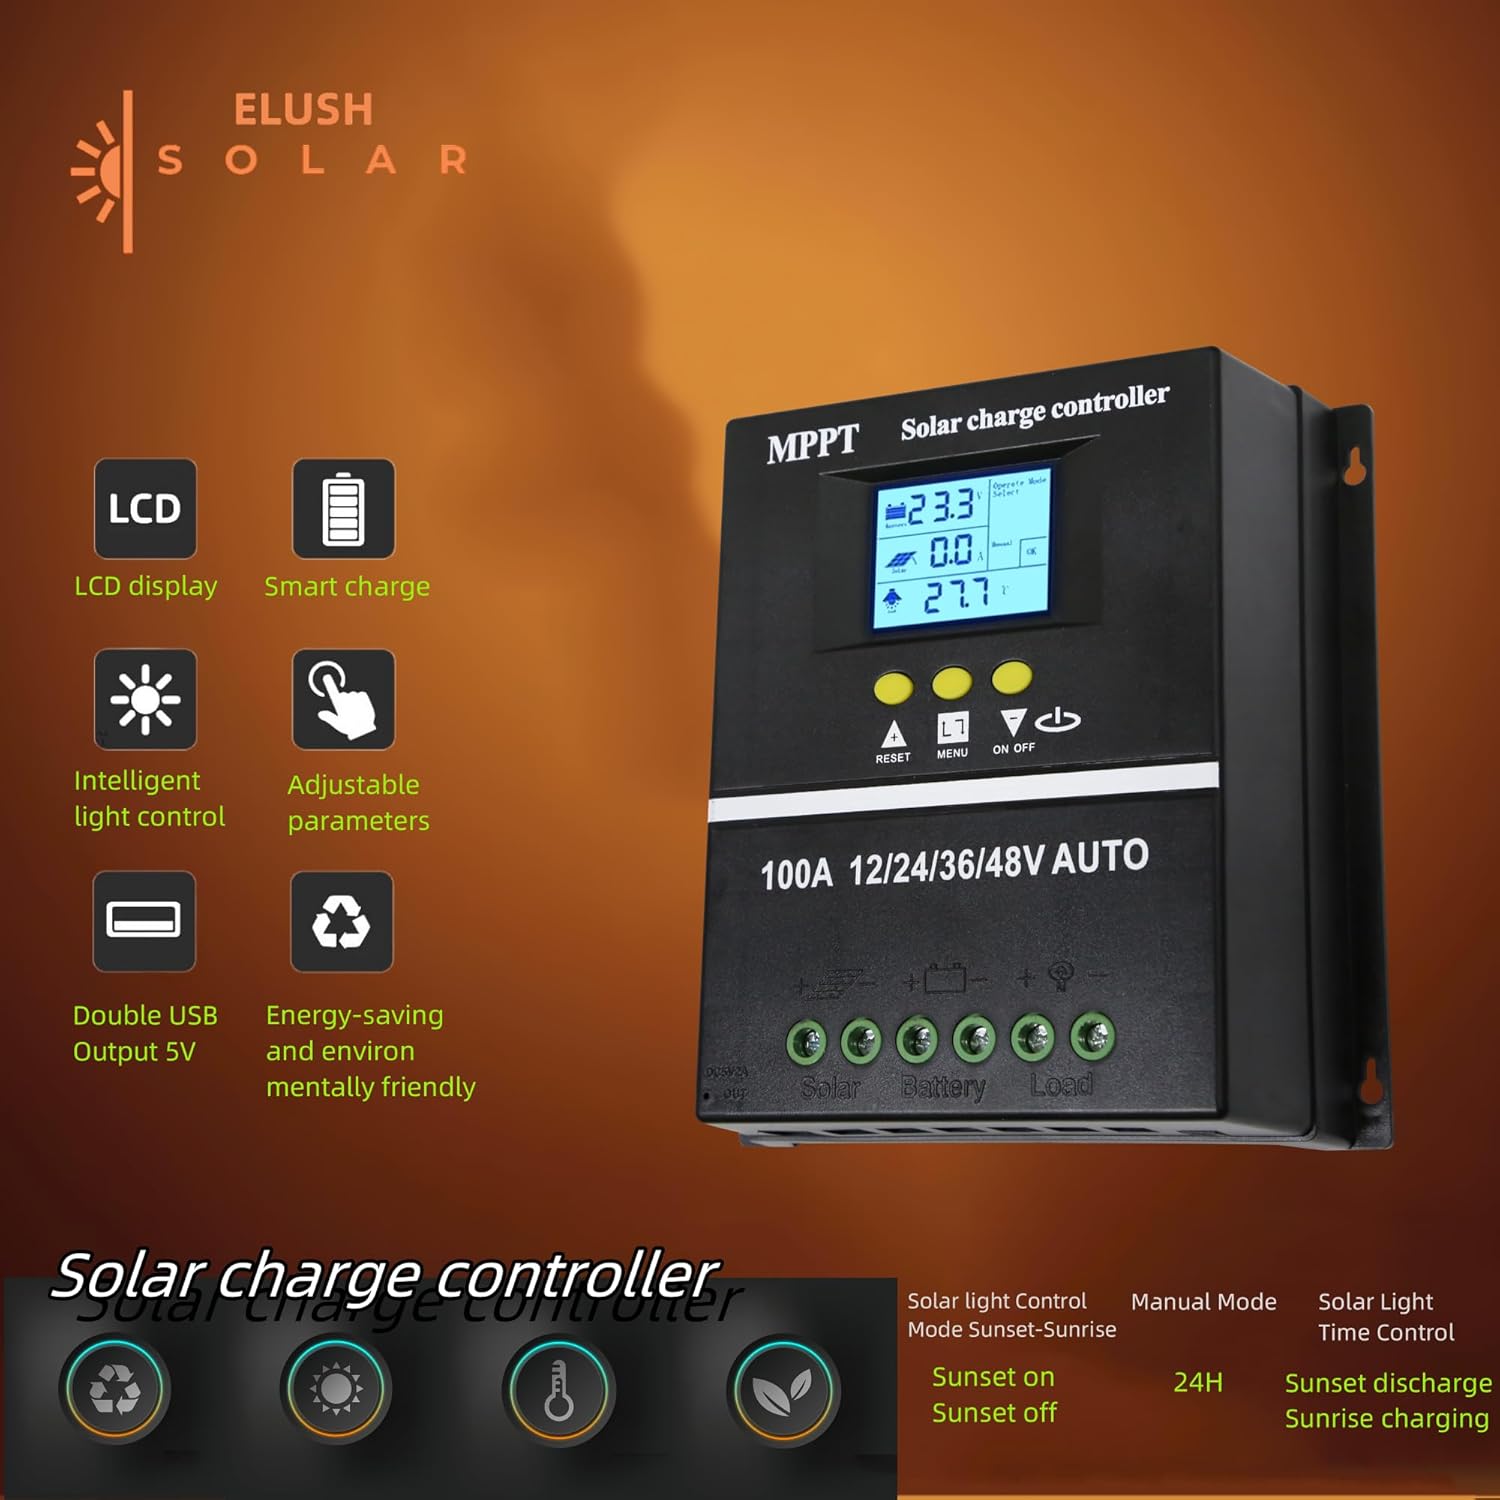
Figure 3.1: Key features of the ELUSH Solar Charge Controller.

Rajah 3.2: Terperinci view of connection ports and heat dissipation design.
4. Persediaan dan Pemasangan
Ikuti langkah-langkah ini untuk pemasangan pengawal cas solar anda dengan betul:
- Sediakan Lokasi Pemasangan: Choose a dry, well-ventilated area, protected from direct sunlight and moisture. Ensure there is enough space around the controller for proper heat dissipation.
- Sambungkan Bateri: First, connect the positive and negative terminals of your battery to the corresponding battery terminals on the controller. Ensure the battery has sufficient charge to power the controller's display.
- Connect the Solar Panels: Next, connect the positive and negative terminals of your solar panel array to the corresponding solar panel terminals on the controller.
- Sambungkan Beban (Pilihan): If you are connecting a DC load directly to the controller, connect its positive and negative terminals to the load terminals on the controller.
- Sahkan Sambungan: Periksa semula semua sambungan untuk memastikan ia selamat dan terkutub dengan betul.

Figure 4.1: Typical connection diagram for the solar charge controller.
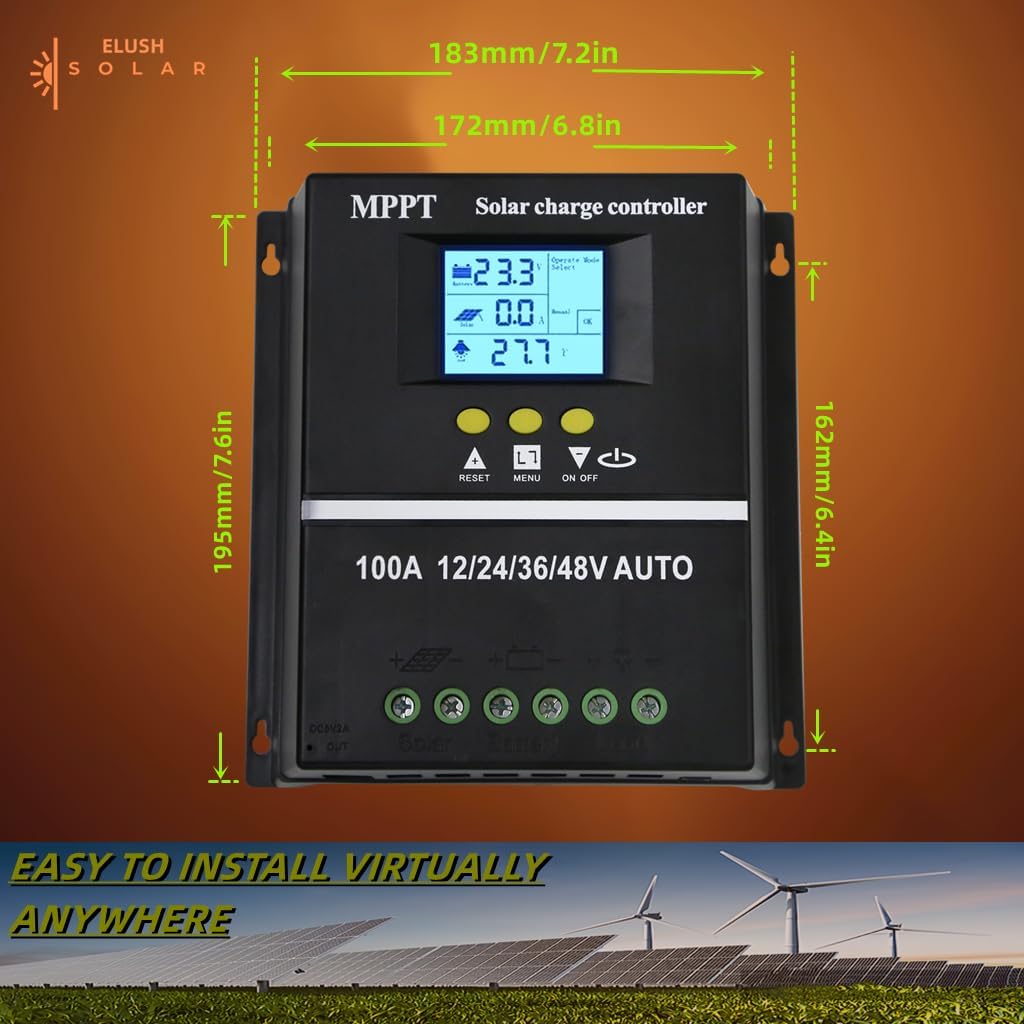
Rajah 4.2: Dimensi produk untuk perancangan pemasangan.
5. Arahan Operasi
The controller's LCD display provides real-time information and allows for configuration of various settings.
5.1 Paparan LCD dan Butang
The LCD dynamically displays operational data. Use the buttons below the screen to navigate menus and adjust settings:
- TETAP SEMULA: Resets certain parameters or enters settings mode.
- MENU: Navigates through different display screens and settings.
- Anak Panah ATAS/BAWAH: Adjust values or select options within menus.
- HIDUP/MATI: Controls the DC load output.
5.2 Mod Pengecasan
The controller supports a rapid, efficient, and safe battery charging algorithm with four stages:
- Caj Pukal: Awal stage where the battery receives maximum current.
- Caj Meningkatkan: Mengecas bateri kepada volum yang lebih tinggitage untuk memastikan cas penuh.
- Caj Terapung: Mengekalkan bateri pada volum yang malartage to prevent overcharging.
- Caj Penyamaan: Mengecas bateri secara berlebihan secara berkala untuk mengimbangi volum seltages (for certain battery types).

Figure 5.1: Four-stage battery charging process.
5.3 Pemilihan Jenis Bateri
The controller is compatible with Sealed, GEL, Flooded, and LifePO4 batteries. Ensure you select the correct battery type in the settings for optimal charging and battery longevity.

Figure 5.2: Compatible battery types.
5.4 Senario Aplikasi
The ELUSH MPPT Solar Charge Controller is suitable for various applications, including:
- Residential solar power systems
- RV and marine solar setups
- Off-grid cabins and remote power solutions
- Portable solar power kits
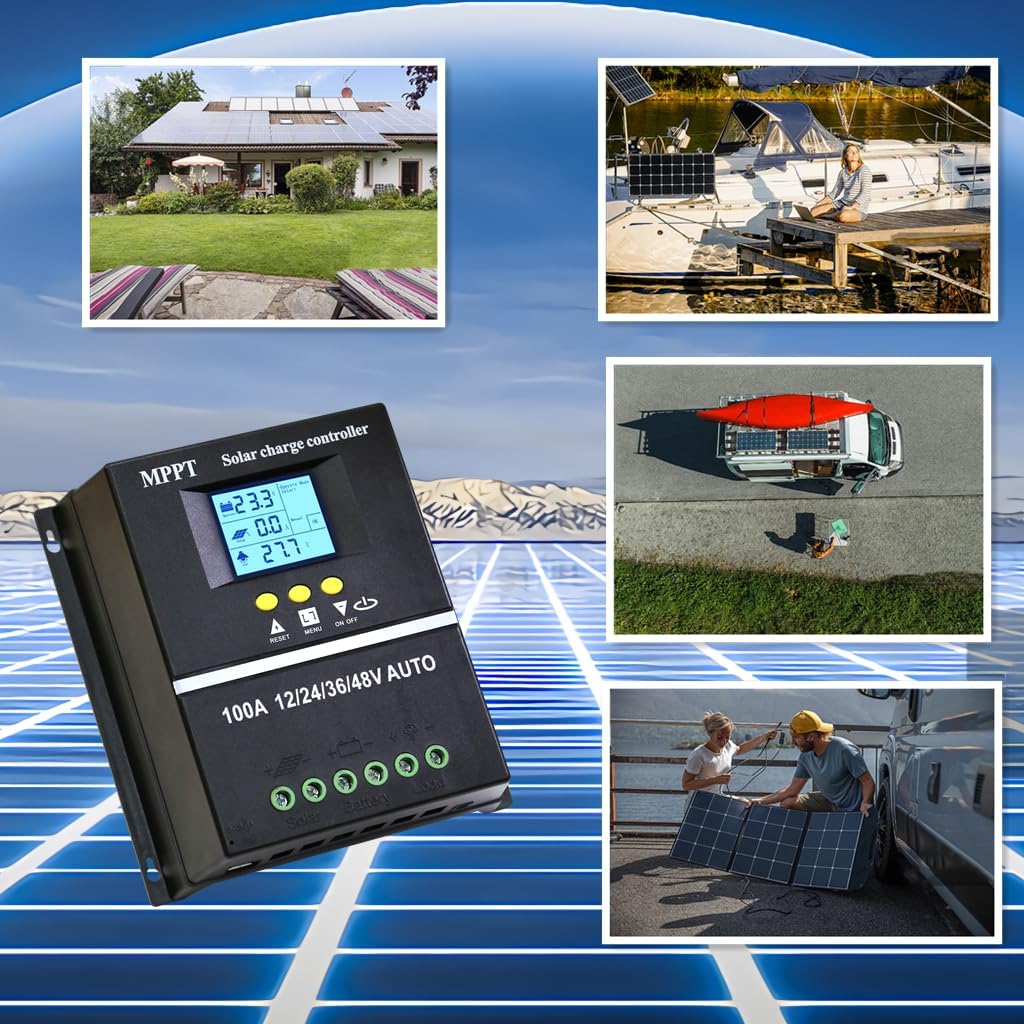
Figure 5.3: Diverse application scenarios for the solar charge controller.
6. Penyelenggaraan
Penyelenggaraan berkala memastikan jangka hayat dan prestasi optimum pengawal cas solar anda:
- Kebersihan: Keep the controller clean and free from dust and debris. Use a dry, soft cloth for cleaning.
- Sambungan: Periodically check all wiring connections to ensure they are tight and free from corrosion. Loose connections can lead to power loss or overheating.
- Pengudaraan: Ensure the installation area remains well-ventilated to prevent overheating, especially during peak operation.
- Kemas kini Firmware: Semak pengeluar website for any available firmware updates to ensure your controller has the latest features and bug fixes.
7. Penyelesaian masalah
Jika anda menghadapi masalah dengan pengawal cas solar anda, rujuk masalah dan penyelesaian biasa berikut:
| Masalah | Kemungkinan Punca | Penyelesaian |
|---|---|---|
| Controller not powering on / No display | Battery not connected or insufficient battery voltage. | Ensure battery is connected first and has adequate charge (minimum 9V for 12V systems). Charge battery externally if completely depleted. |
| No solar charging current | Solar panels not connected, insufficient sunlight, or panel issues. | Check solar panel connections. Ensure panels are receiving direct sunlight. Verify panel voltage. |
| Bateri tidak dicas sepenuhnya | Incorrect battery type setting, insufficient solar input, or battery degradation. | Verify battery type setting on the controller. Increase solar panel capacity if needed. Test battery health. |
| Beban tidak berfungsi | Load output disabled, overload, or low battery voltage. | Check load output setting (ON/OFF button). Reduce load if overloaded. Charge battery. |
| Terlalu panas | Poor ventilation or excessive load/charging current. | Ensure adequate airflow around the controller. Reduce load or check for short circuits. |
8. Spesifikasi
Detailed technical specifications for the ELUSH 100A MPPT Solar Charge Controller:
| Parameter | Nilai |
|---|---|
| Bateri Voltage | Automatik 12V/24V/36V/48V |
| Mengecas Arus | 100A |
| Max Solar Input (Voc) | 15-25V (12V Battery); 30-50V (24V Battery); 45-75V (36V Battery); 60-100V (48V Battery) |
| Kuasa Input PV Maksimum | 1200W (12V Battery); 2400W (24V Battery); 3600W (36V Battery); 4800W (48V Battery) |
| Port USB | DC 5V/1.5A x 2 USB |
| Suhu Operasi | -25°C ~ 55°C |
| Pengeluar | ELUSH |
| Berat Barang | 1.79 paun |
| Dimensi Pakej | 8.11 x 8.03 x 2.91 inci |

Figure 8.1: Detailed specifications of the 100A model.
9. Waranti dan Sokongan
ELUSH offers a 1-year warranty for this product. For technical support or any issues you may encounter, please feel free to contact our team. Our engineers are available to provide advice and solutions.
Untuk maklumat lanjut dan produk, sila layari ELUSH Store.