pengenalan
The Grimtron Electronic 40-Key Lock Box (Model GM08 E) is designed for secure and versatile key management. This electronic key cabinet offers advanced security features, including private and public access modes, temporary passwords, and a decoy password function. It is suitable for various environments, from homes and offices to property management and commercial spaces, providing an organized and secure solution for storing up to 40 keys.
Kandungan Pakej
Before installation, please verify that all components are present in your package:
- 1 x Grimtron Electronic 40-Key Lock Box
- 40 x Colored Key Tags (4 warna)
- 40 x Key Hooks
- 3 x Skru Pemasangan
- 3 x Sauh Dinding
- 1 x Manual Pengguna
- 1 x Emergency Key

Imej: Selesaiview of the Grimtron 40-Key Lock Box and its included accessories, such as key tags, hooks, mounting hardware, and the user manual.
Spesifikasi
| Ciri | Perincian |
|---|---|
| Nombor Model | GM08 E |
| Dimensi (L x W x H) | 6.5 x 20.5 x 31 sm (2.56"P x 8.03"L x 12.2"T) |
| Berat badan | 1.45 kg (3.19 lbs) |
| bahan | Keluli Aloi |
| warna | Beige |
| Jenis Kunci | Kunci Gabungan Elektronik |
| Kapasiti Utama | Up to 40 keys |
| Jenis Pemasangan | Lekap di dinding |
| Ciri Khas | Electronic Keypad, Sensor Light, Frosted Anti-Static Finish, Anti-Pry Notch Design |

Image: Detailed dimensions of the key box and its electronic keypad for accurate measurement and placement.
Persediaan dan Pemasangan
Pemasangan Dinding
The Grimtron 40-Key Lock Box is designed for secure wall mounting. It comes with all necessary hardware for installation on various wall types.
- Pilih Lokasi: Select a suitable indoor or outdoor location on a sturdy wall. Ensure the surface is flat and provides adequate support for the weight of the key box and its contents.
- Tandakan Titik Penggerudian: Hold the key box against the wall at the desired height and use a pencil to mark the positions for the mounting holes.
- Lubang gerudi: Using an appropriate drill bit for your wall type (drywall, plasterboard, concrete, brick, or wood), drill pilot holes at the marked positions.
- Masukkan Sauh: For drywall, plasterboard, concrete, or brick walls, insert the provided wall anchors into the drilled holes. For wooden walls, anchors may not be necessary.
- Secure the Key Box: Align the key box with the drilled holes and secure it to the wall using the provided mounting screws. Ensure the box is firmly attached and does not wobble.
For detailed visual instructions, please refer to the included user manual.
Arahan Operasi
Accessing the Key Box
The Grimtron key box offers two primary methods for access:
- Kunci Kecemasan: In case of forgotten password or battery depletion, the emergency key can be used to manually open the lock box. Insert the key into the emergency keyhole and turn it clockwise to unlock.
- Digital Password: Enter your programmed digital password on the electronic keypad, then press the 'OK' button. Once the correct password is entered, turn the rotary knob to open the door.

Image: Visual guide demonstrating access via emergency key and digital password entry.
Programming Passwords and Modes
The key box supports various password and operating modes for enhanced security and flexibility. Detailed programming instructions are provided in the included user manual. Please refer to it for specific steps on:
- Setting/Changing Your Master Password: Establish your primary access code.
- Mod Peribadi: For personal use, allowing access only with a unique, permanent code.
- Public Mode / Temporary Passwords: Generate one-time or temporary access codes that expire after a single use or a set period, ideal for shared access.
- Decoy Password Feature: Enter a series of random numbers before or after your actual password to deter unauthorized observation.
Pengurusan Utama
The Grimtron key box is designed to help you organize up to 40 keys efficiently. Use the provided colored key tags to categorize and identify your keys quickly.
- Attach Key Tags: Remove the key ring from a colored tag and take out the paper insert.
- Label Keys: Write down the purpose or identification of the key on the paper insert.
- Pasang semula Tag: Slide the labeled paper back into the plastic cover and reattach the key ring.
- Hang Keys: Gantungkan tagged keys onto the designated hooks inside the cabinet. This prevents clutter and ensures easy retrieval.
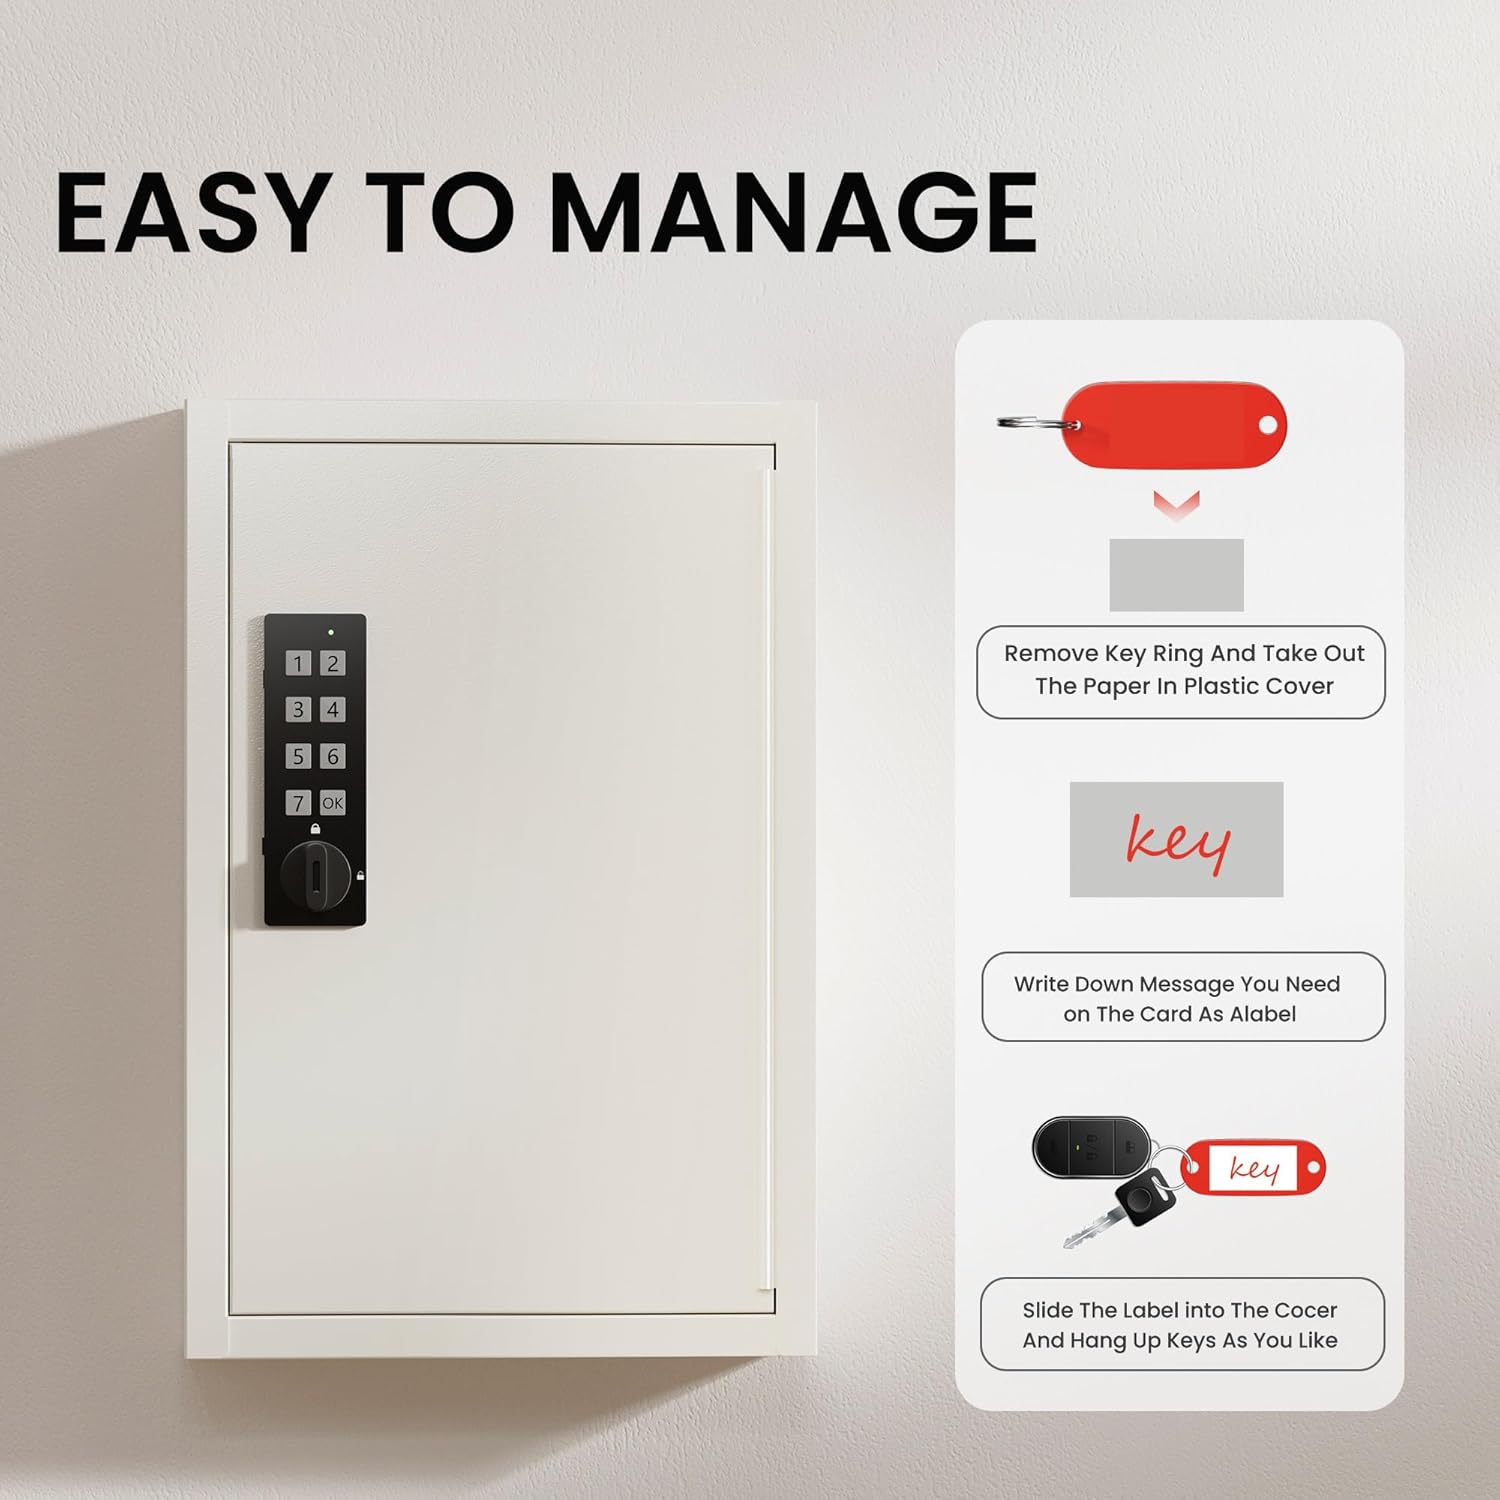
Image: Step-by-step guide on how to label and manage keys using the included colored tags.
Penyelenggaraan
To ensure the longevity and optimal performance of your Grimtron Electronic 40-Key Lock Box, follow these maintenance guidelines:
- Pembersihan: Lap bahagian luar kotak kunci dengan kain lembutamp kain. Elakkan menggunakan pembersih atau pelarut yang kasar yang boleh merosakkan kemasan atau komponen elektronik.
- Penggantian Bateri: The electronic keypad is powered by batteries (type and quantity specified in the full manual). Replace batteries promptly when the low battery indicator appears to avoid loss of access.
- Penjagaan papan kekunci: Keep the keypad dry and free from dust or debris. Avoid pressing the buttons with excessive force.
- Pelinciran Engsel: Periodically check the door hinges for smooth operation. If necessary, apply a small amount of silicone-based lubricant to prevent squeaking or stiffness.
Menyelesaikan masalah
If you encounter issues with your Grimtron Electronic 40-Key Lock Box, consider the following troubleshooting steps:
- Pad kekunci Tidak Menjawab: Check the batteries. If they are low or depleted, replace them. Ensure the keypad is clean and free from obstructions.
- Kata Laluan Terlupa: Use the emergency key to open the box. Refer to the user manual for instructions on resetting or recovering your password. If public mode was enabled, a temporary password might have been set.
- Door Not Opening After Correct Code: Ensure you are turning the rotary knob fully after entering the correct password. Check for any physical obstructions preventing the door from opening.
- Keys Not Fitting: While designed for 40 keys, very large key fobs or unusually shaped keys might take up more space. Consider spacing them out or using fewer hooks if necessary.
For persistent issues or problems not covered here, please contact customer support.
Waranti dan Sokongan
Your Grimtron Electronic 40-Key Lock Box comes with a one-year warranty from the date of purchase. Grimtron is committed to customer satisfaction and provides premium service and support for all its products.
If you have any questions, require assistance with setup or operation, or experience any issues with your product, please do not hesitate to contact Grimtron customer service. Refer to the contact information provided in your included user manual or visit the official Grimtron webtapak untuk sokongan.
Ciri-ciri Produk Tambahan
- Cahaya Sensor: The interior of the key box may feature a sensor light for improved visibility in low-light conditions.
- Frosted Anti-Static Finish: Helps protect the contents and maintain the aesthetic appeal of the cabinet.
- Anti-Pry Notch Design: Enhances security by making it more difficult to pry open the door.

Imej: Terperinci view of various product features including the digital lock, sensor light, and anti-pry design.