
1. Pengenalan
This manual provides detailed instructions for the installation, operation, and maintenance of your Mars Gaming MC-MAG ATX Gaming Case. The MC-MAG case is designed for advanced gaming setups, featuring a tempered glass side panel, dual magnetic dust filters, and efficient cooling capabilities. Please read this manual thoroughly before beginning installation to ensure proper setup and optimal performance.
Key features of the MC-MAG case include:
- Full tempered glass side panel for component visibility.
- Dual magnetic grilles on the front and top panels with removable dust filters.
- Three pre-installed 120mm Fixed RGB front fans.
- Support for liquid cooling systems up to 360mm.
- Dual-chamber design for optimized cooling and space management.
- Front panel connectivity: 2x USB 2.0, 1x USB 3.0, HD Audio, Microphone.
2. Kandungan Pakej
Sahkan bahawa semua komponen terdapat dalam pakej:
- Mars Gaming MC-MAG ATX Gaming Case
- Accessory kit (screws, cable ties, standoffs)
- Manual Pengguna (dokumen ini)
3. Case Overview
Familiarize yourself with the main components and features of the MC-MAG case.
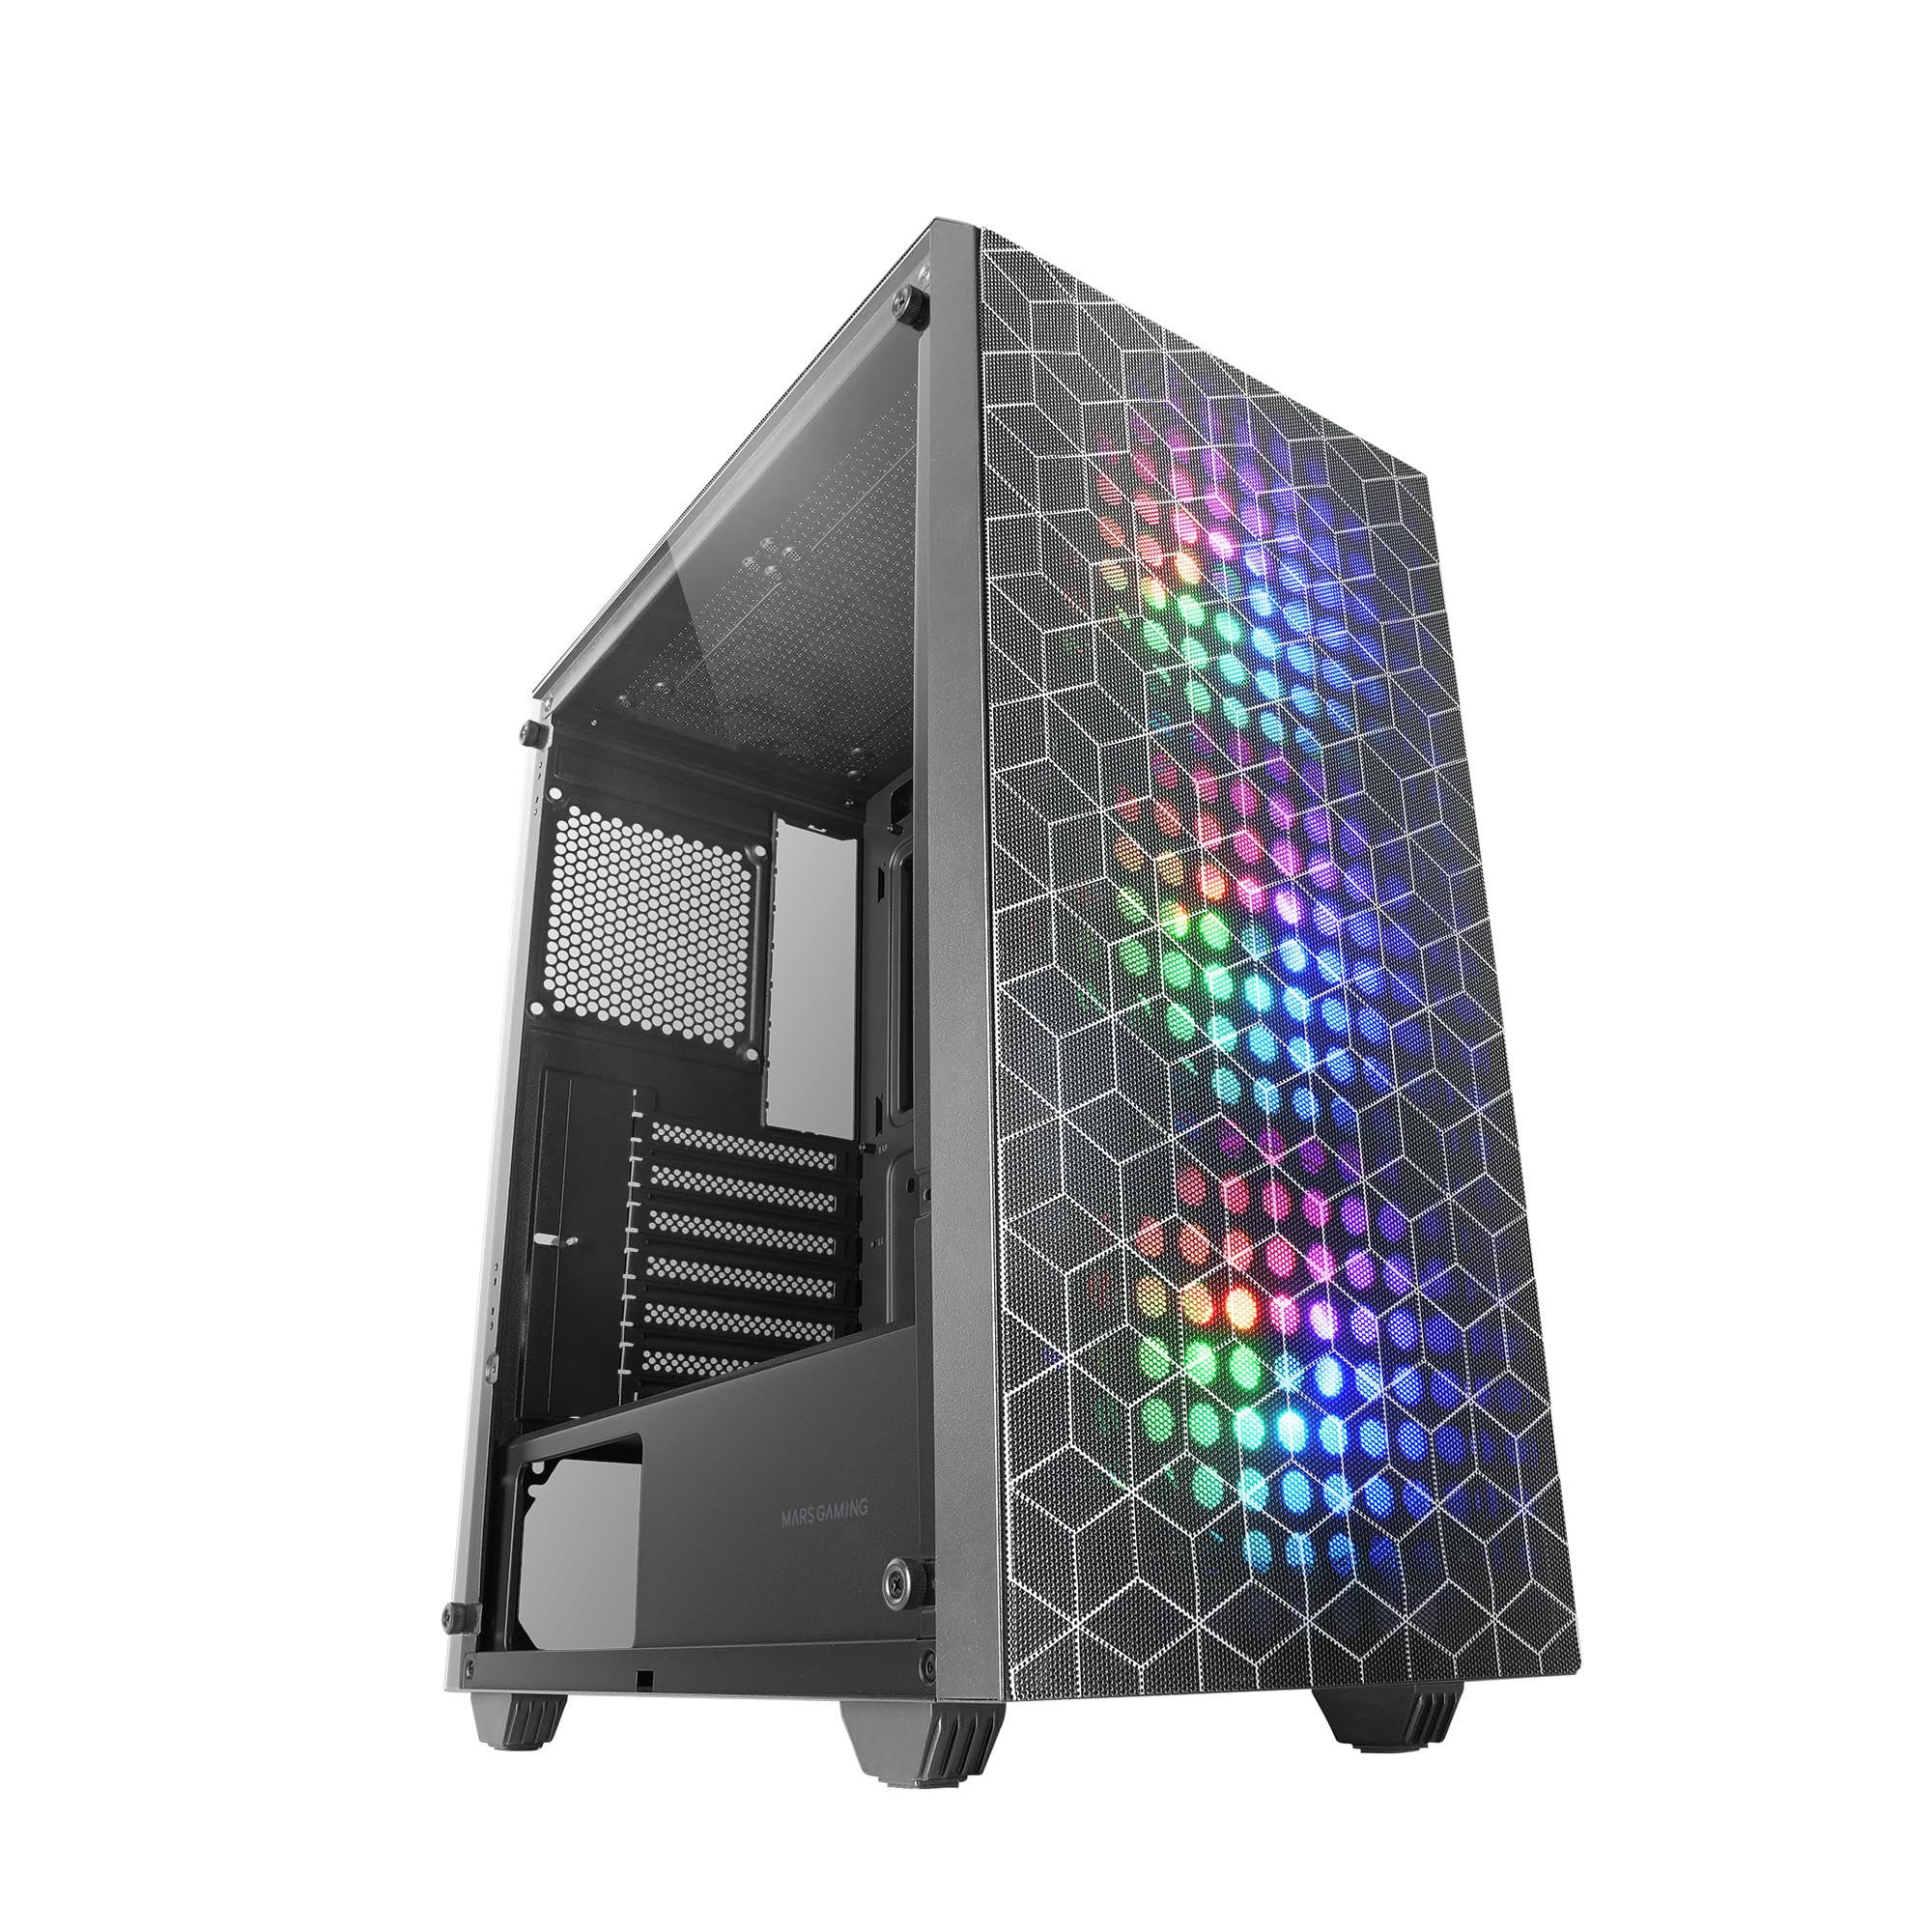
Figure 3.1: Mars Gaming MC-MAG ATX Gaming Case (Front-side view).

Figure 3.2: Tempered Glass Side Panel. This panel provides a clear view of internal components and is secured with thumbscrews.

Figure 3.3: Double Magnetic Front + Top Mesh. These removable grilles facilitate airflow and dust filtration.

Figure 3.4: Internal Layout Diagram. Illustrates fan and radiator mounting points, CPU cooler clearance (max 160mm), and VGA card length (max 350mm, 290mm with front radiator/fan).
4. Persediaan dan Pemasangan
Follow these steps to install your PC components into the MC-MAG case.
4.1 Menyediakan Kes
- Letakkan bekas di atas permukaan yang rata dan stabil.
- Remove the tempered glass side panel by unscrewing the thumbscrews at the rear of the case and carefully sliding the panel off. Set it aside on a soft, protected surface.
- Remove the rear side panel to access the cable management area.
4.2 Pemasangan Motherboard
- The MC-MAG case supports ATX, MicroATX, and Mini-ITX motherboards.
- Ensure the correct standoffs are installed for your motherboard size. Adjust if necessary.
- Pasangkan pelindung I/O ke dalam bukaan belakang bekas.
- Letakkan papan induk anda dengan berhati-hati pada penyangga, selaraskan lubang skru.
- Selamatkan papan induk dengan skru yang disediakan.
4.3 Pemasangan Unit Bekalan Kuasa (PSU)
- The PSU mounts in the bottom rear chamber of the case.
- Slide the PSU into its designated bay from the rear of the case.
- Selamatkan PSU dengan skru dari bahagian luar belakang kes itu.
4.4 Pemasangan Pemacu Storan
- The case supports up to 2x 3.5" HDDs and 4x 2.5" SSDs.
- HDD 3.5": Locate the drive cage in the PSU shroud area. Slide the HDD into the drive tray and secure it with screws.
- SSD 2.5": Mount SSDs to the designated brackets on the rear of the motherboard tray or within the PSU shroud area. Secure with screws.
4.5 Graphics Card (VGA) Installation
- Tanggalkan penutup slot pengembangan yang diperlukan dari bahagian belakang bekas.
- Insert your graphics card into the PCIe slot on the motherboard.
- Secure the graphics card with the expansion slot screw.
- Note: Maximum VGA length is 350mm (290mm with front radiator/fan installed).
4.6 Cooling System Installation (Fans & Liquid Cooling)
The MC-MAG case comes with 3x 120mm Fixed RGB fans pre-installed in the front.
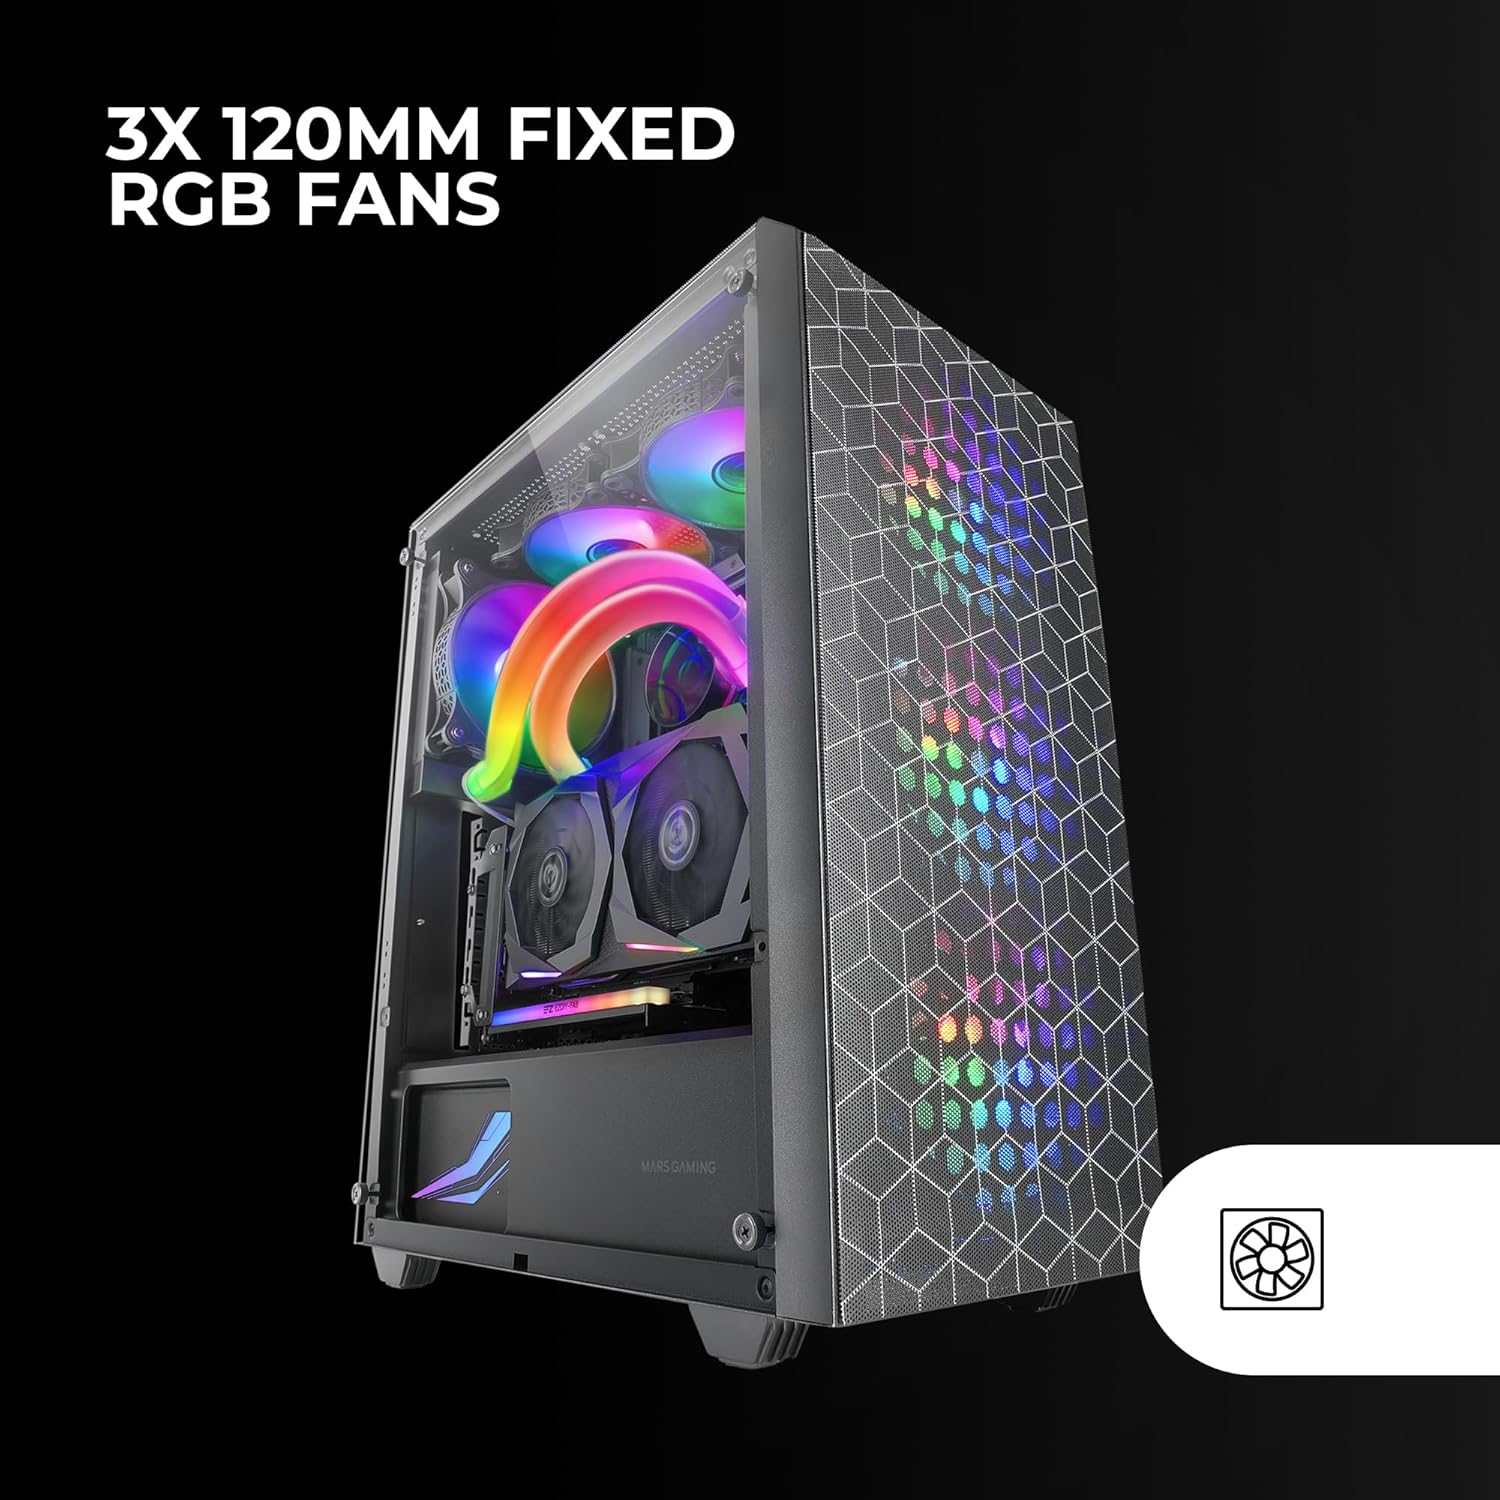
Figure 4.1: Pre-installed 3x 120mm Fixed RGB Fans.
- Additional Fans: The case supports up to 6x 120mm fans or a combination of 4x 120mm and 2x 140mm fans. Refer to Figure 3.4 for fan mounting locations.
- Penyejukan Cecair: The case supports liquid cooling radiators up to 360mm.

Figure 4.2: Liquid Cooling Installation. The case supports radiators up to 360mm.
- Install radiators and fans according to their respective manufacturer's instructions.
4.7 Pengurusan Kabel
Gunakan potongan penghalaan kabel dan titik ikat di belakang dulang papan induk untuk menyusun kabel. Ini meningkatkan aliran udara dan estetika.
4.8 Menyambung I/O Panel Hadapan
Connect the front panel cables (USB 2.0, USB 3.0, HD Audio, Microphone, Power Switch, Reset Switch, Power LED, HDD LED) to the corresponding headers on your motherboard. Refer to your motherboard manual for specific header locations.
4.9 Perhimpunan Akhir
- Once all components are installed and cables are managed, reattach the rear side panel.
- Carefully reattach the tempered glass side panel and secure it with the thumbscrews.
5. Arahan Operasi
After successful installation, your MC-MAG case is ready for operation.
- Hidupkan kuasa: Tekan butang kuasa yang terletak pada panel atas kes itu.
- Port USB: Use the front USB 2.0 and USB 3.0 ports for connecting peripherals and external devices.
- Bicu Audio: Connect your headphones and microphone to the front panel HD Audio and Microphone jacks.
- RGB Fans: The pre-installed fans feature Fixed RGB lighting. Their lighting pattern is static and does not require software control from the case itself.
6. Penyelenggaraan
Penyelenggaraan tetap membantu memastikan prestasi optimum dan jangka hayat komponen PC anda.
- Penapis Habuk: The front and top panels feature magnetic dust filters. Regularly remove these filters and clean them with compressed air or by rinsing them with water (ensure they are completely dry before reattaching).
- Panel Kaca Terbaja: Clean the tempered glass side panel with a soft, lint-free cloth and a glass cleaner. Avoid abrasive materials that could scratch the glass.
- Pembersihan Dalaman: Periodically open the case and use compressed air to remove dust from internal components, especially fans and heatsinks.
7. Penyelesaian masalah
If you encounter issues, refer to the following common troubleshooting steps.
- Tiada Kuasa:
- Ensure the PSU is switched on and properly connected to a power outlet.
- Verify all power cables from the PSU are correctly connected to the motherboard and components.
- Check the front panel power switch cable connection to the motherboard.
- Peminat Tidak Berpusing / RGB Tidak Menyala:
- Ensure fan power cables are securely connected to the motherboard or fan controller.
- For RGB, ensure the RGB cables are correctly connected (if applicable, for the fixed RGB fans, they should light up upon power).
- Panel Depan USB/Audio Tidak Berfungsi:
- Verify that the USB and HD Audio cables from the front panel are correctly connected to the motherboard headers.
- Terlalu panas:
- Pastikan semua kipas kotak berputar dengan betul dan berorientasikan untuk aliran udara optimum (pengambilan/ekzos).
- Clean dust filters and internal components to prevent dust buildup.
- Sahkan penyejuk CPU dan penyejuk GPU dipasang dan berfungsi dengan betul.
8. Spesifikasi
| Ciri | Perincian |
|---|---|
| Nama Model | MCMAG |
| Jenis Kes | Mid Tower |
| Keserasian Papan Induk | ATX, MicroATX, Mini-ITX |
| bahan | Kaca Terbaja, Keluli, Plastik |
| warna | Hitam |
| Peminat prapasang | 3x 120mm Fixed RGB (Front) |
| Sokongan Peminat | Up to 6x 120mm or 4x 120mm + 2x 140mm |
| Sokongan Penyejuk Cecair | Up to 360mm radiator |
| Ketinggian Penyejuk CPU Maks | 160mm |
| Panjang Kad VGA Maks | 350mm (290mm with front radiator/fan) |
| Drive Bays | 2x 3.5" HDD, 4x 2.5" SSD |
| Slot Pengembangan | 7 |
| Pelabuhan I / O Depan | 2x USB 2.0, 1x USB 3.0, HD Audio, Mic |
| Berat Barang | 3.96 Kilogram |
9. Waranti dan Sokongan
Mars Gaming products are manufactured to high-quality standards. For information regarding warranty coverage, terms, and conditions, please refer to the warranty card included with your product or visit the official Mars Gaming webtapak.
For technical support, troubleshooting assistance beyond this manual, or to inquire about replacement parts, please contact Mars Gaming customer support through their official channels.
Mars Gaming Official Webtapak: www.marsgaming.eu