1. Pengenalan dan Lebihview
This manual provides detailed instructions for the installation, operation, and maintenance of the Enter E-H81 Micro ATX Motherboard. Designed for 4th Generation Intel Core, Pentium, and Celeron processors, this motherboard offers a reliable foundation for your personal computer system. It features an Intel H81 Express Chipset, DDR3 RAM support, USB 3.0 ports, HDMI, and HD 6 Channel Audio for a comprehensive computing experience.
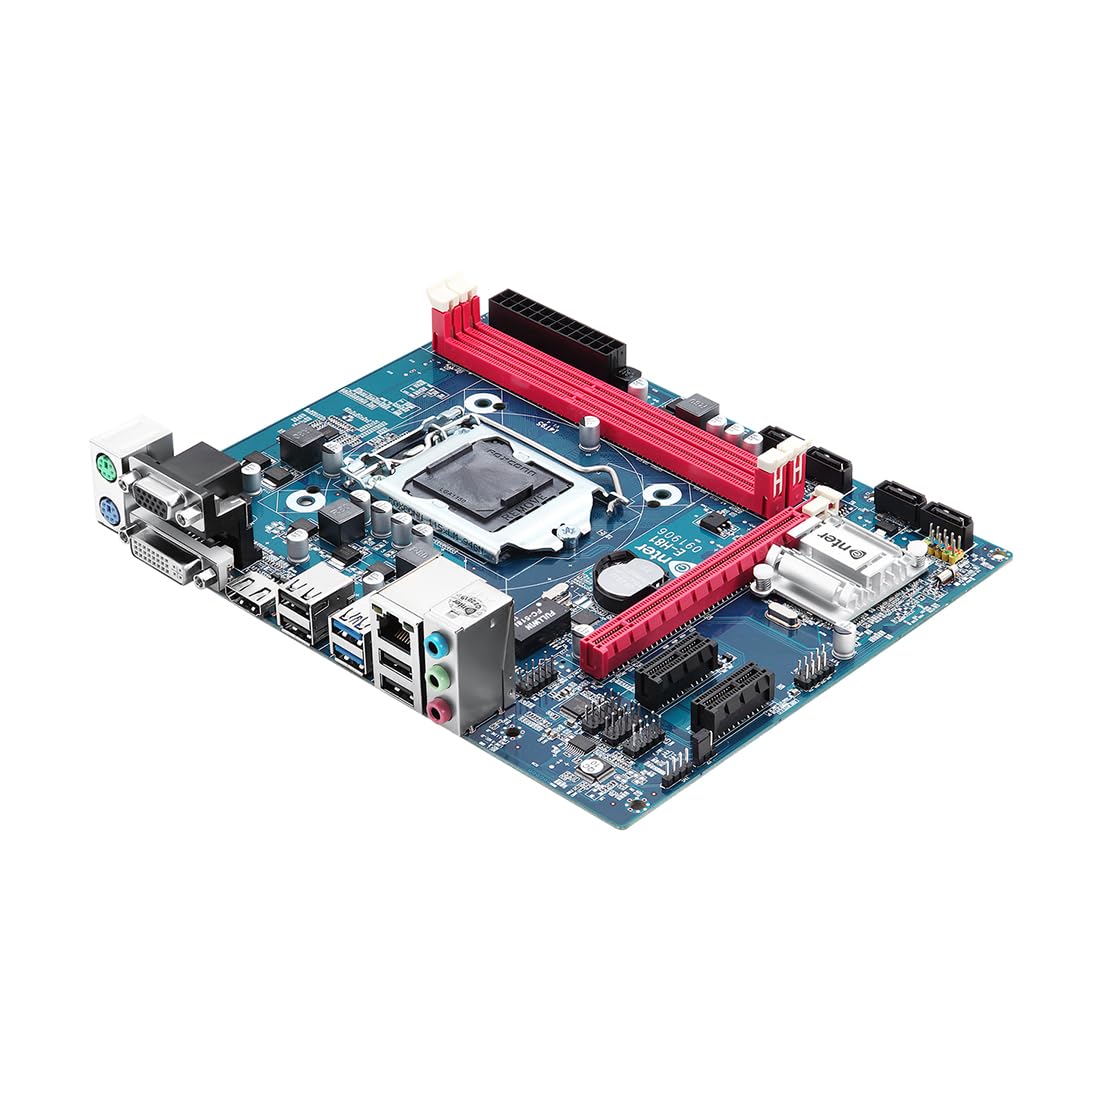
Rajah 1: Depan view of the Enter E-H81 Micro ATX Motherboard, showing the CPU socket, RAM slots, and various connectors.
2. Ciri-ciri Produk
- Sokongan Pemproses: Compatible with 4th Generation Intel Core, Pentium, and Celeron processors (LGA 1150 socket).
- Sokongan Memori: Two DDR3 RAM slots, supporting up to 16 GB total memory with clock speeds up to 1600 MHz.
- Chipset: Equipped with the Intel H81 Express Chipset for stable and efficient performance.
- Storan: Features 3 SATA ports for connecting storage devices.
- Ketersambungan: Includes 1 x VGA Port, 1 x HDMI Port, 2 x USB 3.0 Ports, 4 x USB 2.0 Ports, and 6 x Ethernet Ports.
- Audio: Integrated HD 6 Channel Audio for immersive sound experiences.
- Pengembangan: PCI Express graphics card interface.
Video 1: Tamatview of the Enter E-H81 Micro ATX Motherboard, highlighting its key features and specifications.
3. Persediaan dan Pemasangan
3.1 Unpacking the Motherboard
Carefully remove the motherboard from its packaging. Ensure all accessories, including the I/O shield, SATA cables, and driver CD, are present. Handle the motherboard by its edges to avoid static discharge.

Figure 2: Contents of the Enter E-H81 Micro ATX Motherboard package, including the motherboard, I/O shield, SATA cable, and driver CD.
3.2 Pemasangan CPU (LGA 1150)
- Cari soket CPU LGA 1150 pada papan induk.
- Tekan tuil beban ke bawah dengan lembut dan tarik ke sisi untuk membuka penutup soket CPU.
- Sejajarkan tanda segi tiga pada CPU dengan tanda yang sepadan pada soket. Letakkan CPU ke dalam soket dengan berhati-hati tanpa memaksanya.
- Tutup penutup soket dan tolak tuil beban kembali ke kedudukan terkunci.
- Pasang penyejuk CPU mengikut arahan pengeluarnya.
3.3 RAM Installation (DDR3)
- Cari dua slot DIMM DDR3.
- Buka klip di kedua-dua hujung slot DIMM.
- Align the notch on the DDR3 RAM module with the key in the DIMM slot.
- Insert the RAM module firmly into the slot until the clips snap into place. Ensure both clips are closed.
3.4 Storage Device Installation (SATA)
- Sambungkan satu hujung kabel data SATA ke port SATA pada papan induk.
- Sambungkan hujung kabel data SATA yang satu lagi ke cakera keras atau SSD anda.
- Sambungkan kabel kuasa SATA daripada unit bekalan kuasa (PSU) anda ke peranti storan.
3.5 Sambungan Kuasa
- Connect the 24-pin ATX main power connector from your PSU to the corresponding port on the motherboard.
- Connect the 4-pin ATX 12V power connector (CPU power) from your PSU to the port near the CPU socket.
3.6 Panel Hadapan dan Sambungan Persisian
Connect the front panel headers (power switch, reset switch, HDD LED, power LED, front USB, front audio) to their respective pins on the motherboard. Refer to the motherboard's silkscreen labels for correct orientation. Connect external peripherals such as USB devices, display cables (VGA/HDMI), and audio devices to the rear I/O panel.
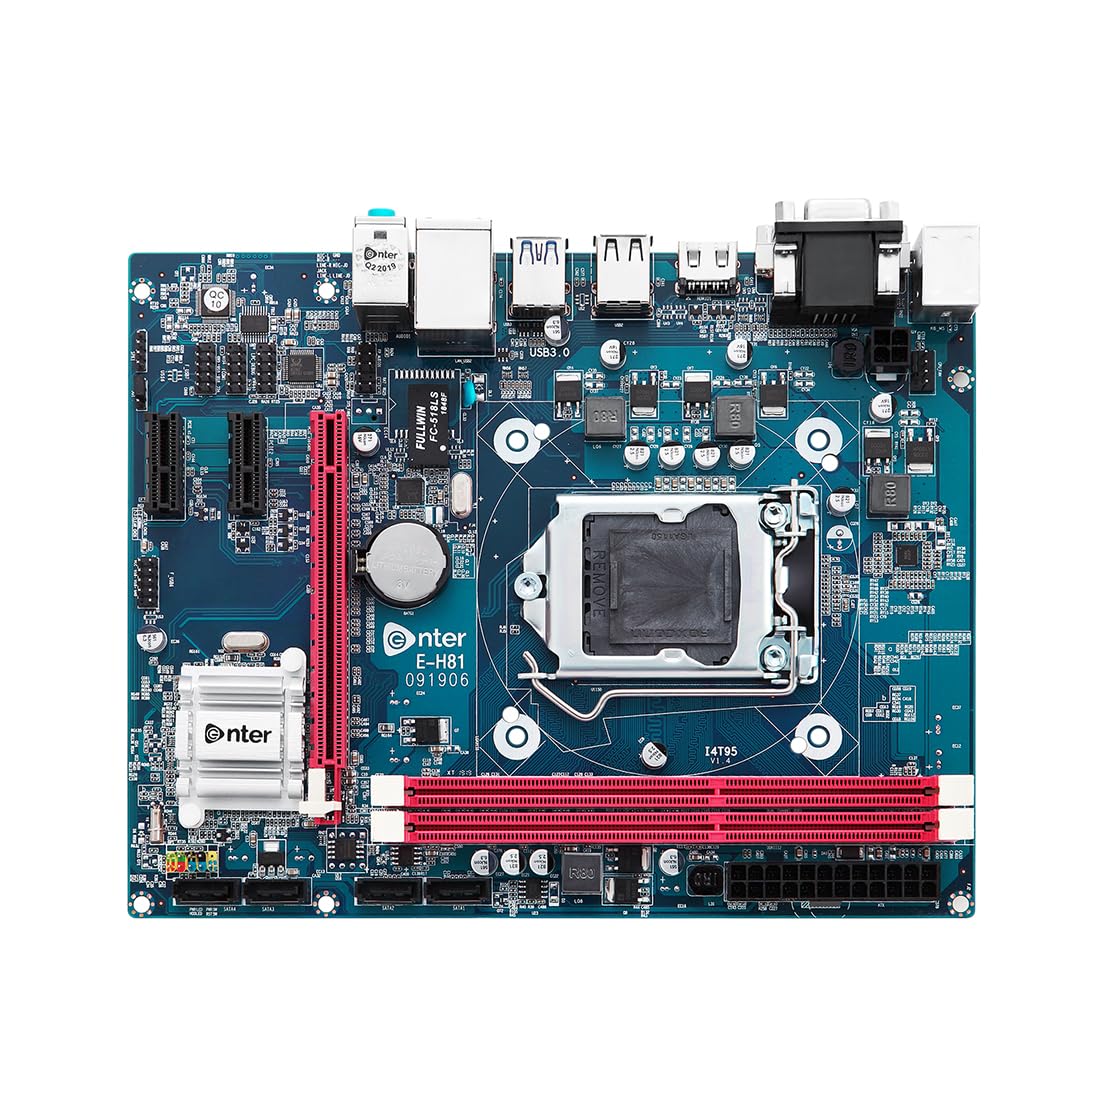
Rajah 3: Bahagian hadapan terperinci view of the motherboard, highlighting CPU socket, RAM slots, and various headers for front panel connections.

Rajah 4: Belakang view of the motherboard, showing the I/O panel with ports for USB, HDMI, VGA, Ethernet, and audio.
4. Arahan Operasi
4.1 Persediaan BIOS
Upon initial power-on, press the designated key (usually DEL or F2) during the boot sequence to enter the BIOS setup utility. The Enter E-H81 motherboard features a user-friendly BIOS interface, allowing you to configure system settings, boot order, and hardware parameters. Save changes before exiting the BIOS.
4.2 Pemasangan Pemandu
After installing your operating system, install the necessary drivers for the motherboard's components. A driver CD is included in the package. Alternatively, you can download the latest drivers from the manufacturer's official website. Install drivers for chipset, audio, LAN, and any other integrated devices.
4.3 Pemasangan Sistem Operasi
Insert your operating system installation media (USB drive or DVD) and set the boot order in BIOS to prioritize the installation media. Follow the on-screen prompts to install your preferred operating system.
5. Penyelenggaraan
5.1 Pembersihan
Regularly clean your computer's interior to prevent dust buildup, which can lead to overheating and component failure. Use compressed air to remove dust from the motherboard, CPU cooler, and other components. Ensure the system is powered off and unplugged before cleaning.
5.2 Kemas Kini BIOS
Periksa pengeluar secara berkala website for BIOS updates. BIOS updates can improve system stability, add support for new hardware, or fix bugs. Follow the provided instructions carefully when updating the BIOS to avoid system damage.
5.3 Kemas Kini Pemandu
Keep your drivers updated to ensure optimal performance and compatibility. Download the latest drivers from the manufacturer's weblaman web untuk sistem pengendalian anda.
6. Penyelesaian masalah
Jika anda menghadapi masalah dengan papan induk anda, pertimbangkan langkah penyelesaian masalah berikut:
- Tiada Kuasa: Ensure all power cables (24-pin ATX, 4-pin ATX 12V) are securely connected. Check your power supply unit (PSU) for proper function.
- Tiada Paparan: Verify that your monitor is connected to the correct video output (VGA or HDMI) on the motherboard or discrete graphics card. Reseat RAM modules and the graphics card.
- Ketidakstabilan/Ranap Sistem: Check RAM modules for proper installation. Ensure CPU cooler is correctly seated and thermal paste is applied. Run memory diagnostic tools.
- Periferi Tidak Dikesan: Ensure USB devices are connected to functional ports. Check device manager for driver issues.
- Tetapan Semula BIOS: If system settings are incorrect, you can reset the BIOS to default settings by clearing the CMOS. Refer to the motherboard diagram for the CLR_CMOS jumper or remove the CMOS battery for a few minutes.
For persistent issues, consult the manufacturer's support resources or a qualified technician.
7. Spesifikasi
| Ciri | Spesifikasi |
|---|---|
| Jenama | Masuk |
| Nombor Model | EN-E-H81 |
| Soket Pemproses | LGA 1150 |
| Pemproses yang Serasi | 4th Gen Intel Core / Pentium / Celeron |
| Chipset | Intel H81 Express |
| Teknologi Memori | DDR3 |
| Slot memori | 2 |
| Memori Maksimum Disokong | 16 GB |
| Kelajuan Jam Memori | 1600 MHz |
| Antara Muka Kad Grafik | PCI Express |
| Port USB 3.0 | 2 |
| Port USB 2.0 | 4 |
| Port HDMI | 1 |
| Port VGA | 1 |
| Pelabuhan SATA | 3 |
| Pelabuhan Ethernet | 6 |
| Faktor Bentuk | ATX mikro |
| Dimensi Produk | 20 x 25 x 5 cm |
| Berat Barang | 350 g |
8. Waranti dan Sokongan
The Enter E-H81 Micro ATX Motherboard comes with a Waranti 1 tahun from the date of purchase. This warranty covers manufacturing defects and ensures reliable operation under normal use conditions. For warranty claims, technical support, or further assistance, please contact your retailer or the manufacturer's customer service department. Keep your proof of purchase for warranty validation.