1. Pengenalan
This manual provides detailed instructions for the safe and effective operation of the GVDA GD166B True RMS Digital Clamp Meter. This high-performance smart digital clamp meter is designed to simplify and enhance your electrical measurement tasks. It integrates a wide range of functions, making it an essential tool for professionals and enthusiasts alike.
The GD166B is capable of measuring AC/DC voltage, AC/DC current, frequency, duty cycle, resistance, capacitance, temperature, diode, continuity, NCV (Non-Contact Voltage) detection, live wire detection, and more.
2. Maklumat Keselamatan
AMARAN: Untuk mengelakkan renjatan elektrik atau kecederaan diri, baca dan fahami semua maklumat keselamatan sebelum menggunakan produk ini.
- Sentiasa mematuhi kod keselamatan tempatan dan nasional.
- Jangan gunakan meter jika ia kelihatan rosak atau jika penebatnya terjejas.
- Jangan gunakan lebih daripada vol yang dinilaitage, seperti yang ditandakan pada meter, antara terminal atau antara mana-mana terminal dan tanah bumi.
- Berhati-hati apabila bekerja dengan voltagadalah melebihi 30V AC RMS, puncak 42V atau 60V DC. Jiltagia menimbulkan bahaya kejutan.
- Keluarkan petunjuk ujian dari litar sebelum menukar fungsi.
- Ensure the battery cover is closed and secured before operation.
- Do not operate the meter with the battery compartment open.
- Gantikan bateri sebaik sahaja penunjuk bateri lemah muncul.
- Jangan gunakan meter dalam gas meletup, wap atau persekitaran berdebu.
- Gunakan terminal, fungsi dan julat yang sesuai untuk pengukuran anda.
3. Produk Lebihview
The GVDA GD166B is a versatile digital clamp meter designed for accurate and reliable electrical measurements. Below are its key features and components.
3.1 Ciri-ciri Utama
- True RMS measurement for accurate readings on non-sinusoidal waveforms.
- Mengukur Vol. AC/DCtage, AC/DC Current, Resistance, Capacitance, Frequency, and Temperature.
- Diode Test and Continuity Test functions.
- Vol. Bukan Kenalantage (NCV) detection and Live Wire detection for enhanced safety.
- AC Inrush Current measurement.
- Smart Measurement (Auto) mode for simplified operation.
- Data Hold, Backlight, and Flashlight functions.
- Large LCD display with 6000 counts.
- Compact and ergonomic design with a 36mm clamp pembukaan.
3.2 Komponen

Rajah 3.2.1: Depan View of the GD166B Clamp meter. This image shows the main unit of the GVDA GD166B digital clamp meter along with its red and black test leads. The large display, function buttons, and the clamp jaw are clearly visible.

Figure 3.2.2: GVDA GD166B with Brand Logo. Seorang yang lebih dekat view of the GD166B clamp meter, highlighting the GVDA brand logo and model number on the device's body.
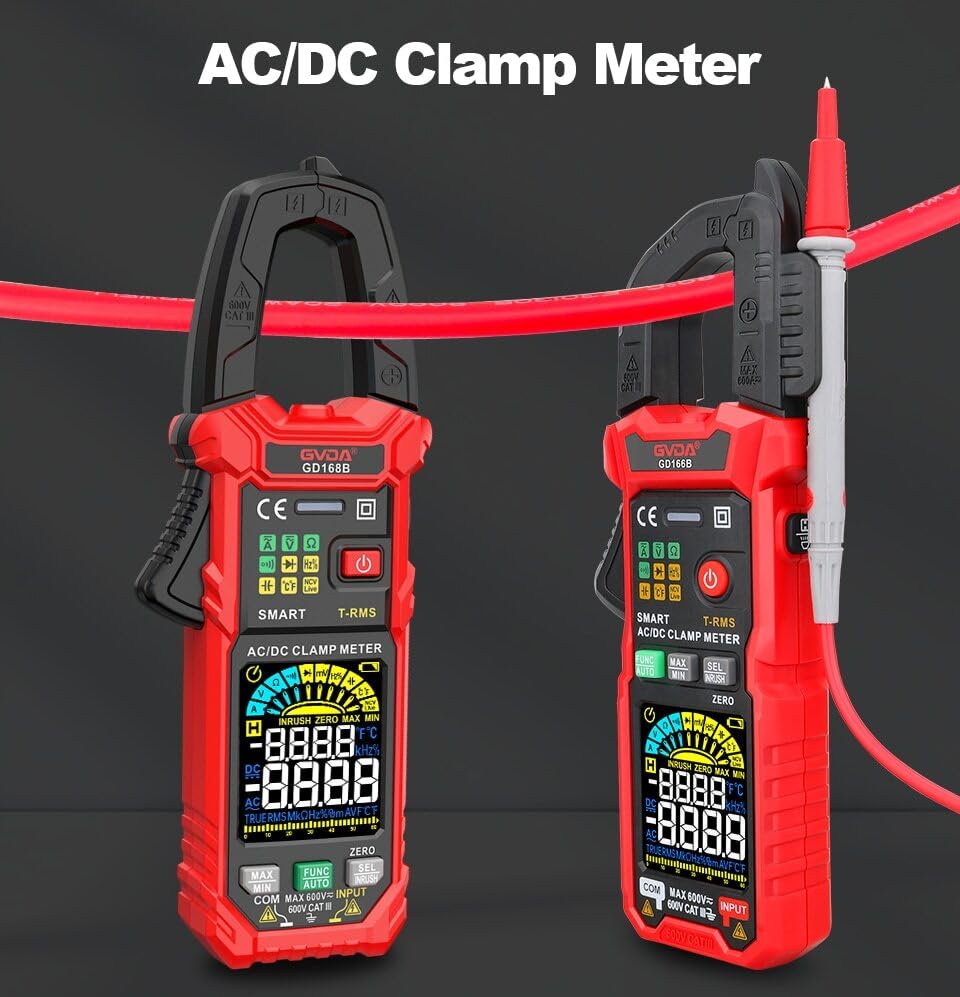
Figure 3.2.3: AC/DC Clamp Meter Comparison. This image displays two GVDA clamp meters, GD168B and GD166B, side-by-side, showcasing their similar design and functionality as AC/DC clamp meter.

Rajah 3.2.4: Kandungan Pakej. This image shows the complete package contents, including the GD166B clamp meter, test leads, a thermocouple probe, a carrying case, and the user manual.
4. Persediaan
4.1 Pemasangan Bateri
The GD166B requires 3 x 1.5V AAA batteries (not included) for operation.
- Cari petak bateri di belakang meter.
- Gunakan pemutar skru untuk membuka penutup petak bateri.
- Insert three AAA batteries, ensuring correct polarity (+ and -).
- Gantikan penutup petak bateri dan kencangkannya dengan skru.
4.2 Menghubungkan Petunjuk Ujian
Untuk ukuran yang memerlukan petunjuk ujian (cth, voltage, resistance, continuity, diode, capacitance, temperature), connect them as follows:
- Masukkan petunjuk ujian hitam ke dalam bicu input "COM" (biasa).
- Insert the red test lead into the "INPUT" (positive) input jack.

Figure 4.2.1: Test Lead Connection. This image illustrates the correct way to connect the test leads to the meter's input jacks for various measurements.
5. Arahan Operasi
5.1 Hidupkan/Mati Kuasa
Tekan ke Butang kuasa (⑂) to turn the meter on or off.
5.2 Pemilihan Fungsi
The GD166B features a "Smart Measurement (Auto)" mode, which automatically identifies the measurement type (voltage, resistance, continuity) when test leads are connected. For other specific functions, use the FUNGSI button to cycle through modes or the rotary dial if present (though this model appears button-driven).
5.3 Common Measurements
5.3.1 AC/DC Jldtage Pengukuran
- Connect the red test lead to the "INPUT" jack and the black test lead to the "COM" jack.
- Pilih vol yang sesuaitage range (or use Smart Auto mode).
- Sambungkan wayar ujian secara selari dengan litar atau komponen yang hendak diukur.
- Baca voltagnilai e pada paparan.
5.3.2 Pengukuran Arus AC/DC (Clamp)
For current measurements, use the clamp jaw. Ensure the circuit is de-energized before clamping.
- Select the AC or DC current function.
- Buka clamp rahang dan hanya melingkari satu konduktor litar.
- Tutup clamp jaw completely.
- Baca nilai semasa pada paparan.
5.3.3 Pengukuran Rintangan
- Pastikan litar dinyahtenagakan sebelum mengukur rintangan.
- Connect the test leads to the "INPUT" and "COM" jacks.
- Select the resistance function.
- Sambungkan petunjuk ujian merentasi komponen yang akan diukur.
- Baca nilai rintangan pada paparan.
5.3.4 Ujian Kesinambungan
- Pastikan litar dinyahtenagakan.
- Connect the test leads to the "INPUT" and "COM" jacks.
- Select the continuity function.
- Connect the test leads across the circuit or component. A continuous beep indicates continuity (low resistance).
5.3.5 Bukan Kenalan Voltage (NCV) Pengesanan
Fungsi NCV membolehkan pengesanan vol ACtage tanpa sentuhan langsung.
- Select the NCV function.
- Place the top end of the meter near the conductor or outlet.
- The meter will beep and the NCV indicator will light up if AC voltage dikesan.

Figure 5.3.5.1: NCV Measurement in Progress. This image demonstrates the GD166B clamp meter being used to perform a Non-Contact Voltage (NCV) measurement on an electrical outlet, indicating its ability to detect live voltage tanpa sentuhan fizikal.
5.3.6 AC Inrush Current Measurement
This function measures the initial surge of current when a device is turned on.
- Select the Inrush Current function.
- Buka clamp rahang dan hanya melingkari satu konduktor litar.
- Turn on the device to be measured. The meter will capture the peak inrush current.

Figure 5.3.6.1: Inrush Current Measurement. This image shows the GD166B clamp meter actively measuring inrush current on a set of electrical wires, demonstrating its capability to capture transient current peaks.
5.3.7 Fungsi Lain
- Pegangan Data: Tekan ke TAHAN butang untuk membekukan bacaan semasa pada paparan. Tekan sekali lagi untuk melepaskan.
- MAX / MIN: Tekan ke MAX/MIN button to record the maximum and minimum readings.
- Lampu latar/lampu suluh: Tekan ke Butang cahaya to turn on/off the display backlight or the integrated flashlight.
- DCA Zero: Used to zero out the DC current reading before measurement to ensure accuracy.
6. Penyelenggaraan
6.1 Pembersihan
Lap kes dengan iklanamp cloth and mild detergent. Do not use abrasives or solvents. Keep the input terminals free of dirt or moisture.
6.2 Penggantian Bateri
When the low battery indicator (ikon bateri) appears on the display, replace the batteries immediately to ensure accurate readings. Refer to Section 4.1 for battery installation instructions.
6.3 Penyimpanan
If the meter is not to be used for an extended period, remove the batteries to prevent leakage and damage to the meter. Store the meter in a cool, dry place, away from direct sunlight and extreme temperatures.
7. Penyelesaian masalah
| Masalah | Kemungkinan Punca | Penyelesaian |
|---|---|---|
| Meter tidak dihidupkan. | Bateri mati atau tidak dipasang dengan betul. | Periksa kekutuban bateri; menggantikan bateri. |
| "OL" dipaparkan. | Overload or out of range. | Select a higher range (if applicable) or ensure the measured value is within the meter's limits. |
| Bacaan yang tidak tepat. | Low battery; incorrect function/range; poor test lead connection. | Replace batteries; select correct function/range; ensure secure test lead connection. |
| Tiada bip kesinambungan. | Circuit not continuous; high resistance; meter not in continuity mode. | Check circuit; ensure resistance is low; select continuity mode. |
8. Spesifikasi
| Parameter | Julat/Nilai |
|---|---|
| DC Voltage | 600mV, 6V, 60V, 600V |
| Vol. ACtage | 600mV, 6V, 60V, 600V |
| AC Semasa | 60A, 600A |
| Arus DC | 60A, 600A |
| Rintangan | 600Ω, 6kΩ, 60kΩ, 600kΩ, 6MΩ, 60MΩ |
| Arus Masuk AC | 60A, 600A |
| Kapasitansi | 6nF, 60nF, 600nF, 6µF, 60µF, 600µF, 6mF, 60mF |
| Kekerapan | 100Hz, 1000Hz, 10kHz, 100kHz, 1000kHz, 10MHz |
| Kitaran Tugas | 1-99% |
| Suhu | -40℃ ~ 1000℃, -40℉ ~ 1832℉ |
| Maks. Jilidtage antara terminal dan Earth Ground | 600V |
| Paparan | 6000 kiraan |
| Petunjuk Pelbagai Julat | "OL" |
| Petunjuk Bateri Rendah | ya |
| Petunjuk Kekutuban Masukan | Display "-" |
| Clamp Saiz Pembukaan | 36 mm |
| Keperluan Kuasa | Bateri AAA 3x 1.5V |
| Saiz Produk | 199*81*32 mm |
| Berat (Pakej) | 440g |
9. Waranti dan Sokongan
This product is manufactured to high-quality standards. For information regarding warranty coverage, technical support, or service, please refer to the documentation provided with your purchase or contact your retailer.
Sila simpan bukti pembelian anda untuk tuntutan waranti.