
1. Pengenalan
This manual provides essential instructions for the safe and efficient operation, maintenance, and troubleshooting of your Graco FinishPro GX 19 Cordless Airless Sprayer. The FinishPro GX 19 is designed for portability and performance, allowing for painting tasks in various locations without the need for direct power outlets.

Figure 1: Graco FinishPro GX 19 Cordless Airless Sprayer. This image shows the overall design of the sprayer, including the motor unit, hopper, and frame.
2. Arahan Keselamatan
Adhering to these safety guidelines is crucial for preventing injury and ensuring proper equipment function.
- Always read and follow the safety instructions provided with the product.
- Never operate the sprayer in hazardous environments.
- Always secure the drain line to prevent accidental disconnection.
- Keep the sprayer clean and free of debris to prevent mechanical risks.
- Always wear appropriate personal protective equipment (PPE) when using the sprayer, including eye protection, gloves, and a respirator.
3. Komponen dan Item yang Termasuk
The Graco FinishPro GX 19 Cordless Airless Sprayer typically includes the following components:
- Contractor PC Compact Spray Gun
- RAC X FF LP 210 Spray Tip
- RAC X Guard
- 3/16 inch x 25 ft BlueMax II Airless Hose
- 2 - DEWALT 20V/60V Max FlexVolt Batteries
- DEWALT Fan-Cooled Fast Charger
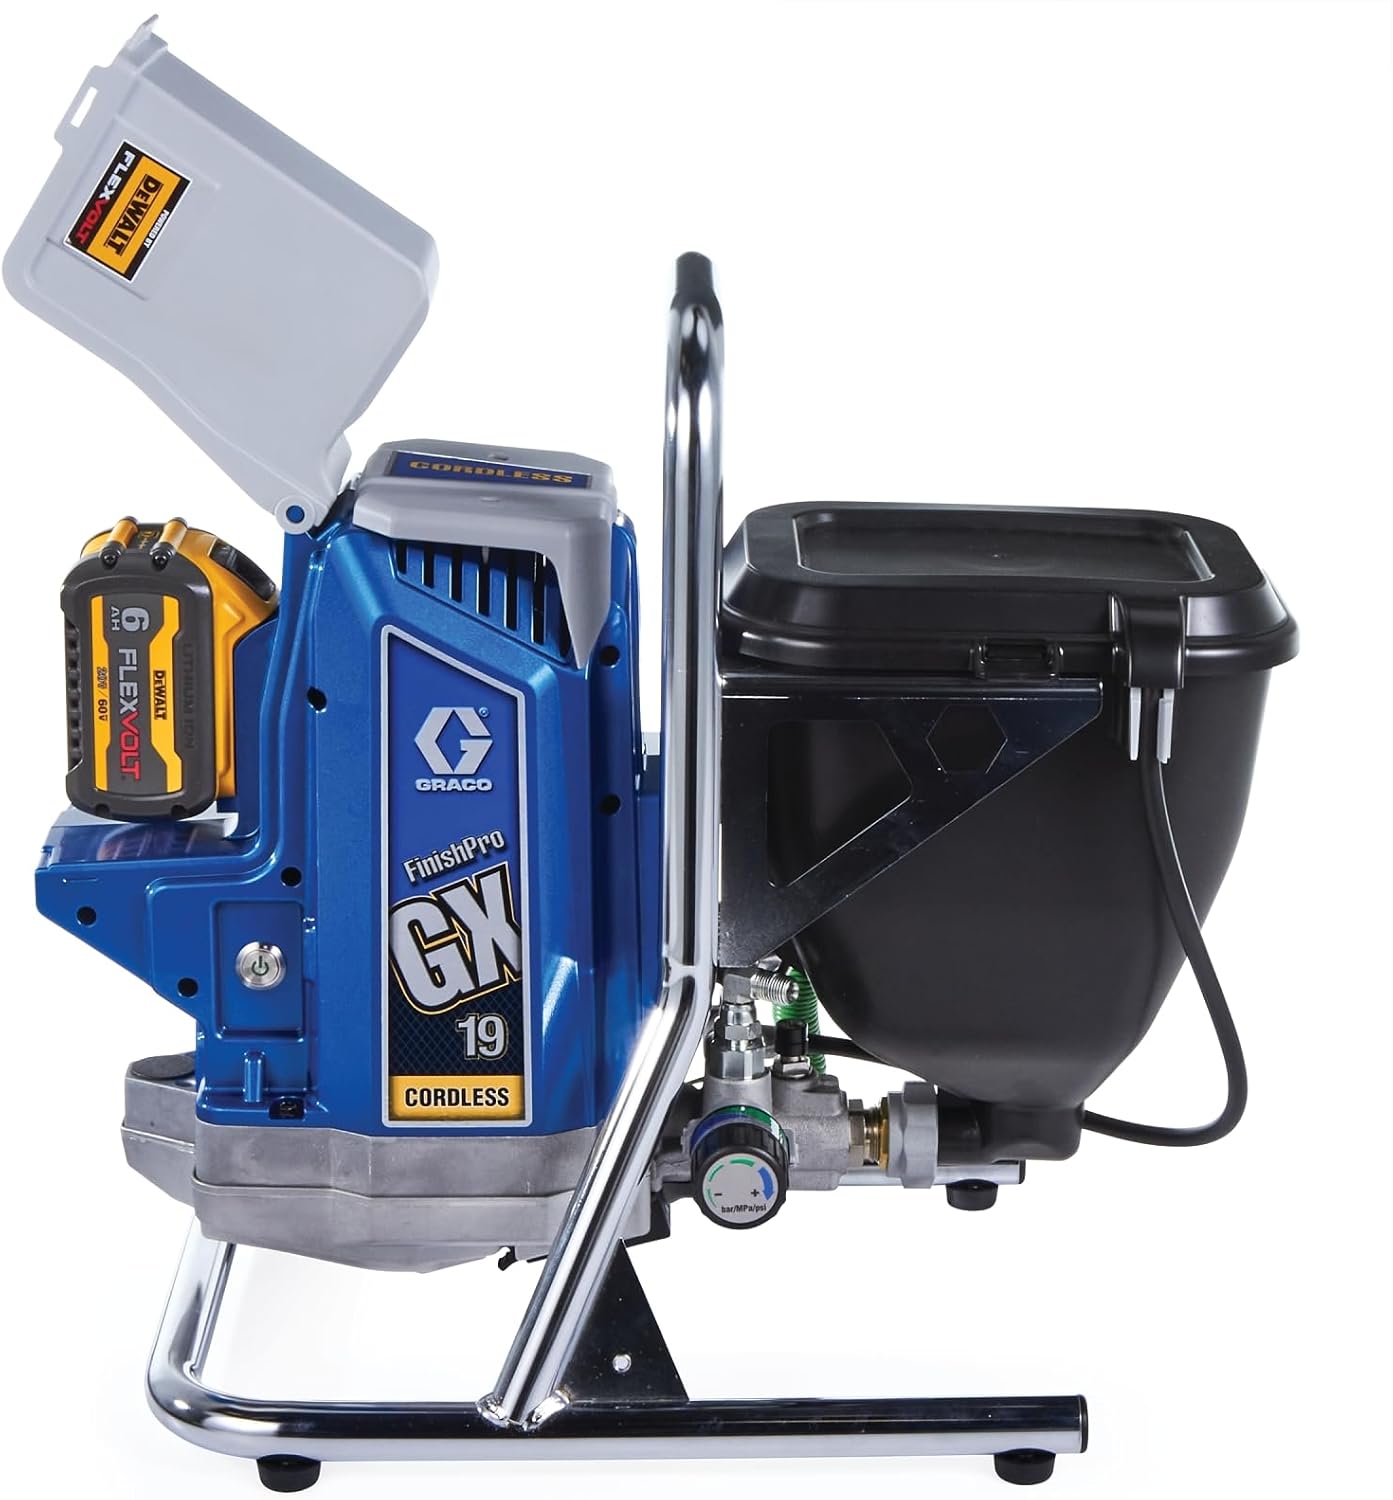
Figure 2: Graco FinishPro GX 19 with a DEWALT FlexVolt battery inserted. This illustrates the battery compartment and power source.
4. Persediaan
- Membongkar: Keluarkan semua komponen dari pembungkusan dengan berhati-hati. Periksa untuk sebarang kerosakan.
- Pengecasan Bateri: Fully charge both DEWALT FlexVolt batteries using the provided charger before initial use.
- Sambungan Hos: Connect the BlueMax II Airless Hose to the sprayer outlet and to the Contractor PC Compact Spray Gun. Ensure all connections are tight.
- Tip and Guard Installation: Install the RAC X Guard onto the spray gun, then insert the RAC X FF LP 210 Spray Tip into the guard.
- Lampiran Hopper: Securely attach the 1.5-gallon hopper to the sprayer's intake.
5. Arahan Operasi
- Penyediaan Bahan: Prepare your painting material according to the manufacturer's instructions. Strain the material if necessary to prevent clogs.
- Fill Hopper: Pour the prepared material into the 1.5-gallon hopper.
- Masukkan Bateri: Insert a fully charged DEWALT FlexVolt battery into the sprayer's battery compartment.
- Penyembur Penyembur:
- Turn the prime valve to the "Prime" position.
- Place the drain line into a waste bucket.
- Turn on the sprayer. Allow it to run until a steady stream of material flows from the drain line, indicating air has been purged.
- Turn off the sprayer and return the prime valve to the "Spray" position.
- Melaraskan Tekanan: Use the pressure control knob to set the desired spraying pressure. Start with a lower pressure and gradually increase until a consistent spray pattern is achieved. The maximum pressure is 3000 PSI.
- Teknik Penyemburan:
- Maintain a consistent distance (approximately 10-12 inches) from the surface.
- Move the spray gun in smooth, even passes, overlapping each pass by about 50%.
- Lepaskan picu pada akhir setiap hantaran untuk mengelakkan pengumpulan bahan yang berlebihan.
- Hayat Bateri: The high-capacity 6Ah FlexVolt batteries allow spraying up to 6 gallons before recharging is typically required. Monitor battery indicator.
6. Penyelenggaraan
Penyelenggaraan yang betul memastikan ketahanan dan prestasi penyembur anda.
- Pembersihan Selepas Setiap Penggunaan:
- Remove remaining material from the hopper.
- Rinse the hopper with appropriate cleaning solution (water for latex, mineral spirits for oil-based).
- Prime the sprayer with the cleaning solution until it runs clear from the drain line and spray gun.
- Clean the spray tip and guard separately.
- ProConnect Cartridge: The ProConnect cartridge allows for quick pump replacement. Refer to the detailed service manual for specific instructions on rebuilding the gun in seconds.
- Storan: Store the sprayer in a clean, dry, and temperature-controlled environment. Ensure all components are thoroughly cleaned and dried before storage.
7. Penyelesaian masalah
Bahagian ini menangani isu biasa yang mungkin anda hadapi.
| Masalah | Kemungkinan Punca | Penyelesaian |
|---|---|---|
| Tiada semburan atau semburan lemah | Clogged tip, low material, air in system, low battery | Clean tip, refill hopper, prime sprayer, charge/replace battery |
| Corak semburan tidak konsisten | Incorrect pressure, worn tip, material too thick | Adjust pressure, replace tip, thin material as per manufacturer |
| Sprayer not turning on | Dead battery, loose battery connection | Charge battery, ensure battery is fully seated |
For more detailed troubleshooting, refer to the comprehensive Graco service manual or contact Graco customer support.
8. Spesifikasi
| Ciri | Perincian |
|---|---|
| Nama Model | 25U341 |
| Jenama | Graco |
| Sumber Kuasa | Battery Powered (DEWALT 20V/60V Max FlexVolt) |
| Tekanan Maksimum | 3000 PSI (Pound setiap Inci Persegi) |
| Isipadu Tangki | 1.5 gelen |
| Panjang Hos | 25 Kaki |
| Berat Barang | 35 paun |
| Dimensi Produk | 14"W (width) |
| bahan | plastik |
| Penggunaan yang Disyorkan | Melukis |
| UPC | 769946216103 |
9. Waranti dan Sokongan
For information regarding product warranty, technical support, or replacement parts, please refer to the documentation included with your product or visit the official Graco website. You can also contact Graco customer service directly for assistance.
Graco Official Webtapak: www.graco.com