1. Pengenalan
This manual provides detailed instructions for the installation, operation, and maintenance of your BITIWEND Wireless Doorbell Signal Transfer Kit. This kit is designed to integrate seamlessly with existing wired doorbell systems, converting their signal into a wireless one, allowing you to place receivers in various locations within your home or business.
The system includes two wireless receivers and two radio signal transmitters, offering extended coverage and customizable alert options.
2. Kandungan Pakej
Sila sahkan bahawa semua item terdapat dalam pakej anda:
- Penerima Tanpa Wayar x 2
- Radio Signal Transmitter (3-24V AC/DC) x 2
- Manual Pengguna x 1

Figure 2.1: Contents of the BITIWEND Wireless Doorbell Signal Transfer Kit, including two plug-in receivers and two wired transmitters.
3. Spesifikasi
| Ciri | Spesifikasi |
|---|---|
| Jenama | BITIWEND |
| Nombor Model | B12+WET01 |
| Vol. Input Pemancartage | 3-24V AC / DC |
| Kekerapan Wayarles | 433 MHz +/- 40 kHz |
| Julat Tanpa Wayar | Sehingga 200 meter (656 kaki) di udara terbuka |
| Nada dering | 58 melodi polifonik |
| Tahap Kelantangan | 5 levels (0-110 dB) |
| Bekalan Kuasa (Penerima) | AC 220V (Universal EU plug) |
| Dimensi (Penerima) | Kira-kira 8 x 8 x 2.5 cm |
| Dimensi (Pemancar) | Approximately 3.8 cm (circuit board length) |
| Berat badan | 200 g (total package) |

Figure 3.1: Physical dimensions of the receiver and transmitter components.
4. Persediaan dan Pemasangan
4.1 Pemasangan Pemancar
- Identify your existing doorbell system: The transmitter is designed to connect to your existing wired doorbell button or chime unit. It requires a 3-24V AC/DC power source.
- Pemutusan Kuasa: Before any wiring, ensure the power to your existing doorbell system is completely disconnected at the main circuit breaker to prevent electrical shock.
- Sambungkan Pemancar: The transmitter has two red wires and one grey wire with an antenna. The two red wires are for power connection. They are non-polarized, meaning the positive and negative poles do not need to be differentiated. Connect these two red wires to the terminals of your existing doorbell button switch or directly to the chime unit's power input (3-24V AC/DC).
- Secure the Transmitter: Once connected, ensure the transmitter is securely placed within the doorbell housing or a suitable junction box, away from moisture.
- Penyambungan Semula Kuasa: Restore power to your doorbell system.

Figure 4.1: Transmitter wiring diagram. Connect the red wires to the doorbell button switch port. Ensure the voltage is within 3-24V AC/DC.
Amaran Penting: Pemasangan voltage must be 3-24V AC/DC. Do not connect to circuits above 24V, as this poses a risk of short-circuiting and damage to the device. If your existing system operates above 24V, a transformer must be used to reduce the voltage.
4.2 Pemasangan Penerima
- Pasangkan: Insert the wireless receiver into a standard 220V AC wall outlet in your desired location.
- penempatan: For optimal performance, place the receiver in a central location within the desired listening area, away from large metal objects or other electronic devices that may cause interference. The maximum range is up to 200 meters in open air.
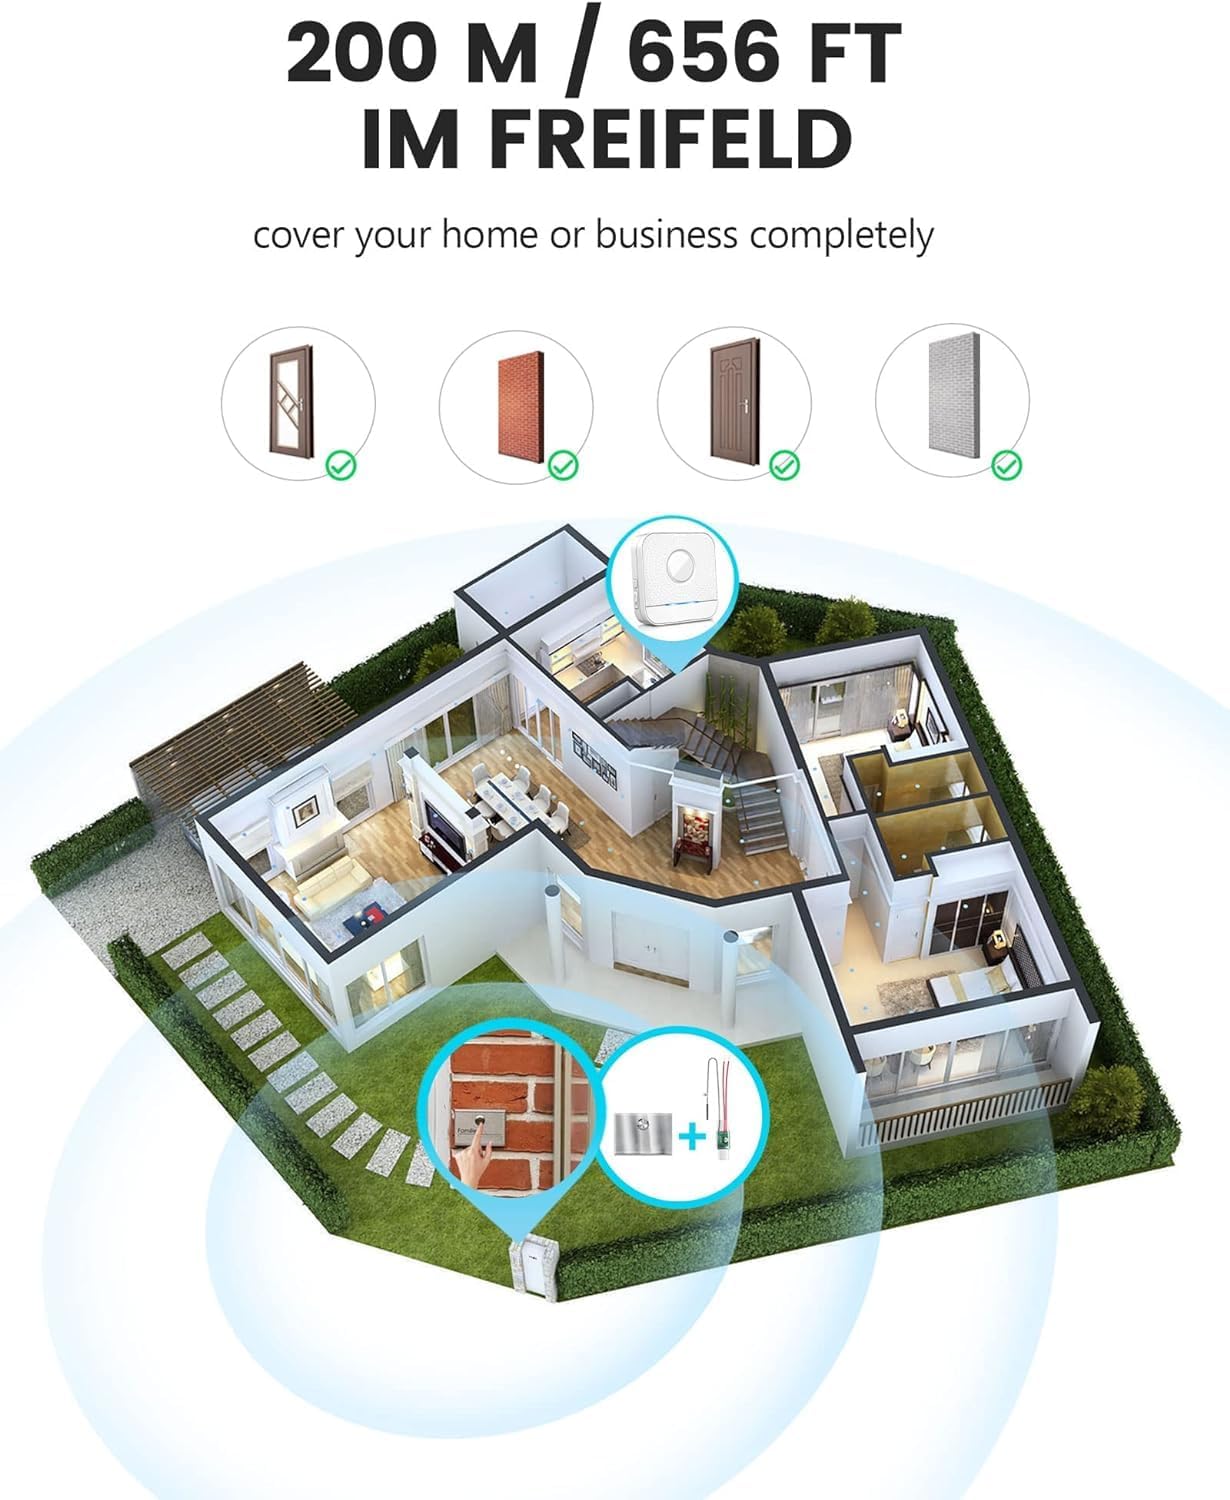
Figure 4.2: Illustration of the wireless range, covering a home or business up to 200 meters in open areas.
5. Arahan Operasi
5.1 Pairing (Synchronization)
The transmitter and receiver are typically pre-paired from the factory. If re-pairing is needed or if you are adding additional components:
- Palamkan penerima ke salur keluar kuasa.
- Press and hold the volume button on the receiver for approximately 3-5 seconds until the LED indicator flashes rapidly. This indicates pairing mode.
- Immediately press your wired doorbell button (which is connected to the transmitter). The receiver should chime, and the LED indicator will stop flashing rapidly, confirming successful pairing.
- If pairing fails, repeat the steps.
5.2 Selecting Ringtones
The receiver offers 58 polyphonic melodies:
- Press the "Melody Selection" button (usually indicated by a music note or arrow icon) on the side of the receiver to cycle through the available melodies.
- Once you hear a melody you prefer, stop pressing the button. The receiver will automatically save this selection.
5.3 Melaraskan Kelantangan
The receiver has 5 adjustable volume levels (0-110 dB):
- Press the "Volume" button (usually indicated by a speaker icon) on the side of the receiver to cycle through the volume levels.
- The lowest setting (0 dB) will mute the sound, but the LED indicator will still flash, providing a visual alert.

Figure 5.1: Receiver features including volume control, melody selection, LED indicator, and memory function.

Figure 5.2: The receiver retains the last selected melody and volume settings even after being unplugged.
6. Penyelenggaraan
- Pembersihan: Wipe the receiver and transmitter with a soft, dry cloth. Do not use abrasive cleaners or solvents.
- Persekitaran: Keep the devices away from direct sunlight, extreme temperatures, and moisture.
- Gangguan: If you experience signal issues, try relocating the receiver to a different outlet or ensuring there are no large metal objects obstructing the signal path between the transmitter and receiver.
7. Penyelesaian masalah
| Masalah | Kemungkinan Punca | Penyelesaian |
|---|---|---|
| Receiver does not chime when doorbell button is pressed. |
|
|
| Receiver rings continuously or does not stop ringing. |
|
|
| Short range or intermittent signal. |
|
|
8. Waranti dan Sokongan
BITIWEND products are designed for reliability and performance. For warranty information and technical support, please refer to the contact details provided with your purchase documentation or visit the official BITIWEND webtapak.
Sila simpan bukti pembelian anda untuk tuntutan waranti.