
1. Maklumat Keselamatan Penting
Sila baca dan fahami semua arahan sebelum memulakan pemasangan. Kegagalan berbuat demikian boleh mengakibatkan renjatan elektrik, kebakaran atau kecederaan lain yang boleh membawa maut atau menyebabkan kerosakan harta benda.
- AMARAN: To avoid electric shock, ensure power is turned off at the circuit breaker or fuse box before installation.
- Semua sambungan elektrik mestilah mengikut kod tempatan, ordinan atau Kod Elektrik Kebangsaan (NEC).
- Rujuk juruelektrik bertauliah jika anda tidak pasti tentang proses pemasangan.
- This fixture is designed for indoor use in damp lokasi.
- Jangan cuba mengubah suai lekapan atau komponennya.
2. Kandungan Pakej
Verify that all parts are included before proceeding with installation.
- LED Chips (Integrated)
- Installation Kits (Mounting hardware)
- Manual Arahan (Dokumen ini)
3. Spesifikasi Produk
| Ciri | Spesifikasi |
|---|---|
| Jenama | Hamilyeah |
| Model | CL |
| Dimensi | 12"L x 12"W x 3.3"H |
| bahan | Anti-rust Metal, LED |
| Wattage | 18 Watt |
| Voltage | 120 Volt (AC) |
| Jenis Sumber Cahaya | LED (Bersepadu) |
| Suhu Warna | 3000 Kelvin |
| Kecerahan | 2200 Lumen |
| Boleh dimalapkan | Ya (Serasi dengan kebanyakan dimmer) |
| Jenis Pemasangan | Gunung siram |
| Penggunaan Dalaman/Luar | Dalaman (Damp Lokasi Dinilai) |
| Pensijilan | ETL Listed (for electrical components) |
4. Arahan Pemasangan (Persediaan)
Sebelum anda memulakan: Ensure the power is OFF at the circuit breaker. Use a voltage tester to confirm the power is off before touching any wires.
- Sediakan Plat Pemasangan:
The fixture includes a mounting plate. Attach this plate to your junction box using the provided screws. Ensure it is securely fastened.
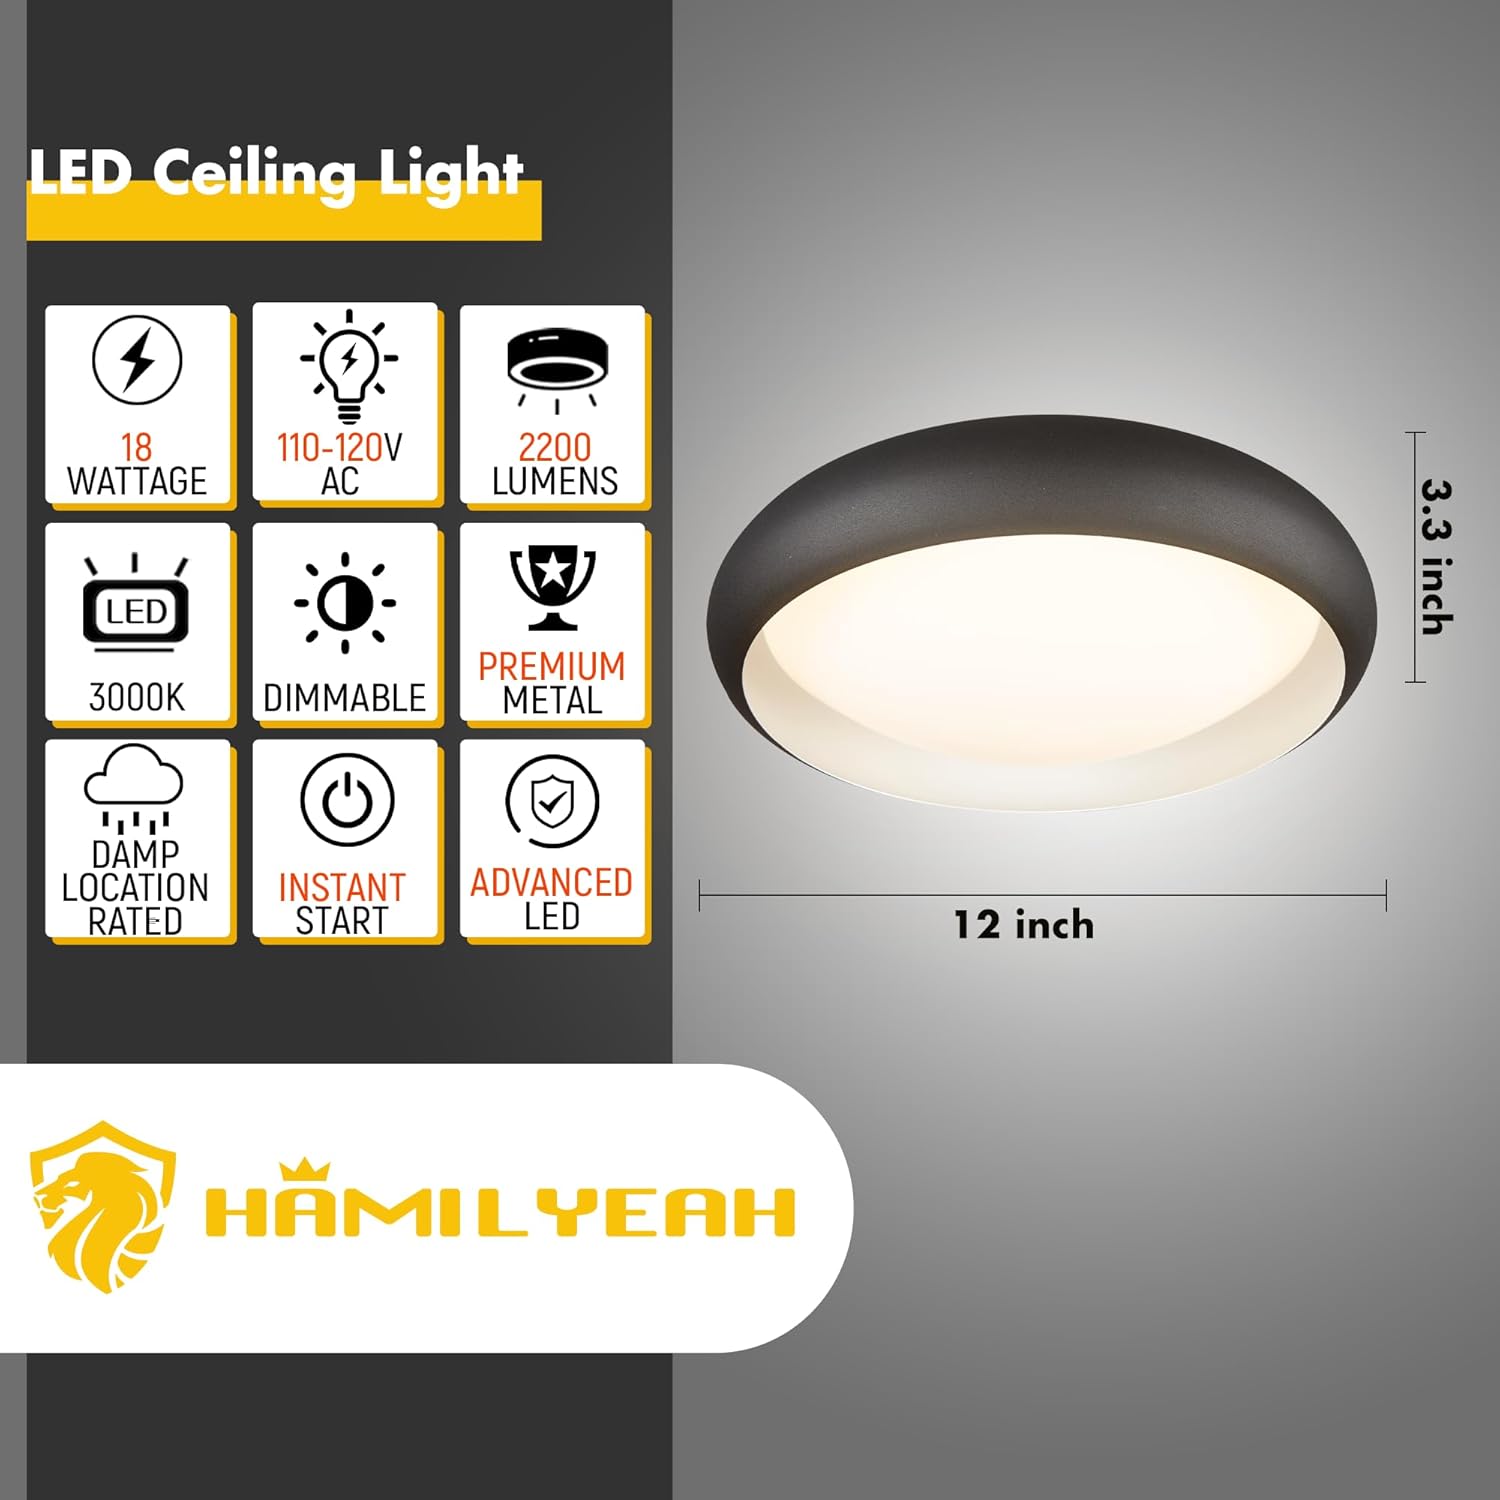
Image 1: Product dimensions and key specifications. This image illustrates the physical size and electrical characteristics of the light fixture.
- Sambungan Elektrik:
Connect the fixture's wires to the corresponding wires from your junction box. Typically, this involves:
- Sambungkan wayar hitam dari lekapan ke wayar hitam (panas) dari kotak simpang.
- Sambungkan wayar putih dari lekapan ke wayar putih (neutral) dari kotak simpang.
- Connect the green or bare copper (ground) wire from the fixture to the ground wire from the junction box.
Secure connections with wire nuts. Ensure all wires are tucked neatly into the junction box.
- Pasang Lekapan:
Align the fixture with the mounting plate and secure it firmly. This usually involves tightening screws that pass through the fixture into the mounting plate.

Image 2: The Hamilyeah flush mount LED ceiling light installed and illuminated. This shows the light's appearance when operational.
- Pulihkan Kuasa:
Once the fixture is securely installed and all connections are made, restore power at the circuit breaker. Test the light fixture.
Note on older junction boxes: Some older homes may have smaller junction boxes where the LED plate might obstruct mounting holes. In such cases, it may be necessary to carefully disassemble the LED plate from the mounting bracket to access the holes, then reassemble after securing the bracket. If you encounter difficulties, consult a professional electrician.
5. Arahan Operasi
This Hamilyeah LED ceiling light is designed for simple operation.
- Hidupkan/Mati Kuasa: Kawal lampu menggunakan suis dinding standard yang disambungkan ke lekapan.
- Fungsi Peredupan: This fixture is dimmable. If connected to a compatible dimmer switch (sold separately), you can adjust the light intensity to your preference.
Video 1: Hamilyeah Flush Mount LED Ceiling Light Modern. This video demonstrates the light fixture in various room settings, showcasing its aesthetic and functionality.
6. Penyelenggaraan
To maintain the appearance and performance of your Hamilyeah LED ceiling light, follow these simple guidelines:
- Pembersihan: Pastikan kuasa dimatikan sebelum membersihkan. Lapkan lekapan dengan lembut, kering atau sedikit damp kain. Jangan gunakan pembersih atau pelarut yang kasar, kerana ini boleh merosakkan kemasan atau komponen elektrik.
- Panjang Umur LED: The integrated LED chips are designed for long life and do not require replacement.
7. Penyelesaian masalah
Jika anda mengalami masalah dengan lekapan lampu anda, rujuk masalah dan penyelesaian biasa berikut:
| Masalah | Kemungkinan Punca | Penyelesaian |
|---|---|---|
| Cahaya tidak menyala. | Tidak ada kekuatan untuk perlawanan. Sambungan wayar longgar. Suis dinding rosak. | Check circuit breaker/fuse. Ensure power is on. Sahkan semua sambungan wayar selamat (dengan kuasa dimatikan). Test the wall switch with another device or replace it. |
| Cahaya berkelip atau malap tanpa diduga. | Suis dimmer tidak serasi. Sambungan wayar longgar. | Ensure dimmer switch is LED-compatible. Replace if necessary. Check wire connections (with power off). |
| Cahaya tidak terang seperti yang diharapkan. | Tetapan dimmer terlalu rendah. Pemasangan yang salah. | Laraskan dimmer kepada kecerahan maksimum. Review installation steps to ensure proper wiring. |
8. Waranti dan Sokongan
Waranti: Hamilyeah provides a 1-year hassle-free warranty for this product. This warranty covers defects in materials and workmanship under normal use.
Sokongan Pelanggan: If you have any questions, require assistance, or need to claim warranty service, please contact Hamilyeah customer support. You can typically reach us through your purchase platform by navigating to "Your Orders," finding your order in the list, selecting "Problem with Order," and choosing the relevant topic.
For more information, visit the official Hamilyeah store: Hamilyeah Store