
1. Pengenalan
This manual provides comprehensive instructions for the safe and efficient operation of the Cole Parmer Digi-Sense Model 2186-20 Temperature Controller. Please read this manual thoroughly before operating the device to ensure proper usage and to prevent damage or injury.
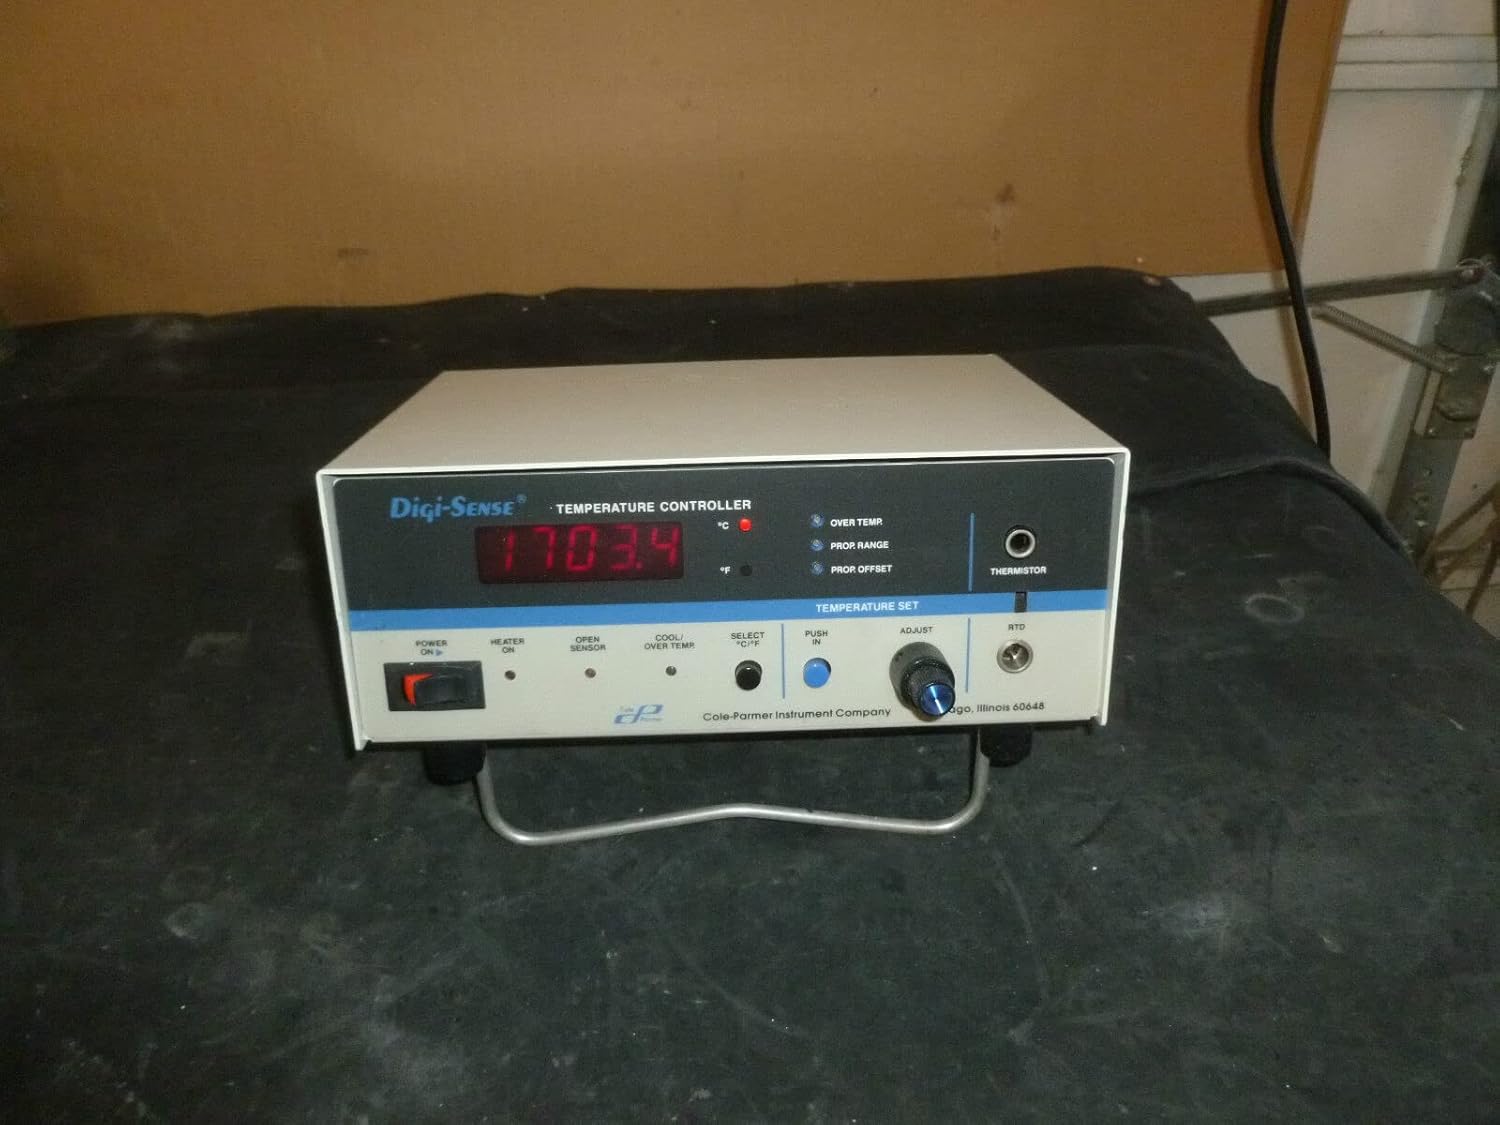
Rajah 1: Depan view of the Digi-Sense Model 2186-20 Temperature Controller, showing the digital display, control knobs, and indicator lights.
2. Persediaan
Before initial use, ensure the temperature controller is placed on a stable, level surface with adequate ventilation. Keep the unit away from direct sunlight, excessive heat, or moisture.
2.1 Sambungan Kuasa
- Ensure the power switch on the front panel is in the DIMATIKAN kedudukan.
- Connect the provided power cord to the power input on the rear of the unit.
- Plug the other end of the power cord into a grounded electrical outlet (115 VAC, 12 AMP, 20 AMP Peak).
2.2 Sambungan Sensor
The unit supports Thermistor and RTD sensors. Ensure you connect the correct type of sensor to the corresponding input jack on the front panel.
- Thermistor Input: Connect your thermistor probe to the "THERMISTOR" jack.
- RTD Input: Connect your RTD probe to the "RTD" jack.
2.3 Sambungan Beban
Connect the device you wish to control (e.g., heater, cooler) to the "LOAD" output receptacle on the rear of the unit.
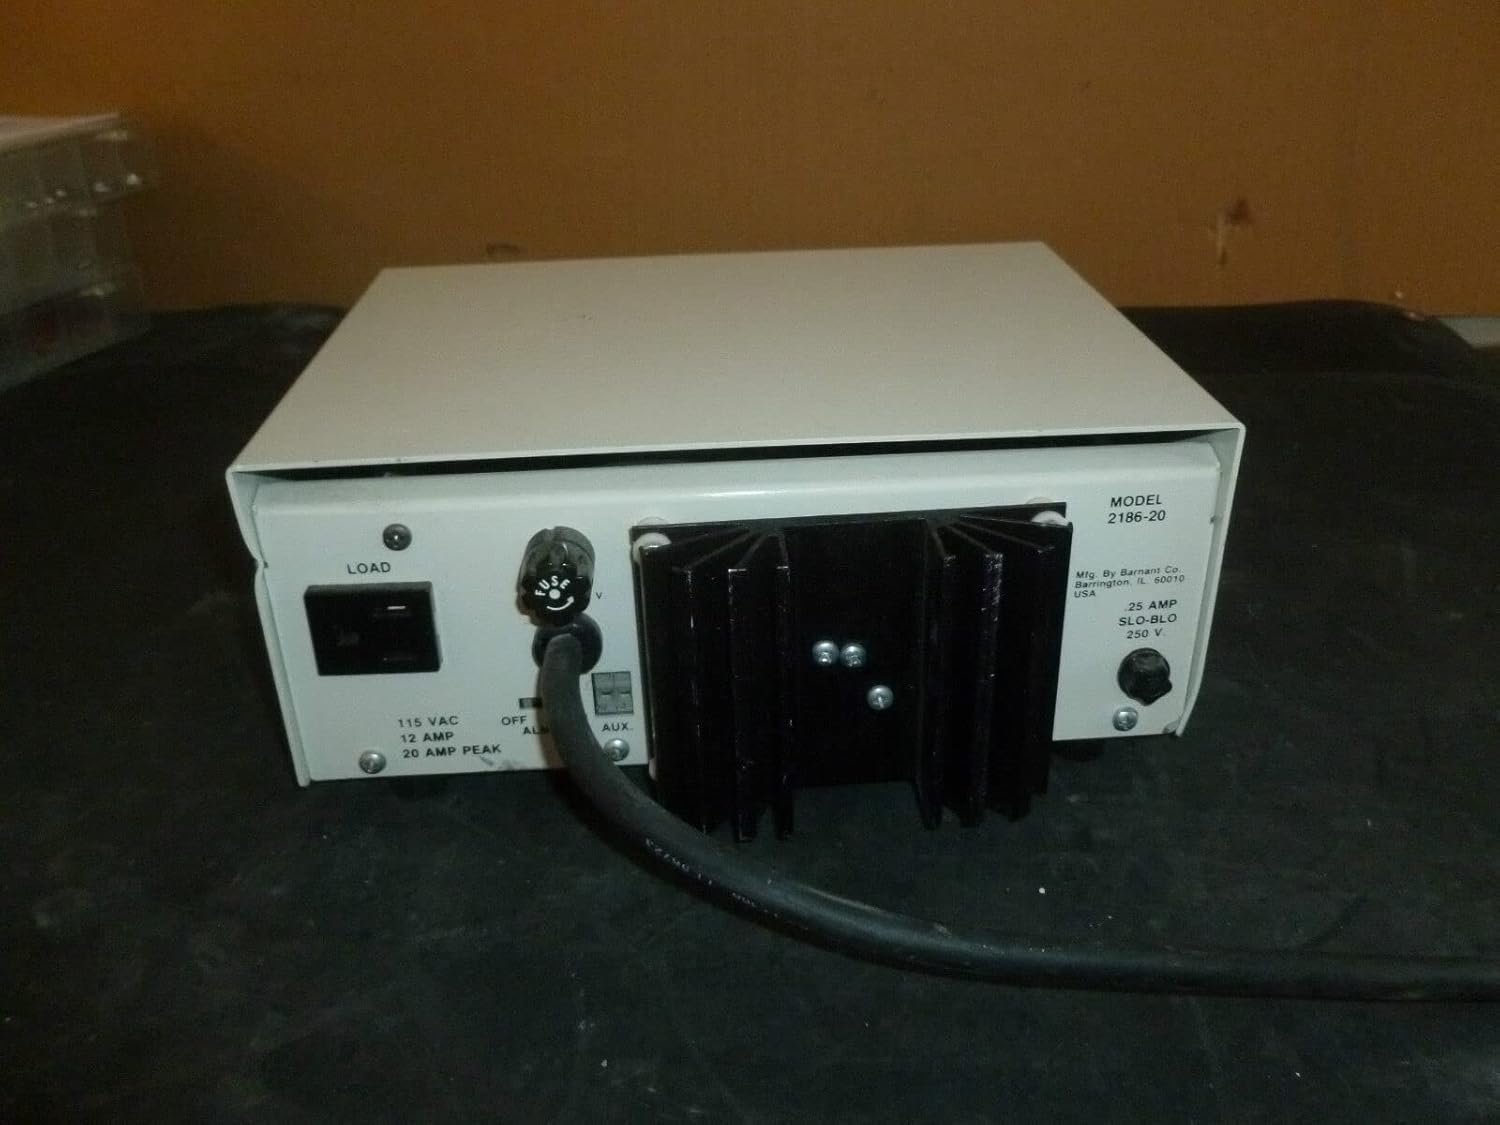
Rajah 2: Belakang view of the temperature controller, showing the power input, load output, and fuse holder.
3. Arahan Operasi
3.1 Menghidupkan/Mematikan
- To power on the unit, flip the KUASA HIDUP/MATI bertukar kepada ON position. The digital display will illuminate.
- Untuk mematikan kuasa, tekan suis ke DIMATIKAN kedudukan.
3.2 Menetapkan Suhu
- The large digital display shows the current measured temperature.
- To set the desired temperature, use the SESUAIKAN knob located under "TEMPERATURE SET".
- Rotate the knob clockwise to increase the set temperature and counter-clockwise to decrease it.
- The display will temporarily show the set temperature as you adjust the knob.
3.3 Selecting Temperature Units (°C/°F)
- Tekan ke SELECT °C/°F button to toggle between Celsius (°C) and Fahrenheit (°F) temperature readings. The corresponding LED indicator will light up.
3.4 Lampu Penunjuk
Observe the following indicator lights on the front panel:
- HEATER ON: Illuminates when the heating element connected to the LOAD output is active.
- OPEN SENSOR: Indicates a disconnected or faulty sensor.
- COOL/OVER TEMP: Illuminates when the unit is cooling or if the temperature exceeds a safe limit.
- OVER TEMP: Indicates the measured temperature is above the set point.
- PROP RANGE: Indicates the unit is operating within the proportional control range.
- PROP OFFSET: Indicates a proportional offset is active.

Rajah 3: Terperinci view of the front panel, highlighting the digital display, temperature set knob, and various indicator lights.
4. Penyelenggaraan
Regular maintenance ensures the longevity and accuracy of your temperature controller.
4.1 Pembersihan
- Sentiasa putuskan sambungan unit daripada kuasa sebelum membersihkannya.
- Lap permukaan luar dengan lembut, damp kain. Jangan gunakan pembersih atau pelarut yang melelas.
- Pastikan tiada cecair memasuki unit.
4.2 Penggantian Fius
If the unit fails to power on, check the fuse located on the rear panel. Replace with a fuse of the same type and rating: .25 AMP SLO-BLO 250 V.

Figure 4: Close-up of the rear panel, showing the fuse holder and model information.
5. Penyelesaian masalah
| Masalah | Kemungkinan Punca | Penyelesaian |
|---|---|---|
| Unit tidak dihidupkan. | No power from outlet; Blown fuse; Loose power cord. | Check power outlet; Replace fuse (.25 AMP SLO-BLO 250 V); Ensure power cord is securely connected. |
| "OPEN SENSOR" indicator is lit. | Sensor not connected; Faulty sensor; Incorrect sensor type. | Connect sensor securely; Test sensor; Ensure correct sensor (Thermistor/RTD) is used. |
| Bacaan suhu tidak tepat. | Sensor not properly placed; Sensor calibration needed. | Ensure sensor is in good thermal contact; Refer to manufacturer for calibration procedures. |
| Load (heater/cooler) not activating. | Load not connected; Set temperature not reached; Faulty load. | Check load connection; Adjust set temperature; Test load device independently. |
6. Spesifikasi
- model: 2186-20
- MPN: 2186-20
- Pengeluar: Generic (Mfg. By Barnard Co., Barrington, IL 60010 USA)
- Input Kuasa: 115 VAC, 12 AMP, 20 AMP Puncak
- Fius: .25 AMP SLO-BLO 250 V
- Input Sensor: Thermistor, RTD
- Tarikh Mula-mula Tersedia: 15 Februari 2019
7. Waranti dan Sokongan
For specific warranty information and technical support, please refer to the documentation provided with your purchase or contact the manufacturer directly. As this product is listed under a "Generic" brand, it is recommended to contact the original manufacturer, Barnard Co., for detailed support.
Manufacturer details found on the unit: Mfg. By Barnard Co., Barrington, IL 60010 USA.