1. Maklumat Keselamatan
Sila baca dan fahami semua arahan sebelum pemasangan dan penggunaan. Simpan manual ini untuk rujukan masa hadapan.
- Ensure the bed frame is properly assembled according to the instructions to prevent instability or collapse.
- The maximum weight capacity of the bed frame is 900 pounds; exceeding this weight recommendation could result in serious injury or damage to the bed frame.
- Be cautious of potential pinch points or sharp edges during assembly and use.
- Always use a compatible mattress with the recommended thickness of 10-12 inches to ensure proper support and stability.
2. Produk Lebihview
The Keyluv King Upholstered LED Bed Frame is designed for comfort and functionality. It features a velvet upholstered, button-tufted headboard with integrated LED lighting, four spacious storage drawers, and a sturdy metal frame with wooden slat support. This bed frame does not require a box spring.
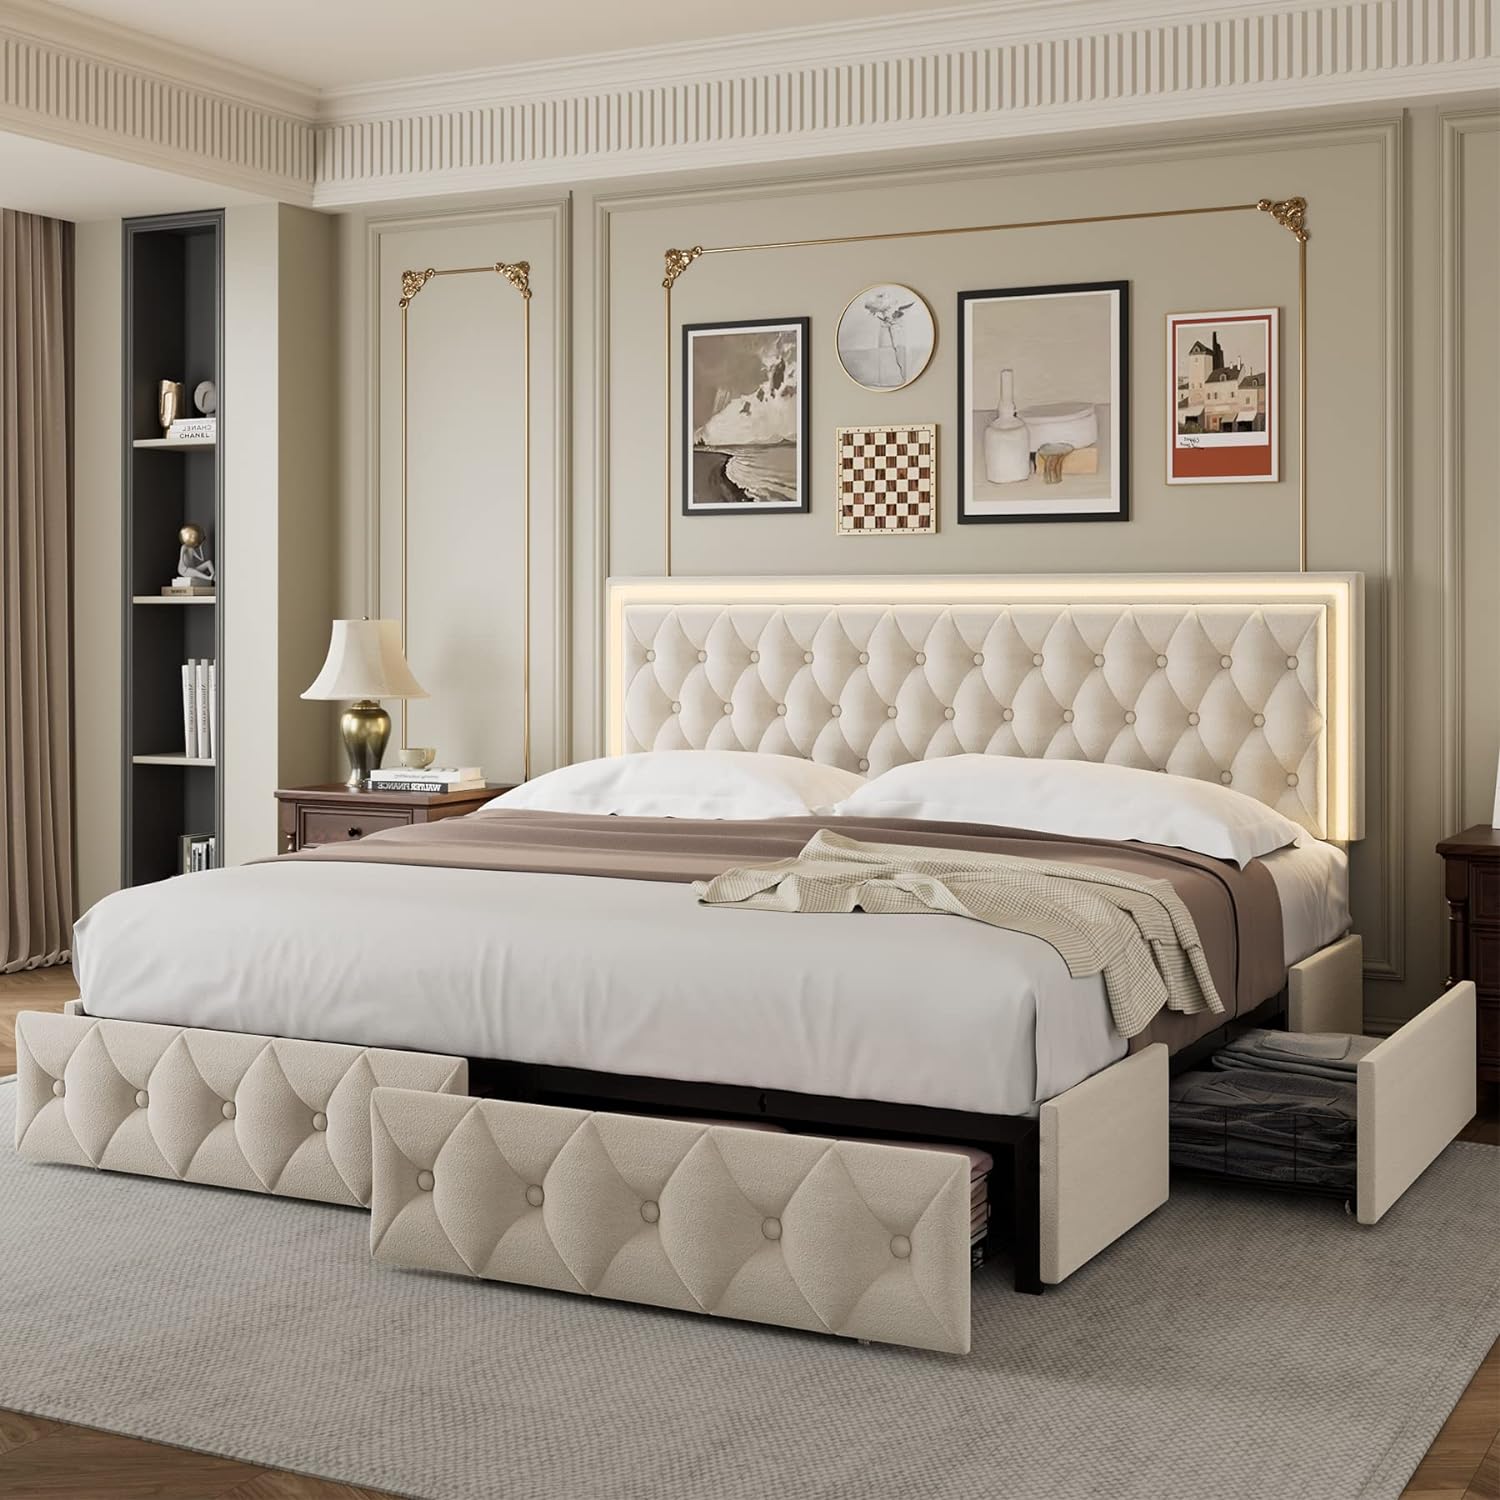
Rajah 2.1: Keseluruhannya view of the Keyluv King Upholstered LED Bed Frame in beige, showcasing the LED headboard and open storage drawers.
Video 2.2: This video highlights the features of the Keyluv LED Bed Frame, including the four large storage drawers and the LED headboard.
3. Kandungan Pakej
Verify all components are present before beginning assembly. All parts and detailed instructions are included in one box.
- Upholstered Headboard with LED Strip
- Bed Frame Steel Components
- Bilah Kayu
- 4 Storage Drawers (with wheels and locking mechanism)
- Perkakasan Pemasangan (skru, pencuci, sepana Allen)
- Kawalan Jauh Lampu LED
- USB Power Adapter for LED Lights
- Manual Arahan

Rajah 3.1: Terperinci view of the velvet fabric, durable wooden slat support, and easy-assembly slat clips.
4. Arahan Perhimpunan
Ikuti langkah-langkah ini dengan teliti untuk pemasangan yang betul. Adalah disyorkan untuk mempunyai dua orang untuk perhimpunan.
4.1. Bed Frame Assembly
For a visual guide, please refer to the official assembly video below.
Video 4.1.1: Official assembly instructions for the Keyluv LED Bed Frame with Storage. This video demonstrates the step-by-step process of constructing the bed frame.
- Buka Pembungkusan Komponen: Tanggalkan semua bahagian dari pembungkusan dengan berhati-hati dan letakkannya di atas permukaan yang bersih dan lembut untuk mengelakkan calar. Pastikan semua bahagian yang disenaraikan dalam kandungan pakej ada.
- Assemble Headboard Support: Attach the headboard support bars to the upholstered headboard using the provided screws and Allen wrench. Ensure all connections are secure.
- Sambungkan Rel Sisi: Join the side rails to the headboard and footboard sections. Hand-tighten screws initially, then fully tighten once the frame is aligned.
- Pasang Kaki Sokongan Pusat: Attach the center support legs to the middle support beam. Adjust the height of the feet if necessary to ensure stability on uneven floors.
- Letakkan Bilah Kayu: Insert the wooden slats into the designated slots on the side rails. Ensure the plastic caps are securely fitted to prevent movement and noise.
- Pasang Laci Penyimpanan: Construct the four storage drawers by attaching the metal frames to the upholstered drawer fronts. Install the wheels on the bottom of each drawer.
- Sisipkan Laci: Slide the assembled drawers into the designated spaces under the bed frame. Ensure the locking mechanisms are functional to prevent accidental rolling.

Rajah 4.1.2: Illustrates the dimensions of the King size bed frame and the individual storage drawers.

Rajah 4.1.3: Shows the adjustable height feature of the headboard and recommended mattress thickness (10-12 inches).
4.2. LED Light Setup
Connect the LED strip to the power source and prepare for operation.
- Locate the LED light strip cable extending from the headboard.
- Connect the LED light cable to the provided USB power adapter.
- Plug the USB power adapter into a standard wall outlet.
5. Arahan Operasi
5.1. Kawalan Lampu LED
The LED lights can be controlled via the included remote or a mobile application.
Video 5.1.1: Demonstrates how to operate the LED lights using both the remote control and the mobile application.
Menggunakan Alat Kawalan Jauh:
- Ensure the plastic film is removed from the remote control's battery compartment before first use.
- Point the remote directly at the LED receiver on the headboard.
- Use the color buttons (R, G, B, W, and other color dots) to change the light color.
- Use "SPEED+" and "SPEED-" buttons to adjust the speed of dynamic lighting modes.
- Use "MODE+" and "MODE-" buttons to cycle through various lighting effects (e.g., flash, fade, strobe).
- Use the brightness buttons (sun icons) to adjust light intensity.
- The "ON" and "OFF" buttons control the power to the LED lights.
Menggunakan Aplikasi Mudah Alih:
- Scan the QR code provided in the manual or on the LED controller to download the compatible mobile application.
- Enable Bluetooth on your smartphone. The LED light will automatically connect to the app.
- Within the app, you can select colors from a color wheel, choose from various dynamic modes, adjust brightness and speed, and set timers for the lights to turn on/off.
- The app also features a music activation mode, allowing the lights to react to music played through your phone.

Rajah 5.1.2: The LED headboard showcasing different color options, controllable via the included remote or a smartphone application.
6. Penyelenggaraan
Penyelenggaraan yang kerap membantu memanjangkan jangka hayat dan penampilan rangka katil anda.
- Penjagaan upholsteri: For general cleaning, gently vacuum the velvet fabric using a soft brush attachment. For spills, blot immediately with a clean, dry cloth. Do not rub. For stubborn stains, consult a professional upholstery cleaner.
- Pemeriksaan Bingkai: Periodically check all screws and bolts to ensure they are tight. Re-tighten if necessary to maintain stability and prevent noise.
- Lampu LED: The LED lights are designed for long-term use and generally do not require maintenance. If issues arise, refer to the troubleshooting section. Avoid exposing the LED strip to excessive moisture.
- Laci Storan: Keep the drawer wheels clean and free of debris to ensure smooth operation.
7. Penyelesaian masalah
Isu biasa dan penyelesaiannya.
| Masalah | Kemungkinan Punca | Penyelesaian |
|---|---|---|
| Lampu LED tidak menyala. | Power cable disconnected, remote battery dead, app not connected. | Check USB cable connection and wall outlet. Replace remote battery. Ensure Bluetooth is enabled and app is connected. |
| Bed frame is wobbly or noisy. | Loose screws/bolts, uneven floor, improperly installed slats. | Tighten all assembly hardware. Adjust the height of the center support feet. Ensure all wooden slats are correctly seated in their caps. |
| Storage drawers do not slide smoothly. | Debris in wheels, misaligned drawers, damaged wheels. | Clean wheels and tracks. Realign drawers. Contact support if wheels are damaged. |
| Headboard height adjustment issue. | Screws not loosened sufficiently, obstruction. | Ensure the screws allowing headboard height adjustment are loosened before attempting to change height. Check for any obstructions. |
8. Spesifikasi
| Ciri | Perincian |
|---|---|
| Jenama | Keyluv |
| Nombor Model | MBSDLKSCDKCK |
| Saiz | Raja |
| Dimensi Produk | 82.7"L x 78.7"W x 40.6"H |
| warna | Beige |
| Jenis Selesai | baldu |
| Ciri Khas | LED adjustable headboard, No Box Spring Needed, 4 Storage Drawers, Sturdy construction |
| Saiz Tilam Serasi | 10-12 inci |
| Berat Barang | 128.5 paun |
| Perhimpunan Diperlukan | ya |
| UPC | 721718608318 |
9. Waranti dan Sokongan
For warranty information or technical support, please refer to the product packaging or contact Keyluv customer service directly. Keep your purchase receipt for warranty claims.