
MPM 144326
MPM Automatic Microchip Pet Feeder User Manual
Model: 144326
1. Pengenalan
The MPM Automatic Microchip Pet Feeder is designed to provide controlled access to food for your pets, particularly beneficial in multi-pet households, for pets on special diets, or for managing pet weight. Utilizing RFID tag technology, the feeder grants access only to designated pets, preventing unauthorized consumption.
This innovative feeder allows you to schedule up to four meals per day, ensuring your pet receives their food at precise times. Its sealed food bowl design helps maintain food freshness and deters insects. The feeder is constructed from food-grade ABS materials, with a PP bowl and PC lid, ensuring safety for your beloved pets.
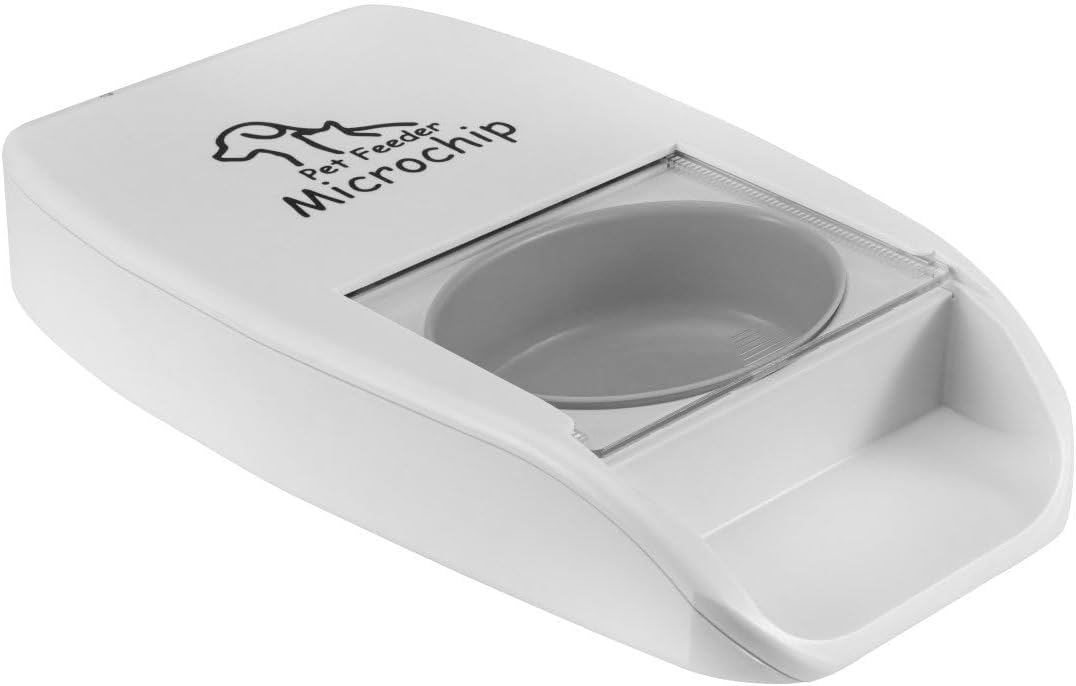
Image 1.1: Front-top view of the MPM Automatic Microchip Pet Feeder.
2. Kandungan Pakej
Sila sahkan bahawa semua item yang disenaraikan di bawah disertakan dalam pakej anda:
- MPM Automatic Microchip Pet Feeder Unit
- Mangkuk Makanan Boleh Tanggal
- RFID Collar Tags (2 termasuk)
- Kabel Kuasa USB
- Manual Arahan

Image 2.1: All components included in the MPM Automatic Microchip Pet Feeder package.
3. Produk Lebihview
Familiarize yourself with the main components of your pet feeder:
- Unit Utama: Houses the electronics, motor, and RFID sensor.
- Mangkuk Makanan: Removable for easy cleaning, suitable for wet or dry food.
- Tudung: Automatically opens for authorized pets and seals to keep food fresh.
- Paparan LCD: Shows current time, feeding schedule, and menu options.
- Butang Kawalan: For navigating the menu and setting parameters.
- RFID Sensor: Detects registered RFID collar tags.
- Pelabuhan Kuasa: For connecting the USB power cable.
- Petak Bateri: (If applicable) For backup power using batteries.

Image 3.1: The feeder with the lid open, showing the food bowl.
4. Persediaan
Ikuti langkah ini untuk persediaan awal:
- Bongkar: Keluarkan semua komponen dari pembungkusan dengan berhati-hati.
- Sambungan Kuasa: Connect the USB power cable to the feeder's power port and plug it into a suitable power adapter (not included) or a USB power source. Alternatively, install batteries (not included) into the battery compartment for backup power.
- Install Food Bowl: Place the removable food bowl securely into the main unit.
- Fill Food Bowl: Add your pet's wet or dry food to the bowl. Do not overfill.
- Attach RFID Tag: Securely attach one of the provided RFID collar tags to your designated pet's collar. Ensure it is not easily lost or damaged.
5. Arahan Operasi
5.1. Hidupkan Awal dan Tetapan Masa
- Once powered, the LCD display will illuminate.
- Use the control buttons (usually 'M' for Menu, 'SET' for Set, and arrow buttons for navigation) to set the current time. Refer to the specific button functions indicated on your feeder.
5.2. Registering RFID Tags
The feeder needs to learn your pet's RFID tag to grant access:
- Access the 'RFID Registration' or 'Pet ID' menu option on the LCD display.
- Follow the on-screen prompts to initiate the registration process.
- Hold the pet's collar (with the attached RFID tag) near the feeder's sensor area (typically near the front of the lid). The feeder will emit a sound or display a confirmation message when the tag is successfully registered.
- Repeat for any additional pets requiring access, using a unique RFID tag untuk setiap.
5.3. Programming Feeding Times
You can schedule up to 4 meals per day:
- Navigate to the 'Meal Schedule' or 'Feeding Times' menu.
- Select a meal slot (e.g., Meal 1, Meal 2).
- Set the desired feeding time for that slot using the control buttons.
- Confirm the setting. Repeat for up to four daily meals.
- The feeder will automatically open its lid at the scheduled times when a registered pet approaches.
5.4. Pemakanan Manual
To open the feeder manually for immediate access:
- Locate the 'Manual Feed' or 'Open' button/option on the feeder's control panel or menu.
- Press or select this option to temporarily open the lid. The lid will close automatically after a short period or when the pet moves away.
5.5. Tetapan Semula Kilang
If you need to clear all settings, including registered RFID tags and feeding schedules, use the factory reset function:
- Navigate to the 'System Settings' or 'Reset' menu option.
- Select 'Factory Reset' and confirm your choice. All custom settings will be erased.
6. Penyelenggaraan
Regular cleaning and maintenance ensure optimal performance and hygiene for your pet:
- Membersihkan Mangkuk Makanan: The removable food bowl can be easily detached for separate cleaning. Wash it with warm, soapy water and rinse thoroughly. Ensure it is completely dry before placing it back into the feeder.
- Membersihkan Unit Utama: Lap bahagian luar pengumpan dengan iklanamp cloth. Do not submerge the main unit in water. Avoid using abrasive cleaners.
- Lid and Sensor Area: Periodically check and clean the lid mechanism and the RFID sensor area to ensure smooth operation and accurate tag detection. Remove any food debris or pet hair.
- Kesegaran Makanan: The sealed design helps keep food fresh. For wet food, it is recommended to clean the bowl and refill more frequently to prevent spoilage.
- Pemeriksaan Bateri: If using batteries, check their charge periodically and replace them when low to ensure continuous operation during power outages.
7. Penyelesaian masalah
If you encounter issues with your MPM Automatic Microchip Pet Feeder, refer to the following common problems and solutions:
- Feeder not opening for registered pet:
- Pastikan RFID tag is securely attached to the pet's collar and is not damaged.
- Sahkan RFID tag is properly registered with the feeder (refer to Section 5.2).
- Check for any obstructions around the sensor area or the lid mechanism.
- Confirm the feeder has adequate power (AC adapter connected or fresh batteries).
- Unauthorized pet accessing food:
- Ensure only designated pets have registered RFID tags.
- Verify the feeder is not in a manual open mode.
- Check if the feeder's sensor is obstructed, preventing it from closing properly.
- Some clever pets may attempt to manipulate the lid. Ensure the feeder is placed in a stable location.
- Power issues (feeder not turning on/display off):
- Check the USB power cable connection to both the feeder and the power source.
- If using batteries, ensure they are correctly installed and have sufficient charge. Replace if necessary.
- Food not dispensing/lid not opening at scheduled time:
- Verify the feeding schedule is correctly programmed (refer to Section 5.3).
- Ensure the food bowl is not empty.
- Check for any food jams or obstructions preventing the lid from opening.
- LCD display not working or showing errors:
- Try performing a factory reset (refer to Section 5.5).
- Disconnect and reconnect power to restart the device.
Jika masalah berterusan selepas mencuba penyelesaian ini, sila hubungi sokongan pelanggan.
8. Spesifikasi
| Ciri | Perincian |
|---|---|
| Nombor Model | 144326 |
| Dimensi (L x W x H) | 40.64 x 25.4 x 7.62 cm |
| Berat badan | 1.36 kg |
| bahan | Acrylonitrile Butadiene Styrene (ABS), Polypropylene (PP), Polycarbonate (PC) |
| Spesies Sasaran | Dog, Cat (Multi-Pet) |
| Penggunaan yang Disyorkan | Dry Food, Wet Food, Multiple Pets |
| Ciri Khas | RFID Sensor, Automatic Feeding, LCD Display |
| Scheduled Meals | Sehingga 4 sehari |
9. Waranti dan Sokongan
For warranty information, technical support, or service inquiries, please refer to the contact details provided with your purchase documentation or visit the official MPM webtapak. Simpan resit pembelian anda sebagai bukti pembelian untuk tuntutan waranti.
For further assistance, you may contact MPM customer service directly. Please have your model number (144326) and a description of the issue ready.
Ask a question about this manual
Ask about setup, troubleshooting, compatibility, parts, safety, or missing instructions. Manuals+ will review the question and use this page’s manual context to help answer it.