1. Pengenalan
Thank you for choosing the Cleyver ODHW30 Mono Wireless DECT Headset. This manual provides detailed instructions to help you set up, operate, and maintain your headset for optimal performance. The ODHW30 is designed for professional use, offering exceptional audio quality, extended wireless range, and long-lasting comfort.
2. Kandungan Pakej
Sila sahkan bahawa semua item terdapat dalam pakej anda:
- Cleyver ODHW30 Mono Wireless Headset
- Stesen Pangkalan DECT
- Penyesuai Kuasa untuk Stesen Pangkalan
- Kabel Sambungan USB
- Manual Pengguna (dokumen ini)
3. Produk Lebihview
Familiarize yourself with the components of your Cleyver ODHW30 headset and base station.
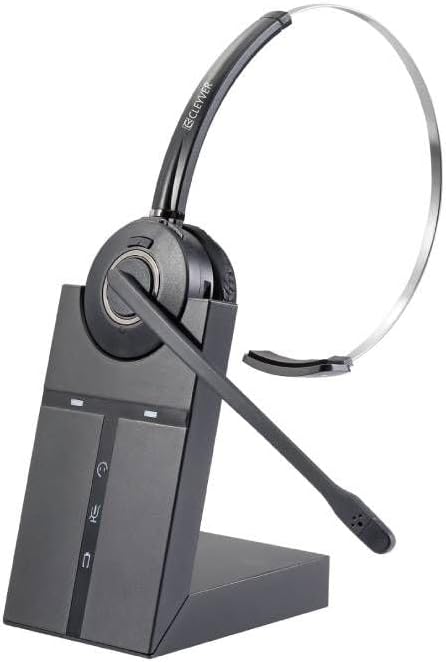
Image 3.1: The Cleyver ODHW30 Mono Wireless DECT Headset resting on its charging base station. The headset features a single ear cup and an adjustable microphone boom. The base station has indicator lights and control buttons.
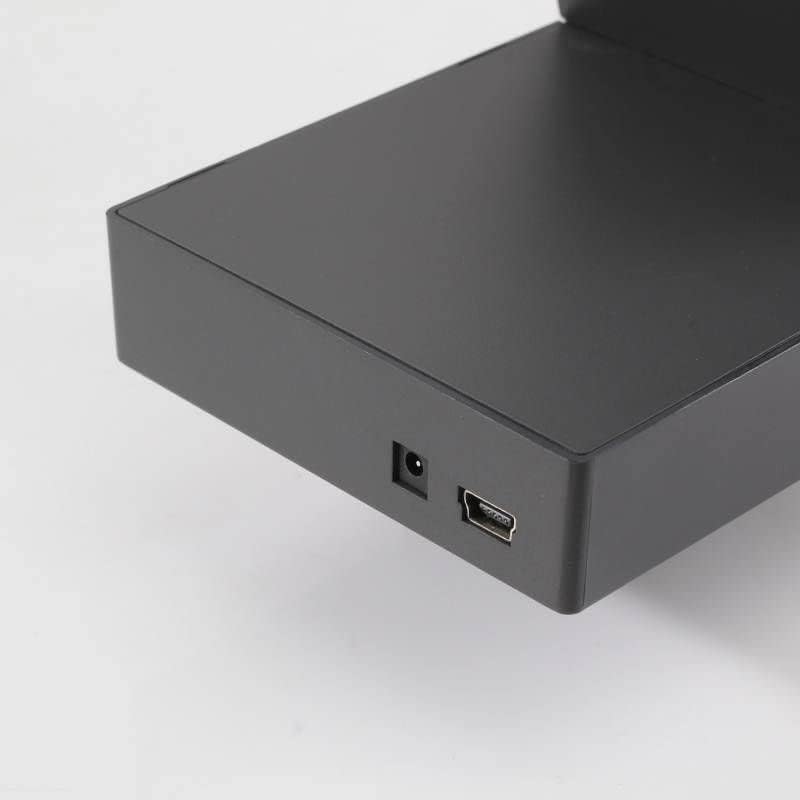
Imej 3.2: Gambar jarak dekat view of the rear ports on the Cleyver ODHW30 DECT base station, showing the power input and a USB port for connectivity.
4. Persediaan
4.1 Mengecas Alat Dengar
Before initial use, fully charge your headset. Place the headset onto the charging cradle of the DECT base station. The charging indicator light on the base station will illuminate to confirm charging. A full charge takes approximately 2-3 hours and provides up to 8 hours of talk time.

Image 4.1: An icon representing power or charging, indicating the headset needs to be charged.
4.2 Menyambung Stesen Pangkalan
Connect the DECT base station to a power source using the provided power adapter. Connect the base station to your computer or desk phone using the appropriate cable (USB for computer, or specific phone cable if applicable, not included). Ensure all connections are secure.
4.3 Pairing the Headset
The headset and base station are typically pre-paired from the factory. If re-pairing is necessary:
- Pastikan set kepala dicas dan dihidupkan.
- Place the headset on the base station.
- Press and hold the pairing button on the base station (refer to base station diagram for exact location) until the pairing indicator light flashes.
- The headset will automatically pair with the base station. The indicator light will turn solid when pairing is successful.

Image 4.2: An icon representing connectivity, illustrating the wireless connection between the headset and its base station.
4.4 Memakai Alat dengar
The ODHW30 is a mono headset designed for comfortable, all-day wear. Adjust the headband for a secure fit and position the microphone boom approximately two finger-widths from your mouth for optimal voice pickup.

Image 4.3: A person wearing the Cleyver ODHW30 headset, shown from a side profile, demonstrating proper microphone positioning.

Image 4.4: A person wearing the Cleyver ODHW30 headset, shown from a front view, highlighting the single ear cup design.
5. Arahan Operasi
5.1 Hidupkan/Mati Kuasa
- Hidupkan kuasa: Press and hold the multifunction button on the headset until the indicator light flashes.
- Matikan: Press and hold the multifunction button until the indicator light turns off.
5.2 Pengurusan Panggilan
- Jawab/Tamatkan Panggilan: Tekan butang berbilang fungsi sekali.
- Laraskan Kelantangan: Use the volume up/down buttons located on the headset.
- Redam Mikrofon: Press the mute button on the headset. Press again to unmute.
5.3 DECT Range
The DECT technology provides a wireless range of up to 120 meters (390 feet) in open environments. Range may vary depending on obstacles and interference.
5.4 Hayat Bateri
The headset's 300mAh Li-Polymer battery offers up to 8 hours of continuous use. For optimal battery longevity, avoid fully discharging the headset frequently and store it in a cool, dry place.
6. Penyelenggaraan
- Pembersihan: Use a soft, dry cloth to clean the headset and base station. Do not use liquid cleaners or aerosols.
- Storan: When not in use for extended periods, store the headset on its charging base to maintain battery health. Keep the device away from extreme temperatures and humidity.
- Penggantian Kusyen Telinga: Ear cushions may be replaced if worn. Contact customer support for replacement parts.
7. Penyelesaian masalah
7.1 Tiada Bunyi daripada Fon Kepala
- Pastikan set kepala dihidupkan dan dipasangkan dengan stesen pangkalan.
- Check the volume settings on both the headset and your connected device (computer/phone).
- Verify that the headset is selected as the default audio output device in your computer's sound settings or communication software.
- Confirm the base station is properly connected to its power source and your device.
7.2 Mikrofon Tidak Berfungsi
- Pastikan mikrofon tidak diredamkan.
- Check the microphone input settings on your computer or communication software.
- Reposition the microphone boom closer to your mouth.
7.3 Headset Not Connecting/Pairing
- Ensure the headset is within range of the base station.
- Perform the pairing procedure again as described in Section 4.3.
- Restart both the base station (by unplugging and replugging the power) and the headset.
7.4 Hayat Bateri Pendek
- Pastikan set kepala dicas sepenuhnya sebelum digunakan.
- Prestasi bateri mungkin merosot dari semasa ke semasa dengan penggunaan yang meluas.
- Avoid operating the headset at maximum volume for prolonged periods, as this can reduce battery life.
8. Spesifikasi
| Ciri | Perincian |
|---|---|
| Nama Model | ODHW30 |
| Teknologi Tanpa Wayar | DECT, Bluetooth |
| Julat Tanpa Wayar | Sehingga 120 meter |
| Jenis Bateri | Li-Polimer (300mAh) |
| Masa Berbual | Sehingga 8 jam |
| Faktor Bentuk | On-ear (Mono) |
| Pembatalan Bunyi | Microphone Noise-Cancelling |
| Jenis Kawalan | Kawalan Kelantangan, Butang Tekan |
| Penggunaan yang Disyorkan | DECT Phone, Cordless Phone |
| Pengeluar | Cleyver |
9. Waranti dan Sokongan
Cleyver products are designed for reliability and performance. For information regarding warranty coverage, technical support, or replacement parts, please refer to the warranty card included with your product or visit the official Cleyver webtapak. Simpan bukti pembelian anda untuk tuntutan waranti.