
1. Pengenalan
Thank you for choosing the G-MARK Karaoke Base 3 Wireless Microphone System. This system is designed to provide high-quality audio for various applications including home karaoke, church events, weddings, and DJ parties. It features a 2-channel UHF wireless receiver, two cordless handheld microphones, and versatile connectivity options including 3.5mm AUX and Bluetooth. Please read this manual thoroughly before operation to ensure proper setup and optimal performance.
2. Produk Lebihview
2.1 Komponen yang Disertakan
Pakej termasuk item berikut:
- 1 x UHF Receiver with 2 x Antennas
- 2 x Mikrofon Genggam
- 1 x Penyesuai Kuasa
- 1 x 1/4" to 1/4" cable adapter
- 1 x 1/8" to 1/8" cable adapter
- 2 x Anti-Slip Rings
- 2 x Sponge Mic Covers
- 1 x Manual Pengguna (dokumen ini)
2.2 Ciri-ciri Utama
- Advanced Audio Configuration: Built-in echo reverb device and UHF wireless system (550-595MHz frequency range) for reduced interference. Automatic frequency recognition and matching.
- Cardioid Pattern Microphones: Uni-directional pickup pattern minimizes background noise, ensuring clear vocal reproduction.
- Robust Audio Sound: Two handheld microphones with quality mic cores. Adjustable echo reverberation, treble, and bass for customized audio effects.
- Serasi Bluetooth: Receiver supports Bluetooth music streaming for connection with PCs and other devices.
- Stable Wireless Performance: Dual-channel design with a large dynamic signal range, offering up to 100 feet of wireless operation.
- Keserasian Berbilang: Features XLR, 6.35mm (1/4"), and 3.5mm (1/8") output jacks. Can connect directly to Bluetooth speakers with AUX input or TV soundbars.

Image: Dynamic Core with Cardioid Pickup Pattern. This diagram illustrates the uni-directional sound pickup pattern of the microphone, designed to focus on the sound source directly in front of it while minimizing ambient noise.
3. Arahan Persediaan
3.1 Sambungan Penerima
- Sambungan Kuasa: Sambungkan penyesuai kuasa yang disediakan kepada input DC 12V pada penerima dan pasangkannya ke soket kuasa.
- Pemasangan Antena: Screw the two antennas securely into their respective ports on the receiver.
- Output Audio: Connect the receiver to your audio system (speaker, amplifier, soundbar, PC) using one of the following methods:
- Keluaran XLR: Untuk peralatan audio profesional.
- 6.35mm (1/4") Output Jack: Use the provided 1/4" to 1/4" cable adapter if needed.
- 3.5mm (1/8") AUX Output Jack: Use the provided 1/8" to 1/8" cable adapter if connecting to devices with a 3.5mm AUX input, such as Bluetooth speakers or TV soundbars.
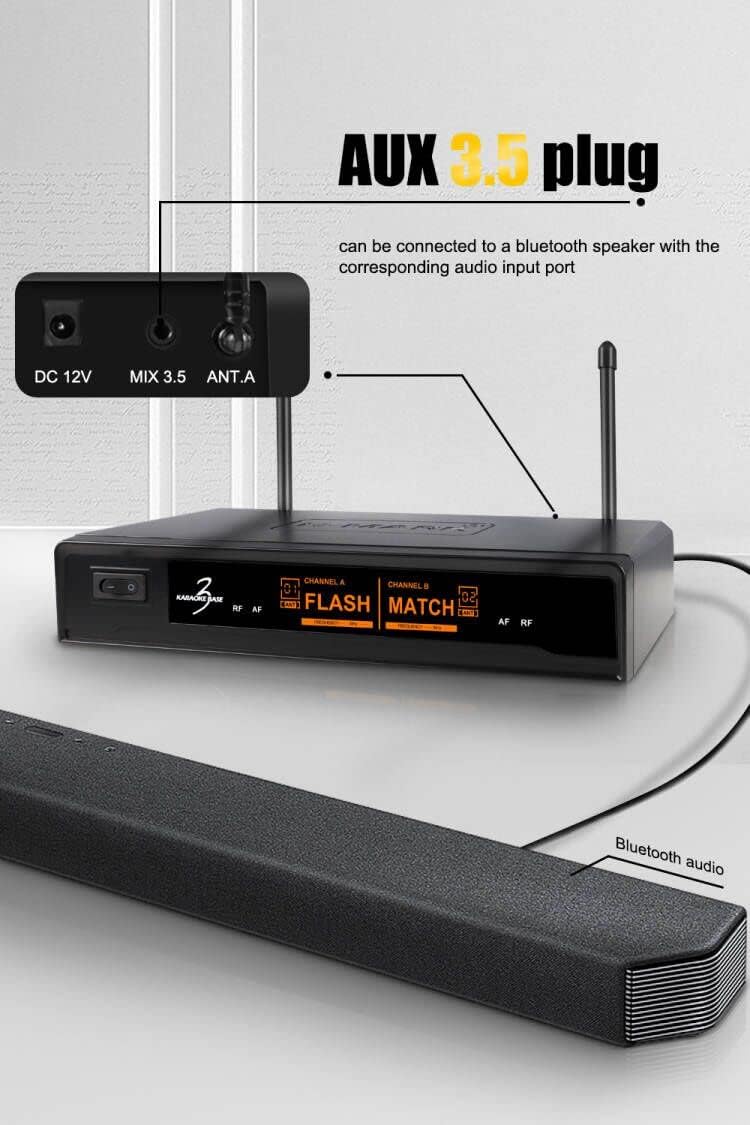
Image: AUX 3.5mm Plug Connection. This image demonstrates how to connect the receiver's 3.5mm AUX output to a Bluetooth speaker or soundbar using the appropriate cable.
3.2 Persediaan Mikrofon
- Insert batteries into each handheld microphone (batteries not included).
- Turn on the receiver and the microphones. The system will automatically recognize and match the suitable frequencies.
3.3 Berpasangan Bluetooth
To stream music via Bluetooth:
- Pastikan penerima dihidupkan.
- On your smartphone, PC, or other Bluetooth-enabled device, navigate to the Bluetooth settings.
- Cari untuk available devices. The receiver should appear as "BASE 3".
- Select "BASE 3" to pair. Once connected, you can stream music through the receiver to your connected audio system.
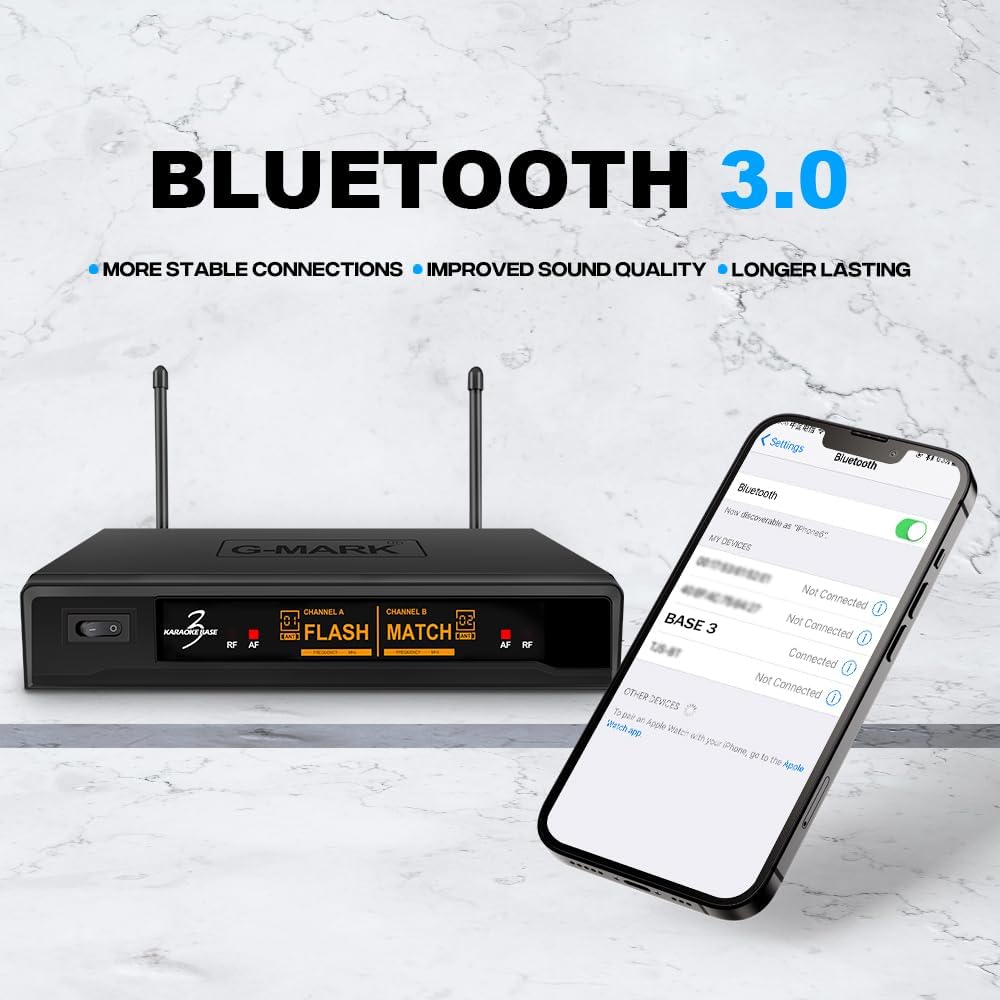
Image: Bluetooth 3.0 Connectivity. This image shows a smartphone's Bluetooth settings screen, indicating how to find and connect to the "BASE 3" receiver for wireless audio streaming.
4. Arahan Operasi
4.1 Kawalan Mikrofon
Each handheld microphone features controls for adjusting audio effects:

Image: Professional Microphone with Sound Effect Adjustments. This illustration highlights the various controls on the handheld microphone, including adjustments for Echo, Treble, Bass, Volume, and the Power switch.
- ECHO +/-: Adjusts the echo reverberation strength.
- TREBLE +/-: Adjusts the high-frequency response of your voice.
- BASS +/-: Adjusts the low-frequency response of your voice.
- VOL +/-: Adjusts the microphone's output volume.
- HIDUP/MATI: Power switch for the microphone.
Experiment with these controls to find the optimal sound for your voice and environment.
4.2 Echo Reverb Function
The system includes a built-in echo reverb function to enhance vocal performance, making your voice sound fuller and more spacious. Adjust the ECHO setting on the microphone to achieve the desired effect.
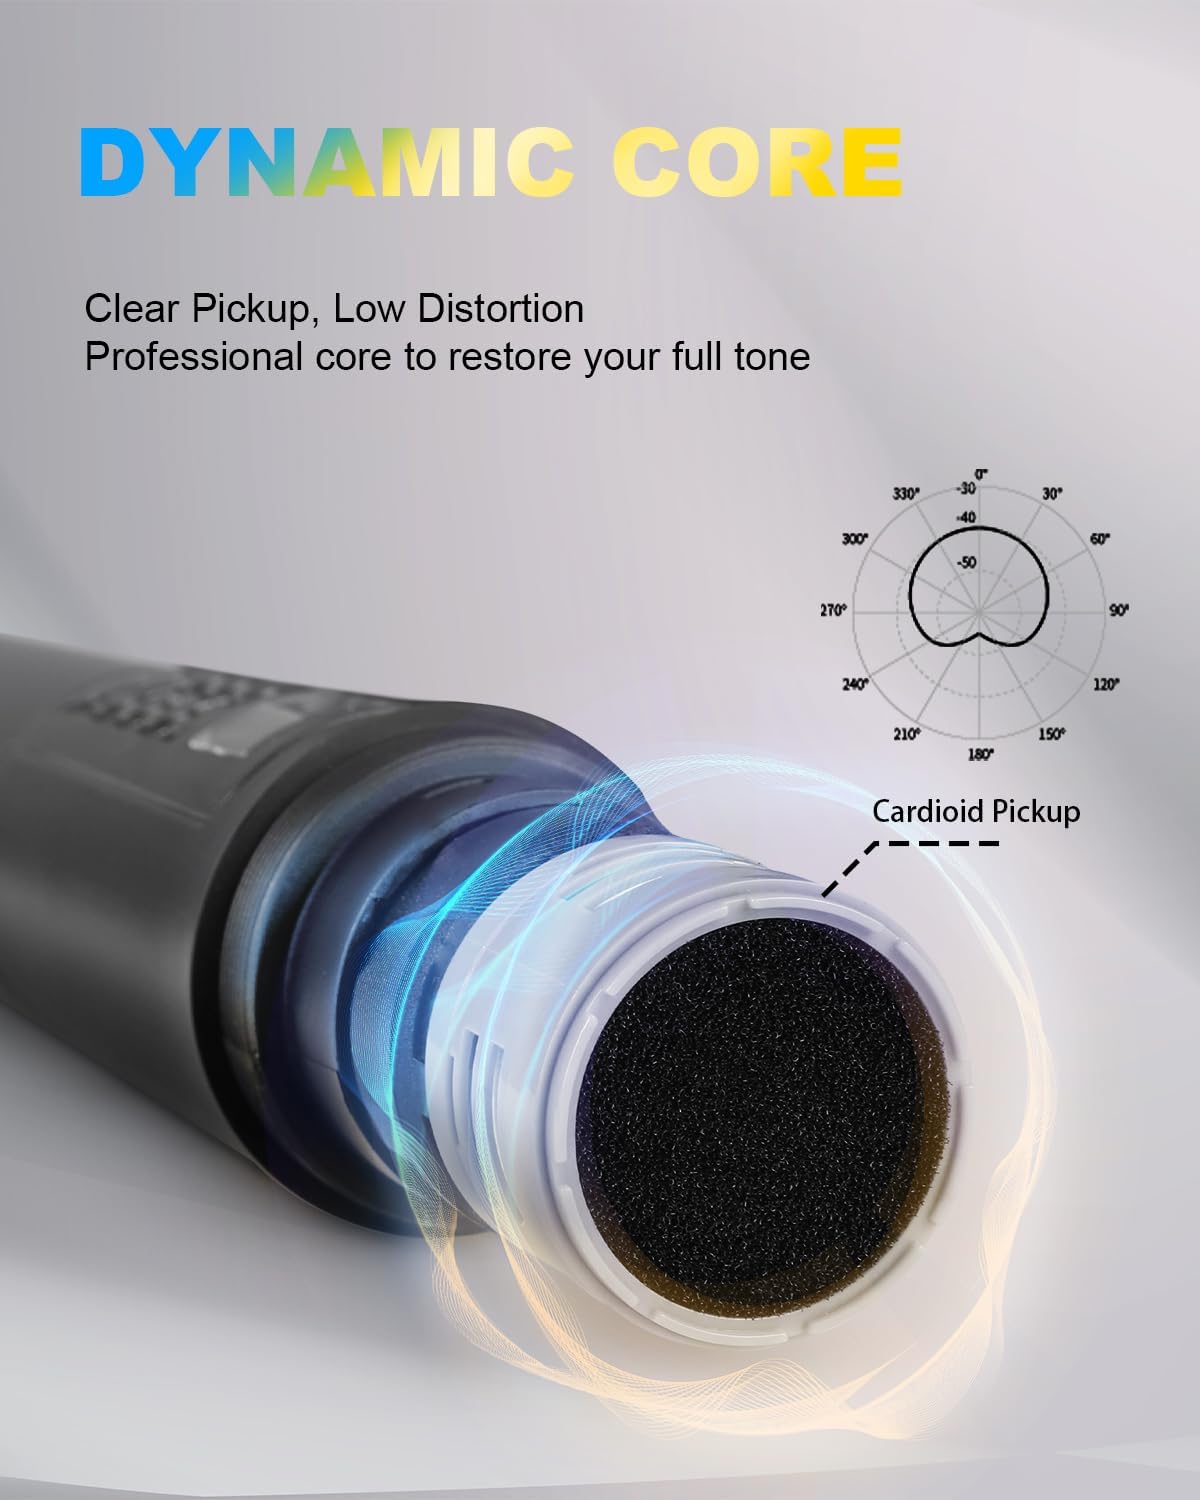
Image: Built-in Echo Reverb Function. This graphic visually represents the integrated echo reverb capability of the system, designed to enrich vocal output.

Image: 5 Levels of Reverb Adjustment. This image, a screenshot from a video, demonstrates the microphone's display indicating the availability of 5 distinct levels for reverb adjustment, allowing users to fine-tune the echo effect.
5. Penyelenggaraan
- Pembersihan: Gunakan kain lembut dan kering untuk membersihkan penerima dan mikrofon. Jangan gunakan pembersih cecair atau pelarut.
- Storan: Simpan sistem di tempat yang sejuk dan kering jauh dari cahaya matahari langsung dan suhu yang melampau apabila tidak digunakan.
- Penggantian Bateri: Replace microphone batteries promptly when performance degrades to ensure optimal operation.
- Microphone Covers: Use the provided sponge mic covers to protect the microphone capsules and reduce plosive sounds.
6. Penyelesaian masalah
| Masalah | Kemungkinan Punca | Penyelesaian |
|---|---|---|
| Tiada bunyi dari mikrofon |
|
|
| Interference or poor sound quality |
|
|
| Peranti Bluetooth tidak berpasangan |
|
|
7. Spesifikasi
| Ciri | Perincian |
|---|---|
| Jenama | G-MARK |
| Nama Model | Karaoke Base 3 |
| Teknologi Ketersambungan | XLR, 1/4" Output Jack, 1/8" Output Jack |
| Jenis Penyambung | Bicu 3.5 mm, XLR |
| Ciri Khas | Tanpa wayar, Tanpa Wayar |
| Peranti Serasi | Telefon Pintar, Mesin Karaoke |
| warna | Hitam |
| Corak Kutub | Tidak arah (Cardioid) |
| Impedans | 600 ohm |
| Faktor Bentuk Mikrofon | Sistem Mikrofon |
| Sumber Kuasa | Battery Powered (Microphones), Power Adapter (Receiver) |
| Nisbah Isyarat-ke-Bunyi | 80 dB |
| Bilangan Saluran | 2 |
| Respons Kekerapan | 50-15000 Hz |
| Julat Kekerapan UHF | 550-595 MHz |
| Julat Tanpa Wayar | Sehingga 100 kaki (lebih kurang 30 meter) |
8. Waranti dan Sokongan
For warranty information or technical support, please contact G-MARK customer service through your purchase platform or the official G-MARK website. Please have your product model number (Karaoke Base 3) and purchase details ready when contacting support.