
1. Pengenalan
The HYUNDAI WS 1070 B is a compact weather station designed to provide accurate indoor and outdoor temperature readings, along with humidity information. It also features an integrated clock with an alarm function, making it a versatile device for your home or office. The large LCD ensures clear digital display of all values and functions.
This manual provides detailed instructions for setting up, operating, and maintaining your weather station to ensure optimal performance.
2. Kandungan Pakej
- HYUNDAI WS 1070 B Main Unit
- Sensor Luaran Tanpa Wayar
- Manual Pengguna (dokumen ini)
Nota: Bateri tidak disertakan dan mesti dibeli secara berasingan.
3. Produk Lebihview
3.1 Unit Utama
The main unit features a large LCD display showing indoor and outdoor temperatures, time, and alarm status. Control buttons are located below the display.
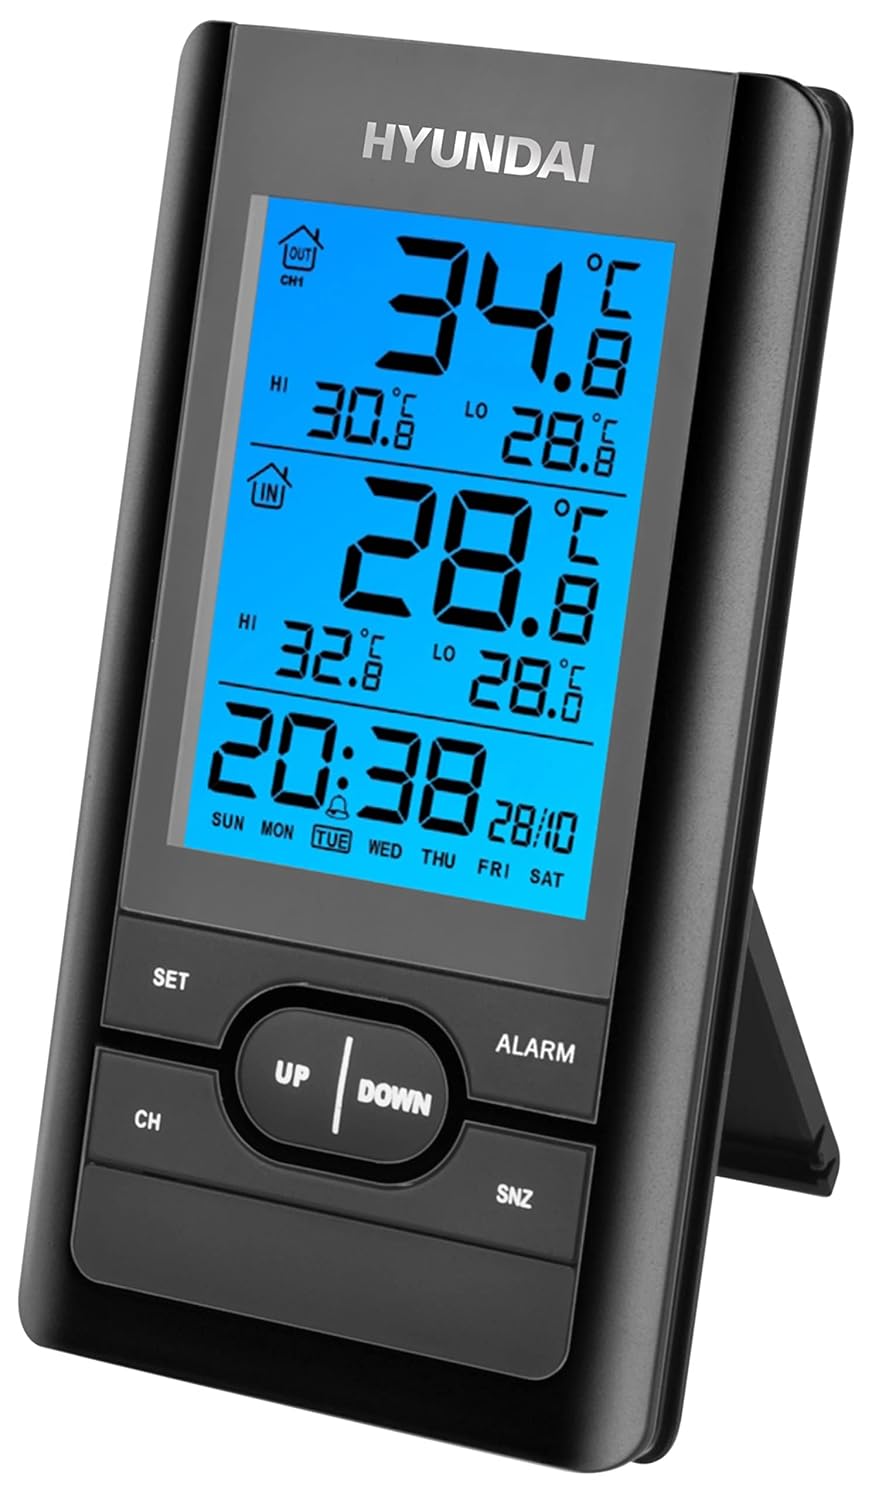
Imej 1: Depan view of the HYUNDAI WS 1070 B main unit, displaying indoor and outdoor temperatures, time, and day of the week. Buttons for 'SET', 'CH', 'UP', 'DOWN', 'ALARM', and 'SNZ' are visible below the screen.
- Paparan LCD: Shows time, date, indoor/outdoor temperature, humidity, and alarm status.
- Butang SET: Enters setting mode for time, date, and other parameters.
- Butang CH: Selects display channel for multiple outdoor sensors (if additional sensors are connected).
- Butang ATAS / BAWAH: Adjusts values during setting mode or cycles through display options.
- Butang PENGGERA: Enters alarm setting mode or activates/deactivates the alarm.
- SNZ (Snooze) Button: Mengaktifkan fungsi tunda apabila penggera berbunyi.
3.2 Penderia Luar Wayarles
The wireless sensor transmits outdoor temperature data to the main unit. It features a small display for local temperature readings and a channel selector.

Imej 2: Sisi view of the HYUNDAI WS 1070 B wireless outdoor sensor, showing its compact black casing and a small display indicating 'CH1' and the current temperature. A 433MHz signal icon is also visible.
- Paparan suhu: Shows the current temperature measured by the sensor.
- Pemilih Saluran: Allows selection of the transmission channel (1, 2, or 3) to avoid interference with other sensors.
- Petak Bateri: Located on the back for battery installation.
4. Persediaan
4.1 Pemasangan Bateri
- Unit Utama: Open the battery compartment on the back of the main unit. Insert 2 x 1.5V AAA batteries, observing the correct polarity (+/-). Close the compartment.
- Sensor Luaran Tanpa Wayar: Open the battery compartment on the back of the sensor. Insert 2 x 1.5V AAA batteries, observing the correct polarity (+/-). Close the compartment.
4.2 Initial Setup and Synchronization
- After installing batteries in both the main unit and the outdoor sensor, the main unit will automatically begin searching for the sensor signal. This process may take a few minutes.
- Ensure the outdoor sensor is within effective transmission range (typically up to 30 meters in open air) and not obstructed by thick walls or large metal objects.
- Once synchronized, the outdoor temperature will appear on the main unit's display. If synchronization fails, remove and reinsert batteries in both units, then try again.
4.3 Penempatan Sensor
For accurate outdoor temperature readings, place the wireless sensor in a sheltered location away from direct sunlight and rain. Avoid placing it near heat sources (e.g., vents, windows) or reflective surfaces that could affect temperature measurements. Ensure it is mounted vertically for proper drainage.
5. Arahan Operasi
5.1 Menetapkan Masa dan Tarikh
- Tekan dan tahan butang SET button for approximately 3 seconds to enter time setting mode. The hour digit will start flashing.
- Gunakan UP or TURUN butang untuk melaraskan jam.
- Tekan SET sekali lagi untuk mengesahkan jam dan beralih kepada menetapkan minit.
- Ulangi proses menggunakan UP/TURUN for minutes, then SET to cycle through year, month, and day settings.
- Tekan SET sekali lagi untuk keluar dari mod tetapan.
5.2 Menetapkan Penggera
- Tekan ke PENGGERA butang sekali untuk memaparkan masa penggera semasa.
- Tekan dan tahan butang PENGGERA button for approximately 3 seconds to enter alarm setting mode. The alarm hour digit will flash.
- Gunakan UP or TURUN butang untuk melaraskan jam penggera.
- Tekan PENGGERA again to confirm the hour and move to setting the alarm minutes.
- Gunakan UP or TURUN butang untuk melaraskan minit penggera.
- Tekan PENGGERA one last time to confirm and exit alarm setting mode.
- Untuk mengaktifkan atau menyahaktifkan penggera, tekan PENGGERA button briefly when the alarm time is displayed. An alarm icon will appear/disappear on the LCD.
5.3 Fungsi Tunda
Apabila penggera berbunyi, tekan SNZ button to activate the snooze function. The alarm will temporarily stop and sound again after a few minutes (typically 5-10 minutes, depending on the model's default setting). To turn off the alarm completely, press any other button (e.g., ALARM, SET, UP, DOWN).
5.4 Pemilihan Unit Suhu
The weather station displays temperature in Celsius (°C). There is no explicit mention of Fahrenheit (°F) conversion in the product description. If available, this option is usually found within the SET menu or by a dedicated button on the back of the unit.
5.5 Pemilihan Saluran (untuk berbilang sensor)
If you have purchased additional outdoor sensors (up to three are supported), press the CH button repeatedly to cycle through the channels (CH1, CH2, CH3) and view the temperature from each connected sensor. The main unit will automatically scan and display data from active channels.
6. Penyelenggaraan
- Pembersihan: Wipe the main unit and sensor with a soft, slightly damp kain. Jangan gunakan pembersih atau pelarut yang kasar, kerana ini boleh merosakkan paparan atauasing.
- Penggantian Bateri: Replace batteries in both the main unit and the outdoor sensor when the display becomes dim or readings become erratic. Always replace all batteries at the same time with new ones of the same type.
- Storan: If the device will not be used for an extended period, remove the batteries to prevent leakage and corrosion.
7. Penyelesaian masalah
| Masalah | Kemungkinan Punca | Penyelesaian |
|---|---|---|
| No outdoor temperature reading or '---' displayed. |
|
|
| Masa atau tarikh yang salah. |
|
|
| Paparan malap atau kosong. |
|
|
8. Spesifikasi
| Ciri | Perincian |
|---|---|
| Nombor Model | HYUWS1070B |
| Dimensi (L x W x H) | 14 x 3.81 x 12 cm |
| Julat Suhu Dalaman | 0 °C hingga +50 °C |
| Julat Suhu Luar | -20 °C hingga +50 °C |
| Jenis Paparan | LCD |
| Bekalan Kuasa (Unit Utama) | 2 x 1.5V bateri AAA |
| Power Supply (Sensor Unit) | 2 x 1.5V bateri AAA |
| Ciri Khas | Outdoor, Indoor, Digital, Alarm, Snooze |
| bahan | plastik |
| warna | Hitam |
9. Waranti dan Sokongan
For warranty information or technical support, please refer to the documentation provided at the time of purchase or contact your retailer. You may also visit the official HYUNDAI Electronics weblaman web untuk butiran perhubungan khidmat pelanggan.