
1. Pengenalan
This manual provides instructions for the safe and effective operation of your ThreeH 1/4 Inch Digital Torque Adapter. This device converts a standard ratchet wrench into a digital torque wrench, offering precise torque measurement with audible and visual alerts.
2. Maklumat Keselamatan
- Always wear appropriate personal protective equipment, such as safety glasses, when using tools.
- Ensure the adapter is securely attached to the ratchet wrench and the fastener before applying torque.
- Do not exceed the maximum torque capacity of the adapter (30 Nm / 22.1 ft-lb).
- Keep the device clean and dry. Avoid exposure to extreme temperatures or corrosive environments.
- Do not attempt to disassemble or modify the adapter. Refer servicing to qualified personnel.
3. Produk Lebihview
The ThreeH Digital Torque Adapter features a clear digital display, intuitive controls, and a compact design for use in various applications.

Rajah 3.1: Digital Torque Adapter Components and Controls. This image highlights the LED flashing indicator, buzzer, and control buttons (P/T, Power, M, +, -) for unit selection and value adjustment.
Komponen Utama:
- Paparan Digital: Shows real-time torque values and settings.
- P/T Button: Toggles between Peak Hold (P) and Track (T) modes.
- Butang Kuasa: Menghidupkan/mematikan peranti.
- Butang M: Used for mode selection and data memory functions.
- Butang '+' dan '-': Adjust preset torque values.
- LED Flashing Indicator: Provides visual alert during torque application.
- Buzzer: Provides audible alert during torque application.
- 1/4 Inch Drive: Input and output square drives for connecting to a ratchet wrench and sockets.
4. Persediaan
4.1 Pemasangan Bateri
The torque adapter requires two (2) AAA 1.5V batteries (not included).
- Locate the battery compartment cover on the back of the adapter.
- Remove the screw(s) securing the battery cover and carefully lift it off.
- Masukkan dua bateri AAA, pastikan kekutuban (+/-) betul seperti yang ditunjukkan di dalam petak.
- Gantikan penutup bateri dan kencangkannya dengan skru.
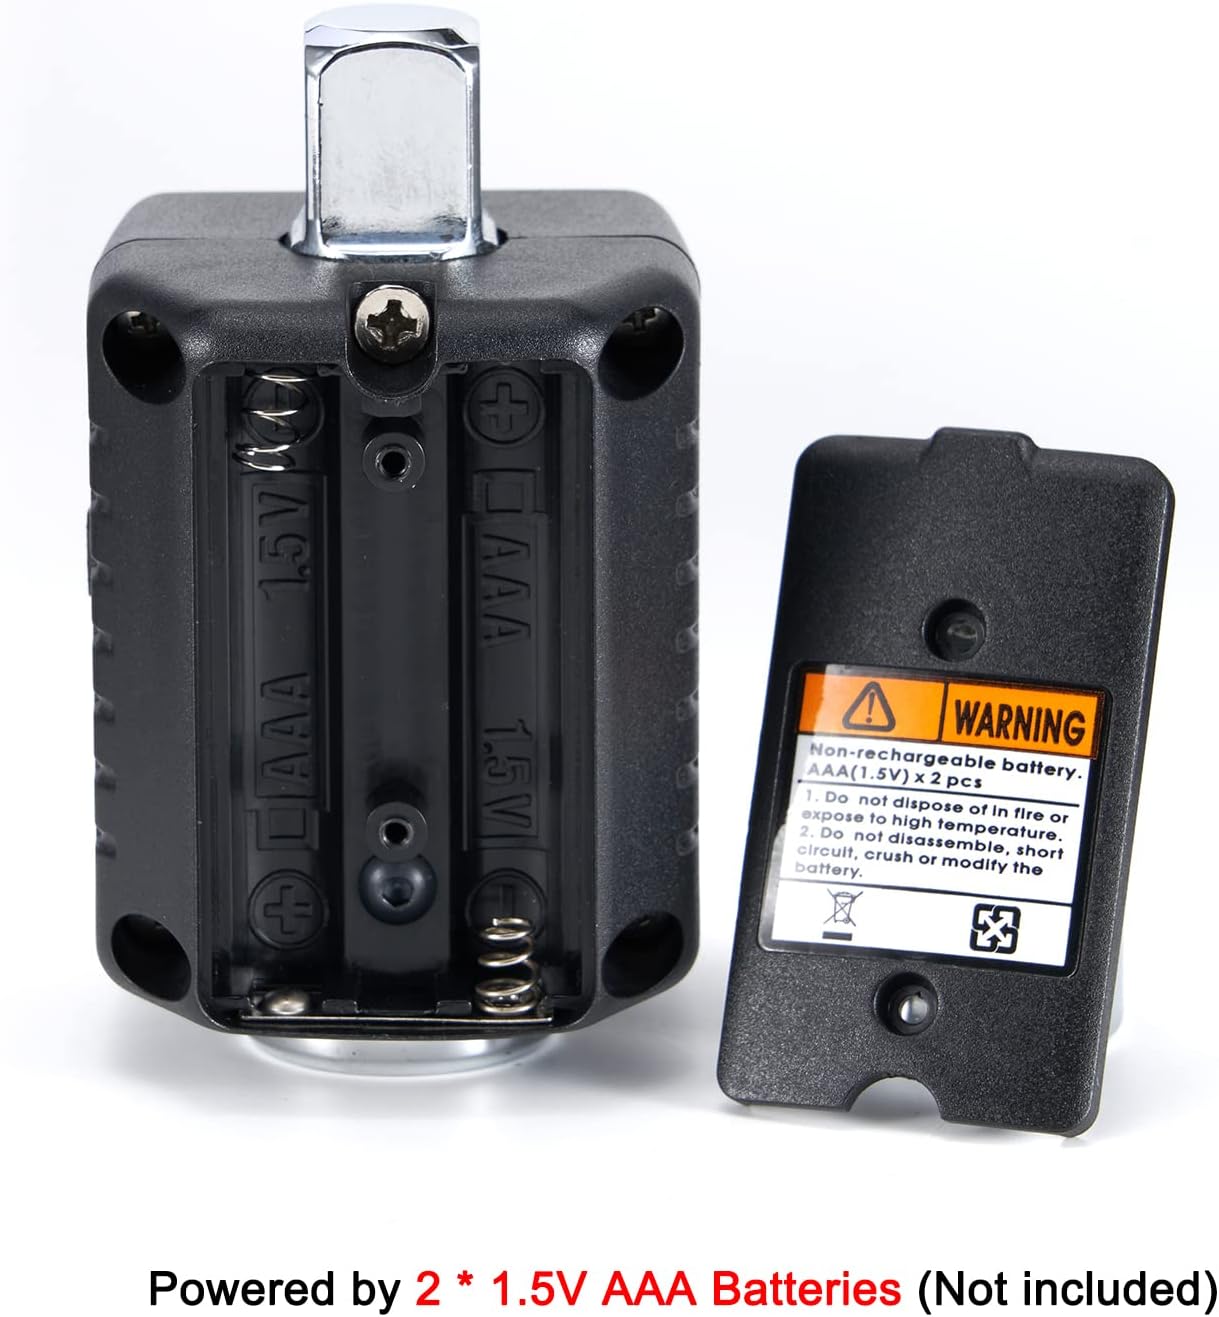
Rajah 4.1: Battery Compartment. The image shows the open battery compartment, ready for two AAA batteries to be inserted with correct polarity.
5. Arahan Operasi
5.1 Hidupkan/Mati Kuasa
- Untuk menghidupkan: Tekan butang kuasa butang.
- Untuk mematikan: Tekan dan tahan butang kuasa button for approximately 3 seconds. The device will also auto shut off after 70 seconds of inactivity.
5.2 Pemilihan Unit
The adapter supports torque units in Newton-meters (Nm), foot-pounds (lb-ft), and kilogram-meters (kg-m).
- To change units: Simultaneously press the P / T dan M buttons. The unit displayed on the screen will cycle through Nm, lb-ft, and kg-m. Release the buttons when the desired unit is shown.
5.3 Setting Target Torque Value
- Tekan ke M button to enter the preset torque setting mode.
- Gunakan '+' dan '-' buttons to adjust the target torque value. Pressing and holding these buttons will increase or decrease the value more rapidly.
- Setelah nilai yang dikehendaki ditetapkan, tekan butang M butang sekali lagi untuk mengesahkan dan keluar dari mod tetapan.
5.4 Torque Application and Alerts
Attach the digital torque adapter to your 1/4 inch drive ratchet wrench, then attach the appropriate socket to the adapter's output drive. Apply torque to the fastener.

Rajah 5.1: Adapter in Use. The image shows the digital torque adapter connected to a ratchet wrench, being used to tighten a fastener on an engine.
- As you apply torque, the digital display will show the real-time torque value.
- When the applied torque reaches 80% of the preset target value, the buzzer will begin to sound, and the LED will flash. The frequency of the beeps and flashes will increase as the torque approaches the target.
- When the preset target torque value is reached, the buzzer will emit a continuous tone, and the LED will flash rapidly. At this point, stop applying force immediately to avoid over-tightening.
5.5 Peak Hold (P) and Track (T) Modes
- Track Mode (T): Displays the real-time torque value as it is being applied. This is the default mode.
- Peak Hold Mode (P): Displays the maximum torque value achieved during the tightening process. To switch to Peak Hold mode, press the P / T button once. The display will show 'P' to indicate Peak Hold mode. To clear the peak value, press the P / T butang lagi.
6. Penyelenggaraan
6.1 Pembersihan
- Wipe the adapter with a soft, dry cloth after each use.
- Do not use abrasive cleaners or solvents, as these can damage the display or housing.
6.2 Penyimpanan
- Store the adapter in its protective case when not in use to prevent damage.
- Tanggalkan bateri jika peranti tidak akan digunakan untuk tempoh yang lama untuk mengelakkan kebocoran.
- Simpan di tempat yang sejuk dan kering jauh dari cahaya matahari langsung dan suhu yang melampau.

Rajah 6.1: Protective Carrying Case. The image displays the compact protective case designed for storing the digital torque adapter, with dimensions indicated.
7. Penyelesaian masalah
- Peranti tidak dihidupkan: Periksa pemasangan bateri dan pastikan bateri baru. Gantikan jika perlu.
- Bacaan tidak tepat: Ensure the adapter is properly seated on the ratchet wrench and the socket is firmly attached. Avoid sudden jerking motions when applying torque. If persistent, the device may require professional calibration.
- Paparan malap atau berkelip: Batteries may be low. Replace batteries.
- Buzzer or LED not working: Check battery level. If the issue persists, contact customer support.
8. Spesifikasi
| Ciri | Spesifikasi |
|---|---|
| Nombor Model | H-TG55A |
| Julat Tork | 0.3 - 30 Nm (0.22 - 22.1 ft-lb) |
| Saiz Pemacu | 1/4 Inci |
| Ketepatan | ±2% |
| Unit | Nm, lb-ft, kg-m |
| Memori Data | 40 set |
| Automatikan | 70 seconds (no usage) |
| Sumber Kuasa | 2 x Bateri AAA 1.5V |
| bahan | Keluli Aloi |
| Panjang Item | 4.7 Inci |
| Berat Barang | 120 Gram |

Rajah 8.1: Drive Size and Torque Range. This image visually confirms the 1/4 inch drive size and the specified torque range of 0.3-30Nm (0.22-22.1ft-lb).
9. Maklumat Waranti
This product comes with a standard manufacturer's warranty. Please retain your proof of purchase for any warranty claims. For specific warranty terms and conditions, refer to the documentation included with your purchase or contact ThreeH customer support.
10. Sokongan
For technical assistance, troubleshooting, or warranty inquiries, please contact ThreeH customer support through the retailer's platform or the official ThreeH website. Please have your product model number (H-TG55A) and purchase details ready when contacting support.