pengenalan
Thank you for choosing the ANDELI ADLDH9242-A Auto-Darkening Welding Helmet. This manual provides essential information for the safe and effective operation, maintenance, and troubleshooting of your welding helmet. Please read this manual thoroughly before use and keep it for future reference.
Langkah-langkah Keselamatan
Always prioritize safety when welding. Failure to follow safety guidelines can result in serious injury or damage to equipment.
- Perlindungan Mata: This helmet provides protection against harmful UV/IR radiation and intense visible light during welding. However, it is not suitable for laser welding.
- Perlindungan Kesan: This helmet is designed to protect against light impact, but it is not a substitute for safety glasses or face shields for heavy impact applications.
- Pengudaraan: Ensure adequate ventilation in your work area to avoid inhaling welding fumes.
- Suhu: Do not use the helmet in temperatures outside its specified operating range.
- Penyelenggaraan: Regularly inspect the helmet for damage. Replace any damaged parts immediately.
- Pembersihan: Clean the lens and helmet body with a soft cloth and mild detergent. Avoid abrasive cleaners.
Ciri-ciri Produk
- True Color Lens Technology: Provides clearer and more accurate color views, enhancing visibility of the weld puddle.
- Aplikasi luas: Suitable for TIG, MIG, MMA welding, plasma cutting, and grinding operations.
- Fast Auto-Darkening: Switches from light to dark in 1/15000 seconds upon arc ignition.
- Solar Powered with Replaceable Battery: Combines solar charging with a replaceable CR2032 battery for extended life and reliability.
- Adjustable Headgear: Ergonomically designed headgear for comfortable and secure fit.
- Kejelasan Optik: Rated 1/1/1/2 for superior optical performance.

Image: Comparison of True Color Lens technology with traditional lens technology, showing clearer vision with the True Color lens.
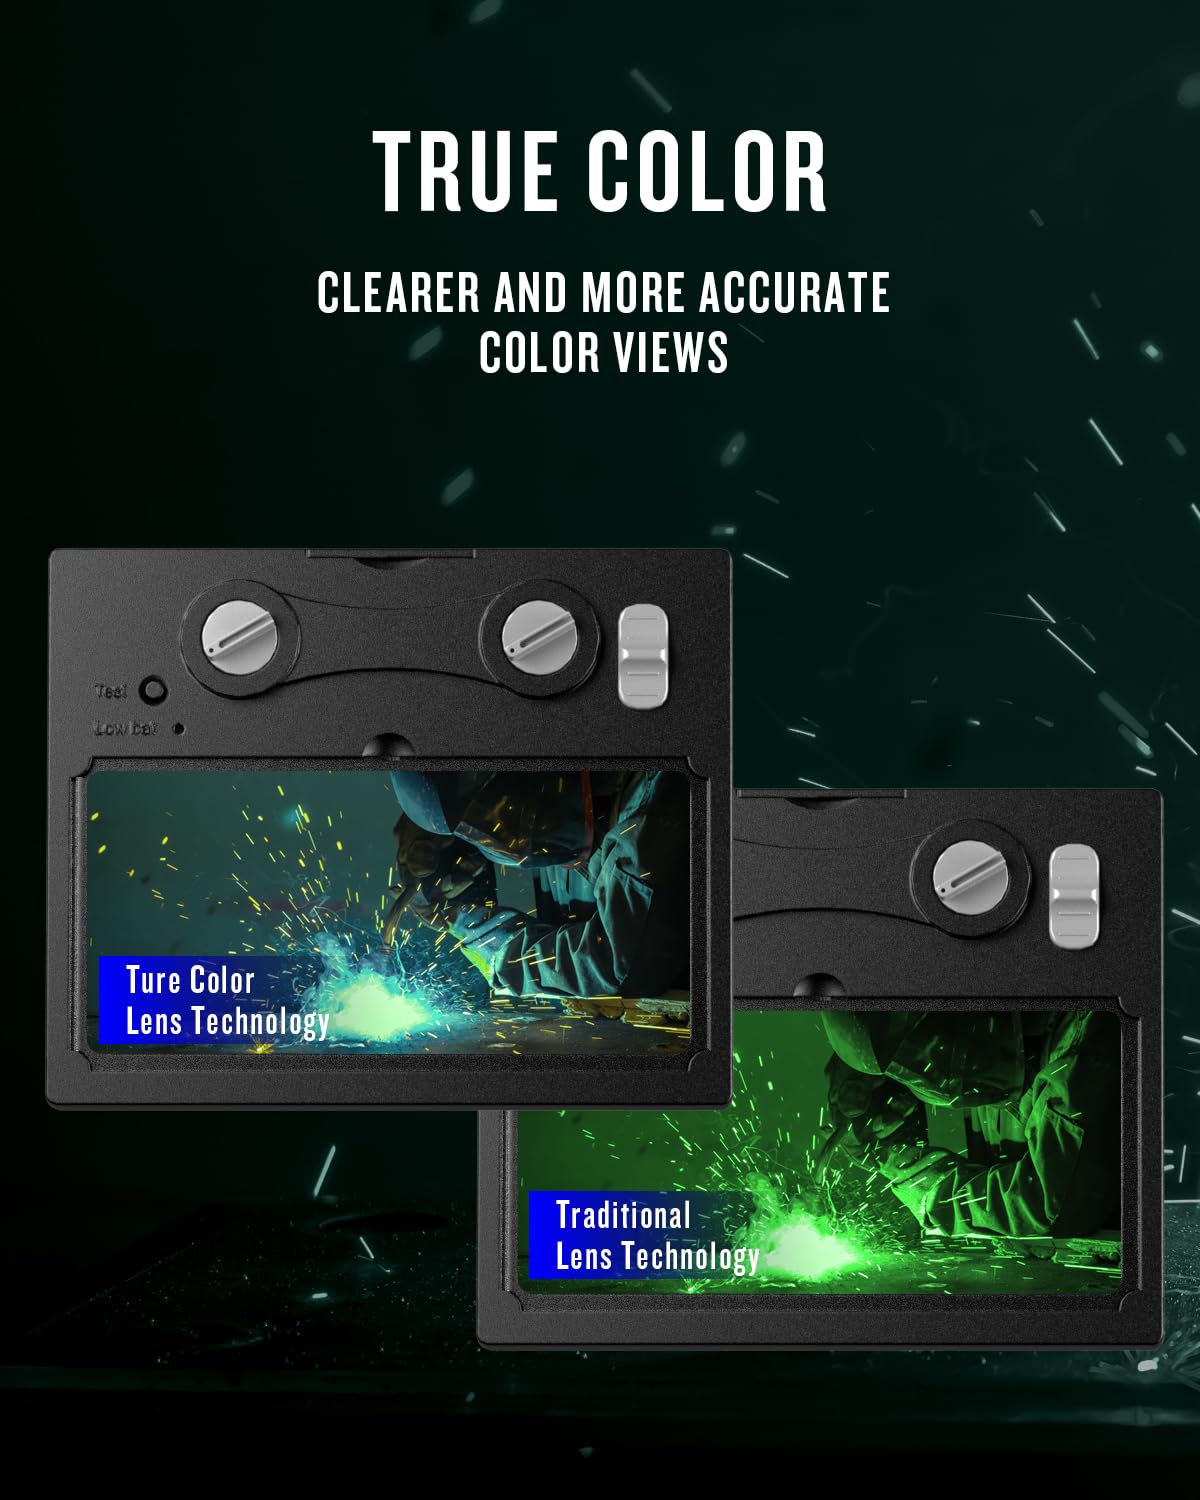
Image: The helmet being used for various welding processes including MMA, MIG, and TIG.
Persediaan dan Perhimpunan
- Membongkar: Carefully remove all components from the packaging. Ensure all parts are present: helmet shell, auto-darkening filter (ADF) lens, headgear, and spare protective lenses.
- Headgear Adjustment:
- Attach the headgear to the helmet shell using the pivot points.
- Adjust the top strap to fit the crown of your head.
- Rotate the rear adjustment knob to tighten or loosen the headband for a snug, comfortable fit.
- Adjust the distance between the helmet and your face using the side knobs to ensure proper viewing angle and balance.

Imej: Terperinci view of the adjustable headgear, showing the various adjustment points for a custom fit.
- Protective Lens Installation:
- Ensure the inner and outer protective lenses are free from scratches or damage.
- Remove the protective film from both sides of the new protective lenses before installation.
- Insert the outer protective lens into the designated slot on the front of the helmet.
- Insert the inner protective lens behind the ADF unit.

Image: Protective films for the inner and outer lenses, with a warning to remove them before use.
- Pemeriksaan Bateri: The helmet is equipped with a solar panel and a replaceable CR2032 battery. The battery is typically pre-installed. Ensure the battery is properly seated.
Arahan Operasi
- Hidupkan/Mati Kuasa: The helmet automatically powers on when exposed to light and powers off after a period of darkness. There is no manual on/off switch.
- Pelarasan Sensitiviti: Use the sensitivity knob on the side of the ADF unit to adjust how quickly the lens reacts to light. Higher sensitivity is suitable for low-amp Kimpalan TIG.
- Pelarasan Kelewatan: Use the delay knob to set the time it takes for the lens to return from dark to light state after welding stops. A longer delay is useful for high-amp welding to prevent eye fatigue from afterglow.
- Pelarasan Lorek: The helmet offers variable shade settings from DIN 4/9-13. Use the external shade knob to select the appropriate shade level for your welding process.
- Shade 4: For grinding mode.
- Shade 9-13: For various welding processes (TIG, MIG, MMA). Refer to welding shade charts for specific recommendations.
- Grinding Mode: Activate the grinding mode (usually a switch on the ADF unit) to lock the lens in a light state (Shade 4) for grinding operations. Remember to switch back to welding mode before welding.
- Butang Ujian: Press the "Test" button on the ADF unit to verify the auto-darkening function. The lens should momentarily darken and then return to its light state.
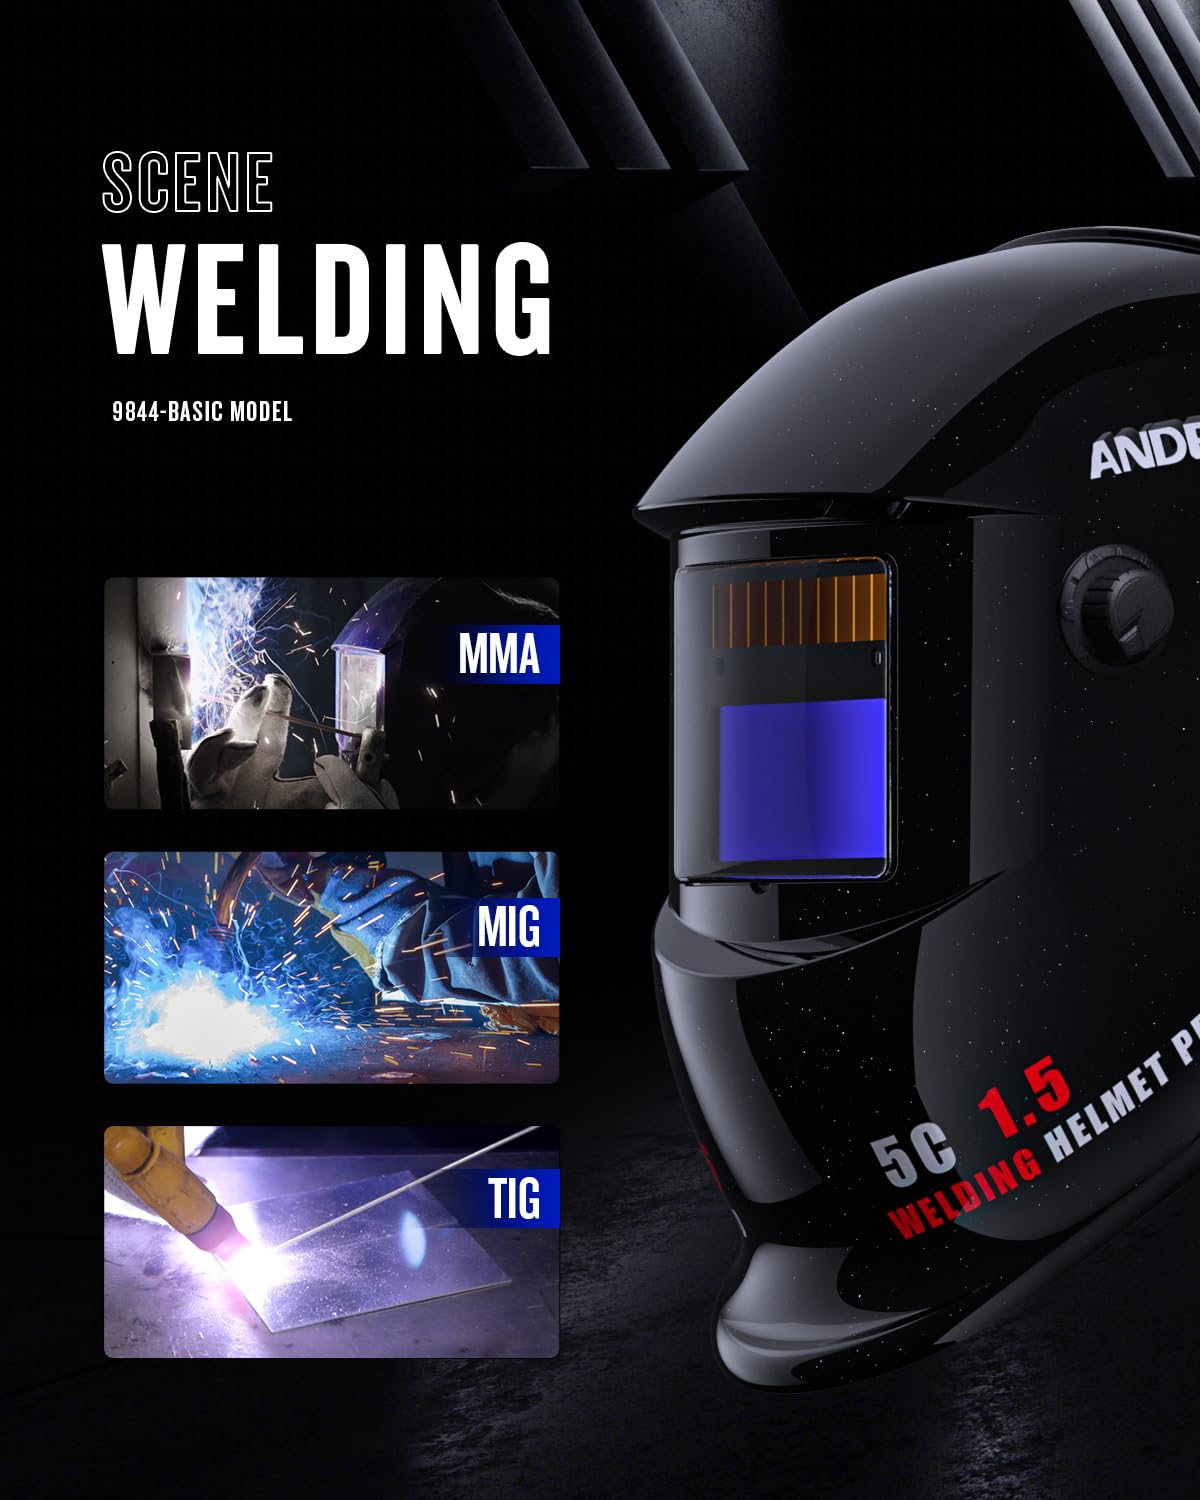
Image: Close-up of the ADF lens showing the arc sensors, adjustment knobs for sensitivity and delay, and the replaceable battery compartment.
Penyelenggaraan
- Cleaning the Helmet: Clean the helmet shell with a mild soap and water solution. Avoid strong solvents.
- Cleaning the ADF Lens: Gently wipe the ADF lens with a soft, lint-free cloth. Do not use abrasive materials or cleaning solutions that could damage the lens coating.
- Replacing Protective Lenses: Replace the outer and inner protective lenses when they become scratched, pitted, or too dirty to clean effectively.
- Penggantian Bateri: When the low battery indicator illuminates (if present) or the auto-darkening function becomes unreliable, replace the CR2032 battery.

Image: Illustration showing how to access and replace the CR2032 battery in the auto-darkening filter unit.
- Storan: Store the helmet in a dry, clean place away from direct sunlight and extreme temperatures.
Menyelesaikan masalah
| Masalah | Kemungkinan Punca | Penyelesaian |
|---|---|---|
| Lens does not darken when welding arc starts. |
|
|
| Lens remains dark after welding stops. |
|
|
| Keterlihatan yang lemah melalui kanta. |
|
|
Spesifikasi
| Ciri | Spesifikasi |
|---|---|
| Model | ADLDH9242-A |
| Jenama | ANDELI |
| Kelas Optik | 1/1/1/2 |
| ViewKawasan Kawasan | 92mm x 42mm (3.63" x 1.66") |
| Teduh Negeri Cahaya | DIN 4 |
| Naungan Keadaan Gelap | DIN 9-13 (Adjustable) |
| Masa Bertukar | 1/15000 saat |
| Masa Kelewatan | Adjustable (Short-Long) |
| Sensitiviti | Boleh laras |
| Penderia Arka | 2 |
| Bekalan Kuasa | Solar Cell & Replaceable CR2032 Battery |
| bahan | plastik |
| Berat badan | 0.48 kg |
| Aplikasi | TIG, MIG, MMA, Plasma Cutting, Grinding |

Image: Diagram illustrating the viewing area dimensions of the auto-darkening filter: 92mm x 42mm.
Waranti dan Sokongan
For warranty information and technical support, please refer to the official ANDELI webtapak atau hubungi pengedar tempatan anda. Simpan resit pembelian anda sebagai bukti pembelian.
Pengeluar: ANDELI
Hubungi: ANDELI Official Store JP